Datasheet
Year, pagecount:1942, 122 page(s)
Language:English
Downloads:3
Uploaded:August 03, 2018
Size:17 MB
Institution:
-
Comments:
Attachment:-
Download in PDF:Please log in!
Comments
No comments yet. You can be the first!Most popular documents in this category


Content extract
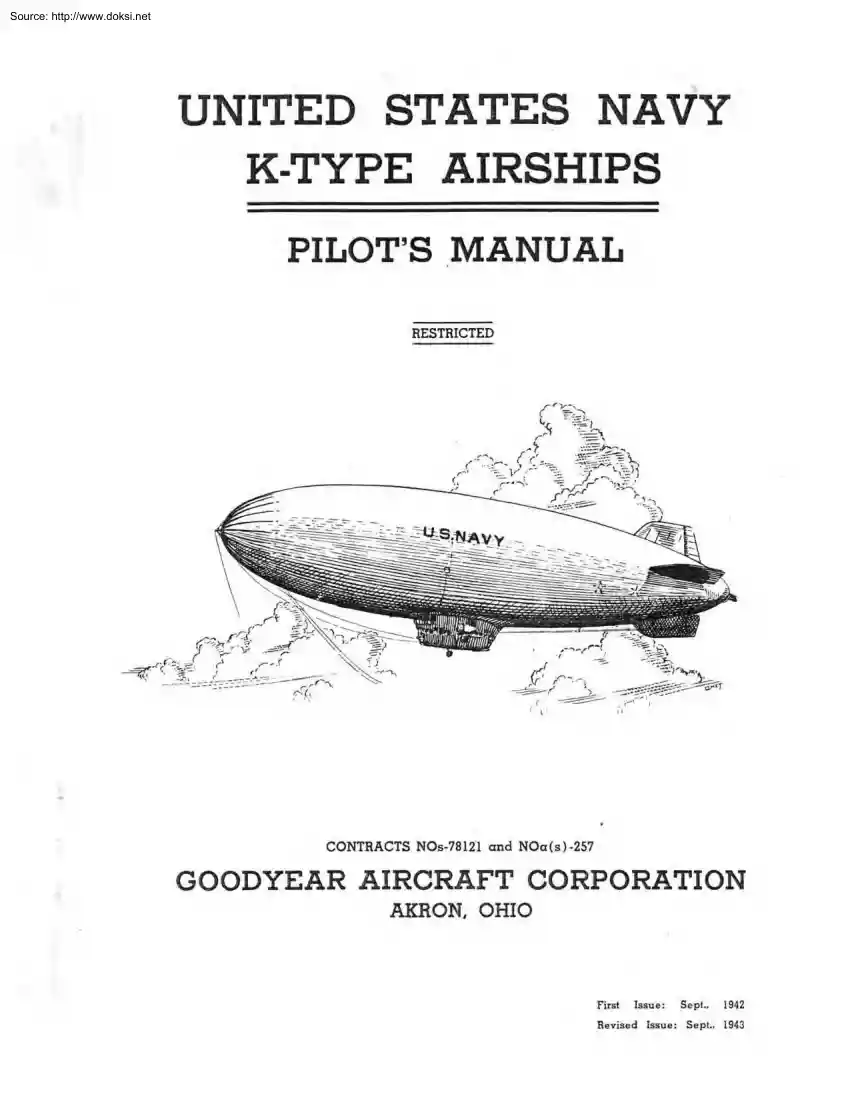
Source: http://www.doksinet UNITED STATES NAVY K-TYPE AIRSHIPS PILOTS MANUAL RESTRICTED CONTRACTS NOs-78121 and NOa (s )-257 GOODYEAR AIRCRAFT CORPORATION AKRON, OHIO First lssu e : S ep t., 1942 Revised [ss ue : Se pl., 1943 Source: http://www.doksinet Source: http://www.doksinet iii Source: http://www.doksinet iv Source: http://www.doksinet V Source: http://www.doksinet THE CONTENTS OF THIS MANUAL ARE RESTRICTED EXTRACT FROM ESPIONAGE ACT Section 31. Unlawfully obtaining or permitting to be obtail.ffed information effecting National Defense-lHH(-; or (d) whoever ,lawfully or unlawfully having possession of, access to, contr.o l over, or being intrusted with any document, writing, code book, signal book, sketch, photograph, photographic negative, plan, blueprint, map, model , instrument, appliance, or note rela ting to the National Defense, willfully communicates or transmits or attempts to communicate or transmit the same to any person not entitled to receive
it, or willfully retains rthe same and f ~ils to deliver it on demand to the officer or employee of the United States entitled to receive it, or (e) whoever, being intrus ted with or haVing lawful possession or control of any document, writing, code book, signal book, sketch, photograph., photo gr aphic negative, blueprint, plan, map, model, note, or information relating to the National Defense, through gross negligence permits the same to b.e removed from its proper pl ace of custody or delivered to anyone in viol a tion of his trust, or to be lo s t, stolen, abstracted or destroyed, shall be punished by a f i ne of not more than $10,000 or by imprisonment for not more t han t wo years or both." 11 V1 Source: http://www.doksinet The information herein is designed to embody only such material as crew K- airship during flight operatlons . of the descriptive may matter be vi tal of value to the pi lot and the Further to the ship and its care is set forth in the
Specification and Maintenance Manuals. While this manual is not intended to serve as infall ible more guide for all an flight oper a tions, some of the advanced points of aerostatics are included for ready reference . Amendments wi ll be made when signif ican t changes in future airships occur. The Goodyear Aircraft Corporation gestions ment, and welcomes sug- for the improvement of the a irship and its equip1nvites constructive criticism of this manual. Such suggestions will be cordially entertained and accorded the most careful coosideration . vii Source: http://www.doksinet 7Á8ll OF (JONTENTS PARTI. GENERAL DESCRIPTION A. DIMENSIONS AND CHARACTERISTI,CS ••• • • •• • •• • • • • • • • • . Envelo:pe • • • • • • • • • • • • • • • • • • • • • • • • • • • • • • • • • • • • 3. Ballonets 4. Tail Surfaces • •
• • • • • • 5. We:ights and Lift -• 6. Power Plants AVERAGE PERFORMANCE . 1. Overall Dimensions ~- B. PART II. 1 1 1 1 2 2 2 3 FLIGHT AND FLIGHT CONTROL A. FLIGHT CHARACTERISTICS •••••••••• ••••••••••••••• 4 . 4. Factors of Safety 5. Weight Empty 10 12 12 . 18 . 22 1. General Description •••••••••••••••••••••••• 2. Air System ••••••••••••••••••••••••••• 22 23 l. Static Lift • • • ■ • • • • • • • • • • • • • • • • • • • • • • • • • • • • • 2. Static Trim 3. Dynamic Lift 6. Useful Load . B. ENVELOPE PRESSURE CONTROL SYSTE}J[ . - - .
. Air Valve Adjustment . Take-Off . Climb . Level Flight . Descending . Landing . a. Scoops b. Valve Settings e. Pressure Regula tion d. e. f. g. h. i. . Shifting Air K. Blowing Air into the Gas j ~ viii • •• ••• ••• • •••• •• • 4 15 23 25 27 29 35 35 36 37 37 38 38 Source: http://www.doksinet 3 . Gas Release System . . . Controls and Auxiliaries . a . Valve Controls b. Damper Control . . e . Manometers d. St a rting Auxiliary Bl ower • • . e . Stopping Blower f. LaDel Electric Blower . a . Gas Valves b . Rip Panels 4. PART III . 49 . 52 . 52 POWER PLANT . General Characteristics . Starting Warming Up . . Ground Test A. ENGINES 1. 2. 3. 4.
43 . D. RETRACTABLE LANDING GEAR E. HANDLING LINES 43 . & Auxiliaries Chart . b. Controls, Instruments e. Operation Chart C. MAJOR CONTROLS 39 41 41 41 44 45 45 45 45 45 45 5. Summar y: Pressure Control System a. Settings 39 5. Take-Off 6. Cruising 7 . Single Engine Operat ion 8. Stopping 9. Operating Limits and Charts ix . . . . . . 53 53 53 56 56 56 57 57 57 58 Source: http://www.doksinet . B. FUEL SYSTEM e. REC0MMENDED CARBURET0R ADJUSTMENT D. 0IL SYSTEM PART IV. . GENERAL DESCRIPTI0N B. DISTRIBUTI0N e. C0NTR0L B0XES AND CUT-00TS • ••••••••••••••• • •••••••• 86 88 . 90 1. Carbon Pile Regulator •••••••• • •••••••• 2 . Service Troubles •••••• • • •• ••••••••••••••• 90 90 . 93 L0CATI0N 0F C0MP0NENT PARTS . 2. Auto-matic Controls ••• •• • ••• ••••• •
•••• • •• • 3. Instruments 4. Cooking • • • • • • • • • • 5 • La.mp s • • • • • • • • • • • • • • • • • • • • • • • • • • • • • • 6. Fllses •••••••••••••••••• • •• •• •• • • • • •• •• • • 93 94 94 94 94 94 LAWRANCE AUXILIARY GAS0LINE P0WERED ELECTRIC GENERAT0R . 1 . Specifications • •• • • ••• ••• •••••• •••• • •••• 2 . Prepar ations for starting •••••• • •••• •• •• 3. Starting . 4. Manual Sta~ting •• • ••••••• • •••••• ••••••• 5. Warm Op ••• •••• • ••••• • •••••••••••••••••••• Loading .•••• 6. 7. 8. 9. PART V. Overload
Caution . • • 0verspeed Cut-0ut •••••••• ••••••••••••.• •• Stopping the Engine •••• •••• ••• • ••• •• • • • • • 1 02 102 102 105 105 106 106 106 107 107 YISCELLANE0US . . . . . HEATING SYSTEM B. FIRE EXTING0ISHING SYSTEM e. B0MB HATCH D. SERVICE ENGINEERING E. N0TES A. 82 . 1. Switches E. 70 ELECTRICAL SYSTEM A. D. •••• • •••••• 69 X 1 08 110 110 111 112 Source: http://www.doksinet Fig. I Superheat Chart Fig. XX Helium Purity •• • • • •••• ••••• • ••• • ♦ • 6 Fig. III . Dynamic Lift Chart . Fig . IV Take-Off Chart 14 Fig . V Air Pressure 24 Fig. VI Air Scoops . 25 Fig. VII Air Pr essure in Excess of Gas Pressure - VS - %Fullness of Ballonets at Zero Pitch .ADgl e at Standard Unit Lift Condi tions •. • • •• •••••• • ••••• •
• •• 26 Fig . VIII . System . • . • • • Fig. IX 36" Air Valve, K-49 , K- 54 Fig. Belium I nfl ation Sl eeve Future • . • & Fig . XII . Flight & Instrument Panel . Starting Auxiliary Blower . Fig. XIII Controls, Instruments Fig . XI •· Char t Fig . XIV 13 36" Air Valve, K-3 thru K-53, Excl. of K-49 X 8 & 31 34 40 42 44 Auxiliaries . • 46 Operation Chart - Pressure Control System . • •• • • • ••••••••••• • • Fig. XV Major Controls Fig. JYI Top of Landing Gear Strut Fig . XVII Landing Gear Shaft xi 47 48 •.•• • 50 . 51 Source: http://www.doksinet Fi g . XU: Horse Power VS . Manifold Pressure (Sea Level Per formance) .••••••• • • • ••• 61 Fi g. XX Hor se Power VS . Manifold Pressure (1500 Ft. Alti tude Performance) 62 Fi g. XXI Power Curves for Pr att & Whitney
Engine Model H. P - 1340-AN- 2 ( At Se a Le·v el ) • . • • • • •• • •• • • •• • 63 Power Curves for Pratt & Whitney Engine Model HR - 1340- AN-2 (At 1500 Ft. Altitude) 64 Fuel Consumption & R. P M - VS Air Speed (K- 3 thru K- 8) . • • • • • · · 65 Fue1 Consumption & R. P M - VS Ai r Speed (K- 57 & Fut ure) •.•••••• • • 66 . 67 Fi g. XXII Fig. XXIII Fig . XXIV Fig . XXV Economical Ai r Speeds Fi g. XXVI Mechanic s Check ·Chart Fig . XXVII Fuel System . 68 71 Fig. XXVIII Fuel System, Schematic DiagraJns (K- 3 thru K- 10) . 72 - 76 Fuel System, Schematic Diagrams (K- 11 and Future) . • • • • • • • 77 - 81 Fig . XXIX Fig. XXX Fig. XXXI Fig . XXXII Fi g. XXXIII Fig . XXXIV . Oi l System, K-75 and Futur e . Electrical Load Analysi s •· . Auxil iary Panel . Oil System, K- 3 thru K- 74 83 84 87 89 Generator Control Box and
Battery Ins talla tion . xii 91 Source: http://www.doksinet Fig. XXXV Fig. rxxvr Fig . XXXVII Fig. . Data Chart . Spare Lamp Data Chart 95 - 98 Electric Fuse 99 - 101 Auxiliary Generator and Blower XXXVIII Beating System xiii . . 104 109 Source: http://www.doksinet R41<rI (/ENER.J/l 1JBIJRIPOON Source: http://www.doksinet ========!. GENERAL DESCRIPTION A. DIMENSIONS AND CHARACTERISTICS 1. Overall D1mens1ons - Feet K-3 . . Height Width •• ••••• •• • •• •• ••••••••• • ••• •• •• Length 2. K-14 to K-13 & Future 79.00 62.50 248.50 79.00 62 . 50 251 . 70 416, 000 3,900 246.00 425,000 3,965 98.40 112.40 113 . 95 424,600 435 , 000 Envelope Theoretical: VolllDle, 0u. Ft • •• • • • • • • • • • • • • • • • • • Surface Ar ea, Sq. Yds ·• • ••• ••• ••·••• Length, Ft. •••• ••••••• ••
••••••••• •• • Diameter, Ft. . • •• •••• • • Fineness or Slenderness Ratio ••• • ••• ·Maximum Section from Bow, Ft • • ••••• • Center of Buoyancy, Ft . • •••••••••.• 249 - 20 57.85 4 .i5 57 . 85 4.31 98.40 Demonstrated Volume (wit h stretch) Cu. 3. Ft. . • • ••••••• Ballonets K-6 K-7 to K-13 55,700 58,400 53,000 58.400 58 , 950 61 . 600 114,100 111,400 120,550 27 . 5 26.8 27.7% •••••••••••• • ••• ., • •••• itt 525 562 544 lli ••••• • •• •••••••••••• 1106 1087 1106 to Volume - Cu . Ft: Forward •·• • • ••~··• ·••••• • Aft .••• Total ••••••••• • •• •• ••• ••• Per Cent Envelope Volume K- 3 K-14 Future & Surface Area - Sq . Yds: Fo.rv1ard A.f t Total ••••••• ••
••••••••• -1- Source: http://www.doksinet 4. Tail Surfaces - Sg. Ft All Ships Fins: Horizontal (2) •···•··•••••· · • · Top (1) ••••••••• • •••••••••.•• Bottom (1) •••• • •• • •• • • ••••• • • 732 366 Total . • 1348 Rudders: Top (l} . • •• • Bottom (1) ••••••.•••••• •••• 130 Total .• Elevators (2) . 260 Weight and Lift - Lbs . K-3 to K-8 K-9 to K-1-3 & Gross Lift (Based on 62 lbs. per 1000 Cu.Ftwith stretch) 26,325 26 , 325 26, 970 Approximate Total Wei ght, Empty 17,600 18,350 1 8,430 8,725 7,975 8,540 .331 .303 .310 . . Ratio Useful Lift to Gross Lift . Approximate Oseful Lift 6. --22. * 199 1807 GRAND TOTAL - Tail Surfaces ,. 250 K-:14 Future Power Pl ants K-3 to K-8: K-9 & Engines (2) Wri ght, Model R-975-28 , Direct Drive-Horsepower, each 420 H.P at 2200
RPM Propellers (2) - Three Blades - 90 11 Diameter. Future:Engines (2) Pratt & Whitney Wasp , Model R-1340 -AN2, Geared 3:2 Horsepower, each - 425 H. P at 1775 RPM Propellers (2) - Three Bl ades - 12 1 0 11 Di ameter Propeller Pitch: Diameter Pitch Setting at 42 11 Station 12 1 6" 12 0" 116" *Inboard aft corner cut to prevent puncturing the envelope during heavy landings. - 2- 19.5° 20.5° 21.5° Source: http://www.doksinet B• .AVERAGE PERFORMANCE ) K-3 thru K-8 . 40 50.0 62.5 50 50 67.5 40 1450 1780 2200 1120 1340 1775 1050 Fuel Consumption Lbs./Hour ••••••••••• • • 1 20 l60H- 520 98 160~ 375 102 165-iHf- 400 55. 0 34.2 14.1 2200 1 710 950 Speed Knots R.P •M 1 vJ 1 * . K-9 thru K-13 K-14 & Future 50 67.5 1290 1740 Endurance, Hour5 Based on 6000 Lbs. Fuel " " 5200 Lbs . Fuel " 11 5650 Lbs.Fuel Range, Nautical Mil es * . 50 37 .5 11 5 53.2 2000 1875
690 32 . 5 2130 1625 14 945 See Pages 65 , 66 and 67 for more complete performance data. -JHf-Based on lean carburetor setting. RECOMMENDED TOP SPEED - 67.5 KNOTS PER HOUR Source: http://www.doksinet RARr Jl fLl(}HT ANlJ.IÍIQHT CfJHTROL Source: http://www.doksinet =======rr. A. FLIGHT & FLIGH~ CONTR01======== FLIGHT CHARACTERISTICS The lift of an airship is made up of two components -the static lift and the dynamic lift. These two components have different physical origins and require separate treatment. (1) Static Lift The sta tic lift is that component of lift which is due to buoyancy and which is independent of any motion of the ship with respect to the air. The gross static lift of an airship is the difference between the weight of the air displaced and the weight of the lift ing gas . The net lift is the diff erence between the gross l ift and the gross wei ght of the ship. The ship is said to be "light" when the gross lift exceeds the gross
weight. The ship is said to be "heavyn when the gross weight exceeds the gross lift. In calculating the gross lift of an airship both the gas volume and the lift coefficient of the helium, or lift per 1000 cubic feet, must be known. The lift coefficient can be cornputed„ as indicated below„ when various conditions of the atmosphere and of the helium are known . The gas volume, however, can be determined accur ately only when the ship, is fully inflated. Calculations of gross lift are largely li.mitBd, therefore to full inflation -4- Source: http://www.doksinet Ordinarily an airship t akes off less than fully infl~ted and the lift condition is determined by a weigh- off rather than by calculation. After take-off, the pilot is i nter ested in keeping track of the variations in gross and n~t lift as affected by the burning of fuel or dro~p ing of bal la s t on the one hand, and by the vari a tions in a tmospheric condi tions on the other. The changes of lift ca.n be
followed by means of simple rules of thumb discussed l a ter on. (a) Calculating Full Inflation Lift References: (1) War Department Technical M.anual TI!- 135 (2) Goodyear Aircraft Report on 1 00% Weigh Off of K-4 Airship, Oct . 15, 1941 , Revised Nov. 6 , 1943 The lift coefficient, or lift per 1000 cubic feet can be computed from the following formula: L = CP 1322 - 16.7 Ra Ea Ta Where: L - 182 - 21.,2 Rg Eg (1) Tg = Lift Coefficient in lbs. per 1000 CuFt e =Gas p = Atmospheric Pressure, in. of HG Purity, % Ta = Absolute Air Tempera ture, oF. = 4598 Plus Air Temp Tg =Absolute Gas Temperature, oF. = 459-8 Plus Gas Temp# Ra -- Relative Humidity of Air, % Rg -- Relative Humidity of Gas, %, Ea ::: Vapor Pressure at Temperature, Ta Eg - Vapor Pressure at Temperature, Tg - 5- Source: http://www.doksinet 40 C.-F r--1-----1--l l 00 .3 5·1-t--E3--l 15 ~ :§--j 60 1Ol-t--E3--l50 30 EFFECT 0 15 lC 5 0 c. EFFECT °F. SOPERHEAT ON LIFT SOPERHEAT ON
LIFT 15 l-t--E3--l c. LBS. -- 1--1---+---I 1500 ~ ----~ 1000 LBS. °F 0 201-+---F"l FARENHEIT CENTIGRADE SCALE 1500 30 20 ~ -- 500 H~:t7 lO ·- 0 0 0 Far K-Airship Fig. I Superhea.t Chart - 6- Source: http://www.doksinet If the effect of humidity is neglected , the formula becomes: L = CP (2) 1322 - 185 Ta Tg If Tg = Ta and there is no superheat, then : L = 1140 (3) CP Ta Formula (.3) may be accurate enough for rough computations But even when more accura te resul ts are d esired, 1 t may be f ound convenient to use this formula and to apply q uick corrections for bumidity and superheat according to the foll owing r ules: 1. For each 5° of positive superneat, increase lift by 1%. 2 . For ea ch 5° of negative superheat, reduce lift by 1%. 3 . Correct for humidity in accordance with the following table: LOSS IN LIFT CAUSED BY HUMIDITY Air Temnerature Loss in Lift at Saturation 1/20 1/10 32°F 1/5 of 1% of 1% of 1% 50°F 70°F 1/2
óf 0°F 20°F 1% 1% less than dry air l . 8% l ess than dry air 90°F 2 . 5% less than dr y air l00°F For less than 100~ humidity, multiply loss in lift a.t satu!ation by %humidity. -7- Source: http://www.doksinet FIG . 21 .os2 - - 054- HELIUM I// I!/ Fig. II - Helium Purity -8- Source: http://www.doksinet The curves in Fig. II mak e it pos sible to find directly the lift coefficient given by formula (J). This lift co- efficient should be corrected for humidity and superheat as outlined above. (b) Lift Vari a tions The table below gives a number of rules which permit keepin g track of lift vari a tions after take-off. EFFECT - OF VARIOUS ATMOSPHERIC CONDITIONS ON GROSS LIFT CONDITION EFFECT ON GROSS LIFT Below Pressure Height Above Pres sure Height Increased Altitude, Decreased Barometric Pres s~re NONE Decreased Altitude, Increas ed Barometric Pressure. NONE NONE -~ Decreased Ambient Tempere. ture, No S1:lperheat NONE NONE Increased Ambient NONE
Reduced by 1% for every 360 ft.or * .3 in Hg Tempe1•3ture, No Superheat. ~ Reduced by 1% fo:r every 5o F. * Positive Superheat Incre ased by 1% for every 5° F. * Increased by a n egligible amount. Negative Superheat Decreased by 1% far every 5° F. * Decreased b 1% for every 5 F. ~ * ~ 6 For the K-ship, 1% of gross lift amounts to about 250 lbs. Superheat can be seen, therefore, to affect lift by about 50 lbs. for every 1°F, or 90 lbs for every 1°c Gas contracts and ship is no longer a t pressure hei ght . -9- Source: http://www.doksinet NOTE: The student pilot i s sometimes confused by the apparent contradiction between some of the above rules, which seem to impl y that lift is unaffected by temperature, and the known fact that an a irship has a greater l ift in winter than i n surnmer . The contradiction i s easily cleared when it is considered that the rules in the above t abl e appl y only to the lift of an airship to which no helium is added. It is true,
as indicated by the above rules, that the lift of an airship inf l a ted during the sumroer remains the same when cold weather sets in, provided no gas is added and no gas is lost and neglecting the .effect of humidity The gas and the displaced air contract in t he same proportion so tha t a like weight of gas has th.e same lift in winter as i n summer. At the same tim.e, becau s e of the gas contraction , it is pos~ible to add a certain amount of gas i n winter t o a ship which had been fully infla ted in the summer. A fully i nfla ted ship ha~ , therefore, a greater lift in Winter than in summer. (2) Static Trim An a irship trims at an angle such as to bring the center of gr avity dir ectly below the center of buoyancy . The K~airships trim a t an angle of 3.5°, plus or t!linus 1/2°, nose down at static eguilibrium, when fully inflated , with conditions such as to produce a static lift of 62 lbs . per 1000 cubic f eet and with a load distribution as indicated on the following
page. Onder the above condi tions, the location of the center of buoyancy and of some of t he important centers of gr avity al ong the longitudinal axis are given below: - 10- Source: http://www.doksinet Center of Buoyancy: 20.53 ft Aft of Frame 9 Center of GraVity of Ship as a whole: 1.75 ft Forwa rd of Center of Center of Gravity of Loaded Car. Center of Gravity of Envelope: Buoyancy. 8.45 ft Forward of Center of Buoyancy. 10.00 ft Aft of Center of Buoyancy. The useful load 1s ordinarily distributed approximately about the center of grav1ty of t.he car so that changes in the useful load do not alter greatly the location of the center of gravity of the car. The center of gravity of tb.e ship as a whole, however, changes with the total car load since, as indicated above, the center of gravity of the car is considera bly fo rward of the center of gravity of the envelope which makes up the balance of the gross load. An increas e of car load has the effect of moving tbe
center of gravity of the ship f orward and of increasing the nose down an gle. A decrease of car load has the effect of moving the center of gravity of the ship a ft and of decreasing the nose down angle. A change of 10,000 ft . lbs 1n tbe moment balance with respect to the center of buoyancy of the ship, whether caused by a change of t otal load or by a chan ge of load distribution, alters the static tr;im angle by about 1~ -11- Source: http://www.doksinet Since the trim angle is measured at full inflation 1 1 t and at equilibrium a change in the lift coefficient must be accompanied by a corresponding change in the car load to maintain equilibrium. Therefo.re, when the lift is greater, the load will also be greater, and the ship will trim at a greater nose down a ngle . A difference between the summer and winter t rim angles may be observed because of thi s f actor . At les s tban full infla tion the trim of the ship is affected by the above factors, and also by the
relative inflation of the ballonets. (.3) Dynamic Lift Tb.e dynamic l ift of an airship is the lift which depends upon the forward motion and the angl e of attack of the ship with r espect to the air. See Fig. III for dyn amic lift at various forward speeds. The curves plotted in Fig. IV show the variation of the minimum length of the t ake-off run of model K- a i rships with heaviness and bead vdnd. The assumptions on which the curves a r e based are nei ther exact nor invariable, bu-c they a re on the safe side, giving an over estimate rather than an under estimate of the req uired l ength of the t ake-off run. (4) Factors of Safety The suspen sion system and the car structure of the K- a irship are designed for a total car load of 1 6, 000 lbs. The minimum factors of safety at this load are 3.00 for the car structure and 4 . 00 for the cal: suspension -12- Source: http://www.doksinet ----, 90 FIG.III 80 [)~NAMIC LIFT CHART 0.7S FuLL PowER 60 --- so e., . 0 < ~
., 40 ),. ~ <.; 0 -.J " 30 DYNAMIC LIFT VS. IIELOCITY AT VARIOUSANGLES OFATTACK AND VAR/OUS HORSE POWERS l<-TYPE AIR SHIP ~ 20 ON l<-13 FLIGHT Tcs-r VALUEs BAsEc, ON M-I MoocL TEsr VitL.ucs BAsca /0 OL,,. 0 /OOO 2000 3000 4-000 6000 5000 D r !i M lC 7000 LIF T 8000 9000 10000 11000 12000 ( P O UND S) - - - - - - - - - J3 - Source: http://www.doksinet I 100 t--- - , - - - - -- 1000 1-----.---------VARIATION OF MINIMUM LENGTH OF TAKE-OFF RUN Wl7"H HEAI/INESS ,----- - - ,, - -- --,,-----,--,---,--,---,--,-~ AND HEAD WIND . ~~ 800 ~ 700 FIGURE JY- TAKt-Off CHART /rom Bureau of Aeronaufics le t SERVICE BULLETIN No. 60 600 0 1 ~ 500 ; 400 ~ r~ t 300 zoo /00 S 10 H~AD WIND„ ·-14- KNOT.S Source: http://www.doksinet WEIGHT EMPTY (5) Note: All weights are for ships before K~75. ENVEL0PE GR0UP Main Envelope Fa bric •••• •••• ••.••
•••• ••••••• • • ••• Ball onets . • Air Li nes . • • Frames . • •• • • • 85.7 Lbs Fabric Patches & Lacing • ·· ••••· •· 109 . 6 Rip Panel s , Complete with cords ••••• .••• ••• •• • Car Suspens i on . • • • Inside Catenaries •••••••••.•••••• Inside Cables • ••• . • • ••• • Outside Catenaries ••.• •• • • •••••• Ou tsi de Cables ••• •• • .•••• •• •• 524.0 129.6 102.2 22 . 7 Gas Valves & Reinforcement •••.• • ••••••••••• •• • Air Pr essure System ••••••• • •••• • ••• •. ••••••••• Air Valve Reinforcement . •• • • ••••• 6.0 Bow Stiffening . - Bow Cone ••••••••••••.•••••••••• Ba.
tten Pa tches, Laces, Ete • •••• 106.8 102 . 0 378. 0 28.6 45 . 4 32. 5 Ba ttens . • • •• • Batten Cables •••• • ••• • •••••••••• Moor ing Cone Spindle & Pendant .• • Miscellaneous •• •••• ••• •• •••• ••• • • Handling Lines . • . . 18 . 5 4 • • • • • • Drag Rope •••••• ••• ••••• •• • .• ••• •• .Yaw Lines •••• •• ••••• • • • •••••••• • 21.1 778.5 68 . 0 6. 0 693 . 3 137.2 39.9 78.8 Handling Lines, All Others ••.•• Fin Suspension, attached to envelope • •••••••.•• • • Lighting & Bonding System ••.••••••••••••••• ••• • Car Fairing, Tape Lacing Cord & Padding .• •••••• Miscellaneous equipment, patches, manholes a nd s l eeves a ttached to t he envelope •. •
•••••• T0TAL ENVEL0PE GR00P 5670 . 4 Lbs 820.0 195.3 . 145.6 20 . 5 31.8 301 . 6 8895.3 Lbs EMPENNAGE GR0UP 24l.O Lbs 482.0 217 . 0 86 . 0 172. 0 56 . 0 100.0 Upper Fin ··••••·• •• ·•••••· •• ·••· Hori zontal Fi ns (2) •·••••••··••· Lov1er Fin . • • , • • • , Opper Rudder •.••••••• •• Elevators (2) ••••• •••••••• • ••.• Lower Rudder •• . •• ••••• Fin Br ace System • .•••••••••• T0TAL EMPENNAGE GR0UP • • TOTAL ENVELOPE & EiiPENNAGE - 15- • • • • • • • • ♦ •••• ••••• •• 1354. 0 Lbs • • • • • • • • • • • • • • • • • • • 10 , 2/4,9. 3 Lb~ Source: http://www.doksinet WEIGRT EMPTY CONTROL CAR GROUP Car . ·~ Framework ••••••••.•••••••• • ••• •• 1
0560 Lbs Me t al Skin & Skin Stiffener s ••• • 436 . 6 Fabric Coveri ng •••••••• • • ••••• • • 5. 6 Windov. s . •• •••••• 2250 . 0 Lbs 120 .1 Doors Compl ete •··••·•·••·· • ··· • • 61.1 Handling Boxes and Doors •••••••• 9. 5 Bomb Hatch Door s & Opening Mech. 44.6 Hand Rails and Br ackets •• ••••••• 32. 7 Insulation & Compartment P~rtition 33 . 8 Fl ooring & Supports •••• ••• •• • • •• 322.6 Access Ladders if carried in flight 16 . 8 Miscell aneous ••••••••••••••••••••• 110 . 6 Landing Gear Landing Wheel As sembly ••••••• • • .• ••••••••• Wheel & Tire ·····•··••·• • · · ···•• 77.5 Lbs Fork a n d Axle •• • •••• •••• • • •• •••• 45 .9 Shock Absorber ••• ••
••• ••••• • .• • • 43.6 Retracting Mechanism . •••••••••• • 37 .5 Miscellaneous Installation • •••• • 24. 0 Outriggers & Engine Nacelles ••···• ····•• ·•··•·· Structure •• •• ••• ••••• ••• •••.•• • 250 . 0 Lbs Metál Ski n & Skin Stiffeners . • • • 151 . 5 Engine Mounts • .••••••••••••• 78 . $ Cowlin .gS •• • • • • •• • • • • • • •• • •• • • •• 95 . 0 Engine Nacelles & Stiffeners •••. 165.8 228.5 Lbs 741 . 1 Lbs Power P1ant Group • •••••••••••.••••• •• •••••• •• 2é42 8 Lbs Engines (as installed) • • •••• • • • 1858.0 Lbs Engine Accessories ••••••• •• •• •• 238.l Power P1ant Controls ·•• • • • · ·•• · 39. 9 Propellers . Sta rting System •
•• •• •• . • •• • •••• Lu bri cati on System 422 . 8 84. 0 • • • • • • • • • •• • • • • • • • • • • • • • • • • • • Tanks & Pr otection, Installation 44. 1 Lbs Oil Coolers •• •••••• •• ••••• •• • •• 60.5 Pumps,not i nt€gral with engine 4. 5 Piping, etc . · • · • · •• ·• • · • ·· •• · · 45 . 2 -16- 154.3 Lbs • Source: http://www.doksinet WEIGHT EMPTY Fi.lel System •••••••• •• •••• • ••••••••• • • ••• • •••• Tanks & Protection, ins tallation Pumps, including transf er pump &. hose .•••• 314.4 Lbs Pi ping for Fi.lel and Vent Systems 233 . 6 FiXed Equipment • • , •••.••••• Instruments •••••••••••••••••••• 127.2 Lbs Ma jor Controls , complete • •••. • • 125 8
Minor Controls, complete ••••••• 42.5 Pressure Tube Assembly ••••••••• 32 . 6 Electrical ••••••••••••••••••••• 624 . 8 Communica tion ( Radio & Radar, MAD, IFF) · •••••• 1098.0 Furnishings Personnel Einergency . •• ••• ••• •• •••••••••••••• •• •••• 287. 4 Lbs •• • • • • • •• • • • •• • • • • • • • • Chair Base i n Aft Section •••••• Naviga tor s Table ·····•···•·•·· Radio Table • ••••• • ••••••••• • ••• Heating Equipment · •••••••·••~· • Car Ceiling •••••••••••••••••••• Rigger 1 s Cabinet ··•••••• • •·• •• • Naviga tional Gear Rack ••••• • ••• Miscellaneous •••••••• • ••• •
••••• -17- 2050 . 9 Lbs 466 . 9 Lbs 47. 4~ 3.2 19.9 26.7 33.0 27 .3 15.0 5.3 1.7 . Auxilia ry Power Pl ant . TOTAL CAR GROUP . Air System 548 . 0 Lbs 352.8 Lbs • 200 .3 Lbs • 9635 .6 Lbs Source: http://www.doksinet USEFUL LOAD (6) 1750 . 0 Lbs Crew (10 Men a t 175 lbs • .each) Fuel 3930.0 Lbs • Main Engines & Aux. Engines • • • • • • • • • • • • • • • Overhead Tanks 475 Gal.@ 6#/Gal 2850 0 Lbs Slip Tanks, 180 Gal ••••••••••• 1080 .0 Oil Main Engines - 52 Gal.@ 7-5# Gal Aux. Power Plant, 3 Gal @ 75# . . Droppable Fuel Tanks (2) . Baggage . •· Cargo . . 50 Cal. MG 105 .0 Lbs 132 . 0 M.G Ammunition Bomb Racks . 41 . 6 . . Bomb Racks 41.6 Bombs M-17 .0 . 650 650 . 0 Bombs M-17 Armament 1. 2. 3. 4. 5. 6. Equipment m . Navigation Gear a. Charts, Publications • • ••••
b . Optical Drift Sight ••••••• e. Wiley Dr ift Sight • ••••~••• d. Parallel Rulers, Binoculars, Stop Watch, Dividers •···• ·• e. ~iscellaneous Gea r •••• ••••• Total Photographic •• • •••• .• •••• • ••• 7.5 Lbs 13„5 1. 5 14. 0 18.5 55 . 0 Lbs 55 . 0 Lbs Pyrotechnics a. b. e. d. Signal Pistol •• •••••••••• . 24 Rounds Signal Fl a r es •• • • 24 Float Lights .•••••• • •• 24 Bronze Powder Markers . Total 2 .1 Lbs 7. 2 52 . 8 48 . 0 110 .1 Lbs 390.0 Lbs • 22 . 5 42 .l Lbs • 00. 0 Lbs • 00.0 Lbs 1620.0 Lbs 570 . J Lbs Source: http://www.doksinet USEFUL LOAD Emergency Life Saving Equipment: a. Ten Life Ja~kets@ 3# •••••• b. Li-fe Raft ••••••••••••• 30.0 Lbs 66.0 Total ••.••••• 96.0 Lbs . . . 30.0 Lbs Food and Water: a. b. e. d. e. Food, Canned Food, Fresh .
. Water, Fresh . Rescue, Rations • • • • Emergency, Food and Water . ■ a ■ . ■ ■ R e • 55.0 35.0 16.0 27.0 . ■ . ■ ■ ■ Total 163.0 Lbs Miscellaneous Equipment: a. b. e. d. e. f. g. h. i. Classified eontainer .••••••• Emergency Cable •••••••••••••••• Two Flashlights@ 3/4 Lbs •••••• Signal Flags .••••••• Fuel Pick-up, Green Marker Buoys, Grapnel ••••••••••••••••.••••••• Dne (1) Chute, Dne (1) Harness .• P •. & W Engine Kit •••••••••••• Wire Cutter and Knife •••••••.• Rigger•s Kit . · Total TOTAL USEFUL LOAD -19- 2.2 Lbs 5.0 1.5 1.0 28.0 18.0 15.0 5.0 lli2 91.2 Lbs 8325.1 Lbs Source: http://www.doksinet It is reconimended that the tot al car load be not allowed to exceed 18,300 lbs., or 2300 lbs over the design load. Under such condition of 2300 lbs.
"Design Heaviness" the factors of safety are r educed to about 2. 6 for the car structure and about J.5 for the car suspension NOTE: "Design heaviness" is the excess of car load over design load and should not be confused with "flight heavinessn which is the excess of gross load over gross lift. Flight heavinessn alon~ is no measur e of the f actors of safety of the car structure and suspension . 11 Onder conditions of high lift there may be no "flight heavinessn but a high "d.esign heaviness" Under conditions of low lift there may be no "design heaviness" bu t a h i gh "flight hea viness . n Preceeding pages show computations of a typical car load. It is suggested that similar forms be used for actual computations before t ake-off. - 21- Source: http://www.doksinet B. ENVELOPE PRESSURE CONTROL SYSTEM (1) General Description The maintenance of a predetermined pressure differ- ential between the gas in the envelope of a n
on-rigid airship and the surrounding atmosphere is the first basic requirement to the successful operation of this type of airship. The functioning of the envelope in assuming the v.arious flight stresses, the proper suspension of the car, the efficient operation of the controls, all depend upon a closely held pressure differential. It is the function of the pressure control system to maintain this pressure differe.ntial within a certain range and to do this with a minimum loss of lifting gas. This result is accomplished by inflating the envelope partly with gas and partly with air, the air being contained in a forward and an aft ballonet, and by regulating the inflation of the air by means of an air system,without changes to the amount of gas in the envelope. Under extreme conditions , out s ide of the range of the air system, gas can be released automatically by meails o-r tw6 gas valves to prevent the internal pressure of the envelope from rising above a safe value. Toe
pressure control system is also used to adjust the trim of the ship by regulating the rela ti.ve inflation of the two ballone t s . -22- Source: http://www.doksinet (2) Air System The air system comprises a for ward and an aft ballonet, a system of scoops, ducts, valves and air chambers . Air is taken inat scoops loca ted in the port and starboard motor outriggers and is led through a check valve of the butterfly type into an air chamber. From this cbamber, t wo air ducts lead, one to the forward and the other to the aft ballonet,. through ma~ually controlled dampers An automa tic valve is connected to each ballonet system and is set to release air automa tically when the pressure reaches a predetermined value . In airships K- 3 thru K- 98, a blower with a gasoline power plant is p rovided in the cabin to supply pressure to the air system when the pressure from the r e.gula r In airships K-99 and future, an system becomes inadequate. electric blower is provided . The
construction of the system is described in full deta il in the "Descriptive Specifica tions Manual." The opera tion of the system is considered further below: (a) Scoops As mentioned above, air is collected by scoops located in the port and the starboard outrigger and is led to an air chamber through check valves . This air chamber can be con- nected to either or both ballonets by means of two manually controlled dampers. The air pressure in the ballonets can be adjusted witbin certain limits, as described further on, by regulating the opening of t he scoops. - 2.3- Source: http://www.doksinet Al/1 DISCHAIIGE Fig. V AIR PRESSURE SYSTEM K-3 thru K-98 Source: http://www.doksinet Fig. VI (b) Valve Settings Air Scoops (See Buaer Manual 12-304) Tb.e pressur e in the forward and aft ballonets is limited by the forward and aft automa tic air release val ves These two valves are set to operate at different pressures for reasons that will become apparent further
on. The valve of the forward ballonet is set to start opening when the a ir pressure in the forward ballonet, as read at the car manometer, reaches 1 . 50 inches of wa ter The valve of the aft ballonet is set to begin to open at an ai r pressure of 2 . 00 inches of water When the ballonets are partly inflated there is a difference of pressure between the air in the ballonets and the gas in the envelope . This difference de pends upon t he - 25- Source: http://www.doksinet ------ -- --, 1 ~-i ~ 1 , cn tl i - .-4 ~ ~ 1 i 1 i l I Í j 1 ! 1 i ! - e - - - -+----------~1. c- , ~ , ! 1 1 1 , - - - - + - - - . - - -.---~- , 1 j 1 ------.----,- 1 l 1 1 1 1 1 1 l - 1 l l l ·1 ;~. ---1------------~ r--------~ r-~!---i, ~-Í I ~ l -,-- l 1 1 1 1 1 I --:- - - -r-- --· 1 1 j , 1 1 J ~ Cl1 1 I, l -+-----,--- 1 1 .~ ~ : 1 r ! ~ ~ ~ ~- I t , 1 - - - - i ---.---1 .2 • 1 1 - L-
-1,-.----- 1 • .3 ~ l 1 1 ,1,----,- -1----1, +-,---+--J- 1 :§- 1 1 l , J : 1 ----+---------~-, ! - 1 l ., l l 1 ! ! J 1 ------- - . !~~--- . ~-- Jl l .! i----------------~ ---+---1-------------.------ ~ - - - + - , ----- -·-r--; ~ ~ ! j -s -H•- - -~- - - ,-----"------~----.1j 1 LJ.1 1 - - - ] (/J Cl) T ~ - ~. :: •l=Cl: 1 H --< - - -,- - ~ - - 1 0 1 10 20 30 - 40 60 - 50 - 70 -8 0 90 1 00 ----- fo F ULL NESS OF BALLONEl S i Fig. VI I AIR P·RESSORE IN EXCESS OF GAS PRESSURE %FOLLNESS vs OF BALLONETS AT ZERO PITCH ANGLE AT STANDARD ONIT LIFT CONDITION S - 26- --- Source: http://www.doksinet height of the upp~r part of the fabric of the ballonets or upon the degree of their inflations, upon the lift coefficient of the gas, and upon the fa·bric weight which reacts on the air. Curve in Fig. VII shows the relation between this difference in pressure and the
inflation of the ballonets at sta.ndard lift coefficient It will be noted tha t the difference of pressure is about 0 •.50 inches at full inflation and nearl y zer o when the ballonets are fully deflated Since the automatic air valves are operated by the air pressur~ in the ballonets and not by the gas pressure, it wil l be obvious that the system will tend to regulate for a higher gas pressure when the ballonets are empty than when the.y are infla tea (e) Pressure Regulation 0nder normal flight condition a gas pressure of about 1.5 inches of water should be maintained with a maximum variation of 125 to 2 00 inches CAUTI0N: Under no condition should the pressure be allowed to go lower than 0. 5 inch or higher than 30 inches of water, the 1011.rer pressure being permissible only i ,n landing opera tions or in the hangar Vlhen there is little or no forward speed . It is particularl y essential to maintain an adequate internal pressure when the ship is operated at high speed or
when moored at the mast during high winds. -27- Source: http://www.doksinet The K- airships are designed for a maximum speed of 65 knot s wi th an intern.al gas pressure of 1 5 inches of water . Si nce the automatic air valves, as pointed out above, are operated by the air pressure of the ballonets, the corresponding gas pressure at which they open depends on the gas inflation of tb.e shi-p If, for instance, the ship i s 85% gas inflated and the ballonets are more than half infl?,ted, it can be seen, by referring to the curve in Fig. VII that the gas pressure in the envelope is about 0.32 inches of water less than the air pressure in the ballonets . The air valve of the forward ballonet will open, therefore, at air pressure of 1. 5 inches of water, while the corresponding gas pressure is .32 inches of water less than the setting of th~ gas valve or 1.18 inches I t will still be possible, however, to maintain the recommended operating gas pressure of 1 . 5 inches of water
by opening the forward air damper and regulating the scoop opening so as to produce air circulation through the air damper and the partially opened air valve . CAUTION: The matter of the pxoper regulation of the a ir scoops 1s of the utmost importance. If the scoops are opened too wide , excessive pressure may be built up in the envelope causing loss of gas. If the scoops are not opened enough, the gas pressure may drop to a dangerously low value resul ting in buckling of the envelope. - 28- Source: http://www.doksinet With t he differential valve setting outlined a bove , it is apparent that as long as the ship i s operated below the pres sure hei ght of the forward ballonet, a ir is re- l eased only f rom this ballonet when the altitude of the ship is increased. Hence, if u pon de scending, t he pilot operates only the fo r ward dampe r, the air which has been valved out during the ascent will be r epl aced to the forward ballonet, thus restoring the trim of the ship to the
same condi tion tha t existed at take- off. During short f lights , the oper a tion of the system is au t omatic, and no manual adjustment ne eds to be made except to open the forward damper. During long flights, occasional manual adjustments of the air balance may be nec e ssary , but the system r emains largely self- operating. (d) Air Valve Adjustment All valves are adjusted to their specified settings and t ested before be-ing insta lled in the a irship a,nd r etes t ad a fter installation. The valve settings should not be cbanged unless difficulties arise. Adjustments should then be made only by a qualified person . During eme r gency , it may be necessa r y t o adjust the valve in f light . Instructions below sh ould cl a rify any difficulties tha t may be encountered. - 29- Source: http://www.doksinet Two 36-inch diameter air valves , see Fig . VIII and IX, are provided in the air line in tbe top of the ear str ucture for valving air from the ballonets . One o,f the
valves is located between Frames 4 and 5, and valve,s air from the aft ballonet, the air going out through louvers on the port s i de of the car. Tbe other valve, located between fra.mes 6 and ?, valv=s air f-rom the forward ballouet and exhausts a i r on the starboard side of the ca r. Controi l ines for opening and closing the valves extend to Pilots I nstr ument panel , s ee Fig. XI, Page 42 The air val ves ar e set to open as follows: Aft Valve Fo r ward Valve - 1.5 11 H20 To adjust valves on K- .3 thru K- 53 exclusive of K- /49: (1) Inside knob adjustments (Three) (e) (d) (e) (f) (g) Break seal on ea ch valve adjustment knob. Apply same number of turns to each knob . Never adjus t one ~r two knobs, but a djust them all e quall y, to prevent warping and improper seating . On e complete turn of each of the inside adjustments will effect a change in the opening point of .018 inch H20 Do all loosening and some tightening on thei ns i de . Turn adjustments clockwise to
tighten or increase opening pressur e . Turn adjustments counter-clockwise to l oosen or decrea~e opening pressure . Re- seal valve adjustments to prevent valve f r om losing its setting . -30- Source: http://www.doksinet Fig . VIII - 36" Air Valve K-3 thru K-53, Excl. of K-49 -31- Source: http://www.doksinet (2) Outside Gear AdJustments (d) (e) (f) (g) Remove gear cover. Remove cotter pin ( through gear). Do most tightening on outside gear and no l ooseiifng. When tightened until 2-7/8 11 of screw protrudes from the gear, the forward or aft air valve opening point will i ncrease 7/16" H20. This is a ma~:µnum condition Turn counter-clockwise to tighten or increase opening point. Turn clockwise to loosen or decrease opening point . Replace cotter pin and gear cover. In the event the valves are completely out of adlustment, then proceed as follows: 1. Set outside gear adjustment to neutral setting NOTE: Neutral setting is defined as 1-1/2" Total length of
screw 1s 3 inches . of screw protrusion from gear. 2. Build up air pressure to 15n H20 at the manometer 1n the car and adjust inside knobs a s previously described. 3 . The valve is considered in adjustment when the dome begins to float freely and emits a characterístic hum. 4. Re-seal all adjustment knobs and replace outside adjusting gear cover, together wi th the cotter ])in . Insofar as the aft valve is concerned, build up air pressure to 2 inches and r epeat the above procedure. To adjust valves on K-49, K- 54 and later airships: Open the zippers for the acces s openings in the .c eiling of the car and remove the lock seal a ttached to ea ch knob. Onscrew the 1/2 11 O. D sealing caps and t urn adjusting knobs - 32- Source: http://www.doksinet Give each of the knobs an eaual number of turns and in the same direction. Turning the knobs clockwise, or to the right, inc~eases the pressure necessary to operate the valve . Turning the knobs counter-clockwise, or to the
left, lowers the pressure necessary to operate the valve. Tests conducted on a number of modified yalves ina valve t est chamber determined that ten complete turns on each of the three knobs changes the pressure setting neces sary to operate the valve by 1/5 of an inch of a2o. After a sat isfactory resetting is found, add lea tber washers and screw the sealing caps 1n pl ace again, then safety the k:nobs to the clips on the shield . against the air manometers. Test setting The use of the gas manometer is misleading, except at, or very near, pressure height. -33- Source: http://www.doksinet Fig . IX - 36" Air Valve K-49 , K- 54 & Future - 34- Source: http://www.doksinet ( e) Take- Off ·,Vhen the ship i s in the hangar i t is norrnally ~ept under prope r press ure by means of a ground blower. J.s the ship is t aken out of the hangar, weather condi t ions -:i,ay be such as to c ause a chan ge of the tempe r a ture of the gas . If the temperatur e i s
increased , ai r will be released autom~tically by the air valves. If ~he t emperature is de- creased, air ma y have t o be blo~~ into the system to k e ep up the pressure . This !::lay be done by o pening t he scoops éind the a ir damper s , and spe eding up the engines or it may be done by ~eans of tb~ auxilia ry blower . NOTE: The damp ers can be k eut continuously open while a ir i s blown occasionally in the system by maneuvering the tbrot t l es , ~he check valves preventing loss of air when t he ene:ines a.re ; dle Under normal conditions . however it is best to keep the dampers closed when not oum>Jin g a ir . ( f) Climb As soon as the ship begins to ri se , t he problem is no l onger one of feeding a ir to the s ystem, but one of releasin g air to maintain a cons te.nt differential pressur e between the gas in the envelope an d the decreÍ:; sing a tmosph2ric pressure. This i s done automa tically a s outlined above, cy the ~ir valves . The air valve s and
ducts can prevent the pre ssure from rising above 2 . 5 irlches of water when the ship is rising ~t a s peed of 2400 ft . pe r minu te - 35- Source: http://www.doksinet During the climb both d amp er s shoul d be clo ~ed. Tb.e scoops , however, should remain open s o th~t the pilot ruay be able to blow a ir into t.he ba llonets by c pening the darr.pers, shoul d he decide to come down again CAUTI 0N : 2400 ft •. per minute i s the maximum µer missible r ate of climb. The actual r a te of climb shoul d be kept well below this value . (g) Level Flight In level flight it is coliiI!lon pr ac tice to keep the fo r wa rd damper and the s coops open so as to produc e an air pr essure slightly higher than the s etting of the valves, causing e circula t ion of air through the air d21:iper and the ai r valve . CAUTI0N : The air r elease valves should not be opened manually when the shi p is fly ing near or above pressure height . A war ning to this effect i s mounted on the
pilotts instrument panel. As long as the valves a re oper ated au to- ma tically, wi th the scoops and air damper opened , pret su re in the system does not drop below the setting of the valves a lthough t he ballonets may become comple tely deflated . If the air valves we re opened manually at t h i s :point, th e small a.mount of a ir in the system would become quickly exheusted, the pressure dropping to atmospheric pre::sure . The "ir line pa tches or the air line rrame ~ay be damaged by the full unbalanced gas pressure. -36- Source: http://www.doksinet (h) Descending When tbe ship is descending, air must be fed into the system to maintain the differential p.ressur e between the inside of the envelope and the increasing atmospheric pressure. The scoops should be opened vnde enough to per- mit adequate air flow. The a ir scoops , ducts, and damper valves can ad.mit air into the ba llonets at a sufficien t rate to maintain a gas pressure of 1.25 inches of water when
the ship is descending at a r ate of 1 200 feet per minu•te , at a forward speed of 50 knots. The air intake capacity naturally decreases as the forward speed is reduced so that the maximum permissible rate of descent is less than 1200 feet per minute when the forward speed is less than 5.0 lmots CAOTION : 1 200 feet per minute is the maximum permissible r ate of descent. The actual rate of descent should be kept well below this value . (i) Landing At the time of landing it usually becomes necessary to throttle down the motors and the air scoop system can no longer supply the required pressure to the ballonets. An auxiliary blower is provided for such conditions . The blower is of suffici ent capacity to maintain a gas pressur.e of 0 5 ínches of water at the gas manometer -37- Source: http://www.doksinet when the ship is descending without power at the rate of 250 ft. per minute This pressure, while inadeQ.Uate for normal flight„ is sufficient to permit satisfactory
handling of the ship during landing operations . Instructions for starting the bl ower for airships K-3 thru K-98 are given on p~ ge 44. (j) Shifting Air During flight, it may become necessary to adjust the relative inflation of the two ballonets in order to change the trim of the ship. This i s done by operating the air valves and dampers manually. In trimming the ship in this manner, it may be well to consider aií as ordinary ballast, the effect of transferring air being the same as that of transferring any ballast . (k) Blowing Air Into The Gas In emergency cases where a large amount of gas has been lost, such as when tbe ship is descending after having overshot its pressure height, and the ballonets , even when fully infla ted, cannot keep up the. pressure of the envelope, i t may become necessary to blow ai r into the gas. This may be done by untyin g the sleeve connecting tbe air chamber to the envelope. This sleeve is located above -38- Source: http://www.doksinet the
cabin ceiling, starboard, and makes a "Y" connecti on with the helium inflation sleeve. Only the amount of air neces sary to bring the pressure to th~ r equired value should be used. (3) Gas Release System (See BuAer Manual 12- 304 12-307). Tb.e gas release system includes two 20- inch gas valves, located on the port and starboard sides of the envelope at panel 34, and gores K and L. It includes, also , two rip panel s located on the top of the ship from panel 21 t o 28, and from panel 53 to 59. (a) Gas Valves The gas valves are set to operate automatically when the gas pressure reaches 2-1/2-inches of wa ter as r ead on the gas manometer. They can also be operated manually from the pilot •s instrument panel. The gas valves are equipped with micro switches which operate telltale lights on the pilot s panel .hen the gas valve begins to open a t 2- 1/2-inches of water . In order to offset localized drop of pressure i n the a i r stream and to prevent premature
opening of the valves, a semi-circular windshield is attached to the envel ope on the aft side of the valve . CAUTI0N : Do not attempt to hold gas valves closed manually when flying above pressure height as excessive pressure may deYelop in the envel ope. -39- Source: http://www.doksinet Fig. X Helium Inflation Sleeve -40- Source: http://www.doksinet (b) Rip Panels The rope which opens the f orv1ard rip panel c a n be reached from · the forward. door; the rope which opens the aft panel can be r eached from the aft door. They are dyed red to avoid confusion with the other ropes. (4) Controls and Auxiliaries (a) Valve Controls The air and gas release valves can be operated manually from t.he pilot•s 1nstrument panel, Fig XI valve has an opening and a closing control. opening control liftsthe valve off its air or gas as the case may be . Every Pulling the seat and releases The valves should close by themselves when the opening control is released. A closing
control is provided, however, to force the valves closed in case t hey should sti ck. The control is also used to make certain tha t the gas val ves are closed, and that no gas is being lost when flying near pressure he1ght. The following check procedure of the valves 1s r ecommended: 1. Before take-of.f , crack all va lves ópen fa r a short instant to make ce~tain that the valves and telltale lights operate satisfactorily . 2. When flying close to pressure height, pull closing c0ntrol of gas valves from time to time. - 41- Source: http://www.doksinet ~ /i r . J, l r r 1; I lllll:o.-lllt,Ja,-=:; ,,;i,airi,J ABCDE- Safety Switch Mechanic 1 s Signal Forwar ~ Air Damper Forward Air Val ve, Open Aft Air Valve , Open F - Aft Ai r Damper, Cl ose G - · Forward Air Valv~, Cl ose > H - Aft A1r Valve, Close I , J, K, L - Fuel Dumping M - Port Heli um Valve, Close N - .Port Helium Valve , Open O - St l bd Hel ium Val ve, Close P - St 1 bd. Hel ium Val ve , Open Q, R -
Sl ip Tanks (0<9 ·F ig. XI - Flight and Instrument Panel -42- ®@ Source: http://www.doksinet (b) Damper Contr ol The air damper s can be kept open by means of an olive on the control cabl es . The dampers are normally held clo.sed by springs which prevent the dampers from opening under the pressure of air from the scoops. (e) Manometers The air pressure in the two ballonets and the gas pressure in the envelope are r ead on three manometers, located on the flight panel. Each manometer is e quipped with a three- position valve. When this val ve 1 s turned on the po s i tion ma rk.ed "Check" the manometers sbould read zero . If necessary, the r eading can be brought back to zero by means of an a d j ústing dial. ThiS check should· be made befo~e every ta.ke- off While in fli ght the valve should be turned on the position marked »static. n A mechanical manometer on the instrument panel reads the gas pressu r e and is used as a check on the liquid
manometer . - 43- Source: http://www.doksinet Fig . XII Starting Auxiliary Blower (K-3 thru K-98) (d) Starting Auxiliary Blower (K-3 thru K-98) 1. Turn on switch on pilots instrument panel. 2. Open fuel line shut-off cock on gasoline filter bowl assembly. (Turn counter- clockwise) 3. Close carburetor choke (choke is open when lever is against stop pin). Open throttle by pulling black button on throttle wire . 4. Wind starting rope on pulley, brace one hand on fuel tank and pull rope hard, giving quick spin to engine. Repeat, if necessary, until engine starts. Then i mmediately open choke partially easing to full position as engine warms up. If engine is warm from previous running, it is not necessary to use choke for starting. 5. Open air intake door. -44- Source: http://www.doksinet (e) Stopping Blower 1 . Turn off button on pilot s panel NOTE: Engine can also be stopped by pressing red stop button, mounted on megneto stator plate until engine stops . 2. When
the airshio is in flight with the Homelite Módel HRU- 28 auxili~ry blower stopped, a partia l vacuum is set up in the exhaust . This partial vacuúm draws fuel into the crankcase. In many instances, this ha s resulted 1n bursting the crankcase or cylinders and pistons when the plant wa s started . To prevent this, the fuel line shut-off valve must be tightly closed whenever the pl ant is stopped, whether in flight or at the airship base . (f) LaDel Electric Blower The production schedule calls .for a LaDel electric blower to replace the gasoline powered blower, described above , on airships K-99 and future. The only source of power far this blovrer is the LaVrance auxili2.ry genera tor The auxilia ry gener a tor must be runnin g at r ated s peed before the electric blower may be used. (5) Summary: Pressure Control System (a) Settings 1 . Forward Air Valve : Begins to open at 150 inches of water of air pressure in the forüar d ballonet as read on car manometer . 2 . Aft Air Valve:
Begins to open at 200 inches of water of a ir pressure ín the aft ba.llonet as read on car manomete:r . 3. Gas Valve: Begins to open at 2-1/2-inches of wa ter as r ead on gas manometer. (b) Control, Instruments See Fig. XIII (e) Operation Chart See Fig. XIV -45- & Auxiliaries Chart Source: http://www.doksinet INSTRUMENTS, CONTROLS AUXILIARIES LOCATION PURPOSE Air Scoop Adj u s tme.n t Port & Starboard of Frame 6. To control air pressure in air chambers and ballonets. Air Damper Contols Pilots Instrument To direct atr to the forward or aft ballonet Air Valve Contro,l s Pilotrs Instrument Panel Fig, XI To r elease air from the forward or aft ballon 8ts and to close valv·e . Manometers (3) Pilot s Flight Panel Fig. XI To indicate pressuxe of the gas in envelope and of the air in the two ballonets Pres sure Gage Pilot 1 s Instrument Panel Fig. XI To check liquid ga s pres sure manometer Auxilia ry Blower Gabin Deck, Frame 5, Fig. XII To supply air
pres sure to ballonets when regula r system becomes inadequa te Switch for Auxiliary Blower PilotTs Ins t rument BoaTd Fig. XI ilso swi tch on engine To shut off motor. Gas Valve Controls Pilots Instrument Panel Fig. :XI To release ga s manually and to clo s e valve. Air Sleeve Ceiling Frame 6. To blow air into gas in emergency Rip Cords Outside of Forward and A:ft Doors To deflate ship r apidly i n emergency Panel Fig. XI Fig. XIII Controls, Instruments and Auxili ar.i es Chart -46- Source: http://www.doksinet OPERATION CONDITION NORMAL SETTING Take-off Air in both bal lonets Both dampers closed Keep up ship inflation if necessary by opening dampers and by occasional .blasts of propellers or by auxiliary blower Climbing Air being released from Fwd . Ballonet Both dampers closed Watch for excessive gas pressure. Stay below climbing r ate of 1200 ft . per minute . Fl ying nea.r pressure height Ballonets are Open both fully deflat- dampers and ed.Gas valves
scoops operate automatically to release gas if pressure beight is exceeded. Level Flight Ship in trim . Air in both ballonets . Normal Descending Air being nor- Open forward mally replaced damper in forward ballonet Landing Motors arE throttled down.Pressure from regular system is inadequate Shifting Air Blowing air into gas Excessive loss of gas RWi.ARKS Maintain full operating pressure in air system . Do not operate air valves manually . Check closing control of gas valves to make sure no gas is being lost. Watch the tell- tale lights . Open forward Consider air as regular damper and re- ballast in determining gulate scoops effect of shift on trim. to produce desired pressure Watch far too low pressure. Stay below descending rate of 600 ft. per minute Start blower motor,open intake door, open both dampers. See Page 44 far instructions to start blower motor. use dampers & air valves as needed . Consider air as regular ballas t in determining effect of shift on
trim . Untie sleeve Blow only the minimum amount which connects air necessary to maintain air to gas. pressure . Fig . XIV Operation Chart - Pressure Control System -47 Source: http://www.doksinet t 1 1 t 1 1 i 1 t 1 1 1 . ! 1 1 ! 1 1 ; 1 1 1 1 1 1 Ul 14 ~ . 1:11) M rs. ~ E:➔ z0 u 1%: g = . -48- Source: http://www.doksinet C. MAJ OR CONTROLS Occasional adjustments are re quired in the tension of the control lines of the major control s to compensate fo•r slight changes in the shape of the envelo pe wi th variation s of the· pressur e and of the loading . Tension Varies par ticularly with the fullness of the aft ballonet, a large amount of air in this ballonet causing the cables t o slacken . An automatic tensioning device located in the aft por tion of the car between frames 1 a nd 2 t akes care of part of these variations. In addition , the tension can be adjusted f r om the pilots compa rtment. The crank on the port s i de is
for the elevator lines, and the one on the star boar d s i de is for the rudder lines . The tenston of the controls should be checked from time to time in flight . A check should always be made immediately after a heavy take- off, because of the added sagging of the en- velope caused by the dynamic lift. CAUTION : I t is particularl y important tbat the pilot check the controls and adjust the tension of the lines as required before take-off and before landing otherwise he ma y find himself without enough control in an emergency . Occasional adjustments may also have to be made in flight . 1,q Source: http://www.doksinet LATCH KNOB SAFETY LATCH LATCH WHEEL POSITIONING SRANK MOORING LOCK 1 VI 0 1 OPERATING SHANK .-· • 1 ., . -- - . - - -~ ~ ~ 4 , ; , ~ ~ ~ , •-----~., , • • • +l te ♦ ♦♦ e>• • l • . :, , ~ - -- +e+ t ~. . ~ e f#e,+ ·♦ • ♦♦ A ♦ ♦ e r,~ 1-,,,,,,;, •1 . ~
"5A .i , r J l ~ Fig. XVI - Top of Landing Gear Struti Source: http://www.doksinet D. RETRACTABLE LANDING GEAR (1) To Drop Landing Gear (a) Open trap door giving access to landing gea r mechanism (car floor at frame 7). See that mooring pin is up~ Place crank on top of operating shaft and crank until top of strut is against the stop . (d) Make sure that the latch drops fully into place, and lock it in place by means of the s afety device. (e) Back off crank slightly to relieve pressure on worm gear. Gear should now be ready for landing (2) To Retract Landing Gear After Takeoff (a) Open access trap door and place crank on top of strut shank. (b) Turn the shank until tb.e guide f ork on top of the strut and the landing wheel are ina direct aft position. (e) Drop the moorin g pin and turn the crank slightly to and fro until the pin drops into the slot in the guide fork . Onlock the safety device and raise the lateh . Place the crank on the opera ting sha ft and turn until the
strut is fully retracted. (f) Raise the mooring pin . (~) To Lock Landing Gear at 90° To A.xis Of Ship For Operation On Mooring Mast (a) Turn strut in position by means of crank ins erted in positioning shank. (b) Push mooring lock in place . E. HANDLING LINES At take-off, the yaw lines are stowed in two compa rt- ments in the bow of the car from ,1here they c.an be relea sed by means of a control loca ted at the left of the elevator pilot. A drag rope can be released from a comp~rtment in the stern of the car by means of a control located on the port side of frame 2. - 52- Source: http://www.doksinet PAfl, DI Powt12 PLANr Source: http://www.doksinet .============ III - POWER PLANT References: 1. Engine Manufa ctur€rs Manual 2. BuAer Manual 14-101 to 14-506 A. ENGINES (1) General Characteristics R-97.5-28 Wright Aero (a) K-3 thru K-8: Take-off rating; 450 H.P at 2250 rpm at sea level. Normal rating: 420 H.F at 2200 rpm at sea (b) level. Gear Ratio:
Direct Drive Fuel: Aviation grade, 91 octane, AN Spec . AN-F-26 011: W.AC Spec No 5815 From K-9 on.: R 1340 - AN Pratt & -whitney Wasp Normal Ra ting: 425 li.P at 1775 rpAm at sea level Gear Ra.tio: J:2 Fuel: AN Spec. No AN -VV-0-446a (2) S tarting The starters are of the hand electric inertia type. In starting, proceed as follows: (a) In cold weather plug in oil tank electric heater untii tank feels warm to the hand. (b) Turn the engines over four or five revolutions by pull- ing the propeller through by hand. (e) Set carburetor heat control in "cold" position. -53- Source: http://www.doksinet CARBON MONOXIDE INDICATOR REMOVED ., BuAer Bulletin No . 89 Fig. XVIII Mechanics Panel -54- Source: http://www.doksinet (d) Set carburetor mixture to "rich," (e) Turn on fuel supply, (f) 0pen throttle to the position corresponding to 600 RPM. (g) Turn primer pump handle i n the direction of the engine which it is desired t o start, (to the
right for tbe starboard engine, to the left for the port engine), give from 2. to 5 strokes of the pump after the priming line has been filled, and reset handle to neutral position. (h) Turn igniti on switch to "Both 0n." (1) Mak:e certain that main battely switch is closed. (j) Turn generator switch on. (k) Maintain about 3 lbs . /sqin fuel pressure with the wobble pump. (1) Select motor to be started by means of selector switch. (m) Push starter switch to 1on 11 position, wait a bout 30 seconds until the whine of the start er indicates tha t it is running full speed and pull switch to mesh . " 11 (n) Rep.eat, 1f necessary, until engine sta rts CAUTI0N: If oil pres sure does not come up to normal in 30 seconds , stop engines and investigate . -55- Source: http://www.doksinet (J) Warming Op (a) Set carburetor heat control to full hot. (b) Set the throttl e for a speed of about 600 RPM. (e) After about one minute raise the speed to about 1000 RPM. CAUTI0N:
Do not attempt to operate engines over 1000 RPM until the oil-in temperature has exceeded l000F. (J86 C) and do not exceed 1400 RPM for contínued opera.tion on the ground under any condition . Do not idle engines at soeeds causing bad vibrations . Critical vibrations occur bet ween 750 to 900 RPM. (4) Gr ound Test Check RPM when operating on one or two magnetos. The drop in RPM when shifting from both magnetos to either of them should not exceed 100 RPM, and 40 RPM when shifting from one magneto to the other . Check oil pressure, oil tempe,r atur e, fuel pressure and ba.ttery charging rate (5) Take Off (a) Ose both service tanks. (b) Ooen valve in cross connecting fuel line between the t?,o engine fuel pumps . (e) Ch.e ck oil temperature (d) Cylinder he.ad temperature should preferably not exceed 260° e. at the time of take off (e) Set mixture control to flrich . " (f) Return preheat valve to full cold as throttles are opened. - 56- Source: http://www.doksinet
(g) Open throttle gradually (3 to 5 seconds desira ble) being careful not to exceed limiting manifold pressure . ( 6) Cruising (Reference Buaer Manual 14- 206) (a) Do not exceed operating limits. (b) Wait until motors have cooled down before leaning carburetor. (e) Do not l ean carburetor beyond 10 RPM drop of speed. CAUTION : It must be kept in mind that while a lean mixture increases fuel economy , it also increases heating of the engine. Leaning is only permissible at reduced power output . See Engine Operator • s Handbook for full discussion of the matter of carburetor setting. (7) Single Engine Operation Vvb.enever it is found necessary to operate on only one engine, stop other engine as directed below and leave mixture control on "Idle Cut-Offn position with closed throttle . This setting insures that the wind- milling •o f the engine will draw minimum of fuel into the cylinder. (8) Stopping (a) Move mixture control to "Idle Cut-Off" position . (b) When
the engin.es have stopped, turn all ignition switches to IIQff" position . (e) In emergency, the motors can be stopped from the pilot instrument panel by means of two ignition grounding switches. -57- Source: http://www.doksinet CAUTION: If engines ar e hot, run them at idling s eed until e 1inder tem erature has dro ed bel ow 00 F. 220 e. before s topping . (9) Operating Limits and Charts (a) Operating Limits for Wright Engine (K- 3 thru K-8 A1rsni ps) • .See page 59 (b) Opera ting Limits for Pr att- ½hitney Engines (K-9 and Su bsequent Airships). See page 60 ( e) Power Output of Wright Engine at Sea Leveland 1500 Ft. Altitude See pages 61 and 62 (d) Power Output of Pra tt-½hitney Engines at Sea Level and 1500 ft . Altitude See pages 63 & 64 (e) Fuel Consumption of Wright Engine . See page 65 (f) Fuel Consumption of Pratt-Whitney Engines . See page 66 (g) Most Economical Air Speed . See page 67. (h) Mechanic 1 s Check Chart for Pra tt- Whitney Engines. See
page 68 -58- Source: http://www.doksinet OPERATING LIMITS FOR WRIGHT V/HIRLWIND R-975- 28 K-3 to K-8 Airships c Minimum 011 Inlet Temperature for Take-Off ••••••••• •. ••• • 104°F or 40°c I1esired Oil Temperature • ••••••• l40°F. or· 60°G Maximum Inlet Temperature •••.• 1 90°F. or 88°c Maximum Cylinder Temperature for Take-Off .•• ••••••• • •• •• •• 500°F. or 26o0 c Maximum Cylinder Temperature (Cruising) ••••••••••.•••••••• 450°F. or 230°c Desired Cylinder Temperature ••• 325°F. or 163°C Minimum Oil Pressure (Idling) . 10 lbs./sqin Minimum 011 Pressure (Cruising). 50 lbs./sqin Desired Oil Pressure • ••••• . • ~ 60- 80 lbs./sqin Fuel Pressure ••••• •• • • •.•• • • • •• 2 . 5-35 lbs/sq in - 59- Source: http://www.doksinet 0PERATING LI MITS F0R PRATT &: WHI
TNEY R- 134 0 WASP ENGI NE For K- 9 and Futur e Minimum Oi l Inlet Temperatu re . f or Take-off . . Desired Oi l Inlet Temperature Maximum 011 Inlet Temper ature . 40° . 60° . 85° e. e. e Maximum Cyli nder Temperature - 1 t o 1- 1/2 Mi n . Cl imb •• •· •· • · • • •••• • ·• •· • Head 260° Base 1680 75° e. e. e. Maximum Cyli nder Temperature -Continuous Cruising •• • • • •• • •••••• • •• • •••• Head 2320 e. Base 93° e. 121° Minimum Oi l Pressu re (At i dling speeds) . - . 40 lbs . /sq in Minimum at 1000 R.PM ~ Minimum at 1400 R. P M ~ 10 lbs./sq in • . ·• 50 l bs . /sq in Desired Oil Pressure at and above 1400 R. PM• • •• • ••••• • ••••••• ••• ••••• •• • • 70-90 lbs/sq in For Setting: 1400 R.P M, 65°c 011- in, using 1100 011 •• 80 lbs/sqin Minimum
Fuel Pressure (400 RPM or less) • ••• 2 lbs. / sq in Mi nimum Fuel Pressure (1000 RPM or above) . 4 lbs /sq in Désired Fuel Pr essure (1000 RPM or above,) • . • • • • • • • • • • • • • • 5 1 bs sq in Maximum Fuel Pr essure (1000 RPM or above) •••• •• • • • • •• • • • •• • •••• •• 6 lbs ./sqin Desired Carburetor Air I ntake Temperature . Note: Take- off - Re turn control s to " Full Cold" as t hr ot tles are opened. Idling . 50° Cruising: 1400 RPM or less •.• • • •• •• •• 50° Above 1400 RPM with stabilized operating conditions • • •••• •• 38° - 60- e. e. e. e. Source: http://www.doksinet 450 400 FULL THROTTLE HORSE POWER 350 300 f2<I! ·;i::: m 250 200 1500 ft . ALTITUDE PERFORMANCE HORSE . POWER VS MANIFOLD PRESSU~E WRIGHT AERO ENGINE MODEL R- 975- 28 1 50 Fig . XX 100 18 20 22 24 26 28 30 32
31 36 A:BSOLUTE MA.NI FOLD PRESSlrttE IN HG - 62- 38 Source: http://www.doksinet ------ ----~- POVIER CURVES -Püff PRATT AND WHITHEY 700 EJ;GINE 1:TODEL H.R -1340- AU- 2 AT SEA LEVEL ;., Fra--:-xxr -600 500 - -- -- - --FULL , THROTTLE HORSE- PO./ER- - --- 40C ---0::, ::0 )> @ 300 X R . P M • 0 ::0 ~200 (./) ·,noo tr:! 2000 "d 200 ; 0 l :lOO 180ti 1 00 1400 20 22 ~4 26 28 30 02 34 36 ABSOLUTB Mfl.lUFOLD PRESSURE, IN HG • . -63- 39 40 Source: http://www.doksinet POWER CURVES FOR PRATT AND WHITNEY ENGINE MODEL IIR - 1340- AN- 2 AT 1500 F1. ALT ITUDE Fig . XXII 700 R. P M 22.0 0 600 2000 1900 1800 500 FULL THROTTLE HORSE- POWER 1100 l6CO 400 1400 tJj :::::, :> 300 8 ::i:: 0 ::i::, Cö r-:1 "o 0 200 ~ t<. !::ó 100 20 22 24 26 28 30 32 34 36 38 ABSOLUlE MANIFOLD PRESSURE, IN . HG - 64- 40 Source: http://www.doksinet -, 2~00 FUEL CONSUMPTION- /1.ND 500 80
R. P M VS AIR SPEED Fig. XXIII 70 0:: ;:::::) 2000 FOR K-3 THRO K- 8 SHIPS EQOIPPED WITH WRIGHT R975- 28 ENGINES - - - 1800 400 ~ --. 60 Cl) o:i ~ 1 z "1 " 0 H 8 P-, ::::;; ::::, C,) ~ ~ 3 00 - - ---- -50 - - - - - - - - - ~ 0 l5 ,-l 0:: 1400 ~ j-• j 0 40 1600 P-1 ~. , ~~- 0 ;z . ;~ . . ~- íXl ::::, Ii. 200 PART LEAN 30 1 200 20 100 . ,; ,;;;;;, 1000 30 40 50 AIR SPEED - KNOTS 1- 60 Source: http://www.doksinet r 1 1 ruel Consumpt1on 1 .M Average Fuel Consumption and R. PM - VS - Air Speed (K- 57 & Future) Equipped with Pratt and Whitney 50 0 1 2000 R- 1340 - AN - 2 Engines go 12- 1/2 .FtPropellers - set at 19° 1900 NA - Y9El - 510 Stromberg Carburetors 1 1goo -~ 1700 70 4oo Fig .XXIV s. ;:, 1 1 • - 0 s. :, 60 ::z:: s. t) 1610 0 CD 1500 p. 0 "" :x2 s. $ 300 50 0e: j M . r-4 At .
1400 Cl! ö CD .0 4o .:1 1300 - ·7 1200 200 30 1100 .1000 100 45 50 55 60 . 70 , 65 1 TRUE AIR SPIED - KN0TS 1 1 L 1 .t J Source: http://www.doksinet HEAD WIND VELOCITY, KNOTS MOST ECONOMICAL AIR SPEED, KNOTS K-.3 thru K- 8 10 15 20 25 30 35 4.0 46.o 46.o 46. o 46.o 49. 0 51.5 56. 0 ,a.o 45 50 58.o Fig. XXV Economical Air Speeds -67- K-9 and Futu.re 42.0 42 . 0 42. 0 43.5 50. 0 56.5 62 •.5 64. 0 64. 0 Source: http://www.doksinet B. FUEL SYSTEM The fuel system of the 1<- a1rsh1p is de:s igned to make possible the shifting of fuel for the purpose of trimming the ship without interference with the normal fe ed of the engine. This is accomplished by carrying the bulk of the fuel in two banks of storage tanks, a forward and an aft bank, and by feeding the engines from two service tanks which can be isolated from the rest of the system. The service tanks can be filled .from either bank of storage tanks without interruption to t he feed of
the engines . The system can be filled through an outside connection or through an inside connection by means of the transfer pump . Provisions are made far dutnping fuel from aft storage tanks and for the release of two slip tank.s locatea under the floor of the cabin, for the transfer of fuel from the slip tanks to the rest of the system and for the proper filtering of the fuel . CAUTION; 1. At take- off, always open valve in cross-connecting fuel line to insure against a fuel pump failure . 2 . Make certain that there is ample fuel in t he service tanks at all times during flight . 3 . Do not dump fuel when either of the auxiliary engines is running. - 69- Source: http://www.doksinet . Operating Condition Engine R. PM Start Set Throttle for 600 R.P M Warm Up Ground Test 1 O <» Take - Off FULL FULL COLD FULL 500-600 For 1 Min. RICH 1000 After ( 2) FULL Cyl. liead Temp. Oil Preeeure lbe./in 2 Must Show in 30 Sec. ;o Minimum 32°c. FULL RICH 32°0.
l.lax 1300 PART 32°c . Stopping 400-500 Oil Inlet Temp . HOT FULL RICH 1800 Cruieing Deeired Ca.rburetor Air Temp. RICH 1400 1 llixture Control 37.8°c ln cold weather heat oil in outrigger tank:e by meane of electrical. units Do not exceed 1400 r.~m for co.ntinual operation 204°C. 70-90 Drop in R.PM Yhen shirting from one magneto to the other ehould not exceed 40, 6o-64°c. 233°c. 10-90 Max. 6o-64°c. 204°C. or Lees Desired 70-90 Do not lean carburetor beyond 10 R.PM drop of speed lfinimum LEAN REM.ARKS rati ng 600 H.P at 2250 R.P M Idle engine until cylinder tem~erature has dr opped below 220 e. before Btopping FULL LEAN 1. Witb propeller setting ot 23° 2. Do at 42" radius do not tly •hip íaater than not operate engines at speeda oauain& bad Tibratione. 67 knots . Haximum Tibrationa occur betveen 650 to Fig.XXVI Mechanic s Check Chart Pratt and Whitney Rl340 - AN2 Wasp Engi.ne 900 r.pm Source: http://www.doksinet 4.
Clean the four fuel strainers after every 120 hours flying time, and oftener, if necessary. The strainers should be cleaned i.mmediately when irregular opera tion of either engine develops. For the loca tion of the s trainers and ins tructi~ns for cleaning them in Ilight, see Fig. XXVII on the following page 5. Make certain that pr essure ín fuel system does not exceed 25 lbs. per sqin when filling from external pump. 6 . Do not feed engines from a tank containing less than 12 gallons of fuel as the outlet is nearly uncovered with this amount of fuel still in the tank, and with the ship at a Jo0 angle of pitch. The various operations which can be performed with the system, together with the proper settings of the valves, are described 1n Fi gures XXVIII- a thru XXVIII-j for K-3 thru K-10 airships, and in Figures .XXIX-a thru XXIX-j for K-11 and future . C. REC0WENDED CARBURET0R ADJOSTMENT a Run engine at 400 RPM. Cylinder head temperature should be normal . Bave good plugs 1n
engine. d Have mixture control FULL RICH . e Note RPM. f Rapidly move mixture control from FULL RICH to IDLE COT OFF positfon. Catch the engine before it stalls . (g) Note RPM. l. If large gain 1n RPM - Carburetor is set t oo rich. 2. If l oss in RPM - Carburetor is set too lean 3. Desired - gain of from O to 10 RPM b e The desired setting is the RICH BEST POWER setting for the carburetor at the idle speed of the engine. - 70- Source: http://www.doksinet -3-4 ·5 -6 -0NLY - Fi g. XXVII FUEL 8YSTEM TANK.5- / -2-3-4 7-8 -9·10 · ARt 5 TORAGE TÁ N1<5- !ZS 6A L éACH - K·? ANO FUTURE ONLY MAIN TRANSFER PUMP CARBURET0// -POWER PLA/IT ~ -- -~ ) BARRETT COUPLIN6 UNE STRAINER SL/P TAtfl( · /00 6AL---- - --==---=---- Sl/P TANK- 80 6AL --- - - - - - - - - -==e:.--=~ REMOVE AND CLEAN FUEL BTRAINERS WITH GASOLINE ANDA BROSH IN THE FOLLOWING SEOOENCE (1) Open crossover valve. (2) Close valve on fuel supply line to one engine. (3) Draio fuel írom inoperative emergency
pump. (4) Remove and clean strainer from inoperative pump. (5) Replace strai ner. (6) Reopen valve previously closed on engine supply l ine. (7) Repeat for other engine (8) Close crossover valve. (9) Close valves to main traDsfer pump (10) Remove and clean strainer 1mm.ediat~y above main transfer pump (11) Replace s t rainer (12) Clos ~ valves on fuel line to Barrett coupling. (13) Remove and clean strainer above ceiling of car in f i l ler l ine. (14) Replace stra1Der. (15) Adjust fuel valves for normal operati on. EMER6ENCY PUMP STRAINER ~ --71- Source: http://www.doksinet FILLING,SYSTEM FROM OUTSIDE CONNECTION Fill each tank in „ succession according to desired fuel load and fuel distr1bution. Truck pump should be equipped with relief valve. Set far a max of 25 lbs. per sq ip If no relief valve is available throttle down the flow by means of main valve. =a-=~ , slao c.~RB ENCV - --. J~~-H!:Ra,tl K-3 thru K-10 Fig. XXVIII-a FILLING SYSTEM THROOGH INSIDEl
CONNECTION ITTR„ IN~RS Use transfer pump and Filler Hose K-3 thru K-10 Fig. XXVIII-b -72- l Source: http://www.doksinet TAKE-OFF Feed engines from both service tank.s Open cross feeding valve. i:icllGu,a .,,, - - - - - -------- A="°-= !i,TnA.C~ K-3 thru K-10 Fig. XXVIII-c FOEL PUMP FAILORES In case of failure of one engine driven pump open cross connecting valve. In case of failure of both pumps set as indicated in <liagrem and us.e emergenéy pump. K-3 thru X-10 Fig.XXVIII-d -73- ~ IT Source: http://www.doksinet FILLING AFT SERVICE TANK FROM AFT STORAGE TANKS WHILE FEEDI NG ENGI NES FROM FORWARD SERVICE TANKS Dse tran sfer pump . Open outl et val ve of storage tank . from which it is desired to draw f uel. K- 3 thr u K-10 Fig. X:XVIII-e FILLING AFT SERVICE TANK FROM FORWARD STOR.AGE TANKS WHILE FEEDING ENGINES FROM FORWARD SERVICE TANK. ír 1~ 8AARCTT r a.l MO C-ONNtClfOW U-se tr:lnsfer pump. Open outlet valv~ of storage tank from which it is des
ired to dr aw fuel to ~il l service tank . PCIIG( NCT ,., ---------::•NO ~~m•~ K- 3 thru K-10 -74- Source: http://www.doksinet FILLING FORWARD SERVICE TANK FROM AFT STORAGE TA.NKS WBILE FEEDING ENGINES FROM AFT SERVICE TANK r---fo•)A i6JIAETT ,-. LING CO-NNE-C-TIOM- - Use transfer pump. Open outlet valve of storage tank from which i t is desired to draw fuel to fill service tank. DCltGENCt , . -. , ~ T T I ~ K-3 thru K-10 Fig. XXVIII-g FILLING FORWARD SERVICE TANK FROM FORWARD STORAGE TANKS VJHILE FEE~ING ENGINES FROM AFT SERVICE TANKS --- - .,-Ji- -~@~R~~l=N[=A5~1 -Use transfer pump. Open outlet valve of storage tank from which it is desired to draw fuel to fill service t ank. PCllGEMCY ,.,, jAÍ,ÍÓi 1ff~"1:tl Jtj l~ K-3 thru K-10 Fig .XXVIII-h -7 5- Source: http://www.doksinet FILLING SYSTEM FRO~ OUTSIDE CONNECTION EMEltGENCY PUMP 6 STRAJNER UNIT. STIWNER DR.AIN BAU.ETT FllUNG CONNKTION. tf TltA NSHR PUMP Fill each t ank wm-1
R.HIEf VAlVE in succession according to desired fuel load and fuel distribution. Truck pump should be e quipped with relief valve. Set for a max. of 25 lbs . per sq in If no relief is available throt6 tle doim the flow by means of ENGINE 01t1vEN PUM P WI TH BY-PMS main valve . ~6~RllH~IEFLJV~Al~V~ESL --~f -t :~ 4 STRAINER DRAIN. EMERGENCY PUMP 6 STRAINER Nil POlT CARIL. - , SCHEMAOC DIAG-AM-FUL SYSTEM-K- AIRSHIP 0 K-11 AND FUTURE Fig. XXIX-a EMERGENCY PUMP 6 STltAINER UNIT. STIWNER DRAIN. FILLING SYSTEM THROUGH INSIDE CONNECTION tf BARRETT FllUNG CONNECTION TRA NSrEll PUMP WITH ltEltH VALVE Use transfer pump and filler hose . 6 2 ENGIN( D!!.IVEN PUM P WITH BY-PASS & RHIEf VALVfS POU K-11 AND FUTURE CARB --- Fig. XXIX-b -77- STRAINER DRATN. EMERGlN(Y PUMP 6 STRAINEk UNIL SCH€MATIC QIAGRAM-fUl SYSHr-f,:,ilRSHIP Source: http://www.doksinet TRANSFERRING FUEL FROM FúRWARD TO AFT STORAGE TANKS WHILE FEEDING ENGINES FROM SERVI CE TANKS
lf"IÁNSEJI PVWP ~uHena W>.& " - , f @RA!N CRS l i~~f~ts~WtstfJOM., " " Open outlet valves· of tank from which it is desired to transfer fuel. Use transfer pump . loc~ENCY ~ . ,AND ~Tn~~ K-3 thru K-10 Fig. XXVIII-i TR.ANSFERRING FUEL FROM AFT TO FORWAR.D STORAGE TANKS WHILE FEEDING ENGINES FROM SERVICE TANKS !!WNSrt:R PUWP ::-H BE;CE YALYt "-, (üRA! NERS jr~:M~~~lflOM " Open outlet vaLves of tanks from which it is desired to transfer fuel. Use transfer pump . " ~ K-3 thru K-10 Fi:g. XXVIII-j -76- l Source: http://www.doksinet TRANSFERRING FUEL FROM FuRWARD TO AFT STORAGE TANKS WHILE FEEDING ENGINES FROM SERVICE TANKS ~ 6ARR[TT -- -Fft.,L1~G C.ONNECTlON Open outlet valves of tank from which it is desired to transfer fuel . Use t r ansfer pump. K- 3 thru K-10 Fig. XXVIII-i TRANSFERRING FUEL FROM AFT TO FORWARD STORAGE TANKS WHILE FEEDING ENGINES FROM SERVICE TANKS (u:AA!NEA $ Open outlet vaL~es of
tanks f.rom which it is desired to transfer fuel. Use transf er pump . K- .3 thru K-10 Fíg . XXVIII-j -76- f Source: http://www.doksinet srso~ A -"11.-=s TAKE- OFF r STRAIN[R. .------ - ---"" TR.ANSftlt PUMP wITH 11.tLIEF VAlVE , EMER.GENCY PUMP & STRAINER UNIT. STRAINER DRAIN. BAltRETT fll UNG CONNECTION lt Feed engines from both service tanks Open cross feeding valve. 1, f. NGINE D11IVEN PUM P IIITH BY·PASS & Rlllff VALVES. STRAINER DRAIN. POlT CARB. EMERGENCY PUMP & 5TRAINER UNlL --, K- 11 AND FUTURE SCHEMAHC DIAGJ.MHUL 5YSTEM-trAIRSl-11P Fig, XXIX-c ~rsb, c~.11=a , : · -- - - FUEL PUMP FAILORES l SlRAlr-:J E! •- -. TRANSflR PUMP WITH RW EF VAlVE. EMf.RGE"ICY PUMP UNIT STRAJNER DRAI . tf BAUHT FILLING CONNKTION, 6 STRAINER ln ca se of failure of one engine driven pump open cross connecting valve . In c ase of ~ 1 failure of both L.tJ pumps set as indi- ~ cated in diagram 2.nd use either eme rgency
pump. r-· -" 7 t-- ; 1 eo>< o, . -, 1 r~ . 10 S"r~ 6 4 1, ENülNE DRIVEN PUMP ./ITH BY-PASS DRAIN. 6 R(lltf VALV 5 POfl CAR8 K- 11 AND FOTURE 2 ---- - . -- Fig. XXIX-d - 78- EMEII.GENCY PUMP 6 ~TlAINER UNll. ,. SCHEM/K Dlt,GRAttflll SYSTfM·"tr.AIRSHJP Source: http://www.doksinet EMERGENCY PUMP FILLING AFT SERVICE lí STRAINER UN!l TANK FROií FORWARD STORAGE TANKS ViHILE FEEDING. ENGINES FROM FORWARD SERVICE TANK STWNER DRAIN. tf BAlRHT FltllNG CONNECTION. HANSHR PUMP wITH RELIEF V~tVE. 9 Ose transfer pump . U) Open outlet valve . $,of storage tank from which i t is - desired to draw r·-" . fuel . ::., run ~, ,1, t ,ttava ff0lllAGt 10 a 6 2 (NGINE DRIVEN PUM P WITH BY-PASS RHlff V.ALVES lí STRAINER DRAIN. EMERGlNCY PUMP 5TlAINER UNIT 6 POU CARB K-11 AND FUTURE SCl-lMATIC DIAGRAM-íl.ll SYSTIM·1rAIRSHIP Fig. XXIX- e EMERGENCY PUMP FI LLING AFT SERVICE TANK FROM AFT STORAGE TANKS WHILE FEEDING
ENGINES FROM FORWARD SERVICE TANKS 6 snAINER UNIT. STWNER DRAIN. if B~UETT fllLING CONNECTION. , .L( •01< Ose tra nsfer pump Open outlet valve of storage tank from which it is desired to draw fuel to f ill s,ervice tank. -.olt D U.,W , - 6 ENGIN[ DRIVEN PUM P wITH BY·PASS b RELIEF VALVES PORT CAR8. - - , . K-11 AND FDTORE Fig . XXIX-f -79- SHAINER DRAIN. EMERGENCY PUMP 6 STRAINER UNIT Source: http://www.doksinet FILLING FORWARD SERVICE TANK FROM AFT STORAGE TANKS WHILE FEEDING ENGINES ~ROM AFT SERVICE EMU.GENCY PUMP 6 STRAINER UNIT. STRAJNER DlAIN, ~ 8AU,ETT FILUNG CONNECTION. TRANSfER PUMP WITH RELIEF VALVE. TANK ruo -(:j)~---- .~ [NGIN[ DRN(N PUM P JITH BY·PASS b RHl[f VALVES POlT CARB. --, K-11 AND FUTORE STR.AINER DRAIN, EMEkGlNCY PUMP 6 SH.AINEk UNIL scHEMAJk: 01AGRAM:flcft symM-)fAJRSH1, Fig . XXIX- g EME1t.GENCY PUMP 6 STRAINER UNIT. SH.AINER DRAIN lf BAJ.RETT flUING CONNKTION FILLING FORWARD SERVICE TANK FROM FORWARD STORAGE
TAl~KS WHILE FEEDIN G ENGINES FROM AFT SERVICE TANKS 4 2 ENGINE DRIVEN PUMP JITH BY-p,-.55 6 RELIEf VMVES POlT CARB. K-11 AND - FUTURB STRAINER DRAIN EMERGlNCY PUMP 6 STR-A NER UNI SCHfMATIC QIAGRAM-fl,ll SYSTEM-"l<.A18,SHIP Fig. XXIX-h -80- Source: http://www.doksinet TRA.NSFERRING FUEL sT8b.~cA=R=B FROM FORWARD TO r AFT STORAGE TANKS WHILE FEEDING ENGINES FROM FORWARD SERVICE TANK EMEkGENCY PUMP f.t STRAINER UNIT STWNER DRAIN -,c. -~-------- 1 STRAINEk. \, TRANSFER PUM P JITH kEllH VAM, tf MUETT FILUNG CONNKTION. Open outlet valves of tanks from which it is desire~ to transfer fuel. Use transfer pump 2 6 ENGJNE DRIVEN PUM P wlTH BY-P,4,SS 6 RELIEF VALVlS. POlT CARB K-11 AND FUTURE - STRAINER DkAIN. EMERGlNCV PUMP 6 SHAINER UNIT SOfMATC DtAGV.lj--fW SYSTEM~AJRSHIP Fig . XXIX- i EMERGENcY PUMP 6 STRAINER UNIT. STRAINER RAIN~ f. BARRETT fllUNG CONNKTION, (IU.(IIJ "(.j)J, ~~~ l NGINt DRIVEN PUM P ./ITH BY-P,45S á kHIEF
VALVES. STRAINER DRAIN. EMfRGENCY PUMP UNIT ll SUAINER. POlT CARB K-ll AND FUTORE SCHEMATIC DIAGRAM-flll SYSTEM-XAIRSHIP Fig. XXIX-j -81 Source: http://www.doksinet D. OIL SYSTEM The oil system for K-3 thru K-74 includes a 30-gallon oil storage tank below the deck of the car, and two 14-gallon oil service tanks, one in each engine na~elle, and a transfer pump with necessary fittings. In K-75 and future, the oi1 storage tank, transfer pump and fittings are removed and the oil service tanks in the nacelles are enlarged to the 26-gall on size . The oil is cooled by a radia tor whicb is located in the nacelle for tb.e K-3 thru K-8 airships, and which is suspended from tb.e lower outriggers for the K-9 and subsequent ships The service tanks are equi pped with electrical heating units to beat the oil in cold weather. The amount of oil in the service tanks is read on two oil gages located on the mechanicts panel. The amount of oil in the storage tanks is read direct.ly on the
tank through a trap door in the deck of the car. -82- Source: http://www.doksinet / THREE WAY VAI. VE / / PRESSURE GAUGES TRANSFER PUMP F.JLLER CAP VENT- / Ull COOLER 1 00. JJ 1 íO fNGINE. O/L PUMP ·, , , -->1.--0/L srRAINER • 10 MESH - P25 HONEL WIRE Fig . XXX OIL SYSTEM (K- 3 thr u K-74) Source: http://www.doksinet / ~ 1 / / - ( "f :ii·,,,,J ~ PRéSSURé. • PDR l E:NG//VIE LIME ~~ " - 0/L TANK / PRéSSURE GA<J6ES T0 SE/4 TANX PRESSIJRC. GAIIGE l ltvE: SfARBO~RO ENGIME: -•.:-=-==>-- 1 00 t OJL OUTLET FROI~ OIL COOLER - -FROM T[t,(P. REGIJIATOR Tt:MPERATURE REGIJLATOR. Fig . XXXI OIL SYSTEM DETAIL ~r (K-7 5 and F1,:Jture) Source: http://www.doksinet SUMMARY OF OPERATION OF OIL SYSTEM OPERATIONS REMJ,.RKS Filling system with oil. (K-3 thru K-74) Fill storage tank through connection inside car and fill service tanks by means of transfer pump . Filling service tank from storage tank . (K-
3 thru K-74) Use transfer pump . Cl eaning oil filter. (K- 3 thru K- 8) Turn lmob on top of filter one full revolutlon every ten (10) hours operation. Regulating cooling. (K-3 thru K- 8) Adjust opening of scoops by means of control on mechanic s stand. Hea ting oil before starting engines . (All ships) Plug in electrical hea ting unit. Filling system with oil . (K- 75 and Future) Fill each 26- gallon service tank thru filler neck which extends thru inboard for•nflrd nacelle at end of catwalk. Cleaning oil fi l ter. (K- 9 and Futur e) Remove and clean oil filters at each major overhaul, interim overhaul, or oftener if conditions are unfavorable . See Oil System d iagram for location of filters. -85- Source: http://www.doksinet PAIZT IY liEer121eAL SYsrcM 601JíJVeA Source: http://www.doksinet STARB OAAO SlOE r SI DE ~ -,.·-· """ ,,,,,, -41~01( COfilf•oi. ASST• (eo,s>-~s,a) INITAUMfl/1 Pfilllt ( 01jl - J102) ,uors f USfA UM .#T ·-o•s
• Y.N~i (6D„t,~,if>f PJ " r,t,c,,u l,.-S,IAUA710~h,tnJ-~~;,t) /H(LINIJ,.,rt·li NJ!TA L ( ""019·S09/) TllftOr r u MAJO~ rONT~~ A$.IY, {,019 •llOI) ~0/ITROU -<"•o„9-•Z<-f") ( 6079-.l--f,01) y --A.f„ATO~ ftlflf,orJ,, ,~~1;~ söó~)91s~ <0"1,WA,ib . , , s .,,ar ◄079 •J,t~scT f!ttCIIYrll - ,1, ,:,• ifCt.fNIN6 !HAIR> TU.1 CHAIA-<:lf"1Sf, t1 kANDtiWG /IJDPl" BO~ ASJ Y.° (&019~?() ,,.,/tt",TION Af fit ~í>,Of9„1f/) ,/tGA7tOftl-1. ~"" PA(#"fS019•,on1 KAtJűATo~is "O"T (,019 ·L7C>IJ N1<r16.4T0~5 rA/Jt,E (5019 - 4~34-) ruHI JJ!3 ""r 1U~G1. :~ roll CP-7 .t,CCT~IC"-L 1f/STAtLlifUJfl (40-,~-su,,o 7 -·r-·, - M.:~:/~:l::s,Ns;;:, ; ,,f~ot f o~~;~~ ff f.lilfi/NtJ ll611T ( ° • ,oz,) l/0;.,ta uirc ~ o«)R OIJ,i~lTHlfi ,,,tHANfSM (6019-i7,,, CON TIIOJ. 80l ~IJ,-PDIIT•tlfF-HtV~ ( 40"19•;3188) WA.TER t:Alt J3$1MIU y ( •
079-26:1;-J ~lt(Ol."4TOll /jkll!Cl<I T A55Y ( -,079 ,~f>) SltltT r!L.,, Cl1A f flf (C~ 7$6/J@ /rflJf C ~ (,L,1/? C-A.4111-ET ( ~01$> • 4 -t,,J .-flU 5/fEU ,,,sT1tLi ( ◄0 7.Jt • lf 39) ,,,,off ,,.,"~•- ("e>l♦ -1•> --M1c::r;,~1v,~::t::.;:r~: ,~:~i~~;~ ~;;~} (,o7.:>-S7 , , . r,,t ~~ ,.,,,G 5,srn, (~01 9-StJ03) 4 /N SY~f<-41 l/1,1 C ltll. (4"0$0 • ✓Zs-3) ; w} t.lAlft f,,,(#"111 CO#fTIIOU /t,!f/NOIII.SlflA S" - ~,r~ AW<, aiNE.fA,ToA tONr„01 ~IIEL {,0111- ffIJ!O"Tf-.E COJ(Tf!Q~ <•019 - f2S"ifl ~ n,,n~~: :~"~:~;,: ~:;~f6:~~J IJ/0 ( tNJ t.Jt,,l"l,ON (6o?J-,tlf8] .,,, DIUNARGf <ON:stur wr;vrFN ,, ~ e re 0«. 7 r"~"f f t ,so} Tu, 1NG (441JJ-3S!Jo, LlEITA✓C A l. ~KSrJ!fltArJo"{(,01,-ss~,> ,N5rAl „a,·o-,.,,, L.u,ua, ~OMI ,,,e, IIVNK ,or~ -nn• l INSrAIL~TION(.019 • 2240) NDTES: 1, • 6) IHDICAHS IWSTAlllTIOIIS INSTALltO Al Wit16í00T l/Kf 2
• Vlf WS IROM Cfrff!Q Df ,HtP• l OOklNG OUUOARO SPLIT VIEW OF CONTROL CAR ltESCVE- K-123 and Fufure K-·TYPé AIRSHIP v-a Source: http://www.doksinet IV. ELECTRICAL SYSTEM = ======== References : 1 . Equi pment Manufacturer 1 s Manuals 2 . BuAer Manual 10-201 to 10-205 A. GENERAL DESCRIPTION The electrical sys t em comprises an 800-cycle, 120-volt AC supply, and a 24- volt DC supply. in connection Vfi The DC supply opera tes th two 12- vol t storage batte ries. The batteries are connected in seri es . The system as a whole includes three separate power pToducers, namely, the port generator, starboard generator, and Lawrance auxiliary power pl ant . CAPACITY IN AMPERES PRODUCERS llO- Volt , 800-Cycles or 24-Volt DC Port Genera tor 7-9 25 Starpoard Generator· 7- 9 25 120- Volt , 800- Cycles Auxil1ary Generator 41 . 7 167 Amp . @ 30 Vol ts . Tb.e DC output of any or all genera tors cen be throvm on the line to charge the ba ttery and to supply the DC
load . - 86- Source:Chttp://www.doksinet - CONTINOUS M - MOMENTARY ELECTRICAL LOAD ANALYSIS (5 MIN. OR LESS) X - OFF OF *- NAVY FURNISHED * - GA C SK-5-7567 K - 51 DURATION OF FLIGHT TYPE OF EQUIPMENT MANUFACTURER & NO AMPERES OF PART DESIGNATION TOTAL AMPERE LOADING DUR ING OPER DURATION OF TYP E OPERATION NORMAL OPERATI ( M ORC) A NCHOR OF NORMAL CRUISING NIGH T CRUISIN G MTTLE A C T ION 62 , 0 62 , 0 POWER SOURCE & CONTROL.S •Eolipse fl84-U.NEA-2E 2 CONTROL BOX Eollpse 111-lD Lawrance -lfav1 Type Oo.e * 11>del 300 „1 .-Model 2Clil41A4 G.F: - 3GBD1-ill 2 1 1 1 1 RELAY - REV. CURRENT •a.E - 5GTR72il •G.E - 3GTR72Bl •u,A., 10 62-34 1 1 2 •xou •• - 800 -1 -B . 2 G! Grill llaan1ng Bowmaa 1 PERCOL ATOR ROASTERETTE EYerbot GENERATORS - OUTRIGGER CONTROL - BOX AUXIUARY - POWER UNIT ENGINE GENERATOR STARTER- CONTACTOR BATTERIES CONVERTERS d as req 1 11red UQ 11 or 0 As re 111red e 3 t o 4 hre d 3 to 6
hre/day 2 to 3 hre/d,q e e Wbile on patrol e See Notel , . &2 0 A - PERSONNEL EQUIPMENT GRILL - STOVE - OVEN 94 1 1 6.7A O 12 0 3 . 0A O 120 3 .0l O 1 20 v. v. v. 6 , 7 AC 3 , 0 AC 3 , 0 AO 6, 7 a 3 , 0 AC 3 , 0 AC 4. 0 4,0 4,0 X 10 . 0 10 . 0 10 . 0 I I I e X X X TOASTER - ARMAME NT BOMB - DOOR SOUNDEBUOY 1 v. 4~0 A O 24 - ENGINE HEATER - OIL SERVICE TANK HEA TER - A UXIUARY UNIT HEATER - ENGINE STARTER STA~TER - .SOLENOID SWITCH MESHING - SOLENOID DEV ICE BOOSTER COIL v. E,L,Weig and - Navy T1pe e 9urnlsh ed w 1 tb Lawran ce Uai Sert ee 11,Ty ~ e 518 .l(odel 2A •Ec lipae, Se ries 11 500 • Eoli se T e 613 Model 7A ébS~ 000V - 120 OA @ 24 Vol te ( Shore Oonneotl,on) 2 300 .A O 24 V, ( Wbile sta rting Eog ne ) 2 lA Cl 28V. " 2 2 1 8 A l OA @ 24 V. 6.6A A 28 V 0 ,6A C 28 V. 0 , 6 .A O 28 V, 0 ,17 A O 28 V, @ LANDING LIGHT Grimea Mfg . Oo, 8T 1220 A l Un it1 Mft , c o . Del11Xe 6 G.lC per Dwg, #"2079-1606 GAC See Note Í 2
Gri-nea #.a2328 l 3 RUNNING LIGHTS - CAR RUNNING LIGHTS - ENVELOPE 1"-lrlr""A T n o 1 1r.t-1T c: ••• 7 6 " " " 18 V TRANSFER PUMPS - FUEL - UGHT/NG SPOTUGHT a A• re q111 red ! )( M " )( . " l4 Jiight Lan dlng Onl e X X 10. 0 As re 11ir ed .lligbt o e ration on e .x e l X X X X 6 6 1,8 4, 2 0 ,86 " " " 0 e A.e req111 red X 0 , 86 X X 1 .8 4 2 0 , 86 L - EN GINE HEA,ER - Ofl SERYICE TANK HEATER - AUXIUARY UNIT e 2 1!tlrn iehed witb Lawrance Uniit 1 E. LWe1gand - Navy Type l OOOW - 120 V. OA @ 24 Vol te (Sbore Oonneotion) e As required 1 10 .0 10.0 e X X 10 .0 l X X 6 6 1.8 4, 2 0 , 86 10 . 0 HEATER - ENGINE ( Wbile s tarting Enii: ne ) STARTER • Eolipee , Sert ee 11 , Ty~~~~ 2 300 A O 24 V. STARTER - SOLENOID SWITCH • f.l ol lpse T:voe 518 Model 2A •Ec lipe e , Se r1ee ll , ~ e . 500 2 2 l A C 28 V, MESHING - SOLEt/010 DEVICE BOOSTER COIL • Eo l
ipse Type 513 . Model 7A 2 1.8 A @ 18 V LANDING LIGHT Grlme e M!g , Oo, 8T 1220 A 1 l OA SPOTLIGHT Un ity Mft , Co, De l 11Xe 6½1 l en GAC per Dwg , 1207 9 -160 6 G,i.C See Note -;2 ••• Gr irnee I A2 328 1 3 7 fi 6 . 6a A 28 Ae re a11i re d Night ope ration oa ll 0 ,6A O 28 v. 0 .6 A O 28 V, " " " 0 ,17 A C 28 V, AB req11i red e a e Grimea K -3 . NAi 1171-2 G.iC l!a i rcbild "Koonglow" 1 2 1 6, 3A e 2 4 v. 0 , 6 02 v. 0 ,2 A O 24 V, 1( 5.3 " " 1.2 PANEL - INCANDESCENT G.AC GAO 1 2 PANEL - ULTRA VIOLET lUF 1192 -1 3 0 , 17 A O 24 V. 0 ,17 A O 2 4 V. 0 . 2 A 024 v " " " e a e e e o., AO 6,8A Cil 28V Same Same .110t Avallable Ae req11l r ed e 5.e •• e •• .•• e . , -~ " " " )( ." ! J( " .11 " " M TRANSFER PUMPS - FUEL E -UGH T ING RUNN ING LIGHTS - CAR RUNNING LIGHTS - ENVELOPE INDICAT OR UGHT S SIGNAL LIGHT ~ R LIGHTING NAV IGATORS
UGHT RADJO TABL E L!GHT @ 24 V, lllight Lan dl ng Only v. " " " " " " " e I X X X 0 , 85 X X 1 ,8 4, 2 0 , 86 6.3 1.2 0.2 6 3 5 3 1 2 1 0.2 0.2 0 .17 0 , 34 0 ,6 0. 17 0 . 34 0.6 0 .17 0 , 34 0 ,6 6 . 8 AO 6 8 AC 5 8 Ar. 1.0 7,0 7,0 7,0 2. 6 I 2,6 2. 6 2.6 ~~ ~:i 1.6 ~g 0 • .2 0 .17 X 2 f -RADIO M AIN TRANSMITTER 1 -.Veat 1n1tb 011se GP 1 T RANSMIT STANDBY MAIN RECEIVER INT RA - SQUAD -------- TRA NSMIT1ER Wut,rn Eleotrio BU - 19 -.reetern Eleotr1o GR-12 STANDBY i l 1) , 1 TRA NSMIT INTRA·SQUA D RECEIVER 1 See ]lo te #3 ••• •eetern Eleotrio RU -17 1 7 ,0 A e 28 V, )Íagaavoz Co. IU240 R A DAR • DIRECT ION FINOER "HC.i - DZ-2A FREOUENCY INDICATOR HOMING EQUIPMENT 1.F F SYSTEM M.AD SYSTEM MISC RAOIO EQUIPMENT •Bendiz Ba41o - IJl7 ~eetern Eleotrio - ZBl or ZB3 ~lt 11.ark IV •• •• 11 MARKER BE ACON RECEIVER INTERPHONE .ae 1 2,6 A. 24 V, l 1 l , ó A O 86
V, ~8 ~·H J i~• v. • • Se• Note A• reqtlired 1 l 1,26 A e 26 V, " 1 1 6,6 A O 28 V, 16 .A O 24 V •• 1,26 A O 26 •• " *" ••• 0 0 ~ -~ 1.6 ~x ~:i M 1 ,26 l,26 1, 26 1.6 1.26 ll X J: X 1,26 1, 26 1.26 6.6 16 ,0 5 ,5 16 , 0 5 .6 16 .0 e e l[ - UGHTS - CAR Source:RUNNING http://www.doksinet RUNNING LIGHT5 - ENVEL0PE per l>Wg, ,~u·1 v-.10u0 G.íC See Hote Í 2 • • • Gr ir11es I A2328 1,4,; v.oA g 7 fj l::O Y. A 0 . 6 A O 28 V " 0.17 A O 28 V As required " e e " X X X 0 ,86 4.2 0 . 86 4.2 0 .85 L.-ENGINE HEATER - 0IL SERVICE TANK HEATER - AUXILIARY UNIT E.L Weigand - Nav, Type O 2 Yurnlehed with Lawra.noe -Unit 1 LOO0W - 120 V. ~oA @ 24 Vol ts ( Sbore Conneoti,on) e Ae reqa.1red 10.0 10 .0 X 10 .0 X X 10.0 X X X 6 - fi 1.8 X HEATER - ENGINE STARTER STAATER -S0LENOID SWITCH MESHING - S0LE~0ID DE,.)CE 8005TER C0IL ~cllpee, Serlee 11,Tyi~~ • Ecl1D8e T:vDe
618 Model 2.A •Eolipee, Serlee ll 1 é!8~tt600 " Eoliose Tvoe 613 - Model 7A 2 300 A C 24 V. 2 2 1 A C 28 V. 2 1.8 A @ l0A 24 V. (WhUe starting Eag ne ) . . " " . 18 V, " )1 ! N ." M )( TRANSFER PUMPS - ~UEL F -UGH TI NG LANDING LIGHT Grimee Mfg,Co. 8T 1220 A SP0TUGHT Unlty Mft,Co. Deltae 6-&" len11 l GAC per Dwg, 12079 -1606 3 G.lC See Note #2 7 fj Grines f-á2328 RUNNING LIGHTS - CAR RUNNING UGHT5 - ENVEL0PE INOICAT OR UGHTS @ fi.6A A 28 V. 1 2 l 5 , 3A e 24 V. 0.6 024 v 0 ,2 A @ 2 4 V. PANEL - INCANDESCENT l 2 PANEL - ULTRA VI0LET NU 11.9? l 3 0 , 17 A C 24 V. 0 .17 A C 24 V 0 . 2 A 024 V R LIGHTING NAV IGAT0RS UGHT RADI0 TABLE L!GHT Blght Laa ding 0nlY Ae reaulred Bight oper atioa onl, 0.6A O 28 V 0. 6 A O 28 V " " 0 .17 A O 28 V AB requl rad ••• Grlmee K-3 NAi 1171-2 Ga.C :ratrchlld "Kooaglow" GAC Gli.C SIGNAL LIGHT ~ l " ~ " l. X X X 0 ,85 4.2 0 .86 1.8 4.2
0 .86 0 X 11 .1( 6 :; 5 3 6 3 5 3 " e e 1.2 1 1 0 ,! 1 2 0,2 0 .2 0,2 e 0 ,17 X 0 .6 0 .17 0,34 0.6 0 .17 0 . 34 0 .6 0 -17 0 . 34 0 .6 e 6.8 AC 6 8 AC 6 8 AC fi A 11 . " " " " e e " " e e e e ? ? F- RADIO MAIN TRANSMITTER l 4Weet lnithouee GP-7 TRANSMIT 5TANDBY MAIN RECEIVER . !!:!!:RA -SQ,!AD TRANSMITTER •••t•rn Eleotrio BJ -19 "Western Eleotrio GR-12 1 l 1) INTRA-SQUAD RECEIVER See Note #3 •·••· RADAR DIAECTI0N FINDER FREQUENCY INDICAT0R H0MING EQUIPMENT 1.FF 5YSTEM M.AD SYS TEM • I •• •• "Western Eleotrio RU-17 7 ,0 A C 28 V, •• e 7-0 7.0 7.0 7.0 2,6 A, 24 V, •• -~ e e 2.6 X 2,6 2.6 2, 5 ~~ ~-~ ~5( 1 .6 1.25 1.26 1.6 1.26 1.26 5,6 16.0 11 MARKER BEAC0N RECEIVER INTERPH0NE Ae reauired ) , TAANSMIT STANOBY AO 6.8A G 28V Same Same Bot Avallable Üagnavox Co. RL240 1 • l ~H ~·H X~fiV 1,6 A O 86 V, Radl o - LM7 4Wee te
rn El eot r 1 o -ZBl or ZB3 1 l 1 1 .25 A G 26 V 1,26 A e 26 V. -.BK llarlt IV 1 1 6.6 A O 28 V 1 5 A O 24 V. 4Weet1n bouee G -7 l 420.L - DZ-2A -Be nd1x •• •• Se• lfote j,e required " •• •• ,. ••• a M " II. e 0 X 1.26 X X X ~H 9~1 l.6 l.26 1.26 5.6 16.0 5 ,5 16,0 ~-i ~ISC. RADI0 EQUIPMENT F-RADIO MAIN TRANSMITTER TRAN MIT 5TANDBY AO 6,8.A Ci! 28V Same Same MAIN RECEIVER ffeet,rn Eleotrio BU-19 INTRA-S0=!f-D TRANSMITTER Western Eleotric GR-12 1 Aa re uired e 6 ,8 AC 5 8 AC 7 0 7.0 7,0 1.6 l, 2 6 1.6 1. 26 1.26 1.25 6.6 16.0 5 .5 16,0 1 .6 l.25 1.26 5 ,5 16 .0 g 8 •• Bot ATallable •• 7 ,0 A C 28 V, •• e 7 0 2,6 A. 24 V •• e 2.6 0 X TRANSMIT STANDBY INTRA-5QUAD RECEIVER See Note #3 ••• •eetern Eleotrio RU-17 MARKER BEAC0N RECEIVER INTERPH0NE R A DAR DiRECTI0N FINDER FRE UENCY INDICAT0R H0MING EQUIPMEN T 1.FF SYSTEM M.AD SYSTEM Magaavox Co, RL240 l •
"BC.L - DZ •2i •.Bendix Badio - LM7 •eetern Eleotr1o-Z.Bl or ZB3 -.BK -Marit IV 1 l l l 1.25 A O 26 V l ,26 A e 26 V. l 1 6,6 A O 28 V, lfi A o 24 v. 28 Volte 1.6 A o 86 V, •• See lfote Aa required " •• " ,. ••• a l[ Al X 1 , 26 X X •• e e X •• e X MISC. RADI0 EQUIPMENT G - MISCELLANEOUS MAPPING CAMERA INSTRUMENTS REMAR KS ot BEMABKB1 Power Bouroe r Generatora I.awranae Genera,or Ollhi Komentaey TOTAL CONTINUOUS LOAD 60 am •• ADDITIONAL M0MENTARY LOAD m ampa. TOTAL LOAD 11 67 6,66 18, 22 0 1 22 06 7,80 129,86 143 66 7 . 80 161.86 200 ampa. ••olflote #1. ,~. ••41Illote 1 2. ••CfJote CX> -.J 1 ••-!fote #4. 0onverter ueed to eupply A.0Load, D.Oload ie ebown, A. 0 loade no t included ln totale s iace Converter Per G.A, C Drawinga #3080-86, 61071 -796 , & 61021 -782 Standby and Reoe 1., 6 ,6A @ 28 Volt e, and 7 o A on Traneml t u Komente.ry 3 ,6 A relay ourrent 4.0 1 27 62
7,80 1 36 . 32 Source: http://www.doksinet B. DISTRIBOTION The electrical system is distributed from two panels, the au.xiliary panel on the starboard side of the car betv,reen frames 5 and 6, and the mechanic s, main panel. .All the AC system and the DC 01:Jtput of the auxiliary generator come to the auxiliary panel. The DC output of the port and star- board generators come to the mechanics panel. See Fig. XVI!I and Fig. XXXIII NOTE: K-3 thru K-29 - as stated below. K-30 & Future - see installation of Lawrance auxiliary generator. The auxiliary panel e arries a selector swi tch to connect. the AC loads to the generators in ·verious combinations in a~cordance with the following table which is reproduced on the panel: SWITCH POSITION Starboard Generator 1 Radio Cook Off 2 Off Radi o Cook 3 Cook Off Radio 4 Cook Radio orr The cookin~ loads consist. of a roasterette, a hot plate and a percolator. A cooking panel eguipped with a selector switch makes it
impossible to coonect more than one load at a time. The battery can be disconnected from the system by means of a safety switch located in the main junction box under the mechanics panel and controlled both from the pilots instrument panel and from the mechanic•s stand. -88- Source: http://www.doksinet 1. 1 1 1 . I 1 1 . H H a • t!:) H . ~1 ♦ 1 ., 1 , . 1 .,,1 t1 il · [ / 1 -89- r:c. Source: http://www.doksinet The generator switches of K-11 ships and future are equipped with the thermal overl.oad devices which opera te when the normal load is exceeded. To reset a generator switch after it has tripped open, wait until the overload device has cooled, and close the swi tch again. C. CONTROL BOXES AND CUTOUTS There is a control box and a cutout for ea-ch generator. The control boxes are the -carbon pile type. See Fig. XXXIV (1) Carbon Pile Regulator No adjustment or repairs should be attempted in night on the carbon pile r egulator. (2) Service
Troubles (a) If the DC voltage output is erratic or low, oheck all connect i ons to be s ure they are clean and t i ght, and examine voltage r egul ator plu g in connections for cor- rosion or poor contact. to insure contact. Spr ead plug in prongs, if necessary, If the r egular contacts ar e dirty or pitted, th~y should be cleaned as instructed under "CONTROL BOX INSPECTION." (b) If at any time the voltmeter shows a reversal of polari ty by r.eading off scale in the wrong direction, or if the voltage reading is not more than 4 or 5 volts, the - 90- Source: http://www.doksinet 0 STA 8D GENERATOR CONTROL ·eox (CARBON PILE) PORT úENERATOR CONTROL BOX (CARBOW-PIL~). STORA6E BATTERIES FIG. XXXIV GENERATOR CONTROL BOX AND BATTERY INSTALLATION -91- Source: http://www.doksinet indications are that either the DC field has been inadvertently "flashed" in the wrong direction, or that tbe generator is operating on residual magn·e tism only. To
"flash" the field, remove the (At) lead from tb.e generator and momentarily close the generator cutout contacts, making certain that the external connections to the battery are correctly connected with regard to polarity . (e) If the ammeter indicates zero charging current when the generator voltage is above 13.5 or 268 volts for 12 or 24-volt systems respectively, check the operation of the generator cutout contacts. If the contacts are open, the unit is out of adjustment and should be reset in accordance with manufacturerts cutout 1nstructions. If the contacts are closed, check the charge on the battery, since the charging current drops down to a low value when operating with a ·fully charged battery resulting in little or no ammeter i.ndication (d) If the AC voltage output is below the· normal 120 volts (=5%), check the DG voltage output and readjust to proper value as instructed under "CONTROL BOX INSPECTION.-" -92- Source: http://www.doksinet Swi
tches (Cont . ) Navigation lights, running lights , instrument s ligh t , galley ligh t . (2) Location Mechan ic 1 s panel . Automatic Contr ols Port and starboard generator t s control box . Back of mechanic 1 s main junc t ion. Port and St arboard cut0uts . Mai n junct i on box. Aux. genera t or control box Aft of auxilia r y pane. (Location changed X-3O & Fut . ) Aux . generetor cutr ut Aux . panel junction box (Aux . panel K- 3O & Future) Blinker Top of mechanics stand . (3) I nstruments 3 A. e Ammeters and 3 A C voltmeters f or port, s tarboa rd a nd a ux . generators Auxiliary panel. Chan ged K- 3O & future . (No A. C Ammeter (One A. C Vol tmeter 1 D. C ammeter and 1 D C voltmeter for aux. engine Auxíliary panel. 2 D.C ammeters anQ 2 D C voltmeters f or nort and starboard gener ators. Mechanics panel. (4) Cooking percolator, roasterette, hot pl ate. (5) Lanms See pages 95 to 98 Incl . for 1am:i: Data. (6) Fuses See pages 99, 100, and
101 for fu se data. -94- Galley port siűe, frame 6 . Source: http://www.doksinet NAF NO . 1 .0 "1 TRADE NO-. 309 306 306 306 306 306 1477 1477 1477 1068-23 302 304 304 304 304 LAMP TYPE CP VOLTS BASE TYPE S-11 32 15 28 28 eand-Bay Cand-Bay Cand-Bay Cand-Bay Cand- Bay Cand-Bay Min- Screw Min-Screw Min-Screv1 Cand-Bay Cand-Bay Cand-Bay Cand-Bay eand-Bay S-8 S-8 S-8 S-8 S-8 T-3 T-3 T- 3 T-4½ G- 6 G-6 15 15 15 15 .17A .17A .17A 3 G-6 6 6 6 G-6 6 . ~ 313 313 ST-1220 1477 304 4618 4618 * *iH~ ~ ➔HriHf. NOTES:/- * ~~ ~·* ~ T-31 T-34 T-3 G-6 28 28 28 28 28 28 28 28 28 28 28 3 ~ 1068-20 1068-20 28 .17A .17A . 9A . 17A 6 iw !w PAR-46 5 . 5A BASE CONT . s . e n.c n.c D. C D.C D.C D.C D.C D.C D.C D.C s .e 22 Min-Bay Min-Bay Pref-Flange s.e s .e s . e s .e 28 28 28 Min-S0rew Cand- Bay D.C 28 Sealed 3 28 28 125 125 Original Lamp by Equipment manufacturer. For Grimes Landing Light. Kollsman Compass Light. Bryant #4618
for Bryant Base #9446 . For Grimes Model K-3 portable signal light. LOCATION NO . REQD Nose Cone E nvelope Fins and Tail Outrigger Car-Running Car-Ceiling Flasher Box Pull-Knobs Panel-Inclinator 5-0-5-Incl. Pilots Panel Flight Panel El Indicator Nav-Inst. Nav-Compass Pilot- Compass Nav-Table Radio Table Spotlight Landing Light Oil-Pressure Mech-Panel Aux-Panel Hot Plate Jct Box Riggers eabinet G.AC SK-1-5953 1 2 4 2 1 5 l 11 1 ./ 1 2 2 1 1 1 f 1 ,t 1 t 1 1 1 ./ ~ 2 3 .l 3 l 1- Source: http://www.doksinet NAF No . 1 1068-20 1068-23 1 °° 1 ~* TRADE NO. 309 306 306 305 306 1477 313 1477 302 304 304 304 LAMP TYPE CP S-11 32 15 15 S-8 S-8 S-8 S-8 T-3 T-3¼ T-3 T-4½ G-6 G-6 .l?A .l7A .17A G-6 6 313 302 T-3:J. T-4½ S1.-1220 1477 304 4618 4618 .17A 3 .9A T-3 G-6 .17A 15 15 3 6 6 ~ 1068-20 1068-23 -~ {f-:(-;{- ~* ,. <~~* 6 .J,w !w PAR-46 5.5A VOLTS 28 28 28 28 28 28 28 28 28 28 28 28 3 3 28 28 22 28 28 28 125 125 28 BASE TYPE BASE
CONT. Cand-Bay Cand-Bay Cand-Bay Cand-Bay Cand-Bay Min-Screw Min-Bay Min-Screw Cand-Bay Cand-Bay Cand-Bay Cand-Bay s.e n.c D.C S.G o.c s.e D.C Min-Bay Cand-Bay Pref-Flange o.c n.c o.c s.e s.e s.e D.C s.e Min-Screw Cand-Bay D.C Sealed Original Lamp by Equipment manufacturer. For Grimes Landing Light. Kollsman Compass Light . Bryant #4618 for Bryant Base #19446*-3Hf- For Grim~s Model K-3 portable signal l ight. LOCATION Nose Cone 1 Envelope 2 Fins and Tail 4 Car-Running .3 Car-Ceiltng 2 Flasher Box 1 Pull-Knobs 11 Panel-Inclinometer 1 /. 1 5-0-5-Incl. Pilots Panel .? Flight Panel 2 El Indicator 1 Compass-Rudder 1 Pilot-Compass 1 Nav-Table 1 Radio Table 1 Spotlight 1 Landing Light 1 Oil-Pressure 2 Mech~Panel 3 Aux.-Panel 1 Hot Plate Jct Box 3 Riggers Cabinet 1 /. ~ j NOTES:/. * ~ *~ NO. REQ 1 D G.AC SK-1-6420 Source: http://www.doksinet NAF NO. TRADE 110 . 1068-20 1068-20 1068-20 1068-20 1068-17 1068-23 1068-18 1068-18 1068-18 1 313 313 313 313 1477 301 .302 303
303 303 305 ° --.J 1 305 305 305 309 .,~ ST-1220 LAMP TYPE CP T-3¼ . 17A •17A •17A .17A .17A 3 3 6 6 6 ~=~1 T- Jt T-3 T-4t T- 42 G-6 G-6 G-6 S-8 S-8 S-8 S-8 S-11 15 15 15 15 32 . 9A VOLTS 28 28 28 28 28 28 28 28 28 28 28 28 28 28 28 22 28 ~-~ 3 ~ 3 125 1 25 -/~~- 4618 4618 ~~* -x-~-~r NOTES: t- * 1Hf- ➔HH~ ➔HH~* 1.-w tW PAR-46 5 -5A 28 BASE TYPE Min-Bay Min-Bay Min-Bay Min- Bay Min- Screw Cand-Bay Cand-Bay Cand-Ba y Cand-Bay Cand-Bay Cand-Bay Cand- Bay Cand-Bay Cand-Ba y Cand- Bay Pref-Flange BASE CONT . s.e s.e s.e s.e s .e D.C s.e s.e s .e s.e s.e s .e s . c s .e s.e Sealed Original Lamp by Equipment manufacturer. For Grimes #ST-1220 Landing Lite. Kollsman Compass Li ght . Bryant #461 8 for Bryant Base #19446 For Grimes Model K- 3 portabl e signal ligh t . LOCATION NO . REQ 1 D Fl asher Box Pull-Knobs Navigator Table Mech-Oil Press. Pilot Panel-Incl. 5-0-5 Incl . Radio Table Pilot s Panel Fl ight Panel Mechanic s Panel Car
Ceiling Car Running Fins & Tail Envelope Nose Con e Spotl ight Landing light Compass-j?ilot Compass- Rudder Auxilia ry Panel Rot Plate JCt Box Riggers Cabinet G.AC SK-1- 6404 1 11 1 .; 2 1 /. 1 1 2 3 3 2 3 4 2 l l j 1 ~ 1 1 1 3 1 1- Source: http://www.doksinet NAF NO. 1068-26 1 TRADE NO. LAMP 305 305 305 305 313 313 S-8 T-3¼ 313 T-3 1068-20 1068-20 1068-20 1068-20 1068-17 313 Bryant 3618 ep VOLTS BASE TYPE BASE eONT . S-8 15 28 S-11 15 32 eand-Bay eand-l3ay Cand-Bay Cand-Bay Cand-Bay Min-Bay Min-Bay Min-Bay s.e s.e s.e s.e s.e s .e s.e s.e s.e TYPE S-8 S-8 15 15 T -3i T-3; G-6. 28 28 28 28 28 28 28 3 28 28 Min-Bay eand-Bay S~C . 125 oi ° 1 1192-9 (Neon-lite) 1/4 Wa tt 24-28 Ultra-Violetfluorescent 1192-0 24-28 Ultra-Violet fluorescent RPrll 0 . 9 amps 22 ST1220A 1171-2 Par-46 Kollsman #71-900 415 24 3. 5 amp 28 Pref.Flange s.e (100 hour) Grimes Sea led Beam 3 *Bryant #4-6/8 l amp for Bryant Base #19446 ~Bulb f or
Kollsman #230B Light Ring LOCATION Run.Lights-Car tt " Nose " " Cone Env. Fin. Dome Lights .H elium Valve Lgt Navigator Light Radio Tal:>le Mechanic Panel Inclinometer NO. REQD 3 .3 3 1 2. 2 1 1 ) 1 Hot Plate Junotion Box 3* Pilots Panel 2 Mechanics Panel 1 Sp~t Lite (Unity) 1 Landing Lite (Grimes) Signal Lite Gun 1 1 ~· e+ • Rudder Compass Light. 1~ GAC SK-1-7657 Source: http://www.doksinet Fig. XXXVI-a ELECTRIC FUSE DATA : Rating Type Amps. 10 10 10 10 60 60 50 50 30 30 20 20 20 1, 20 20 20 20 20 20 20 20 20 20 20 30 20 20 30 NOTE: 4AG 4AG 4AG 4AG BiAmp HiAmp HiAmp HiAmp 5AG 5AG 4AG 4AG 4AG 4AG 4AG 4AG 4AG 4AG 4AG 4AG 4AG 4AG 4AG 4AG 4AG 4AG 4AG 4AG Purpose AC Port Gen. AC Stbd Gen . AC Aux. Gen AC Spares DC Aux. Gen DC Aux. Spare Engine Gdn. Eng. Gen Spare Radio Radio Spare Spare Starter Control Oil-Press Instruments Panel Lights Running Lights Nav. Lights Dome Lights Spare Spare Dome Light Panels Compass Instruments
Landing Ligh t L. L Motor Mise. Spare K-3 thru K-8 Location Cat. No. NAF Number No. Reqd. Auxiliary Panel Auxiliary Panel Auxiliary Panel Auxiliary Panel Aux. Cont Panel Aux. Cont Panel Main-Jct. Box Main-Jct. Box Main-Jct Box Main Jct. Box Mechanic Panel Mechanic Panel Mechanic Panel Mechanic P~nel Mechar~c. Panel Mechazuc :Panel Mechanic Panel Mechanic Panel Mechanic Panel Fwd. Sw Panel Fwd. Sw Panel Fwd. Sw Panel Fwd. Sw Panel Fwd. Sw Panel Fwd. Sw Panel Fwd. Sw Panel Fwd. Sw Panel Fwd. Sw Panel l095 1095 1095 1095 1.235-60 1235-60 1235-50 1235-50 1169 ll69 1-097 1097 1097 1097 1097 1097 1097 1097 1097 1097 1097 1097 1097 1097 1099 1097 1097 1034-4-10 103.4-4-10 1034-4-10 1034--4-10 1034-6-60 1034-6-60 1034- 6-50 1034-6-50 1 1 1 2 1 1 1 1 1 1 1 1 1 1 1 1 1034-4-20 1034- 4-20 1034-4-20 1034- 4-20 1034-4-20 1034-4-20 1034-4-20 1034-4- 20 1034-4-20 1034-4-20 1034-4-20 1034-4-20 1034-4-20 1034-4-20 1034-4-30 1034-4-20 1034-4-20 1099 1034-4-30 All .c atalog numbers by
Littelfuse G.AC SK-1-6410 Fig. 39 - 99- 1. 1 1 1 1 1 1 l l 1 1 1 Source: http://www.doksinet Fig. XXXVI-b ELECTRIC FUSE DATA: Rating Type Amps. 10 10 10 10 30 30 10 10 10 10 10 10 10 10 10 5 5 15 5 5 15 5 15 15 N0TE: 4AG ÍAG AG 4AG 5AG 5AG 4AG 4Ag 4AG 4AG 4AG 4AG 4AG 4AG 4AG 4AG 4AG 4AG 4AG 4AG 4AG 4,AG 4AG 4AG Purpose AC Port Gen. AC- Stbd Gen . AC-Aux. Gen AC Spares Radio Radio Spare Spare Starter Control Oil-Press Instruments Panel Lights Running Lights Nav. Lights Galley Light Spare Spare Dome Light Panels Compass Instruments Landing Light L.L Motor Mise . Spare K- 9 thru K- 50 No . Location Cat . No. NAF Nlmber Reqd. Auxil iary Panel Auxiliary Panel Auxil iary Panel Auxiliary Panel Main-.Jct Box Main-Jct . Box Mechanic Panel Mechanic Panel Mechanic Panel Mechani-c Panel Mechani e Panel Mechanic Panel Mechanic Panel Mechanic Panel Mechanic Panel Fwd. Panel Fwd. Panel Fwd. Panel Fwd. Panel Fwd. Panel Fwd. Panel Fwd. Panel Fwd. Panel Fwd . Panel 1095
1095 1095 1095 1167 1167 1095 1095 1095 1095 1095 1095 1095 1034- 4-10 1034-4-10 1034- 4-10 1031+- 4-10 1 1 1 1095 1095 1094 1094 1096 1094 1094 1096 109í 109 1096 1034- 4-10 1034-4-10 1034-4-10 1034-4-10 1034- 4-10 1034-4-10 1034- 4-10 1034-4-10 1034-4-10 1034-4-5 1034-4-5 1034- 4-15 1034-4-5 1034-4-5 1034-4-15 1034-4- 5 1034- 4-15 1034-4-15 All catalog numbers by Littelfuse. G.AC SK-1-6409 - 1 00- 2 1 1 1 1 1 1 1 1 1 1 1 1 1 l 1 1 1 1 1 1 Source: http://www.doksinet Fig. XXXVI-c ELECTRIC FUSE DATA: Rating Type Purpose 10 10 10 lO 10 4AG 4AG 4AG 4AG 4AG Port Generator Stbd Generator Converter No.l Converter No.2 Spare 10 lú 10 10 10 4AG Oil Pres.Lite 4AG Instruments 4AG Running Lights 4AG Na viga tion Lgt 4AG Dome Light 10 20 4AG 4AG 4AG 4AG Amps 20 20 20 K-51 AC Aux.outlet Box lf " " " " " ti11 11 " 11 Mechanic s Panel Spare Spare 11 1034-4-10 1.034-4-10 1034-4-10 1034-4-10 1034-4-10 1 1 1 l 1 1095 1095 l095
1095 1095 1034-4-10 1034-4-10 10,34-4-10 1034-4-10 1034-4-10 1 1 I 1 ti ,, 1095 1097 1097 1097 1097 1034-4-10 l 1034-4-20 1 1034-4-20 1 1034-4-20 l 1034-4-20 1 1034-4-30 l 1034-4-30 1 1034-4-20 2 1034-4-10 2 1 1034-4-5 Navigation Table Starter Con t. 11 11 " 11 1099 11 1099 4AG 4AG Radio Spare Spare Spare n 4AG Spare 5 4AG Dome 11 11 11 Compass Instruments L.L Motor 11 " "ti " " 4-AG 4AG 4AG 4AG U.VLight 15 15 15 50 50 4AG Land-ing Light 4AG Miscellaneous 4AG Spare 5AG Spare 30 30 5.AG 5AG 5AG MAD Spare Radar "fi 10,97 1095 " Fuse Pan. 1094 ti 11 Fwd.SW & " " " ti 11 11 fi " "n 11 11 11 n f1 11 n "TT "11 " "Junc. Box Main 11 !I 11 11 11 IJ n " " NOTE: All Catalog Numbers by Littlefuse, Tnc. -101- 1 11 11 5 5 5 1095 1095 1095 1095 1095 " ,," "n 4AG No. No. Req. 11 11 IFF NAF " ",, 4AG 4AG
5 " "n fi " Fut. Cat. No. Location 30 30 20 10 5 & 1094 1094 1094 1094 1094 1034-4-5 1034-4-5 1034-4-5 1034-4-5 1034-4-5 1 1 1096 1096 1096 1169 1169 1034-4-15 1034- 4-15 l 1 1167 1167 l 1 l 1034-4-15 1 1 1 l 1 GAC SK-1-7658 Source: http://www.doksinet E. LAWRANCE AUXILIARY GASOLINE POWERED ELECTRIC GENERATOR (1) Specifications of the Lawrance Auxiliary Power Onit Model 30 C-2: No . of Cylinders Igni tion Horsepower Output DC (Continuous) Weight (pounds) Fuel Octane RPM Output (5 mins.cont) 2 Dua.l 14 . 5 5 KW 213 91-100 4100 7.5 KVi (resting 30 mi11utes with an 86 amp .load of 28 1 volts . ) (2) Preparations for starting Before attempting to start the engine for the f irst time , the following checks should be made : (a) At leas t three (3) ga llons of lubrication oil Navy Specifica tion 1065 t o- 1080 should be ple ced in the oil tan."c (b) See that 24 volts of battery are across line and that the roain line svri tches for
auxiliary power pl e:nt are in "off" position . (e) Inspect magneto ground wires for p roper connection. Notice: Press in on automatic over-sneed cut cut button to make sure switch is i n oper ating position. (d) Fuel tank should contain 91 octane gasoline . Open valves and check engine dribble valve for flooding . (e) By aid of the hand crank, turn the engine through two or three r evolutions. If a bnorma.l effort is r equired, remove a spark plug from each cylinder to make sure liquid has not collected in the combustion chamber . This procedure should be followed whenever the engine has been idle for a v,eek or more. (See Navy Spec JtN9505a for prepara tion for storage instructions). -102.- Source: http://www.doksinet N0MENCLAT0RE F0R FIG. XXXVII Auxiliary Generátor and Blower General Assembly DESCRIPTI0ij ITEM l 2 3 4 5 6 7 8 9 10 11 12 13 14 15 lé 17 1$ 19 20 21 22 23 24 25 26 27 28 29 30 31 32 33 34 35 36 37 38 39 40 41 42 43 44 45 46
47 48 49 50 51 Lawrance Generator Mount - Auxili a ry Gener a tor Auxiliary Blower - Homelite Ventilation Control Box Duct - Air Intalte Air Outlet & Exhaust Assembly Oil Pressure Line Fuel Line Oil Line - To Eneine Oil Line - Re turn Oil Tank Vent Line Al ternator Box Al t:!rnators .Air Intí:!ke - Al terna tor s Oil Tank Support Br acket - Oil Tank Drain Tube Assembly D. CBox A.CBox D. C Voltmeter 0-35 V Ignition ·swi tch Oil Temp . Gage o-12ooc A.e Vol tmeter 0- 150- V D. C• Ammeter 0-480 Amps Relay Swit ch Starter Switch Cylinder Temp.Gage 011 Heater Switc~ Br eaker Switch Alt . # 2 Breaker Switch Alt . #1 Selector Switch Switch - Alt. #2 - On-Off Sw,itch-Alte rnator #1 On- Off Vol t a ge Regulator Meter Mounti ng Box Oil Pressure Gage Groundwire Lead to 011 Temperature Lead for Cooker A. C Lead for Radio A.e Lead for Radar A. C Lead to Oil Heater D. C Lead to Magneto Lead to Voltage Regul a.tor Lead f rom Alt. # 2 A C Lead f r om Al t . #1 A C Lead to Al t . #2 D C
Lead to Alt . #1 DC Power -Lead D. C Ther mocoupl e Lead Lead t o Battery -103- Source: http://www.doksinet 10 t I( RfHREN(E ORA.Wlttó - f/G N 6A( 5tfRVIU l3lJH f-ritr - NUMBER AS 15 THR/.1 K,· 98 1(99~ FUTURt. OMIT BLOWER Fig. XXXVII AUXILIARY GENERATOR -104- & BLOWER 4 2. Source: http://www.doksinet (3) Starti ng After the above pr eparations , the engine may be ste.Tted in the following manner : (a) Turn fuel val ve to "ON . " (b) Turn oil valve to 11 0N . 11 (e) Cl ose main line swi tch for auxiliary pov:er pl a nt. See that generator lead is connected. (d) Turn starter switch to 11 0N. 11 Allow sterter to prime engine wi th fuel and oil pump wi th oil. - (e) Turn ignitio:n switch to "BOTH" when oiJc pressure g~u ge · registers p r essure . (f) Turn s tarter swi tch to 11 0FF 11 as soon as engine fires . (g) As soon as engine stcrts , o bserve the oil pressure gauge and shut engine off i .allledia tely if pressure is not indicated .
Ngrmal oil pr essure is 55- 65 lbs per sq . inch (4) Manual Starting If no 24-volt battery source is availnble, the engine may be started with the hand starting drum. (a) Loosen the two Dzus fasteners holding. the sta rter hole cover and remoye the cover plate . (b) I nsert the starting drum shaft until it engages the engine crankshaft nut at the genera tor end . (e) Wrap the r ope around the drum so tha t it will turn counter- clockwise when f a cing the gen er a tor end of the engine . (d) Maintain tension on the starter rope to keep the drum engaged . (e) Turn fuel valve , oil valve , and igni tion switch to posi tio11. ttQN 11 (f) Pull rope thru to spin engine crankshaft and start engine„ (g) Repeat the process if the engine does not start at fir-st pull. - 105- Source: http://www.doksinet (5) Warm Up When the operating temperature is below 21°c t he engine will idle at about 1 800 RPM after starting . As the oil warms, the engine speed will gradually increase to
4200 RPM (no load). The governor is adjusted at the factory to operate betweeen 4000 (full load) and 4200 RPM (No load). engine oil hea.ter should be turned to oil-in temper atu re should be about mitted to excee d 87°c. 11 During warm-up the 0.N " 6o0 c. Normal opera ting and should not be per- DO NOT OSE OIL HEATER BEFORE STARTI NG ENGINE. (6) Loading Load may be a,pplied to generator- as soon as the engine comes up to speed . (7) Overload Caution The generator is ra ted at 5 K.W (175" amp) fo r continuous operation It h as an overload capacity of 7.5 K W (263 amp.) for a 5 minute period CAUTION : DO NOT operate the power plant a bove the normal K. W l oad for more than five minutes at a tirne Allow 10 minutes at not more than Q „ loa.d between overload er iods for the to cool. -106-
 When reading, most of us just let a story wash over us, getting lost in the world of the book rather than paying attention to the individual elements of the plot or writing. However, in English class, our teachers ask us to look at the mechanics of the writing.