Datasheet
Year, pagecount:2014, 16 page(s)
Language:English
Downloads:4
Uploaded:June 01, 2020
Size:1 MB
Institution:
-
Comments:
Attachment:-
Download in PDF:Please log in!
Comments
No comments yet. You can be the first!Most popular documents in this category


Content extract
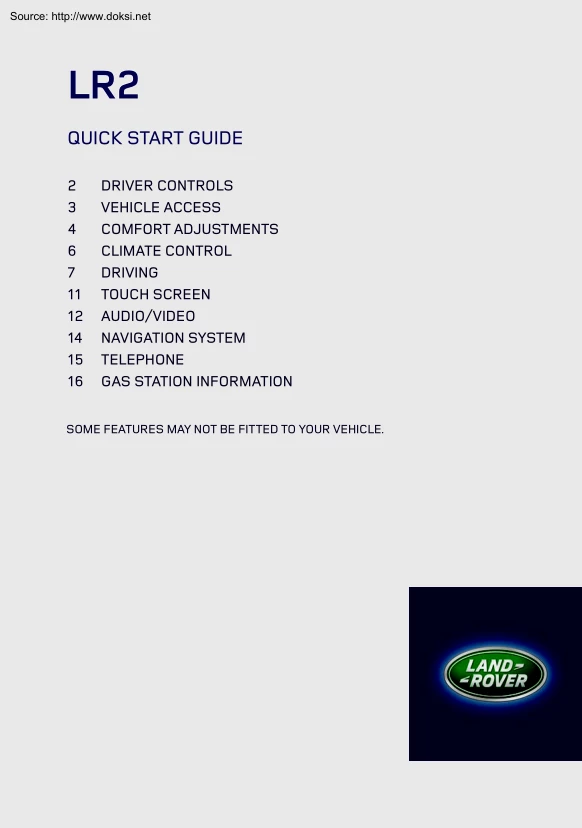
Source: http://www.doksinet LR2 QUICK START GUIDE 2 3 4 6 7 11 12 14 15 16 DRIVER CONTROLS VEHICLE ACCESS COMFORT ADJUSTMENTS CLIMATE CONTROL DRIVING TOUCH SCREEN AUDIO/VIDEO NAVIGATION SYSTEM TELEPHONE GAS STATION INFORMATION SOME FEATURES MAY NOT BE FITTED TO YOUR VEHICLE. Source: http://www.doksinet Driver controls V LR2 LR2 LR2 S 2 Unlo Multi filler f To ch and h secon the c Auto If the open arm t 1. Lighting/turn signals/trip computer 15. Intelligent stop/start 2. Audio controls 16. Stability control 3. Instrument panel, warning lamps and Message center. 17. Climate control 4. Message center control 5. Wiper/washer controls 6. Engine START/STOP 7. CD eject 8. Hill descent control 9. Central locking, unlock 10. Central locking, lock 11. Touch screen 12. Audio system and controls 13. Parking aid switch 14. Hazard warning lamps 18. Terrain response 19. Electric parking brake 20. Heated steering wheel Op The me scr wh Loo can of s Key 21.
Telephone and voice recognition controls 22. Steering wheel adjuster 23. Horn C 24. Cruise control 25. Interior illumination control 26. Mirror adjuster/power fold mirror 27. Window controls 28. Rear window isolator 1. P 2. P enab To un simul Source: http://www.doksinet Vehicle access Smart key Press to unlock and release the tailgate. Press and hold for 3 seconds to activate/cancel the panic alarm. Unlocking mode alternatives Single-point entry. Press once to unlock only the driver’s door and the fuel filler flap. Press twice to unlock all doors, the fuel filler flap and the Luggage area. Multi-point entry. Press once to unlock all doors, the fuel filler flap and the Luggage area. To change the mode - with the vehicle unlocked, press and hold the lock and unlock buttons simultaneously for 3 seconds. The hazard warning lamps will flash to confirm the change. Emergency key release Slide the side section up to remove. Remove the key blade and unfold it. Fully insert the
key blade into the slot beneath the door lock cover embossed with the lock and key icons. Gently prise off the cover. Insert the key into the exposed lock and unlock the vehicle. If the security system was previously armed with the Smart key, when the door is unlocked, the alarm will sound. To disarm the alarm, press the unlock button on the Smart key, or press the START/STOP button with the Smart key inside the vehicle. Automatic relock Operating note If the vehicle is unlocked and no door or tailgate is opened within 1 minute, it will automatically relock and arm the alarm. If the Smart key fails to work, hold it flat against the underside of the steering column with the buttons facing downwards. Start the engine as normal. The Smart key can now be removed. Operating note The Smart key may not be detected if placed in a metallic container, or behind a device with an LCD screen such as a smart phone, laptop (including when inside a laptop bag), games console, etc. Loose coins in
the same pocket as the Smart key can also act as a shield. Keep the Smart key clear of such devices when attempting Keyless entry or Keyless starting. Central door locking Operating note If the vehicle is locked with the Smart key, the master unlocking switch will not release the locks. The door levers will still release locks and open doors. 1. Press to unlock all doors and the tailgate 2. Press to lock all doors and the tailgate This will not enable the alarm. To unlock only the tailgate, press and hold both switches simultaneously for 3 seconds. Drive-away locking If enabled, all apertures will automatically lock when the vehicle speed exceeds 5 mph (8 km/h). LR2 LR2 LR2 Press once to switch the approach lamps on. Press again to switch off. The feature can be turned on or off by a Land Rover Dealer. 3 Source: http://www.doksinet Comfort adjustments C Seat adjustment S LR2 LR2 LR2 1. Seat forwards and backwards, cushion height and cushion angle 2.
Seatback angle 3. Lumbar support control (memory seat only) 4. Lumbar support manual adjuster S Driving position memory Positions for driver’s seat and exterior mirrors, can be stored in vehicle memory for future use. 1. On the side of the driver’s seat, press the MEM button to activate the memory store function. 2. Within 5 seconds, press buttons 1, 2 or 3 to store the current driving position to the chosen number. An existing setting on that button will be over-written. A stored memory position can now be recalled with a press of the appropriate button; 1, 2 or 3. The seat and mirrors will move to their preset positions. Operating note Buttons 1, 2 or 3 must be pressed within 5 seconds after pressing the MEM button, otherwise the memory store function will cancel. The f recog contr • Se indica • Se or ob Windows and door mirrors See page 2, items 26 to 27. Firmly press or lift the respective window switch and release it. Movement can be stopped by briefly operating the
switch again. When the rear window isolator switch is pressed, an indicator lamp illuminates in the switch. Door mirrors Press L or R to select a mirror. Use the mirror adjuster to set the mirror’s position. Power-folding door mirrors Press L and R simultaneously to fold in. Press again to return the mirrors to the opened position. 4 Pa • Se activa For fu the O Resonance with lowered windows If a resonance/booming sound occurs when a rear window is open, lowering an adjacent front window about 1 inch (25 mm) will eliminate the condition. w Comfort adjustments Steering wheel adjustment See page 2, item 22. With the vehicle stationary 1. Unlock the lever 2. Adjust the steering wheel to the desired position 3. Move the lever back to the lock position Steering column electronic lock The steering column lock is deactivated when the vehicle is unlocked. The steering wheel may need slight rotation to release the lock. Seat belts and child safety A warning indicator in the
Instrument panel will illuminate if a front seat belt is unbuckled. This may be accompanied by an intermittent chime. Child seats It is the weight of a child, rather than age, that determines the type of seat required. Refer to Child seats in the Owner’s Handbook to determine the correct seat for your child. Passenger air bag deactivation The front passenger seat is fitted with a sensor that recognizes the state of seat occupancy and notifies the control unit. It also adjusts the air bag indicator as follows: • Seat unoccupied - air bag deactivated and overhead indicator off. • Seat occupied by a child seat or low weight occupant or object - air bag deactivated and indicator on. • Seat occupied by heavier occupant or object - air bag activated and indicator off. For further information, refer to Occupant detection in the Owners’s Handbook. Safety note If the indicator is permanently illuminated when the seat is empty, please contact your Retailer/ Authorized Repairer
immediately. LR2 LR2 LR2 se Source: http://www.doksinet 5 Source: http://www.doksinet D Climate control Climate control E See page 2, item 17 The S Smar LR2 LR2 LR2 Illustrated controls may differ dependent on specification. 6 Igniti 1. P 2. P Engin 1. T 2. P 3. N To sto 1. AUTO mode AUTO is the recommended operating mode. Press for automatic operation of the Climate control system. The system will adjust the air conditioning, blower speed, air intake, and airflow distribution to maintain the selected temperature(s) and reduce fogging without constant manual adjustments. 2. Temperature controls Rotate the controls to set the required temperature. Operating note The automatic system allows a temperature differential of up to 7°F (4°C) between the left and right passenger areas. 5. Maximum defrost program Select to remove frost or heavy fogging from the windshield and rear screen. 6. Heated rear screen 7. Heated windshield 8. Air conditioning
on/off 9. Recirculation on/off 10. Air quality sensing Press repeatedly to cycle through the options: Automatic, Manual, and Off. C 1. P speed (2 km 2. P in me 3. P speed 4. P briefly External water deposits 3. Blower control Rotate clockwise to increase and counter-clockwise to decrease airflow from the vents. 4. Air distribution system • • • The air conditioning system removes moisture from the air and deposits the excess water beneath the vehicle. Puddles may form, but this is normal and no cause for concern. S Windshield and side window vents. Face level. Foot level. More than one setting can be selected at the same time. To fu 1. P 2. P m Driving Engine start/stop See page 2, item 6. The START/STOP button is operational only when the Smart key is inside the vehicle. Ignition only on 1. Press once to switch on the ignition 2. Press again to switch off Engine start 1. The transmission must be in P or N position Operating note 2. Press the foot brake The
START/STOP button must be pressed to stop the engine. If not, it will continue to run, even if the Smart key is removed from the vehicle. 3. Now press and release the START/STOP button To stop the engine, press the button again. Cruise control See page 2, item 24. 1. Press to activate Cruise control and to set a speed. Press briefly to increase the speed in 1 mph (2 km/h) steps. Cruise control override 1 2. Press to resume the previous set speed retained in memory. Set speeds are cleared at ignition off 2 3. Press to suspend Cruise control but retain the set speed in memory. 3 4. Press and hold to decrease the set speed Press briefly to decrease the speed in 1 mph (2 km/h) steps. 4 Cruise control will disengage if the brake pedal is pressed or when the vehicle’s speed falls below 18 mph (30 km/h). Sunroof no To tilt from closed position Press and release switch 2 to open to the tilt position. Press and release switch 1 to fully close. Stop movement by pressing switch
1 again. Operating note To fully open and close 1. Press and release the switch to fully open 2. Press and release the switch to fully close The sunroof will operate for 30 seconds after the ignition has been switched off, as long as the front doors remain closed. The sunroof switch must be pressed until the roof reaches the desired position. LR2 LR2 LR2 ough Source: http://www.doksinet 7 Source: http://www.doksinet D Driving Warning and information lamps Pa LR2 LR2 LR2 The following lamps may illuminate in the Instrument panel during normal driving to indicate that a related system or feature is operating. If any other warning lamp illuminates, refer to the Owner’s Handbook DO NOT ignore warning lamps Seat belt reminder. Headlamp hgh beam on. If a sou the Door open. Rear fog lamps on. Trailer connected. HDC active. Front fog lamps on. Turn signals active. Cruise control active. Parking brake on (USA). DSC switched off. Side lamps on.
Parking brake on (Canada). Pre Re Wh a re wh To cam Exterior lights 1. See page 2, item 1. 1. Outer collar First position for side lamps, second position for headlamps and the third position for AUTO. With AUTO selected, all exterior lamps will switch on automatically when ambient light fades. 2. Inner collar Turn it away and release for front fog lamps Turn it towards you and release for rear fog lamps. Turn and release again for off Headlamps high beam. Push the control forwards for high beam To flash the headlamps, pull back and release. Wipers and washers 2. cur 3. 4. 5. ove H See page 2, item 5. HDC desce 1. With Automatic rain sensing, the front wipers will respond to rain severity. Without Automatic rain sensing, move up to select intermittent delay. 2. With Automatic rain sensing, rotate towards MAX to increase sensitivity. Without Automatic rain sensing, rotate towards MAX to increase frequency of intermittent wipes. 3. Low speed continuous wipe Press of be the
ve 4. High speed continuous wipe 5. Windshield single wipe 6. Windshield wash/wipe 7. Rotate to INT for rear screen intermittent wipe Frequency increases with vehicle speed. Rotate to ON for continuous wipe 8. Rear wash/wipe Continue to hold for additional operation If freezing conditions are likely, the wipers can be set to a higher position so that they can be lifted from the windshield. See Instrument panel menu. 8 Gear shift indicator. Fro tran sub rem 10 To prevent inadvertent wiper activation, turn the Automatic rain sensing off; • • Before entering an automatic car wash. During hot, dry and dusty periods. The C be us ards ash urn h. Driving Parking aids See page 2, item 13. Front and rear Parking aids are activated when transmission R is selected. When a forward gear is subsequently selected, the Parking aids system will remain active until the vehicle’s forward speed exceeds 10 mph (16 km/h). 1 If an obstruction is detected, an intermittent tone will
sound. Moving closer to the obstruction will increase the frequency of the tone. 2 Press the switch to deactivate. 3 4 Rear camera When transmission R is selected, the camera provides a rear-view image with overlaid guidelines, to assist while reversing. 5 To view the Parking aid display instead, or to cancel camera display at any time, briefly touch the display. 1. Broken line - full width of the vehicle 6 2. Solid line - projected reversing path based on the current steering wheel position. 3. Shade - area required for tailgate access 4. Parking sensors activated 6. Hitch assist Designed to aid the process of guiding the vehicle to the trailer tow hitch, a single line is displayed as the reversing guideline. As the vehicle closes to within 23 inches (0.6 m) of the tow hitch, an automated zoom is operated. 5. User options Touch one of the mini views to select overlay options. Hill descent control (HDC) See page 2, item 8. HDC allows greater downhill control, particularly
when descending severe off-road gradients. A continuously illuminated indicator in the Instrument panel confirms HDC selection. Press the switch again to deselect HDC. Press the HDC switch. HDC can be selected at speeds of below 50 mph (80 km/h) but will not be fully active until the vehicle’s speed is below 30 mph (50 km/h). The Cruise control increase and decrease switches can be used to adjust descent speed. LR2 LR2 LR2 mps. Source: http://www.doksinet 9 Source: http://www.doksinet To Driving LR2 LR2 LR2 Transmission To 1. With the engine running and the foot brake applied, press in the selector release button. Move the transmission selector from P position. Automatic gear selection Select D for fully automatic gear changes. The LED to the left of D will illuminate. Sport mode This is an automatic gear change mode, however, change points are modified to make full use of engine power. 2. When the transmission selector is moved to the left side, the
M/S LED will illuminate and the Message center will display SPORT. To return to automatic gear selection, move the transmission selector back to D. CommandShift gear selection This is an alternative to the automatic modes and is effective when rapid acceleration and engine braking are required. With Sport mode selected, move the selector forward or back for manual gear selection. After each gear change, the selector returns to the central position. The Message center will display the selected gear. Operating note If Terrain response is fitted, Sport mode is available only when the General program is selected. With the selector in Sport position, the transmission will stay in lower gears for longer, with downshifts occurring more readily. Fuel consumption will be adversely affected. To return to automatic gear selection, move the selector back to D. Gear shift indicator When CommandShift is selected, the indicator will illuminate briefly in the Instrument panel at the recommended
point for a gear change upshift. Terrain response 1. To menu 2. To icon i the p See page 2, item 18. When the vehicle is started, Terrain response will normally start in its General program. Program selection is via a center console switch. Grass-Gravel-Snow. Suitable for surfaces which are firm but have a slippery surface, e.g, grass, snow, loose gravel, pebbles, or icy conditions. Mud-Ruts. Suitable for soft, muddy, uneven, or rutted ground. Sand. Suitable for soft, predominantly dry, yielding sandy ground, e.g, sand dunes and deserts. If the sand is damp or wet, the MudRuts program may be more beneficial Use the switches to select a program. Icons will illuminate as selected. The Message center will also display an icon It is recommended that a special program be engaged whenever driving conditions are difficult and then moved back to the General program once those conditions are no longer present. General. Use for typical road surfaces 10 The pre Wading Select the program
most suitable for the surface beneath the water. DO NOT exceed 20 in (500 mm) water depth. 3. To 4. To 5. W given is cha Source: http://www.doksinet Touch screen Touch screen See page 2, item 11. e n es e, or icy en, y, and Mud- 1. Touch or press to select the Touch screen Setup menu. 2. Touch to select Valet mode During menu mode, the icon is changed to the back soft key. Touch to return to the previous screen displayed. 6. Touch to adjust the time/date 7. Touch or press to select the On road Navigation menu. The current set destination is displayed 8. Touch or press to select the Phone menu 3. Touch or press to select the Home menu 9. Touch or press to turn the screen on/off 4. Touch or press to select the Audio/Video menu 10. Touch to select the Extra features menu 5. While navigation is operating, touch to repeat the last given navigation instruction. During a phone call, the icon is changed. Touch to end the call 11. Touch to select Home menu shortcuts
LR2 LR2 LR2 The Touch screen requires only light touches. Excess pressure could result in damage. m) 11 Source: http://www.doksinet A Audio/video Radio Po LR2 LR2 LR2 3. Information from the current station 4. Seek up: Short touch to auto seek up to the next radio station. Long touch to activate manual seek mode 5. Touch to view and activate/deactivate: RDS, Traffic, News, AF and REG. 6. Touch to view a list of available stations on the FM waveband. 7. Touch to enter a station frequency on the current waveband, using the numeric keypad. Select OK or wait for automatic tuning. 1. Touch to view and select a waveband 2. Seek down: Short touch to auto seek down to the next radio station. Long touch to activate manual seek mode Includ techn includ 1. To Note: devic SAT radio Satellite radio is a subscription service. Channel 184 is available as a preview channel for a limited time. During this period, the satellite radio provider’s (SIRIUS) telephone
number and the SIRIUS ID number will be displayed. To activate and use the satellite radio, call SIRIUS while you are inside the vehicle. The SIRIUS information can also be viewed via the Settings soft key in SAT information. 5. Touch to view: Audio settings. Select to adjust the tone and balance audio settings. Channel skip. Select individual channels or entire categories. Parental lock. Make selections and lock them with a 4 digit code to prevent access. The PIN default is 0000 Select Edit PIN to change it to your personal code. SAT information. SIRIUS information 6. Touch to enter the instant replay menu Allows live audio to be paused, rewound, and replayed. 7. Select to add the currently playing song reference information into the song memory. Subsequently, if a channel is playing a song and its reference information is stored in the song memory, a pop-up will be displayed giving you the option to tune to that channel. 8. Touch to enable the numerical touch pad Enter a
channel number. 9. Select from the list of categories to view details Select a channel. 1. Touch to view and select a SAT band (SAT 1, 2 or 3) The radio will tune to the last used channel on that band. Touch again to close. 2. Seek down: Short touch to seek the previous available channel. 3. Channel information 4. Seek up: Short touch to seek the next available channel. 12 8. Station presets: Touch and release a preset to tune to the station stored on that preset. Touch and hold to store the current station to that preset. 2. To for M list en down 3. To Selec 4. To start 5. To • Se CD. T • Se Note: featu 6. S 7. R In CD • To again discs Touch S Source: http://www.doksinet Audio/video Portable media In USB or iPod mode: M Note: Repeat mode is not available for Bluetooth wireless technology devices. 8. Pause/Play: Select to pause playback Select again to resume playback. wait ne to tore ce 4 . e 9. Information about the current track Includes CD,
iPod®, USB, AUX and Bluetooth® wireless technology devices. The full infotainment system also includes Stored CD. a Note: Shuffle mode is not available for Bluetooth wireless technology devices. 1. Touch to display all of the options Select an option 11. Skip/Scan backwards Note: Sound quality and volume levels available from devices connected to the auxiliary input may vary widely. Connecting a device 2. Touch to switch traffic and news on or off Additionally, for MP3 recorded media, you can select the number of list entries that are skipped when you use the page up/ down arrows. 3. Touch to view the current CD or Stored CD track list Select a track to start playback. 4. Touch to view contents of the connected device and start playback. 5. Touch to view and manage the Stored CD memory • Select Upload alongside an empty slot to upload a CD. There are 10 slots available • Select Replace to overwrite an existing CD. 1. 35 mm AUX socket e on yed 10. Touch to play random
tracks from the current media Touch again to cancel. Note: Loading time is dependent on content type. Other features can be selected while upload is in progress. 2. USB socket 6. Skip/Scan forwards 7. Repeat In CD mode: • Touch to repeat the current track continuously. Touch again to repeat the current Stored CD (or folder for MP3 discs) continuously until Repeat mode is canceled. Touch again to cancel. Steering wheel audio control See page 2, item 2. 1. Press repeatedly for options 2. Volume increase 3. Seek up LR2 LR2 LR2 fic, • Touch to repeat the current track continuously. Touch again to repeat the current USB folder or to cancel iPod Repeat mode. Touch again to cancel USB Repeat mode. radio 4. Volume decrease 5. Seek down 13 Source: http://www.doksinet Te Navigation System Nav menu Te LR2 LR2 LR2 Blu 14 For sof OW Note: to the used. Conn runni Pairin 1. S scree 1. Use to enter a new destination Provides a choice of options when
entering a destination. 2. Displays previous destinations entered Previous destinations can be selected. 3. Turns the POI (Point Of Interest) icons on the map on/off. 4. Only visible when a destination is set Enables the last voice instruction to be repeated. 5. Highlighted while Route voice guidance is enabled Touch to turn Route voice guidance off. 6. POI shortcuts: Touch the relevant icon to list available POIs that are close to the vehicle’s position. 7. Calculates a detour from the current route 8. Advances to the main map screen 9. Move to the other Navigation menu There are 2 navigation menu screens. On the second screen: Stored locations is used to manage the stored data. TMC (Traffic message channel) will provide data about road conditions and any events that may affect the current route. Route options allows the selection of various options for the route. Nav set-up is for setting personal preferences within the navigation system. Use the More soft key to toggle between
them. 10. Cancels the current route guidance Selecting navigation 2. Fr When navigation is selected after the ignition is turned on, a caution screen is displayed. Touch Agree 3. A Searc selec Note: At the first time of accessing the caution screen, set the required language. Setting a destination Select Destination entry. Select Address and enter address details using the keyboard. As each part of the address is refined, touch OK or List to display all of the streets and towns that are available to be selected. If the house number is not known, press OK. The end of the road is then used as the destination. When the map screen is displayed, you have the option to Review route or GO. Touch GO to calculate the quick route and start guidance. Review route There will be a choice of 3 routes or Change route. 3 routes will display 3 different route options on the map. Select Route 1, 2 or 3 by touching the respective box displayed on the right side of the map and then select GO.
Alternatively, select Change route and then Route preferences to alter the route settings. When changes are complete, touch GO. 4. S Note: is dis 5. U techn to as instru 6. W pairin 7. W phon 8. O conne show Note: ‘autho Pleas furthe Down When is pai autom See P inform n, set ch not as the ion uick map. x ct Telephone Telephone Calls via the Touch screen Bluetooth® wireless technology device For the latest list of compatible phones and their software, refer to www.landrovercom Select OWNERS and then Bluetooth. Note: The process of pairing and connecting a phone to the vehicle will vary depending on the type of phone used. Use the manufacturer’s instructions Connection must be made with ignition on or the engine running. Pairing and connecting using the phone 1. Switch the ignition on and make sure that the Touch screen is active. 2. From the Home menu, select Phone 3. A menu will appear If no phone is connected, select Search new, otherwise select Change phone
and then select Search new. 4. Select the Device to vehicle option Note: The vehicle’s Bluetooth wireless technology system is discoverable for only 3 minutes. 5. Using the phone, search for Bluetooth wireless technology devices. On some phones, this is referred to as new paired device. See the manufacturer’s instructions. 6. When the vehicle’s system is discovered, begin the pairing process and follow the on-screen instructions. With a paired and active phone, press the PHONE button on the Touch screen surround. 1. Select Digit Dialing, Phonebook or Last 10 With Digit Dialing selected, use the keypad to enter the number. With Phonebook selected, choose a number from the downloaded phonebook. Last 10 displays the previous 10 calls. Choose one to dial 2. Touch the green connect icon to make a call The icon will change to a connected call icon. Touch the red icon to end a call. Calls via the steering wheel controls See page 2, item 2 and 21. Connect. Press and release to send or
accept a call, or to access the Last 10 dialled list. Press and hold to access the Phonebook. 7. When requested, enter a PIN of your choice into the phone and the vehicle’s system. Disconnect. Use to end or reject a call 8. Once your phone is paired, it may automatically connect to the vehicle’s system. If not, use the device list shown on the Touch screen or use the phone. Voice control talk button. The screen will display available options. Say Phone and follow the instructions. Note: Some phones require the pairing to be set as ‘authorised’ or ‘trusted’ in order to automatically connect. Please refer to your phone’s operating instructions for further information. es Downloading phonebook entries When a phone with phonebook download capability is paired and docked, its phonebook directory can be automatically downloaded to the vehicle’s system. See PHONEBOOK in the Owner’s Handbook for more information. The left side steering wheel audio controls can be used
to adjust the telephone’s volume and to scroll through phonebook entries. LR2 LR2 LR2 ed Source: http://www.doksinet 15 Source: http://www.doksinet Gas station information Refueling LR2 LR2 LR2 Filling with the wrong fuel 16 If the vehicle is filled with the wrong type of fuel: • • The gas filler flap is located on the right side of the vehicle. If the vehicle is locked, the filler flap cannot be opened. Pull the flap at the rear edge to open. DO NOT start the engine! Call for qualified assistance! Tire pressure label Tire pressures are displayed on a label attached to the pillar behind the driver’s door, or on the rear edge of the driver’s door. Twist the cap counter-clockwise to release. A hook is provided on the flap, to hold the cap out of the way while refueling. After refueling, tighten the cap until it clicks 3 times. The correct fuel specification for your vehicle is shown on a label attached to the inside of the gas filler flap.
Some vehicle engines can use E85 fuels (85% ethanol content). Only these vehicles have a statement on the label indicating that E85 fuels can be used. • DO NOT use E85 fuels in ambient temperatures below 14°F (-10°C). • When using E85 fuels, every 4th tank of fuel must be non-E85 premium quality unleaded fuel. Vehicles without the E85 fuels information on the label CANNOT use fuels containing more than 15% ethanol. • DO NOT use E85 fuels (85% ethanol content). Equipment necessary for the use of fuels containing more than 15% ethanol is not fitted to this vehicle. If E85 fuels are used, serious engine and fuel system damage will occur. • DO NOT use fuels containing more than 3% Methanol. Wherever possible, avoid fuel containing Methanol. The vehicle fuel system will be damaged by such fuels. • DO NOT use fuels containing MTBE if the ratio of MTBE to regular gas exceeds 15%. Part No. LRL 18 96 56 141 Jaguar Land Rover Limited 2013
 When reading, most of us just let a story wash over us, getting lost in the world of the book rather than paying attention to the individual elements of the plot or writing. However, in English class, our teachers ask us to look at the mechanics of the writing.