Datasheet
Year, pagecount:2010, 11 page(s)
Language:English
Downloads:1
Uploaded:February 04, 2019
Size:2 MB
Institution:
-
Comments:
Attachment:-
Download in PDF:Please log in!
Comments
No comments yet. You can be the first!Most popular documents in this category
Content extract
Source: http://www.doksinet SECOND WIND USER’S MANUAL April 27, 2010 Josh Dowler, Caleb Meeks, John Snyder Source: http://www.doksinet Table of Contents: Safety .3 Introduction .5 Set Up .6 Operation .8 Retraction and Storage .9 2 Source: http://www.doksinet Safety 1. If the battery needs to be exchanged or if the battery is being removed, never touch the positive and negative leads together. Also, ensure the red wire is always connected to the positive terminal and the black wire is always connected to the negative terminal. Electrical shock can result if these precautions are not followed. Figure 1: Battery and Battery Leads 2. Never use more than 50 meters of kite string unless FAA authorization is received. 3. Keep hands away from chains, sprockets, and return mechanism while in operation. Primary Shaft Generator Motor Shaft Intermediate Shaft Figure 2: Gearing Ratio for the Generation System 3 Source: http://www.doksinet Figure 3: Spring Return Mechanism 4. The
system is designed to be water resistant, but in the event that water gets inside the system, allow the system to dry before use. 5. Do not open the electrical box while the device is in operation Figure 4: Electrical Box 6. Do not stand in front of the system while in operation (Kite strings can cause injury while kite is in flight) 7. Do not hold the kite strings with your hands during deployment or flight of kite unless gloves are worn. 4 Source: http://www.doksinet Introduction Your Second Wind power generation system has been designed to be user friendly, cost effective, and green. Whatever your power application, our user support teams are dedicated and ready to assist you with any unresolved issues or questions you may have. This user manual is a go-to guide for your kite wind generator. The Second Wind system has been designed to utilize consistent high velocity, high altitude winds in order to generate electrical energy. This system is advantageous over traditional wind
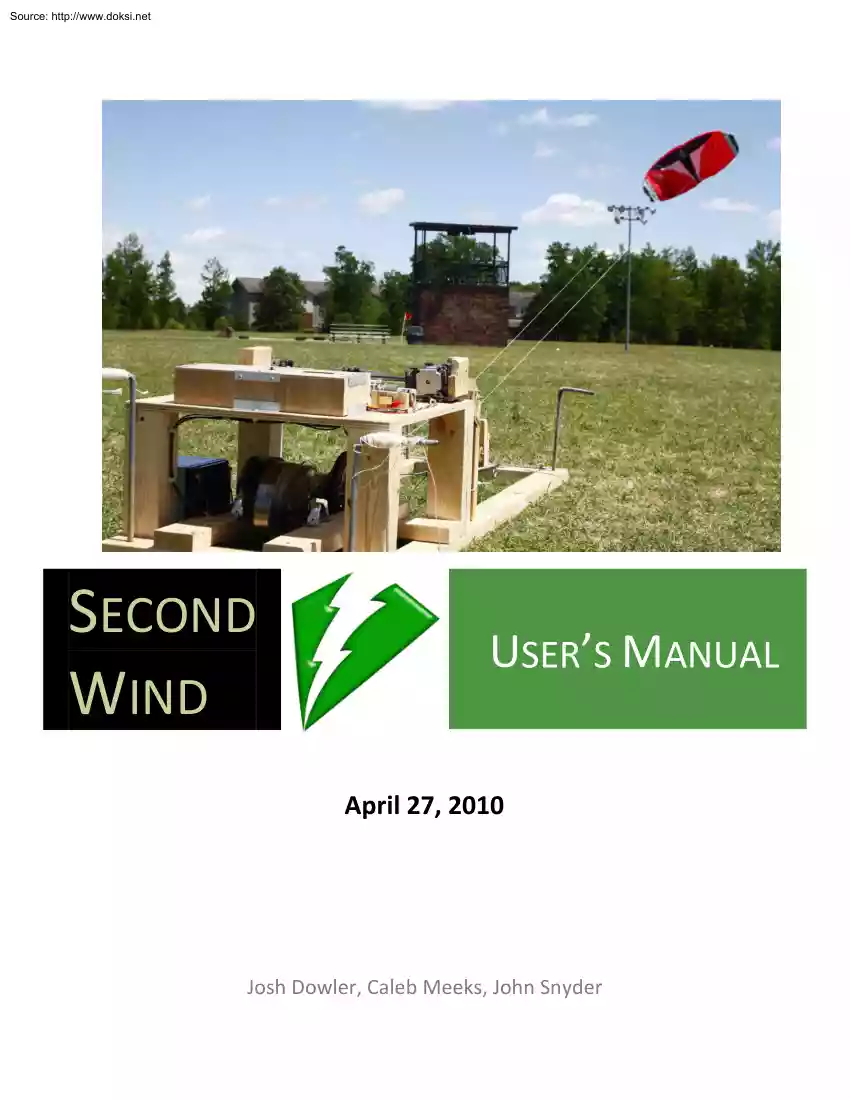
turbines in that it is able to function in a wide variety of geographical locations by reaching afore mentioned high altitude winds. The system generates power by transferring the force applied to the kite from the wind to the generation system over a period of time. The generation system transfers the force from the kite into a rotational speed of the primary shaft. The primary shaft turns the intermediate shaft, which turns the generator motor shaft. The sprockets and spools serve to gear up the rotation to allow the generator motor to run at its operational speed of 2750 RPM. The return mechanism attaches a spring to the primary shaft to store part of the energy supplied by the kite as potential spring energy. When the kite is oriented in such a way to reduce the force applied to it by the wind, the spring will retract causing the kite to be returned to its original position. The kite is controlled autonomously by the control slider mechanism in conjunction with the angle sensor.
The values obtained from the angle sensor are used by the microprocessor to know where the kite is oriented. The control slider will then fly the kite autonomously using this information. 5 Source: http://www.doksinet Set Up 1. Find a level location with an open area with at least 50 meters in all directions. Orient the system with the back towards the direction that the wind is coming. Check that the wind speeds are within the operational limits of 10 – 45 km/h (6 – 28 mph). An approximation of the current wind speeds can be obtained from The Weather Channel’s website (www.weathercom) 2. Stake the Second Wind system frame into the ground with the supplied ground stakes. The stakes will pass through the holes on the four corners of the system frame. A hammer or mallet may be required to securely drive the stakes fully into the ground. Figure 5: Stake Insertion 3. Ensure all attachments and connections are secure a. Spring (Fig 3) b. Battery (Fig 1) c. Kite strings Figure
6: Reel Motor String Connections Figure 7: Retraction Pulley Connections 6 Source: http://www.doksinet Figure 8: Control Slider Connections Figure 9: Pulley and Angle Sensor Connections 4. Set electrical system switch to the ON position The instantaneous power generation and string length released will be displayed on the LCD screen. ON OFF Figure 10: User Interface 5. Deploy kite (be sure all safety precautions are followed as specified by the Safety section of this manual) a. Set mode switch to ascend position (Fig 10) b. Pull the kite away from the base unit at the rate of the reel motor until string length is at least 20 meters or desired length. c. Launch kite d. Return mode switch to sustain position (Fig 10) 7 Source: http://www.doksinet Operation Only fly the kite within 10-45 km/hr (6-28 mph) winds. Check The Weather Channel’s website (www.weathercom) to find out current wind conditions o For 10-20 km/hr winds use the spring labeled ‘Spring 1’. o For
20-45 km/hr winds use the spring labeled ‘Spring 2’. Spring 1 Spring 2 Figure 11: Springs o Change the spring by detaching the current spring from its clips on the system frame and replacing it with the new spring. (Fig3) In the event of kite grounding, check for damages to the kite or system. Verify that all connections, attachments, and pulleys are in place (See ‘Set Up’ Section). Re-launch kite if the system is in working order Electrical system will reengage to keep the kite aloft. Observe kite for 5 minutes to ensure kite maintains figure-eight flight pattern. In the event of impending severe weather, follow retraction and storage procedures in the Retraction and Storage section. In the event of a lightning hazard while the kite is still in flight we suggest not approaching the base station. However, if you choose to try to retract the kite, do so at your own risk. 8 Source: http://www.doksinet Retraction and Storage Stay well informed about the current
weather conditions in your area. In the event that severe weather conditions arise or are expected, set mode switch to retract (Fig. 10) Kite will retract autonomously Once kite is fully retracted, set mode switch to sustain to stop the retraction (Fig. 10) In order to properly pack kite follow these steps: Figure 12: Lay Kite Flat Figure 13: Fold Both Ends Toward the Middle 9 Source: http://www.doksinet Figure 14: Fold Both Ends Toward the Middle Again Figure 15: Place Bar on Top of Kite Figure 16: Roll the Kite around the Bar 10 Source: http://www.doksinet Figure 17: Pack Fully Rolled Kite Away Remove ground stakes, roll away and stow complete system in a dry, temperate area. Figure 18: Transport System to a Storage Area In the case of a malfunction of the retraction system, gently pull on one of the two kite strings while wearing gloves. This process will ground the kite 11


