Datasheet
Year, pagecount:2005, 22 page(s)
Language:English
Downloads:1
Uploaded:January 07, 2019
Size:1 MB
Institution:
-
Comments:
Attachment:-
Download in PDF:Please log in!
Comments
No comments yet. You can be the first!Most popular documents in this category


Content extract
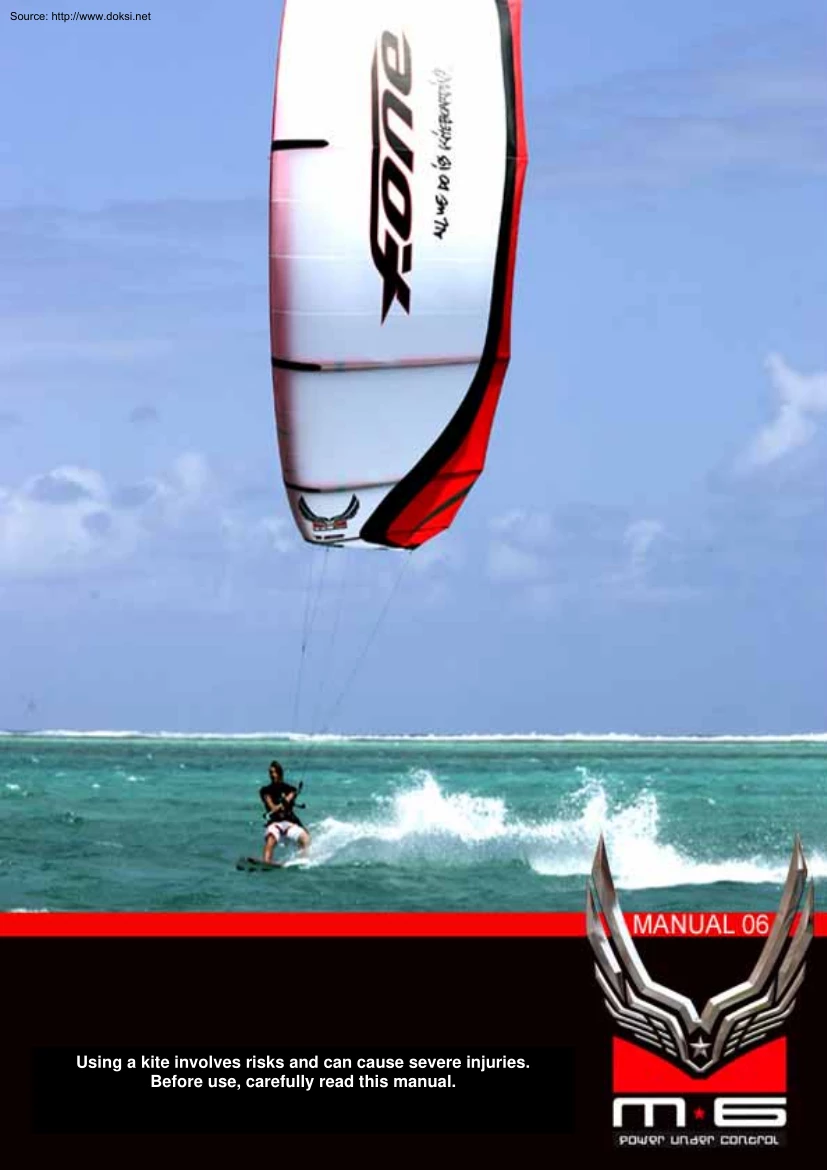
Source: http://www.doksinet Using a kite involves risks and can cause severe injuries. www.f-onekitescom Before use, carefully read this manual. Source: http://www.doksinet FOCUS Here is a glossary of your equipment for you to get acquainted with most technical terms used in this manual. Your kite 1. 2. 3. 4. 5. 6. 1 2 Leading edge Struts Wingtips Trailing edge Front lines connectors Back lines connectors 3 5 4 6 Your Bar 1. 2. Mini harness line Releasable chicken loop available in two sizes 3. Back leader lines 4. Front leader lines 5. Front lines adjustment knots 6. Back lines adjustment strap 7. Power adjustment strap 8. T-one: enables the 5th line power management and undoing of the center lines twists. 9. Push System, safety system that release the power of the kite by pushing the bar. 10. 5th line 4 10 5 7 3 6 9 1 8 2 Accessories 1 2 3 Pump high output Extensible kite bag Patch repair kit for bladders 2 3 1 www.f-onekitescom 2 Source: http://www.doksinet
SAFETY Before use, carefully read this manual Assumption of risk: Using a kite involves certain inherent risks and hazards, and can cause severe injuries, damage or death to the user and or third parties. The user of any Fone product assumes and accepts any and all risks related to Kiteboarding. If you are Kiteboarding you freely agree to take full responsibility for the safety of yourself and others, including informing subsequent users and owners of the assumption of risk. Risks inherent to Kiteboarding can be greatly reduced by practicing common sense and it is strongly advised first time kiteboarders acquire training at an accredited Kiteboarding school. To locate the school nearest you please log on to www.f-onekitescom in the school / dealers area of the site Here are some safety tips to know and to follow: Safety equipment, (helmet, life vest, etc) contributes to your safety, yet caution remains the best safety device of them all. Keep in mind that no one controls the wind, so
always be aware of the weather. Learn to look around to choose a safe path, and to pin point struggling kiteboarders or other hazards. Rule n°1: Your safety Do not ever tie yourself to the kite in a permanent manner, or any heavy or fixed object. You should always be in a position to let go of the kite rapidly in a case of an emergency (tangled lines, wind to strong, injury). To achieve that, regularly check all components, ensure the quick release is not worn out, regularly rinse your material. But keep in mind that every quick release safety system should work in combination with a leash, which allows you to keep your kite attached to you. This leash should also be releasable in case of an emergency. Every Fone bar is equipped with the Life Line system security which allows you to cancel the power of your kite quickly with minimal effort. Do not try to grab a kite by its lines. Under tension they can be as lethal as a razor blade This kite is not a flying device (paraglide) or
floatation devise and should not be used as such. Never go riding alone: It is strongly suggested to ride with someone who could eventually call for assistance in case of an emergency. Rule n°2: Get set up The helmet It is strongly recommended to protect you against your board in case of a fall, and in other unexpected conditions such as hard landing and bad take off. The wetsuit Choose a full-length wetsuit or a shorty according to the water temperature. Please note that if you are cold, you’ll use more of your energy. The life vest The life vest can help you during your waterstarts and while re-launching the kite. You will be glad to wear it during your first jumps to cushion some hard landings. It also will be a good companion if you get stranded and have to swim back to shore. The harness The harness should be comfortable and of strong manufacture. It is the link between you and your kite. Seat harness or waist harness, can both be used Seat harnesses are more appropriate for
beginners. Beginners tend to spend more time with the kite at the zenith (directly above the head) and in that position the seat harness does not move upward as much as the waist harness. Some accessories to accompany your harness: a back handle to help others hold you down in case of gusty winds, a line cutter, a double loop to tie down your leash, kite or board. 3 www.f-onekitescom Source: http://www.doksinet SAFETY Rule n° 3: Choose your practice spot Observe local laws and regulations regarding kitesurf and the usage area. Choose your spot according to your level: The choice of a good spot is a prerogative for a safe learning. The best spot is not necessary the spot where you find the most kites. If you just started or if you do not control your kite properly, the best spot is the least crowded one. The water and wind conditions also vary, advance kitesurfers often look for strong wind and good waves where beginners should be looking for calm waters and softer winds. When
first starting out it is recommended to look for a place with fairly shallow waters. Beginner area: Calm water Side-shore wind No obstacles Less kites Choose an obstacle free area: Check that the space on your sides and under your wind is free of obstacle: no houses, no trees, no cars or jetties. Under no circumstances should you be riding near electrical posts and wires, or near an airfield or even near a harbor. Wind direction: Never ride in strong offshore wind. The wind can die at any moment or a line can break. In offshore wind it is harder to swim back to shore, the wind and the current pushing away from the beach. It is not recommended to ride when the wind is on-shore especially for beginners as the wind pushes directly onto the beach. This will make your learning harder: you will not be able to do good runs and go up wind, and you will end up on the sand very quickly. This will also be more risky the slightest gust could send you onto the sand and your kite may fall
violently onto the sand. Therefore always ride while the wind is side or side-on, you in terms will be able to go downwind while keeping a safe position in case of an emergency. The area down the wind: Be cautious and check that there are no obstacles going down wind. You should always consider room for error Keep in mind that the risk is to go down wind, beginner or not. You are not free from breaking a line, losing your board, or breaking your harness therefore the beach down the wind should always be accessible. Think that you may have to walk back alongside the beach (check that there are no rocks, cliffs, fences, or jetties blocking your way). ON-SHORE SEA NO OK OK OK OK SIDE-SHORE starboard SIDE-SHORE port side NO NO NO LAND OFF-SHORE SEA DOWN WIND AREA UP WIND AREA WIND If you are just starting out or if you cannot entirely control your kite, be careful as to where you stand on the spot: if the spot is big enough, it is better to stand upwind from other kites to
avoid crossing your lines with theirs. It is less tricky for you and them, this will allow you to concentrate on your flying and less on others. www.f-onekitescom OBSTACLES FREE AREA LAND 4 Source: http://www.doksinet SAFETY Rule n°4: Check the weather conditions Check with the local weather forecast, (radio, web, harbor crew). How strong are the winds and from which direction? You must know how the speed of the wind and the direction are going to evolve during the day. You should not ride during stormy weather, the kite may attract lightning! Also check on the tides schedules and the areas for rip currents. Rule n°5: Respect and help out others Put away your material Be careful not to unwind your lines on top of others’. The same applies when you put down your kite, be careful not to do it on top of someone’s line. This can become hazardous if he or she re-launches his or her kite without noticing your lines. If you leave your kite on the beach, to get some rest or just
waiting for better conditions, think of rolling up your lines on your bar to clear up the spot. Disconnect the lines from the kite if you are going to live the kite on the beach unattended. Avoid the kite at the zenith Avoid if possible staying with the kite at the zenith while you are still on the ground, better to take it down in order to get some rest. This could be hazardous for you and the others: you are not safe from a sudden lack of wind or a strong gust that could take you down. On the ground or the beach, falls are harder and they hurt. Your kite at the zenith can also disturb the others from landing and launching their kites. Help out others Always keep an eye on your surroundings, and pay attention to others. Do not hesitate to help out others launching and landing their kites, or going after a struggling kitesurfer. Respect the priority on the water When two kitesurfers are passing each other, the one closer to the wind origin should raise his kite and the kite surfer
under the wind should lower his kite to avoid a tangling of the lines. When two kitesurfers are facing each other, the kite surfer riding with the wind coming from starboard (right hand forward) according to the path followed has the priority over the kite surfer who’s wind comes from port side (left hand forward). The kitesurfer riding starboard should maintain his or her trajectory and the one riding port side should move further down the wind in order not to cross their paths. Before any jumps or direction changes, make sure there is enough room and that you are not going to cross anyone’s path. Respect bystanders. Inform the spectators of the power of the kite and of the potential risk by staying downwind from a kite surfer. Do not lend your equipment to a none kite surfer. Rule n°6: Learn to use your safety systems Do not fly your kite without a proper safety system allowing you to instantly kill the power of the kite and without a safety leash connecting you to the kite
once you have killed the power, this leash should also be releasable in case of an emergency. Frequently check the wear and tear of your safety systems. Do not wait for trouble to learn how to operate your safety systems. Chose a wide open area to practice your release of the kite. 5 www.f-onekitescom Source: http://www.doksinet WIND RANGE The wind range and the size of your kite are spamted on the kite and on the bag. The wind ranges are expressed in knots and the sizes in actual square meters. This wind range is given to you as an indication for a rider weighting 75 kilos. Wind range varies according to each rider. It depends on: WIND RANGE (knots) M6 • 10 12 14 16 19 16-28 12-26 10-22 8-18 6-16 The rider’s level: the more you progress the more you will be able to use the kite in the upper wind range. The rider’s weight: the bigger you are the more you will be able to use the kite in the upper wind range. The board’s volume: the more volume your board has
the more you will be able to use the kite in the lower wind range. • • You also must choose your kite according to: the aerological situation (the airflow quality), the weather conditions (wind direction, speed, forecast), and the overall quality of the spot and the level of safety it offers. When you get to the spot, measure up the wind speed. Take your time to figure out the conditions, don’t make any mistake, one minute is not enough, you need to control that the wind is steady free of gusts. Check out the other kites, their sizes, that will give you some indications on the conditions. If you hesitate between two kite sizes always take the smaller one, you will have more fun riding underpowered rather than overpowered. If you cannot walk backward alone with the kite in the air, that means that you are overpowered. Land your kite Bft Km/h Knots 0 1 2 3 <1 1-5 6-11 12-19 <1 1-3 4-6 7-10 4 20-28 11-16 5 29-38 17-21 6 7 39-49 50-61 22-27 28-33 8 62-74 9
75-88 10+ >89 34-40 41-47 >48 Description Calm, smoke raises vertically. Light air. Gentle breeze. Flags extended, good wind for beginners. First white caps appear; make your first runs. Trees begin to sway, attempt your first jumps. Sand blows on the beach, The white caps are all over, reserved to advanced riders. Resistance felt in walking against wind. Watch the power of nature. Stay home! www.f-onekitescom This table is only to be used for guidance. You should also take into account the wind density. Watch out also for unstable wind. 6 Source: http://www.doksinet SETTING UP YOUR KITE Inflate your kite Unroll your kite and position it so that one of its wing tips is located upwind from the other. Place some sand on the upwind wing tip of the kite. Before using the pump, operate it a few times to eject any sand left in the tube. This will prevent any sand from entering the kite’s bladders. The first few times you inflate your kite, pump the air into each bladder until
it is halfway full and « massage » it in order to correctly position the bladder inside the strut. Finish the inflation until the bladder is firm and full. Center struts are equipped with ball stoppers and side struts are equipped with stop valves, thus no need to pinch the valves. Careful, do not try to push the valve inside as you would do with an inflatable toy. Inflate the leading edge bladder last. Remove the sand from the kite and stand with your back facing the wind, attach your pump to your kite with a larks head knot using the connector next to the leading edge valve. Pump until it’s firm and wrinkle-free Make sure the defaltion valve is properly closed and sealed off with the Velcro cover. Place your kite on its leading edge with the struts pointing downwind and secure it putting sand on it.(1) Connect your lines to your kite Untangle your lines and put your bar down, with the F-one logo facing up. (2) Untangle the 5th line and place it underneath the front lines.
Connect the 5th line to the bridle (3) Connect the front lines to the gray front connectors of the kite. You need to do a lark heads knot with the connectors on the kite. (4) Connect your back lines, green on green, red on red(5) The front and back lines should not cross each other’s. WIND DIRECTION 1 4 3 7 2 www.f-onekitescom 5 Source: http://www.doksinet LAUNCHING Before launching Make sure you don’t have any lines on top of yours. Make sure your lines are free of knots, watch out because strong winds can tangle them up in a few second. Make sure your connectors are in good shape, on your kite and on your bar. Check your safety systems. Make sure you launching area is free of obstacles. If you are concerned of being overpowered ask someone to hold you down using the handle on your harness. Make sure your lines are free of any twist, front and 5th line. In case of twists, use the T-one to undo them. Make sure the pin in the safety push system is well in place. Launching
Launch your kite preferably with someone assisting you. You need to launch your kite in the edge of the wind window, meaning that the wind needs to be coming from one side, move in a way that you feel the power of your kite. Your lines need to be perpendicular to the direction of the wind. Advise your assistant to let go of the kite only when instructed by you (for instance raise your hand). Your assistant should hold the kite by the middle of the leading edge (near the valves). Under no circumstance should your assistant try to throw the kite (as if to get gain speed) but just let go of the kite. For your safety and the one of others choose someone competent enough to help you out in this maneuver. Always make sure that the lines do not cross each other or that they are misplaced. For that pull your center leader line to one side to clearly disengage your front from your back lines. Even if you are sure of your set up this last check up is necessary! Once the kite is air born it is
too late and the kite goes out of control perfect recipe for disaster. The launching phase should happen in slow motion, bring your kite to the zenith slowly to avoid being carried out. We do not recommended to launch without assistance. It is risky. The kite could take off on its own while you walk back to the bar. You will not be able to check if your lines are untangled That is why we do not go over this maneuver in this manual. Landing your kite with assistance When you come back to shore, choose a clean area to land your kite. The kite lands as it takes off, at the edge of the wind window. Ask someone to catch your kite by the middle of the leading edge, never by the tip of the kite. For your safety and the one of others choose someone competent enough to help you out in this maneuver. Landing the kite alone with the Active5 In case you wish to land your kite alone, all you need to do is activate the release system and the kite will land safely on the beach down your wind without
power. Be careful to allow enough space! When the kite is on its back on the ground it pulls no more. To get your kite, do not walk towards it while holding the 5th line, the kite may relaunch inverted. It is necessary to tie the 5th line to a solid object then go get the kite safely. Do not leave the kite in this position, the leading edge of the kite rubbing on the ground my get damaged! www.f-onekitescom obstacles free area minimum 100m edge of the window edge of the window wind 8 Source: http://www.doksinet TUNING UP YOUR KITE Principles of 4 lines tuning: In theory, to tune your kite you have to adjust the lenght of your center and outer lines. Shortening your center lines (black tips) reduces the power generated by your kite, shortening the outer lines (green and red tips) increases the power generated by your kite Caution: these tuning techniques have limits – excessively shortening your centre lines will render your kite hard to steer, and over-shortening your outer
lines will overpower your kite and ultimately make it fly backwards. In practice, to reduce the power generated by your kite whilst sailing: push your bar away from you whilst hooked into the depower loop or pull on your power adjustment strap. On land, select a knot on the center leader line closer your strap. To increase the power generated by your kite whilst sailing: pull your bar towards you whilst hooked into the depower loop or loose off your power adjustment strap. On land, select a knot on the center leader line further your strap. On land, before sailing, use the knots on the center leader line : To find the best tuning try different knots on the center leader line. Begin by the middle knot and play with your adjustment strap while riding. If you feel better with the adjustment strap pulled,select a knot closer to your bar and release your strapYou must reserved the full adjustment capacity of this strap in case a sudden increase in wind requires you to reduce power Check
your kite is correctly tuned: with your kite above you at the zenith, hooked into both loops, the kite wingtips should appear slightly open (see pictures below). Your kite is correctly tuned. 9 Your kite is too open: shorten your centre lines. www.f-onekitescom Source: http://www.doksinet TUNING UP YOUR KITE Whilst sailing, use the depower system and the adjustment strap : Get in the habit of regularly adjusting your strap to complement the depower system – you should be able to sail comfortably with your bar in the middle of its depower range. (1) You should never sail with your arms fully extended, as you would have no further depowering ability in a gust. In this scenario you should pull on the centre line adjustment strap. You should never sail with the bar pulled all the way towards you, as you will loose control and power. In this scenario, if you want more power, simply release the strap In very light winds it is often best to hook in to both loops and therefore not
use the depower capability, instead flying your kite aggressively using the full height of the wind window in order to generate power. (2) Caution: in some cases even the adjustment strap will not allow you to depower sufficiently – in this scenario you should land the kite and use the knots on the center leader line of the front lines. 1 2 www.f-onekitescom 10 Source: http://www.doksinet USING THE UPS The Ultimate Power System (UPS) is many things at once: release, mini harness hook, swivel, 5th line power management. Thanks to the T-one you can easily undo the turns in your lines, as no lines or leash are connected to you, both the 5th line and the depower line go thru the bar’s center hole! T-ONE: allows while riding the adjustment of the power by looping the 5th line around and the undoing of the twists. HOOK: in order to get connected to the mini hook. FINGER: prevents the chicken loop from unhooking while riding. It can be removed by expert riders whishing to do
unhooked tricks. RELEASE: second and last release of the kite, can be place on either left or right side: once activated the kite is lost. We spend a lot of time making sure the entire set up could be personalized: the chicken loop release is mounted on the UPS and can be place on either the left or the right side. We also provide this set up with two lengths of chicken loops: one standard and one long for unhooked tricks. RIDING UNHOOKED Replace the standard chicken loop by the longer version. Undo the center finger from the UPS. Unhook the 5th line from the T-one and attach it directly onto your leash. (Warning: you must be able to release your leash in case of necessity!) If you let go of your bar during an unhooked trick, it will run along the 5th line and your kite will land safely on its back with no power. Pull on the 5th line to retrieve your bar. 11 www.f-onekitescom Source: http://www.doksinet TUNING UP THE ACTIVE 5 The bar is sold with the Active5 mounted and
pre-adjusted. Each bar is set for a specific size With the table below you can see that the same bar can be used for sometimes more than one kite. For example: ■ ■ You can use the M6 16sqm bar, on the M6 19sqm by adjusting the stopper (B). You can use the M6 12sqm bar, on the M6 14sqm by adjusting the stopper (B). FONE BAR FACTORY SET UP X M6 Stopper (B) Front lines (Y) (Minimum) Bridle (X) Y 10 70 cm 14 m 140 cm 12 50 cm 14 m 165 cm 14 25 cm 14 m 183 cm 16 5 cm 17 m 240 cm 19 5 cm 17 m x B www.f-onekitescom 12 Source: http://www.doksinet TUNE UP THE ACTIVE 5 Tension on the 5th line: The 5th line is preset “loose” to not hinder the flying of the kite. It tightens while you depower and increases the depower (see drawing). The 5th line loosens up when you power the kite If it does not loosen up it means that you have pulled on it too much or it is too short. INCIDENCE control with the Active 5 kite powered, maximum traction the 5th line is loose
kite depowered, reduce traction the 5th line tightens adjusting the tension of the 5th line, you directly manage the incidence of the center part of the kite to decrease the power. Never a system has offered you such comfort. If the 5th line is too short, the kite will depower and you will loose performance in the lower wind range of the kite. If the 5th line is too long it will be harder to depower by pulling on it, and the risk of having your lines getting tangle will increase in riding or in case of a release. You can adjust the length of the 5th line at the lower part of the Y. There are 3 adjustment knots +/- 10 centimeters. Factory set up is the center knot Ring stopper position: If the ring is placed too high (too far from the bar): the kite will fly inverted (leading edge facing down) without landing. If the ring is placed too low (too close to the bar): the kite will not loose enough power and will keep on pulling you. 13 www.f-onekitescom Source: http://www.doksinet
Riding with the ACTIVE 5 You can reduce the power of your kite momentarily. To do so, grab the 5th line with your hand, the same one holding the bar. This allows you to walk safely on the beach going to the water (1). At sea this can help you retrieve your board while swimming with less power (2) 1 2 You can manage the power of the kite, by tuning the tension of the 5th line while riding thanks to the T-one. To decrease the power of your kite, roll up the 5th line around the T-one (see picture) If, when you pull down on the bar, the 5th line does not loosen, you have rolled up too many times. Release some. Regularly undo the turns in your center lines by turning the T-one, in order to not hinder the functioning of the Active 5 in case of a release. www.f-onekitescom 14 Source: http://www.doksinet Triggering the ACTIVE 5 The PUSH SYSTEM To cancel completely the power of the kite and to make it land on its back down your wind safely, simply push the bar away from you in order
to active the system then let go of the bar. You then remain connected by the depower line and the 5th line. (see picture) This system of release by pushing of the bar is totally instinctive and instantaneous. Beneath the system we have place a PU disk working as a shock absorber to prevent from unwanted releases. PUSH WARNING If the 5th line gets wrapped around the kite, unhooked it from the T-one (see picture). Ride back to shore with the 4-line set up and reconnect the 5th line. 15 www.f-onekitescom Source: http://www.doksinet RELAUNCHING Relaunching your kite . 1 1 When the kite falls face down on the leading edge, you first need to make it flip. 2 To do this, pull on the 5th Line so the kite falls on its back. Once this is achieved, release the 5th Line. 4 3 Make sure you are holding the bar the right way. Pull on one side of the bar to make the kite come to the edge of the wind window. If necessary, you can pull on 5 feet of back line with your hand. The kite will
slide onto its tip, on the side you are pulling the back line from. Always maintain tension on this line. To do this you can swim on the opposite direction to speed up the process. Be careful, by pulling too much the kite will fall forward on the leading edge, to avoid that release the tension and let the kite follow its course to the edge of the window. 5 Once the kite reaches the edge of the wind window, you may proceed to relaunch the kite. Make sure your chicken loop is not unhooked during the launch, you may get pulled hard otherwise. 17 6 Do not wait for the kite to fall in order to learn this procedure, practice a few times when you are in a safe environment. www.f-onekitescom Source: http://www.doksinet REPAIRING Repairing kite bladders To repair your bladder you will need a set of flying lines and a patch repair kit (supplied with kite). Avoid repairing your kite on the beach or in windy areas Find a clean spot out of the wind Lay the kite out flat with all bladders
facing up and deflated. Tie a “pull” line to the extremity of the bladder to be replaced or fixed. You’ll use this line to pull the bladder back in. If you’re repairing a strut bladder, the line should be tied to the base of the valve. If you’re repairing a leading edge bladder, a line should be tied to each end of the bladder The “pull” line should be longer that the bladder. Do not pull the bladder out by the “pull” line - its only use is to guide the bladder back in. Push the air valve entirely in and for the leading edge bladder, open the zipper flap near the middle of the leading edge and pull the bladder out, first one side, then the other. For the struts, pull the bladder out from the back of its casing. When the bladder has been removed from the kite, the “pull” line should pass through the tube and extend from each end. Inflate the bladder and wipe soapy water on it with a sponge. Holes are indicated by air bubbles Small leaks can be hard to find Dry and
clean the bladder with a towel, circle the leak with a marker and then deflate the bladder. Using the sandpaper enclosed in the repair kit, sand down the surrounding of the hole, peel the backing off the repair patch and apply it on top of the repair area. Wait two hours before usage. Close the valve and fold the bladder like an accordion, with the air valve lined up to the opening on the strut and insert it back. Guide the bladder in by slightly pulling in the rope Once completely inserted, make sure that the air valve is properly exposed through the valve opening Install the zipper back. Inflate the bladder until it is half full with air. Check to make sure that the bladder was inserted correctly and that there are no folds in the bladder material If you detect a crimp in the bladder or the air valve appears misaligned, stop and re-insert the bladder. Failure to correct the problem at this point can cause severe damage to the bladder when it is fully inflated. Roll the excess bladder
material into the tip of the rib and reconnect the Velcro strap under the securing loop. Repairing the kite fabric To repair your kite fabric you have to use kite repair tape. You can find those tapes in kitesurf shops. Before repairing the tear your kite must be rinsed and dry. Lay your kite out on a clean and flat surface. Cut out two sized strips of adhesive skin large enough to cover the entire tear. Stick one piece over the tear and rub it down in order to eliminate any air bubbles. Stick the other piece on the other side of the material in the same way. For majors tears ( > 10 cm) consult your dealer for a kite repair loft. www.f-onekitescom 18 Source: http://www.doksinet GLOSSARY SHEET OUT De-power: the system which alows you to control the amount of power developed by the kite, by pushing (sheet out) or pulling (sheet in) on your control bar. SHEET IN The window: is the region in which your kite can operate. Edge of the window: the power generated is moderate.
Zenith: the kite is at the zenith when it is directly above you. It’s called the neutral zone, the kite has minimum power. Power zone: maximum power is generated when the kite is located at the centre and towards the bottom of the window. ZENITH ZENITH power zone edge of the window edge of the window Reach: a direction of travel relative to the wind direction. Generally 90-160 degrees off the wind Going upwind: a direction of travel relative to the wind direction. 10-70 degrees off the wind. Going downwind: a direction of travel relative to the wind direction. 170– 190 degrees off the wind WIND UPWIND REACH Upwind: the direction from which the wind is coming. Downwind: the direction in which the wind is travelling. DOWN WIND AREA UP WIND AREA DOWNWIND WIND ON-SHORE Side or cross shore: wind is blowing from the left or.from the right, in a perpendicular direction to the shore. Off shore : wind is blowing from the land out to sea. On shore: wind is blowing from the water
toward the land. Starboard: wind blowing from the right. Port side: wind blowing from the left. SEA NO OK OK OK OK SIDE-SHORE starboard SIDE-SHORE port side NO Lark’s Head Knot NO NO LAND OFF-SHORE 19 www.f-onekitescom Source: http://www.doksinet KITE CARE Packing up your kite Deflate all the bladders. To deflate the little struts with non return valve press on the valve Starting from one wingtip roll up your kite all the way to the middle of the leading edge, then do the same from the other wingtip. Close up the deflation valve to ensure no dirt gets inside the inner tube. Kite care Rinse your kite from time to time, but do not store it in a humid place. We recommend that you rinse it and let it dry out while inflated. If you must rinse it while deflated, make sure the valves are shut. Do not store your kite for long periods of time inflated, difference in temperature and air pressure might damage the inner tubes. Do not store your kite under the sun for long
periods of time, this may damage the inner tubes or fabric. If you are not using the kite do not let it sit on the beach, it will work as a flag and this will increase the wear and tear on the fabric. When taking a break be sure to cover each panel with sand so they don’t flap around. Regularly rinse off your bar and lines, let them soak in a tub. Regularly check the wear on the connectors, kite, leader lines and lines side. At the first sign of wear, replace them. Particularly pay attention to the rubbing points especially on the larks head knots. Watch for knots on your lines, this weakens them Regularly rinse off you bags and check the zippers, and make sure no salt is accumulating. If locked by salt pour boiling water on the salt to dissolve it. PROBLEMS and SOLUTIONS My kite flies too far over head: Your front lines (black sleeving) are too short. Reconnect your front lines on central leader line by reattaching the front line to a knot fur ther from your bar. Make sure your
spot doesn’t loose wind du to high cliffs or buildings. My kite doesn’t fly over head: Your front lines (black sleeving) are too long. Reconnect your front lines on central leader line by reattaching the front line to a knot closer to your bar. My kite turns better to one side: Your back or front flying lines are not the same length. Pull hard on the shorter line by given quick and strong pulls until it extands to the correct lenght. For the back lines you can also use the adjustment straps on the leader lines. www.f-onekitescom 20 Source: http://www.doksinet WARRANTY F.ONE warrants this product to be free of major defects in material or workmanship to the original purchase for a period of 1 year from the date of purchase. This warranty is subject to the following limitations: This warranty is valid only when this product is used for normal recreation, and does not cover products used in rental or teaching operations. F.ONE will make the final warranty decision, which may
require inspection and/or photos of the equipment, which clearly show the defect(s). If necessary, this information must be sent to F.ONE distributor in your country This product can be returned only if a return authorisation number is given by the F.ONE distributor in advance. The original purchase receipt must accompany all warranty claims. The name of the retailer and date of purchase must be clear and legible. If a product is deemed to be defective by F.ONE, the warranty covers the repairs or replacement of the defective product only. FONE will not be responsible for any costs, losses, or damages incurred as a result of improper use of this product. This warranty does not cover damage caused by misuse, abuse, neglect or normal wear and tear including, but not limited to, punctures, rigging with anything other than F.ONE components, damage due to excessive sun exposure or to winds on the beach, damage caused by improper handling and storage, damage caused by use in shore break, and
damage caused by anything other than defects in material and workmanship. FOR ALL WARRANTY CLAIMS, CONTACT YOUR NEAREST RETAILER. 21 www.f-onekitescom Source: http://www.doksinet YOUR RETAILER SERIAL NUMBER Carefully write down your kite’s serial number. It is located on one of the wing tips. This number will come in handy for after sales related issue and in case your kite gets stolen. www.f-onekitescom 22 Source: http://www.doksinet www.f-onekitescom
