Datasheet
Year, pagecount:2013, 17 page(s)
Language:English
Downloads:5
Uploaded:January 03, 2019
Size:1 MB
Institution:
-
Comments:
Attachment:-
Download in PDF:Please log in!
Comments
No comments yet. You can be the first!


Content extract
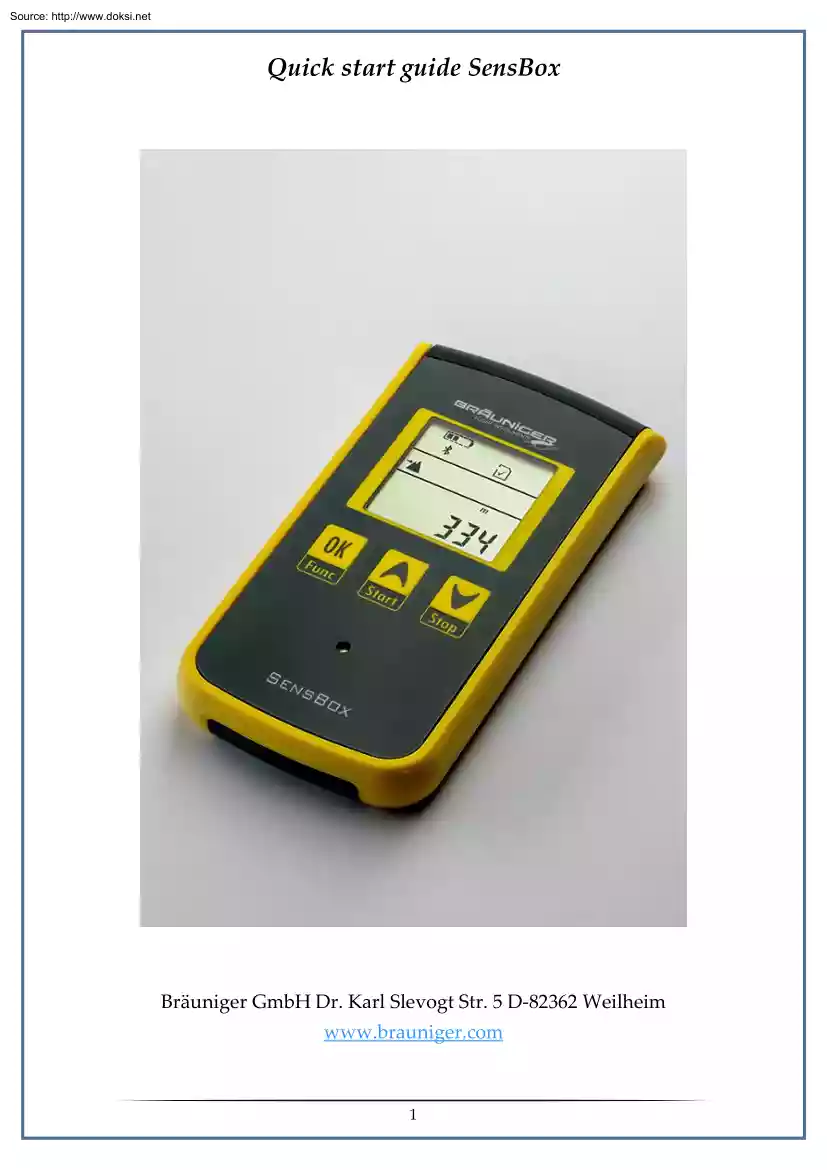
Source: http://www.doksinet Quick start guide SensBox Bräuniger GmbH Dr. Karl Slevogt Str 5 D-82362 Weilheim www.braunigercom 1 Source: http://www.doksinet Quick start guide SensBox 1. Table of contents 2. Operating elements . 3 3. General information . 4 4. Startup . Fehler! Textmarke nicht definiert 5. Switching-on/and –off the SensBox . 5 6. Firmware update . 5 7. Selection and settings of display mode . 6 8. Summary of operation levels . 8 9. Description of single modes. 9 7.1 Altimeter 9 7.2 Variometer 9 7.3 Air pressure display 10 7.4 Magnetic compass 10 7.5 GPS - Speed over Ground 11 7.6 Position by GPS 11 7.7 Time of day 12 7.8 Recording memory 12 7.9 G-Display 13 7.10 Acoustic mode 14 10. Data transfer via Bluetooth 4.0 LE 14 11. Evaluation of recorded flight- or trip data . 15 12. Technical data . 16 13. Guarantee . 16 14. Notes . 16 2 Source: http://www.doksinet Quick start guide SensBox 2. Operating elements On-/Off switch
Status display Menu display Measured data Control keys Access for Micro USB, jack and SD card The present quick start guide is based on Firmware version 1.0006 All technical data are subject to modifications. Please watch out on our website for new firmware versions and adaptations of this manual. 3 Source: http://www.doksinet Quick start guide SensBox 3. General information The SensBox is a universally usable Sensor platform for leisure activities in a wide and varied range. The measurements provided by this device serve as information for the user and are intended to support him in his activity. The instrument records his movements in 3D on a SD-card in the internationally common *.igc format. The *.igc file is provided with a digital signature which will make visible possible manipulations of the file. The execution of all activities is however always carried out in ones own responsibility. Bräuniger GmbH may never be held responsible for a possible malfunction of the
SensBox in no application whatsoever. The casing is waterproof. Therefore the SensBox can be used for all outdoor activities 4. Startup The SensBox is supplied with the following components: a. USB cable b. USB plug-in power supply for 100 240 V~ c. 4 GB SD smart card ( inserted into the device ) d. carrying pouch Before the first switch-on of the SensBox please check if all parts are present. As the next step the built-in Lithium-accumulator should be charged once. For this purpose please connect the USB cable with the SensBox and the plug-in power supply. The charging process will be automatically stopped upon fully charged battery and will last several hours according to battery status. Due to the fact that it is a standardized USB interface, the SensBox can also be charged at other USB charge ports. 4 Source: http://www.doksinet Quick start guide SensBox 5. Switching on/and -off the SensBox Please press the On/Off key, the display shows „ON“, then press the „OK“ key
for confirmation. The instrument will then automatically switch to operation mode via display of the devices serial number and of the installed firmware version. Switch-off: if the Switch-on/-off key is pressed for at least 3 sec., the display shows „OFF“, which is then confirmed with „OK“. By this process all data are stored on the SD card. 6. Firmware update In general the SensBox is provided with the current firmware. However, because time and again improvements, or the removal of bugs require an adaptation of the firmware, it is recommended to watch for the currently valid firmware. Upload of a new firmware: Switch-off the instrument. Insert the SD card with the new firmware file into the device. Press the key and simultaneously press a long time the Switch-on/-off key. The device queries OK? -> Confirm by pressing the 5 key. Source: http://www.doksinet Quick start guide SensBox Reset: If the device does not perform as expected (crash of the firmware) one can
reset it by simultaneously pressing the keys and as well as the on-off switch. 7. Selection and settings of diyplay mode Handling of the SensBox is in principle self-explanatory and easy. After switch-on the altimeter function is always displayed. The basic setting of the altimeter is adjusted in the factory to the 1013 hPa standard. If display of the current altitude value for the respective location is required, the SensBox must be adjusted to the actual atmospheric pressure, such as any other barometric altimeter. This is performed in menu item Air pressure, unless the actual altitude value is known and can therefore be adjusted. Each further pressing on the „OK“ key shifts to the next display mode. In the current firmware 1.0006 are available 9 ( 10 ) modes: Altimeter Variometer - optical and acoustical Air pressure ( QNH ) Magnetic compass GPS Speed over Ground GPS Position Time of day ( UTC ) Memory display Acceleration ( momentarily
not yet active ) Volume According to the mode which is displayed, it may be necessary to execute an adjustment of the display. This procedure is in principle the same for most of the display modes. Therefore it is exemplarily described and illustrated here in detail only once. At this point the correction of altitude display is described. As the altitude display is changed according to atmospheric pressure, it is necessary to perform a correction in order to have a correct barometric altitude display during a flight. 6 Source: http://www.doksinet Quick start guide SensBox The example presents on the display the altitude of 520 m, however, the actual altitude is 470 m. For access into the Set Mode the key must be pressed for at least 3 sec. Then the SensBox is shifted to Set Mode, the altitude display is flashing. By use of the arrow keys „up“ or „down“ the altitude display can now be adjusted to the correct value – as far as known. Either confirm the
value with „OK“ , or wait for 30 sec. until the flashing stops. The new value is automatically accepted If no altitude is known, but the daily updated air pressure, it is possible to rectify this known value in mode "Air pressure". The proceeding is identical. Afterwards the altitude display is adjusted automatically. Caution: all settings can also be performed by use of a small PC-Tool SensboxConfig. The programme is available for Windows and MACcomputers The tool can be downloaded from our website free of charge, or it is downloaded directly from the SD card on which it is stored, such as this quick start guide. Please refer to Notes on page 16 7 Source: http://www.doksinet Quick start guide SensBox 8. Summary of operation levels Units ↑↓ Function Set Set Special Arrow keys 99999 m, ft, FL Altitude +/-99.9 m/s, ft/min*100 1099.9 hPa, inHg QNH Offset 359° N Only ° Compass or Calibration Alti, Filtering Vario Pressure Compass or Track
Track Speed Position 999.9 km/h, mph, kt 47°N -> dd°mm.mmm‘ 15.387’N -> 8°E -> 17.389’E 23:59 Europe, America UTC Offset Time of day Flight time, 9:59:59 Automatic, Recording time Semi-automatic, Manually, Memory Pairing 0-99% Level, free storage Recording space interval 5-3 (number Flylink or of partners – BlueTooth partnernumber) Volume Buzzer 0 up to 4 Louder/Lower step as number Audio Settings More Audio Settings 8 Source: http://www.doksinet Quick start guide SensBox 9. Description of single modes 7.1 Altimeter The barometric altitude is displayed through an air pressure sensor. The altitude value can be displayed in meter = m, or feet = ft. Switching of measurement unit is performed by one of the arrow keys. ‹ Active functions ‹ Selected mode ‹ Measurement or default value, presently altitude 446 m 7.2 Variometer The Vario display is presented exclusively in digital form. In addition the SensBox is equipped with an
acoustical Vario for rise and sink rates. The volume can be modified in Acoustic mode. For this reason the SensBox is also ideally suited as Back-Up Vario for paraglider and hang-glider pilots. ‹ Vario display: 0.0 m/s 9 Source: http://www.doksinet Quick start guide SensBox 7.3 Air pressure display The current air pressure QNH can be displayed in hPa as well as in inHg. The necessary adaptation is performed as described under point 7. ‹ Air pressure display 28,03 inHg 7.4 Magnetic compass Display is executed digitally in degrees. ‹ The SensBox points in longitudinal axis to 178° 10 Source: http://www.doksinet Quick start guide SensBox 7.5 GPS – Speed over Ground Through the GPS module Speed over Ground is displayed in case of active satellite reception. Display can be made in km/h – mph – kt – m/s Selection is performed by use of the arrow keys. ‹ Speed: 0,0 km/h 7.6 Position by GPS In case of active satellite reception the current position is
displayed here once in the northern „N“ or „ S“ position, and by pressing the arrow key the „E“ or „W“ position in format degrees, minutes, seconds. ‹ 11 Position: 47° 44‘ 00‘‘ N and 12° 52‘ 47‘‘ E ( East ) Source: http://www.doksinet Quick start guide SensBox 7.7 Time of day At this item is displayed the UTC time which is synchronized via satellite. The adaptation to local time in steps of ½ h is possible in Setmode. ‹ Time display 7:23:01 7.8 Recording memory At this item is displayed the storage space of the inserted SD card in percent. In addition it is possible to adjuste here the recording interval and the start conditions. The following modes are available, for which respectively a scanrate of 1 – 2 – 3 – 5 – 10 – 30 sec needs to be adjusted: Mode O = Manual start and stop by use of the keys, recording termination and saving on SD card must be confirmed with OK key. Mode I = Recording begins immediately after switch-on
with pre-selected scanrate. Mode A = Automatic if the following value changes are present: 10 km/h GPS speed or 1,5 m/s Vario deflection or 30 m change in altitude. The recording rate is set in Set Mode for each mode. 12 Source: http://www.doksinet Quick start guide SensBox ‹ Memory space 0 % 7.9 G-Display This item displays the maximum acceleration up or down to which the SensBox was exposed during a flight or trip. As from firmware FS 0108 the display will shift in Compass mode to ACC = acceleration by pressing the arrow key. The feature G-Display is not yet activated on the actual firmware. ‹ acceleration 1.0 G = neutral position 13 Source: http://www.doksinet Quick start guide SensBox 7.10 Acoustic mode This item allows for adaptation of the Vario volume. Display is effected in percent and is performed by the arrow keys only. ‹ set value 100% The acoustic mode has even more filter settings in the extended Setmode. However, these settings should be entered
by PC in the SensBox Tool Programme. 10.Data transfer via Bluetooth 40 LE The SensBox is fitted with the newBluetooth - Mode 4.0 LE (Low Energy) This mode allows for a very energy-efficient data transfer within the near field range, such as already standard on new smartphones and tablet –PC devices, or is expected to become standard. After switch-on the SensBox will try to connect with a device being present within reach = pairing. This is visible by the flashing Bluetooth symbol Apples iPhone 4S as also iPad are already fitted with this standard. Android based smartphones are to follow. For the Apple devices a very efficient app of flight navigation programme called „freeflight“ is available from Butterfly-Avionics. On purchase of the SensBox the access code for this app is already included. 14 Source: http://www.doksinet Quick start guide SensBox As soon as an iPhone with this app is recognized by the SensBox, all flight-related sensor data are transmitted live to the
iPhone. In addition to a map presenting all Restricted Areas are also illustrated besides Vario, altitude, GPS-speed other extensive navigation aid information. There is the possibility to manage and display flight plans, such as Routes, Waypoints etc. ›››››››››››› 11. Evaluation of recorded flight- or trip data The SensBox saves according to application a flight or trip as *.igc file All flights are automatically stored on the SD card. Due to this SD card it is possible to read-out these data independently from the operation system on any PC being equipped with SD card slot, or by use of the USB cable. It is only necessary that the computer is fitted with a tool which allows for read-out of *.igc data and to convert them if applicable into Google Earth files. For Windows equipped computers our programme Flychart is well suitable for the presentation and evaluation of the flight files, as also for upload to Google Earth. There are also very simple tools
available which only convert the *.igc file into a Google *.kml file 15 Source: http://www.doksinet Quick start guide SensBox 12. Technical data Altimeter: Digital Vario: Acoustical Vario: Air pressure: Speed (GPS): IGC Logger: Compass: Position display: Time of day: Dimensions: Weight: resolution 1m - up to 11000 m / ft +/- 99,9 m/s variable volume up to 1099,9 hPa ( inHg ) 1 up to 1800,0 km/h, ( mph, kt, m/s ), resolution 0,1m/s up to approx. 24 hours with 1 s recording rate in internnal memory, unlimited on SD card Auto / Semi-Auto / Manual. Max 35 flights per calendar day 359° N format: dd°mm’ss“ 23:59 Europe and US with UTC Offset, also ½ h. 62 x 121 x 17,5mm 137 g 13. Guarantee The guarantee period is 24 months. In case of failure please forward the device to a Bräuniger dealer, or send it directly to Bräuniger. For more details please contact directly Bräuniger GmbH. 14. Notes 16 Source: http://www.doksinet Quick start guide SensBox Screenshot of
SensBoxConfig tool, menu Acoustic with diverse settings. Screenshot of a very simple igc for kml converter programme: www.maddyhomecom It is only required to select the igc or gpx file and to click the button „Generate KML“ This generates a Google Earth File which immediately starts the upload. 17
 Just like you draw up a plan when you’re going to war, building a house, or even going on vacation, you need to draw up a plan for your business. This tutorial will help you to clearly see where you are and make it possible to understand where you’re going.