Datasheet
Year, pagecount:2013, 14 page(s)
Language:English
Downloads:6
Uploaded:January 31, 2019
Size:1 MB
Institution:
-
Comments:
Attachment:-
Download in PDF:Please log in!
Comments
No comments yet. You can be the first!


Content extract
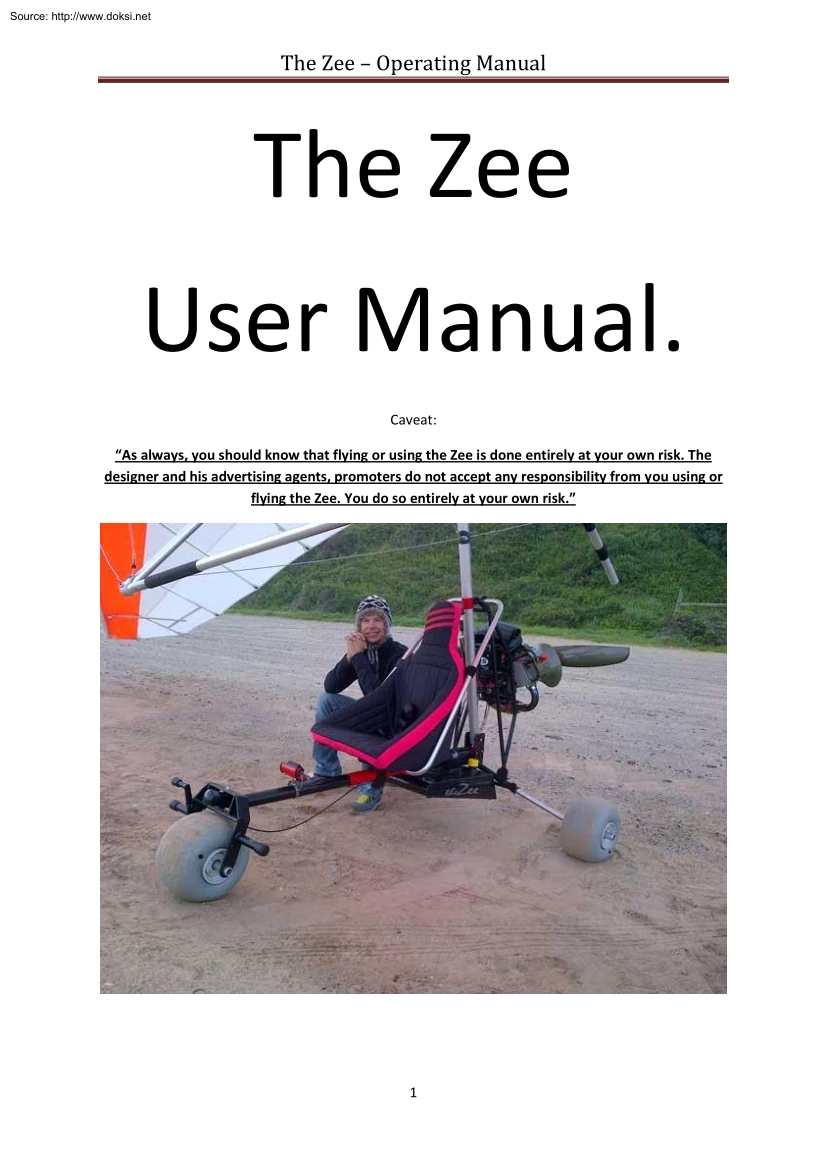
Source: http://www.doksinet The Zee – Operating Manual The Zee User Manual. Caveat: “As always, you should know that flying or using the Zee is done entirely at your own risk. The designer and his advertising agents, promoters do not accept any responsibility from you using or flying the Zee. You do so entirely at your own risk” 1 Source: http://www.doksinet The Zee – Operating Manual Contents. Table Page 1) Introduction 2) Operating limitations 3) Rigging a) The undercarriage b) Fitting the engine c) Fitting the pylon tube d) Fitting the wing to the undercarriage 4) Parking the Zee 5) Flying the Zee 6) Take offs 7) Thermaling 8) Ridge soaring 9) Restarting 10) Landing 11) Dismantling a) Removing the wing b) Removing the engine c) Folding the undercarriage 12) Maintenance 13) Problems 14) Specifications 15) Ordering 16) Spares 3 3 4 8 9 9 10 10 10 11 11 13 13 14 14 14 2 Source: http://www.doksinet The Zee – Operating Manual Introduction. Firstly let me say
thank you for choosing a Zee. We pride ourselves in having produced a product that not only looks good but delivers. The Zee is a motorised soaring hang glider Its primary purpose is to enable and aid in soaring flight. Soaring flight is defined as staying aloft on rising air currents solely. ie without the aid of a motor Operating limitations. The Zee must never be operated beyond the certified manoeuvring and weight limitations of the wing. The wing that comes with the Zee is the Wills Wing Falcon 2/3 tandem wing Notes on the Falcon Tandem hang glider. Wills Wing produces the Falcon range of hang gliders The Falcon range have proved to be the most popular and successful line of hang gliders in the world. When it comes to aerobatics, every single one of Wills Wing gliders are not certified for aerobatics. In fact the user manuals expressly forbid manoeuvring beyond 60degrees bank and 30 degrees in pitch angle. Even so hang glider pilots often participate in hang gliding aerobatics In
much the same way all their wings are not certified for the use with a motor. Even so pilots have found the tandem wing to be very suitable for this application. However, it is worth taking note to the uncertified risks of motorised flight with this wing. Most hang glider wings have not been designed to take into account engine vibrations. However, from experience we have found the Falcon tandem wing particularly suitable for this application. The wing has been very well engineered due to the habit of tandem hang glider pilots to fit a permanent three wheel undercarriage on the airframe whilst engaged in aero towing. The role on rough terrain exposes the airframe to vibrations and forces outside that of the normal hang gliding flight envelope. The Wills Wing designers have taken this into account and beefed up the airframe considerably of the Falcon tandem hang glider 2/3 and later models. Of all hang gliding wings we have found the Falcon tandem to be very suitable for powered hang
gliding flight. Even so the pilot should take note of this limitation and familiarise him/herself with any excessive vibrations due to the engine used. We recommend electric units for their vibration friendliness 3 Source: http://www.doksinet The Zee – Operating Manual Rigging/assembly. Assembling the undercarriage. The Zee undercarriage is uniquely designed to fit together with two pip pins and one threaded lock lever bolt. There are no tools required for assembly Assembly time will vary according to your familiarity of the Zee but should not take more than 15 minutes. 1) 2) 3) 4) 5) 6) 7) 8) 9) Swivel the seat frame forward and under the seat main pylon tube. Engage the seat frame forward slide assembly onto the seat main pylon tube. Align the holes with the use of the locking lever bolt. Slide in the fork tube to line up the holes and insert the locking lever bolt from the bottom up. Secure the locking lever bolt. Do not over tighten this bolt A light hand push is all that
is needed to manoeuvre the locking lever into position. If you have to force this lever, undo the locknut half a turn and try again. Chock the front wheel. Tilt the undercarriage to the left side and remove the rubber protector from the wheel female strut. Insert the right wheel main strut and secure with the pip pin. Ensure the chock is still in position and repeat the procedure to insert and lock the left wheel. 4 Source: http://www.doksinet The Zee – Operating Manual 10) Feed through and secure the seat support strap. 11) Fit the seat and secure the Velcro tabs on the bottom of the seat to the seat frame. 12) Fit the seat belts through the slotted holes of the seat. Fitting the motor. The motor has a custom designed mounting frame. This frame allows the motor to be fitted to any Zee undercarriage. It is a unique Zee feature It also boasts the quick one-wing-nut-exchange feature unique to the Zee. 1) Hold the motor by the lifting handles and tilt the motor forward at a
slight angle 2) Slot the top gap of the engine mounting frame onto the top horizontal engine frame tube. 3) Make sure the engine mounting frame is centred on the undercarriage top horizontal engine frame tube. 5 Source: http://www.doksinet The Zee – Operating Manual 4) Wiggle the engine slightly from side to side until the engine frame top slot is driven home or flush onto the undercarriage top horizontal engine mount tube. 5) Ensure the engine mounting frame bottom slot lock lever is in the open position. 6) Ensure the electric wiring and throttle cables are clear. 7) Swivel the engine down and forward until it engages with the undercarriage bottom horizontal engine frame tube. 8) Engage the engine mount bottom slot locking lever with washer and wing-nut. 9) Finish by securing the locking ring in place. 10) Connect the electric wiring with plug. 11) Fit the throttle cable to the foot throttle as indicated. 6 Source: http://www.doksinet The Zee – Operating Manual Fitting
the main pylon tube. The main pylon tube 1) Ensure the pylon tube is front forward. Use the Keel limiter line as indication of what is front or back. 2) Fit the bottom of the main pylon tube to the undercarriage pylon mounting plates. 3) Secure the washers and wing-nut with the locking ring. 4) Fit the back-up strap around the undercarriage rear fork assembly and close the loop with the quick link. Fitting the wing. There are two main ways of securing the wing to the pylon tube. Strong wind method and light to no wind method. In light winds place the wing nose down into wind In strong winds keep the wings level and facing into wind while the wing angle of attack is neutral. It is advisable to have a helper holding the nose of the wing in stronger conditions. 1) The pylon tube must be secured to the undercarriage pylon mounting plates by this stage. 2) Align the undercarriage behind the wing so it tracks straight and is in-line with the wing keel. 3) Role the undercarriage forward so
that the pylon tube top end moves in under the keel between the A-frame apex to align with the main hang point stoppers. 4) Undo the hang block and fit that onto the keel. 5) Slot the hang block plates into the hang block and line up the main support holes. 6) Insert the main hang bolt and secure spacers, washers and wing-nut. 7) Lock this with the locking ring. 8) Fit the back-up strap around the keel and lock onto itself with the supplied quick clip. 9) Ensure the back-up strap is fed underneath the cross bar tensioning cables. 10) In the light to no wind nose down configuration, role the undercarriage backwards so that the nose of the wing lifts off the ground until the front wheel roles just over the base bar. 11) In this position, chock the rear wheels. 12) In the strong wind rigging configuration you will already be at this point of assembly. 13) NB: Ensure the propeller is in the horizontal position. 14) Stand in front of the base bar and grip it like a weight lifter. Ensure a
wide grip for better stabilizing of the wing while lifting. NB: When lifting the wing make sure you keep the angle of attack of the wing neutral. ie do not allow the nose to go up so that the wing keel becomes parallel to the pylon tube. 15) Lift the wing holding the base bar up until the main pylon is lined up into the undercarriage pylon guide. 16) Slide the pylon locking mechanism down into the locking holes. Make sure the mechanism is down all the way and the safety ring hole is exposed. 17) Fit the safety ring to secure the pylon locking mechanism. 18) Pull the nose down as far as you can and secure the keel limiter cable to the nose fitting. 19) Rotate the prop to the top arc and increase the wing angle of attack to maximum. In this position gently role the wings left to right and check for clearance between the prop and the wing bottom rear cables. Adjust if necessary 20) Ensure the cable length is secured. 7 Source: http://www.doksinet The Zee – Operating Manual Parking
the Zee with the wing on. The Zee uses the Wills Wing Falcon tandem wing. This is a big wing and wind on the wing can create a substantial force. It is thus important and necessary for you to realise this and adjust your wing angles to minimise forces and the possibility of damage. There are two main ways we advocate to park your Zee. The first is with the nose into the wind NB!(Be careful of this position in all but the lightest of winds. The nose can lift and the wing fall over backwards resulting in damaged propeller at the least!) Use the seat safety strap to tie up the base bar in the centre of the bar. The wings will be at a slight negative angle of attack One can vary this slightly by positioning the wing at 45 degrees to the wind and tying the base bar so that the intowind wing will be as low as possible. Ie the safety belt will be near one corner of the control frame The other is with the wing angled to full forward position and one wing down. The downed wing must be just off
the wind direction so that the wind will gently push onto the back of this wing. In some cases it might be advisable to unclip the batten clips on the batten ends to lessen the load on these. NB: Remember to re-clip before flight. Note the VITAL pre-take-off checks! NB: Never ever putt the Zee so that the wind is directly from behind. The down forces on the reflex bridles are excessive and can damage the wing. 8 Source: http://www.doksinet The Zee – Operating Manual Flying the Zee. Flying the Zee is a pleasure. The control is easy, predictable and light There are no funny quirks and flying characteristics are straightforward and predictable. The bar feedback is very positive in both role and pitch. Take offs. Before embarking on flying the Zee make sure you have had proper training and are qualified to do so. Flying can be very unforgiving to the untrained even resulting in death Before taking off in the Zee, first make sure you have a field that is suitable for take offs and
landings and in case of an engine out they are within easy reach in glide. More importantly make sure you have the land owner’s permission to fly from there. Zee take offs will be of the easiest take offs you will ever do. It is almost as easy as, point the nose into wind, keep the wings level with the bar forward, lock your feet with the front wheel straight and gently apply power. Lift off will be achieved in just a few seconds NB: After lift-off allow the bar to gently move back to the trim position. Never ever keep the bar in the pushed out/forward position after take-off. In addition there are a few items that are useful to know too. These will be discussed by your instructor during your PHG course. For the sake of safety we have included a few tips that as a minimum you should be familiar with. Take offs can be divided into the following main categories: 1) 2) 3) 4) 5) 6) 7) zero to light wind take offs in smooth air zero to light wind take offs in rough air strong wind take
offs cross wind take offs short field take offs soft field take offs wet field take offs Each will require a slightly different technique which the pilot must be familiar with before executing. Make use of a properly qualified instructor in your training of PHG In a typical take off, the wings must be into wind and level. The bar almost fully forward Keep the nose wheel straight and your feet locked. Gently apply power to full throttle If you need, gently steer with the nose wheel to keep running straight or use mild weight shift on the wing. As soon as you lift off gently allow the bar to return to trim position. Keep full power Adjust climb angle with bar pitch movements. Keep full throttle Adjust direction with role inputs Keep full throttle Only once a safe altitude is reached come back to cruise climb throttle setting. NB: Note that initial engine running in times will demand you do not use full power settings during this stage. As a general rule for taking off in the Zee you
should never need more than 30 seconds of full power setting for TO.) 9 Source: http://www.doksinet The Zee – Operating Manual Thermaling. Always fly within easy reach of a suitable landing field. Thermaling is defined as the act of circling in a rising column of air, typically known as a thermal. Commonly large birds are seen making use of rising air currents in this way. With the Zee, thermaling is done with no flight adjustments required from the pilots side. With other PHG applications (Such as the mosquito types) the pilots hang position and body position relative to the control frame is compromised. The pilot has to adjust his frame of reference to accommodate this. With the Zee PHG this is not needed Power off flying is almost exactly the same as power off flying. Once at a safe altitude and a thermal is found, start centring on the lift with the use of power. While doing so gently come of the power setting and establish if the thermal is strong enough for power off use
or not. If there is still a good climb on idle you can switch the motor off Use the lift while flying near trim speed as much as possible – adjust with pitch and role to control attitude and speed. If the thermal is not strong enough for sustaining flight simply restart the motor and climb higher to retry the thermaling or search for a stronger thermal in another location. This is what is great of having power at your disposal. Ridge soaring. Always fly within easy reach of a suitable landing field. Once you are on the ridge and in the lifting air position gently come off the power setting to idle. Establish if the lift is still good. If you are maintaining or climbing you can proceed to switch off the motor. Sit back and relax in the super comfort position of the Zee Enjoy the view Try to fly at trim speed position all the time. This will give you the slowest rate of descend possible and maximize your chances of staying in the air. Follow ridge soaring principles and rules as
required Restarting in the air. Always fly within easy reach of a suitable landing field. First establish a suitable landing field is still within easy reach and you are pointing towards it. Check there is no air traffic behind you – beware of your prop wash. Ensure the mag switch is on Push the start button until the motor starts. Depending on your type of motor and settings, you will have slightly varied procedures in the case that the motor does not start. Often a slight amount of throttle setting is required Sometimes you can flood the motor in the air – in which case try the flooded motor start option. If all fails simply land, restart on the ground, take off and resume flight. It is important that you familiarise yourself with your particular engine setup and all its quircks to enable quick problem solving in most common situations. 10 Source: http://www.doksinet The Zee – Operating Manual Landing. Always fly within easy reach of a suitable landing field. Landing the
Zee is the easiest landing hang gliding you can ever do. Ensure you are within easy glide of your intended landing field. Switch of the motor when appropriate. We recommend engine off approaches always Power-on landings are more complicated. Because your Zee has been designed for power-off flight even the slight push from the propeller at idle speeds can significantly increase your landing field length. The slight thrust will keep you airborne for much further than you think. It is not a trike or micro-light Also in the PHG configuration the prop height is less than conventional micro-lights which increases the risk of prop strike damage. Of course with a free spinning clutch landing with power on is also not a problem Approach into wind and with extra speed. Keep the wings level At about ten foot above the ground gently ease the bar forward for a smooth round out. Ensure you are maintaining flight level with the ground but just one foot or less above it. Do not climb With pitch
control try and sustain your flight for as long as you can in this low level position until the rear wheels touches down. Keep the bar fully forward at this stage. Steer with your nose wheel into the desired taxi direction Once stopped restart and taxi to position if required. De-rigging. In principle in de-rigging is the same as rigging but in reverse sequence. Dropping the wing. 1) 2) 3) 4) 5) 6) 7) 8) 9) 10) 11) 12) 13) Position the wing nose into the wind. NB: ensure the propeller is in the horizontal position. Chock the rear wheels Tilt the nose down and undo the nose limiter cable. Undo the pylon locking mechanism safety pin. Straddling the nose wheel lift the base bar up and slightly backwards with one hand in the centre of the bar. With the free hand lift the pylon locking mechanism up to unlock the pylon from the pylon locating slot. Gently lower the base-bar forward and down until it rests on the ground. If the wind is fresh to strong then keep the wings level here. If the
wind is light hold the nose and gently rotate it forward and down – the undercarriage will role forward until the nose of the wing is resting on the ground. Remove the pylon from the keel of the wing, by removing the back-up strap and then the hang block. Secure the hang block onto the pylon. Role the undercarriage backwards out from under the wing. Pack up the wing as trained. NB: Ensure there is a cloth protector for the hang-block locator clamps. If there is no cloth then damage can occur to the cross bars. 11 Source: http://www.doksinet The Zee – Operating Manual Removing the engine. 1) Remove the throttle cable from the front fork and feed it back out of the seat frame forward slide assembly. 2) Unplug the starter cable. 3) Unplug the fuel cable. 4) Remove the safety ring and wing-nut from the engine mount bottom slot locking lever. 5) Open the engine mount bottom slot locking lever and holding the engine mount carry handle tilt the bottom of the engine backwards. 6)
Gently wiggle the motor from side to side while lifting until the engine lifts clear from the undercarriage engine frame bars. 7) Beware of damaging the prop and electric cables when putting the motor down. Dismantling the undercarriage. This can be done with the engine still mounted on the undercarriage frame. 1) 2) 3) 4) 5) Remove the pylon. Remove the seat. Remove the seat webbing from the seat frame forward slide assembly. Remove the throttle cable from the front fork. Remove the locking lever from under the seat frame forward slide assembly and slide the front fork tube forwards and out. 6) Fold the seat frame underneath the rear fork tube. NB beware not to let the undercarriage fall over backwards onto the prop! 7) Remove the left and right rear wheels and plug the rear fork wheel holes. 8) Depending upon the engine option you use, be careful when lifting the frame and engine together. It can be heavy 12 Source: http://www.doksinet The Zee – Operating Manual Maintenance.
As in every aircraft special care must be taken to all parts. It is no different to the Zee You are taking to the air in a privately amateur built aircraft. It is your responsibility to ensure the airworthiness of the Zee before use. Some areas to pay attention to include: 1) Corrosion especially on the mild steel parts. These include the seat pylon tube The engine mount frame. 2) Check the wheel bearings of the wheels. With the soft field wheels care must be taken not to oil the bearings. Use compressed air to blow out any dust after use 3) Check all wear points for signs of wear. These include hang point assemblies, front fork swivel, rear wheel pip-pin holes and the front fork tube join hole. 4) We recommend replacing all rubber components every 12 months. Carefully inspect the engine mount frame rubbers (These are the long flat placing rubber pads). Caring for your Zee will increase the life expectancy of both the pilot and craft. Problems. Whiles every care has been taken in the
construction of the Zee we do love to get your feedback on any problems encountered during normal (or abnormal!) use. We endeavour to always keep an open mind and to improve the design of the Zee at every possible opportunity. We value your feedback. 13 Source: http://www.doksinet The Zee – Operating Manual Specifications. Materials – Stainless Steel 308/316, Aluminium – 6061T6 and 6063T6, Mild steel Weight (excluding motor and fuel) including Aluminium tank – 23kg. Three pins for dismantlement. Unique universal engine mount system allows easy removal and universal swapping between all Zees. Best of all it’s easy to remove – one wing-nut operation! This all translates into easy transporting and storage! www.hangglidingschoolcom Ordering 50% deposit on order balance on delivery. Waiting period approximately 2-3 months 14