Értékelések
Nincs még értékelés. Legyél Te az első!
Mit olvastak a többiek, ha ezzel végeztek?


Tartalmi kivonat
1 HTML and JavaScript HTML (hypertext markup language) web pages are used to display information in web browsers such as Internet Explorer and Netscape. Scripting languages such as JavaScript and VBScript are used to provide functionality for these pages. They define computer programs that are included directly on the page along with the rest of the html code. When activated, they perform some function designed by the programmer. Since the script programs are part of the web page itself, extra time for downloading is not required. This time savings makes them more suitable for server pages that will be downloaded and viewed by many users. Consequently they are more often incorporated into server pages than Java applets, which are downloaded separately from the page. In this tutorial, we will first discuss HTML web pages and then do some JavaScript programs. These programs can be used to change the color of the page or its font, write new information on the page, make calculations,
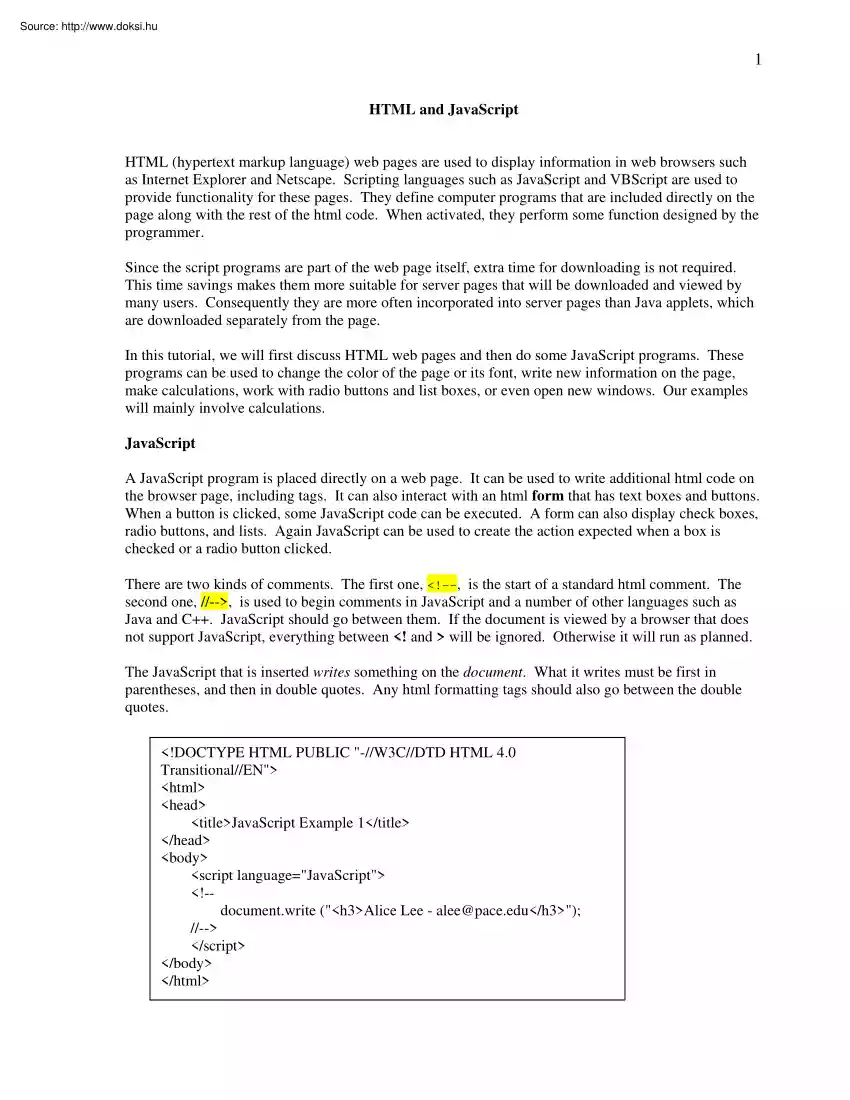
work with radio buttons and list boxes, or even open new windows. Our examples will mainly involve calculations. JavaScript A JavaScript program is placed directly on a web page. It can be used to write additional html code on the browser page, including tags. It can also interact with an html form that has text boxes and buttons When a button is clicked, some JavaScript code can be executed. A form can also display check boxes, radio buttons, and lists. Again JavaScript can be used to create the action expected when a box is checked or a radio button clicked. There are two kinds of comments. The first one, <!--, is the start of a standard html comment The second one, //-->, is used to begin comments in JavaScript and a number of other languages such as Java and C++. JavaScript should go between them If the document is viewed by a browser that does not support JavaScript, everything between <! and > will be ignored. Otherwise it will run as planned The JavaScript that is
inserted writes something on the document. What it writes must be first in parentheses, and then in double quotes. Any html formatting tags should also go between the double quotes. <!DOCTYPE HTML PUBLIC "-//W3C//DTD HTML 4.0 Transitional//EN"> <html> <head> <title>JavaScript Example 1</title> </head> <body> <script language="JavaScript"> <!-document.write ("<h3>Alice Lee - alee@paceedu</h3>"); //--> </script> </body> </html> 2 This JavaScript does not seem to be very useful, and right now, it isn’t. But the next example may show something a little more interesting. It uses a Date object that is built into JavaScript We can get the current date and time from this object. It accesses the clock on your computer and keeps track of a lot of information from it. Type in the following JavaScript program and then preview it You should be able to see the current month, day
and year. <html> <head> <title>Date Example</title> </head> <body> <script language="JavaScript"> <!--Example that writes the current date on the page. var date = new Date () var month = date.getMonth () month = month + 1 var day = date.getDate () var year = date.getYear () document.write ("Month ", month) document.write ("<br>Date ", day) document.write ("<br>Year " year) //--> </script> </body></html> Before discussing what is going on in the program, notice the result. It should have the correct date (day) and year, but the month is off by one. While the days go from 1 to 31, the months go from 0 to 11. Thus January is 0, February 1, etc Therefore the line, month = month + 1, is added to conform to standard usagle. Like Java, JavaScript has objects, and Date is an object. Therefore we have to get a new instance of it This is done in the line date = new Date (). Along
with the month, day and year, a Date object also keeps track of the current time in hours, minutes and seconds. Since these keep changing, we have to get regular updates for the values This is one of the reasons why, in this particular case, we have to get a new instance each time the object is used. Otherwise we would not have the current values. Also as in Java, we access the functions associated with an object using a period, e.g month = date.getMonth () and documentwrite ("Month ", month) The first uses the getMonth function of the Date object to return a value to the variable, month. The second uses the write method of the document object to display some information on the document. You can also add some more information to the html document, such as a heading. You can even change the background color or the pen color. In JavaScript the former is done by document.bgColor = "blue" The pen color is changed by document.fgColor = "white" The bg stands for
background and the fg for foreground. Notice that the C is capitalized JavaScript (like C++ and Java) is case sensitive. That means that fgcolor and fgColor are not the same Forgetting to capitalize letters that are supposed to be upper case causes a strange error. The entire line is simply ignored by JavaScript and not performed at all. So if you have fgcolor instead of fgColor, you will 3 have a blue background, but black type. This is because black is the default That means that unless you specifically change the color, it will be black. There are a number of standard colors built into JavaScript. Some of these are aqua, black, blue, fuchsia, gray, green, lime, maroon, navy, olive, purple, red, silver, teal, white and yellow. You can also specify a color by its RGB (red, green, blue) values. These are values between 0 and 255 written in hexadecimal (base 16). For example, "white" can also be specified as "#FFFFFF" You might have already seen similar strings
in other html documents. The Date object also is used to find the current time in hours, minutes, and seconds. We can modify the JavaScript by adding the following lines: hour = date.getHours () minutes = date.getMinutes () seconds = date.getSeconds () Functions We can add JavaScript functions to a web page. In order to be able to use such a function, a button has to have an event handler. A common one is onClick It is used to define what will happen when the button is clicked. We will have it execute a function called calculateTax () So the line for the button becomes <input type = "button" value = "Calculate Tax" onClick = "calculateTax ()"> The next page shows one way of including the function to calculate the tax. <html> <head> <title>A form with two boxes and a button.</title> </head> <script language="JavaScript"> <!--A function that calculates the sales tax, given the price. function
calculateTax () { var price = parseFloat (taxForm.pricevalue) var tax = price * 0.0825 taxForm.taxvalue = tax } //--> </script> <body> <form name = "taxForm"> Price <input name="price" type="text" value="" size = 6> <br>Tax <input name="tax" type="text" value="" size = 6> <p><input type="button" value="Calculate Tax" onClick="calculateTax ()"></p> </form> Next we will create an html document with a form and a function that computes the user’s body mass index. The BMI is defined to be the weight in kilograms divided by the height in meters squared bmi = weight / (height * height) In English units there is a factor of 703, so if the weight is in pounds and the height in inches, the formula becomes bmi = (703 * weight) / (height height) 4 This form will need two text fields for the weight and height and one for the body
mass index. It will also need a button to calculate the body mass index. <!DOCTYPE HTML PUBLIC "-//W3C//DTD HTML 4.0 Transitional//EN"> <html> <head> <title>Body Mass Index</title> <script language="JavaScript"> <!--Function that calculates the body mass index.> function calculateBMI () { weight = parseInt (document.bmiFormweightvalue) height = parseInt (document.bmiFormheightvalue) bmi = (705 * weight) / (height height) bmi = parseInt (bmi * 100) / 100 document.bmiFormbmivalue = bmi } //--> </script> </head> <body> <h2>Body Mass Index Calculation</h2> <form name="bmiForm"> Weight in Pounds <input name="weight" type="text" value="" size=6> <br>Height in Inches <input name="height" type="text" value="" size=6> <p><input type="button" value="Calculate BMI"
onClick="calculateBMI ()"> <p>Body Mass Index <input name="bmi" type="text" value="" size=10> </form> The body mass index is defined to be a persons weight in kilograms divided by their height in meters squared. In English units it is the weight in pounds multiplied by 705 and divided by the height in inches squared. A body mass index between 20 and 26 is considered to be normal A person with an index below 20 is possibly under-weight, and a bmi over 26 may indicate over-weight. </body> </html> Since no attempt was made to format the answer, it comes with a number of extra digits after the decimal point. A quick (and not perfect) way to fix this is to add in code to multiply the value by 100, use parseInt on it, and then divide the result by 100. bmi = parseInt (bmi * 100) / 100 The function parseInt in JavaScript does not work the same as in Java. It will change any digits at the beginning of a string into an
integer and ignore anything after that. In this case it changes all characters before the decimal point into an integer. This removes all the ‘extra’ digits at the end If the result is then divided by 100, it leaves only the 2 decimal places. Another (and better) method is to use the round function that is part of the Math object. It returns a rounded off integer. Using this, we would have the statement bmi = Math.round (bmi * 100) / 100 This also will return a number with two decimal places. It uses rounding in the last place rather than truncation. The Math object has a number of other functions including cos, exp, log, and random 5 Checkboxes, Radio Buttons and Conditionals Checkboxes and radio buttons are used to make a selection from a list of choices. With a list of checkboxes, users may select several at once, while radio buttons allow only one selection at a time. The following show the results of using them on html pages, checkboxes on the left and radio buttons on the
right. The two different styles look quite similar, and they are handled in much the same way. One important difference is that checkbox choices are individually named, while radio buttons all have the same name. They define an array of buttons, and like arrays in Java the indices begin with 0. Checkboxes and radio buttons execute a JavaScript function the same way that buttons do, with an onClick event handler. The first checkbox used above is defined by: <input type="checkbox" name="first" onClick="showYear ()"> Credits 0 to 31 The same line for the first radio button is the following: <input type="radio" name="year" onClick="showYear ()"> Credits 0 to 31 The radio button line in the name attribute gives the name of the array. If this line is listed first, it will be accessed as year [0]. The function, showYear (), uses an if – else statement to determine which of the boxes or buttons has been clicked. As
before, the reference to the box or button becomes very long A way of shortening this when referring to the same document and form several times is to use a with statement. with (document) { } As in Java, curly braces follow the with statement and are to be filled by all statements that refer to the document. We actually have to access names inside of a form as well as in the document. The first form is called checkBoxForm, so the statement for it is with (document.checkBoxForm) { } The radio button form is called radioForm, so its statement is with (document.radioForm) { } The two html pages follow, the first for the check box example and the second for the radio button document. They both determine a student’s year in college given the number of credits earned First year students are those with credits between 0 and 31, second year between 32 and 63, etc. As usual, the function is placed in the head section and the form in the body. 6 <html> <head>
<title>CheckBox Example</title> <script language="JavaScript"> <!--A function that displays the year of a student in college. function showYear () { with (document.checkBoxForm) { if (first.checked) yearvalue = "First Year" else if (second.checked) yearvalue = "Second Year" else if (third.checked) yearvalue = "Third Year" else if (fourth.checked) yearvalue = "Fourth Year" else year.value = "" } }</script> </head> <body> <h3>Display your year in college.</h3> <form name="checkBoxForm"> <input type="checkbox" name="first" onClick="showYear ()"> Credits 0 to 31 <br><input type="checkbox" name="second" onClick="showYear ()"> Credits 32 to 63 <br><input type="checkbox" name="third" onClick="showYear ()"> Credits 64 to 95 <br><input
type="checkbox" name="fourth" onClick="showYear ()"> Credits 96 or over <p><input name="year" type="text" value="" size=15> </form> </body> </html> <html> <head> <title>Radio Button Example</title> <script language="JavaScript"> <!--A function that displays the year of a student in college. function showYear (index) { with (document.radioForm) { switch (index) { case 0: collegeYear.value = "First Year"; break case 1: collegeYear.value = "Second Year"; break case 2: collegeYear.value = "Third Year"; break case 3: collegeYear.value = "Fourth Year";break } } } </script> </head> <body> <h3>Display your year in college.</h3> <form name="radioForm"> <input type="radio" name="year" onClick="showYear (0)"> Credits 0 to 31
<br><input type="radio" name="year" onClick="showYear (1)"> Credits 32 to 63 <br><input type="radio" name="year" onClick="showYear (2)"> Credits 64 to 95 <br><input type="radio" name="year" onClick="showYear (3)"> Credits 96 or over <p><input name="collegeYear" type="text" value="" size=15> </form> </body> </html> 7 The checkbox example uses a set of if – else statements while the radio button example uses a switch statement. As in Java, each case of the switch must be terminated with a break Also as in Java, semicolons are used to separate statements. In JavaScript you can put in semicolons at the end of statements as well if you want. But semicolons at the ends of lines are not required as they are in Java JavaScript functions can also have parameters, but unlike in Java, they are not listed by
type, only by order. So we can send the index of the button to the function, showYear (index) This saves us the trouble of searching for the index of the checked button. So the first button has onClick="showYear (0)". As in Java, the 0 is copied to the function and when it runs, the 0 case will be executed This will place the appropriate string in the collegeYear text field. Now create an html page that will determine the size of a tip given the total bill and the level of service. It should produce a page looking something like the following: Another thing that you can do with an if – else statement is to generate an alert box. This produces a box that provides the user with some information. For the tip example above, we can add in the code if (document.tipFormbillvalue == "") alert ("Enter the bill before clicking a button") This brings up a box containing the message in the string. When the OK button is clicked, the box goes away. The user can then
proceed to enter the bill, select the service level and see the tip. TextAreas JavaScript also has a for loop. It can be used to create a table of values that give the Fahrenheit values for several Celsius temperatures. We can display the table on a textarea A textarea is similar to a text field. However, instead of showing only a single line, it can show a number of lines These are called rows and the number of characters across are given by cols (columns). In a text field, the number of characters across is determined by the size attribute. You can place a text area into a form by clicking on the third icon from the right, the Form Text Area icon. It will place the following into your form <textarea name="" rows= cols= ></textarea> You should fill in values for the name, rows and cols. The following example defines a text area with 12 rows and 25 columns. <textarea name="area" rows= 12 cols=25 ></textarea> Any characters stored between the
two tags will appear in the text area at the start. 8 Text areas contain a single string of characters. This can either be wrapped when it gets to the end of the row or not. The default is no wrap To ensure that the text will be wrapped, you can add an additional attribute, wrap = “physical” or wrap = “virtual”. The former actually adds end of line characters to the text, while the virtual attribute wraps but leaves the text alone. If you want a lot of material in a text area, you have to first store it into a single string before it is assigned to the text area’s value. The following shows how to do this <body> <form name="textForm"> <textarea name="area" rows="12" cols="25" ></textarea> <script language="JavaScript"> <!-var string = "The first line of text. " string = string + "The second line of text." textForm.areavalue = string //--> </script>
</form></body> You can see that an end of line character, " " , has been added to the end of the first line in order to force the text to be written on the second line. Also we used string concatenation to create one long string consisting of several lines. The JavaScript used follows the textarea tags If it is placed before the text area has been defined, the line document.textFormareavalue is not understood by the html browser. We can place the creation of the string inside of a loop. That way, each time through the loop, the size of the string will be increased until we reach the number of lines desired. An example displays a table of Celsius and Fahrenheit temperatures in a text area. The body of the html document is shown below <body> <h4>Temperature Conversion Table</h4> <form name="tempForm"> <textarea name="area" rows=12 cols=25 wrap="physical"></textarea> </form> <script
language="JavaScript"> <!--Create a temperature conversion table. var Celsius = 10 var string = "Celsius Fahrenheit" + " " for (count = 0; count < 10; count++) { var Fahrenheit = 9 * Celsius / 5 + 32 string = string + " " + Celsius string = string + " " + Fahrenheit + " " Celsius = Celsius + 10 } tempForm.areavalue = string //--></script> </body></html> </body></html> 9 The result is shown below. Tables Tables can also be written by scripts. The following shows a short script that displays a table of numbers. The first column has numbers from 1 to 10 and the second has the double of the number Type this in and see what it displays. <html> <head> <title>Table of Doubles</title> </head> <body> <h4>Table of Doubles</h4> <script language="JavaScript"> <! document.write ("<table border=1
bordercolor=black>") // Start table // Table heading. Top row of table document.write("<tr><td>Number</td><td>Double</td></tr>") for (count = 1; count <= 10; count++) { document.write ("<tr>") // Start row document.write ("<td>", count, "</td>") // First column document.write ("<td>", 2 * count, "</td>") // Second column document.write ("</tr>") // End row } document.write ("</table>") // End table tag //-- ></script> </body></html> We can also show the Celsius to Fahrenheit temperature conversion table this way. The following document body shows an example of this. 10 <body> <h4>Temperature Conversion Table</h4> <script language="JavaScript"> <!--Create a temperature conversion table. document.write ("<table border=1 bordercolor=black>") //
Start table // Table heading. Top row of table document.write("<tr><td>Celsius</td><td>Fahrenheit</td></tr>") var Celsius = 10 for (count = 1; count <= 10; count++) { Fahrenheit = 9 * Celsius / 5 + 32 document.write ("<tr>") // Start row document.write ("<td>", Celsius, "</td>") // First column document.write ("<td>", Fahrenheit, "</td>") // Second column document.write ("</tr>") // End row Celsius = Celsius + 10 } document.write ("</table>") // End table tag //-- ></script> </body></html> List Boxes and Arrays List boxes are used to display a list of choices that a user may select from. They come in two flavors, drop down and regular. You probably have seen both on web pages Drop down boxes allow only one choice at a time from the list. Regular list boxes can be set either to allow only one choice or
multiple choices. Also if the size is set smaller than the number of items in the list, a regular box supplies a scroll bar to view them. A drop down box does not Samples of both are shown below The one on the left is a regular box while the one on the right is a drop down box. There is little difference between the two, so we will mainly look at regular list boxes. They are defined by the code <form name = "listForm"> <select name = "menuList" size = "4" multiple = "multiple" > <option />Hamburger - $2.8 <option />Soda - $1.50 <option />French Fries - $1.00 </select></form> The size attribute determines how many items will be shown. If there are more options than the number given by size, a scroll bar is added. If you want to allow the selection of more than one item at a time, 11 include the multiple attribute. (In order to select several items, users have to hold down the control key when making
the selection.) The items are all values of an array called options. So in the above example, the hamburger option is options [0], the soda option is options [1], and the french fries option is options [2]. As usual with arrays in Java and C, indices begin with 0. So a JavaScript function to find out which option or options were selected uses expressions such as document.listFormmenuListoptions [0]selected Code to compute the total bill might look like the following, using the with statement to make it easier to read. function totalCost () { total = 0 with (document.listForm) { if (menuList.options[0]selected) total = total + 289 if (menuList.options[1]selected) total = total + 150 if (menuList.options[2]selected) total = total + 100 totalBill.value = Mathround (total * 100) / 100 } } JavaScript has more general arrays as well as ones used for radio buttons and list boxes. These are defined by arrayName = new Array () Unlike other languages, the size of the array is not given when it
is declared. To determine the current size of the array, use arrayName.length For example, if an array is supposed to store prices, you might have var prices = new Array () prices [0] = 2.89 prices [1] = 1.50 prices [2] = 1.00 In this case, prices.length would have the value 3 Array values may be given at initialization by prices = new Array (2.89, 150, 100) If all values are known before the script is run, this can be an efficient way to store data in the array. Even if the array is defined this way, values can be changed later in the script. This just supplies initial values. If the number of items is large, the code can be changed to the following: var prices = new Array (2.89, 150, 100, 495, 350) function totalCost () { total = 0 with (document.listForm) { for (count = 0; count < array.length; count ++) if (menuList.options [count]selected) total = total + prices [count] totalBill.value = Mathround (total * 100) / 100 } } 12 Another thing we can do is to use an array to
collect values while the script is being run. For example, if temperature data has been collected, this data can be entered one temperature at a time and stored in an array. Then the array can be used to compute statistics such as the average (mean) temperature, the range (highest temperature – lowest temperature), etc. For this we will need a text field to collect the data, buttons to add a temperature to the array and then to calculate the mean, and another text field to display the result. The html document is shown below <html> <head><title>Array of Temperatures Example</title> <script language="JavaScript"> <!--Temperature Array Example var tempArray = new Array () var count = 0 function addToArray () { with (document.tempForm) { if (temperature.value == "") alert ("Please enter a temperature") else { tempArray [count] = parseInt (temperature.value) count ++ temperature.value = "" } } } function
calculateAverage () { var sum = 0 for (count = 0; count < tempArray.length; count ++) sum = sum + tempArray [count] document.tempFormaveragevalue = sum if (count > 0) mean = Math.round ((sum / count)* 100) / 100 else mean = 0 document.tempFormaveragevalue = mean } //-- ></script> </head> <body> <form name="tempForm"> <input name="temperature" type="text" value="" size = 10> Temperature <br><input type="button" value="Add Temperature" onClick = "addToArray ()"> <p><input name="average" type="text" value="" size = 10> Average <br><input type="button" value="Calculate Average" onClick = "calculateAverage ()"> </form> </body></html> 13 The form for this example is shown here. Notice that if a user clicks the Add Temperature button before entering a value, an alert
box is displayed. If there is no check for an empty box before adding the result to the array, a null value will be entered into the array. Then when the function to calculate the average is called by the Calculate Average button, NaN will be displayed in the text field for the Average. This stands for Not a Number The check for empty with the alert box avoids this problem. Creating New Windows JavaScript can also create a new window with a specified html document in it. This document can either be on your local disk or on the Internet. The following example creates a window for the fast food restaurant page created earlier. The code is straightforward You have to tell the browser where to find the html page and how large the window should be. The following shows a sample script that opens a new window. The first attribute tells where to find the page to open. The second says that it should be opened in a window The last two give the width and height of the new window (in pixels).
Notice that the width and height are enclosed by a single set of double quotation marks since they combine to make up a single attribute. <script language="JavaScript"> menuWindow = window.open ("a:/fast-food-menuhtml", "Window", "width=300, height=200") </script> The new window so created appears below. It is a functioning window You can run the script the same as before
 Eredetileg Ziegler. Apja az 1848-49-es szabadságharc fegyvergyárosa. Fiát Gárdonyban keresztelik, innen az írói névválasztás. Egerben tanítónövendék. Dunántúlon rövid idő alatt több helyen is néptanító: A lámpás (1894), ahogy első regénye címének szép metaforája mondja. Újságíró Győrben, Szegeden, Aradon, Pesten, mint író azután a századvégen Egerben talál