A doksi online olvasásához kérlek jelentkezz be!
A doksi online olvasásához kérlek jelentkezz be!
Nincs még értékelés. Legyél Te az első!
Legnépszerűbb doksik ebben a kategóriában


Tartalmi kivonat
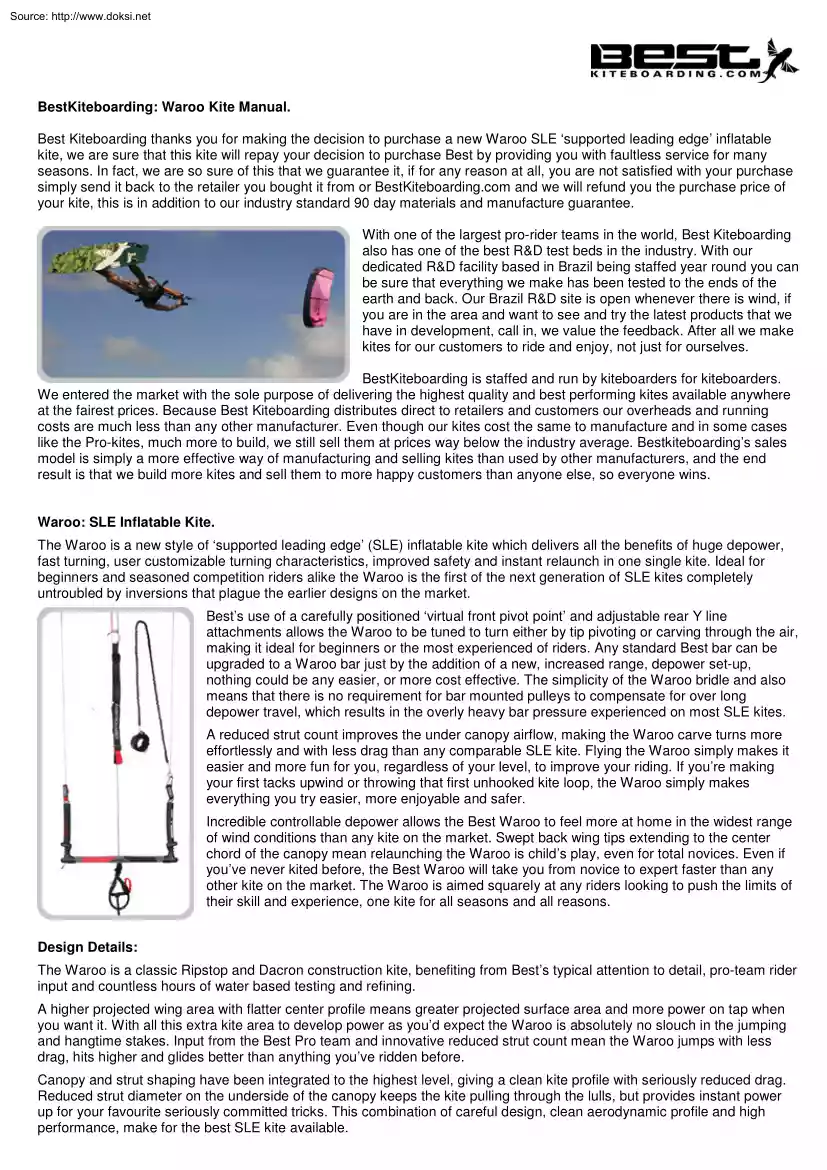
Source: http://www.doksinet BestKiteboarding: Waroo Kite Manual. Best Kiteboarding thanks you for making the decision to purchase a new Waroo SLE ‘supported leading edge’ inflatable kite, we are sure that this kite will repay your decision to purchase Best by providing you with faultless service for many seasons. In fact, we are so sure of this that we guarantee it, if for any reason at all, you are not satisfied with your purchase simply send it back to the retailer you bought it from or BestKiteboarding.com and we will refund you the purchase price of your kite, this is in addition to our industry standard 90 day materials and manufacture guarantee. With one of the largest pro-rider teams in the world, Best Kiteboarding also has one of the best R&D test beds in the industry. With our dedicated R&D facility based in Brazil being staffed year round you can be sure that everything we make has been tested to the ends of the earth and back. Our Brazil R&D site is open
whenever there is wind, if you are in the area and want to see and try the latest products that we have in development, call in, we value the feedback. After all we make kites for our customers to ride and enjoy, not just for ourselves. BestKiteboarding is staffed and run by kiteboarders for kiteboarders. We entered the market with the sole purpose of delivering the highest quality and best performing kites available anywhere at the fairest prices. Because Best Kiteboarding distributes direct to retailers and customers our overheads and running costs are much less than any other manufacturer. Even though our kites cost the same to manufacture and in some cases like the Pro-kites, much more to build, we still sell them at prices way below the industry average. Bestkiteboarding’s sales model is simply a more effective way of manufacturing and selling kites than used by other manufacturers, and the end result is that we build more kites and sell them to more happy customers than anyone
else, so everyone wins. Waroo: SLE Inflatable Kite. The Waroo is a new style of ‘supported leading edge’ (SLE) inflatable kite which delivers all the benefits of huge depower, fast turning, user customizable turning characteristics, improved safety and instant relaunch in one single kite. Ideal for beginners and seasoned competition riders alike the Waroo is the first of the next generation of SLE kites completely untroubled by inversions that plague the earlier designs on the market. Best’s use of a carefully positioned ‘virtual front pivot point’ and adjustable rear Y line attachments allows the Waroo to be tuned to turn either by tip pivoting or carving through the air, making it ideal for beginners or the most experienced of riders. Any standard Best bar can be upgraded to a Waroo bar just by the addition of a new, increased range, depower set-up, nothing could be any easier, or more cost effective. The simplicity of the Waroo bridle and also means that there is no
requirement for bar mounted pulleys to compensate for over long depower travel, which results in the overly heavy bar pressure experienced on most SLE kites. A reduced strut count improves the under canopy airflow, making the Waroo carve turns more effortlessly and with less drag than any comparable SLE kite. Flying the Waroo simply makes it easier and more fun for you, regardless of your level, to improve your riding. If you’re making your first tacks upwind or throwing that first unhooked kite loop, the Waroo simply makes everything you try easier, more enjoyable and safer. Incredible controllable depower allows the Best Waroo to feel more at home in the widest range of wind conditions than any kite on the market. Swept back wing tips extending to the center chord of the canopy mean relaunching the Waroo is child’s play, even for total novices. Even if you’ve never kited before, the Best Waroo will take you from novice to expert faster than any other kite on the market. The
Waroo is aimed squarely at any riders looking to push the limits of their skill and experience, one kite for all seasons and all reasons. Design Details: The Waroo is a classic Ripstop and Dacron construction kite, benefiting from Best’s typical attention to detail, pro-team rider input and countless hours of water based testing and refining. A higher projected wing area with flatter center profile means greater projected surface area and more power on tap when you want it. With all this extra kite area to develop power as you’d expect the Waroo is absolutely no slouch in the jumping and hangtime stakes. Input from the Best Pro team and innovative reduced strut count mean the Waroo jumps with less drag, hits higher and glides better than anything you’ve ridden before. Canopy and strut shaping have been integrated to the highest level, giving a clean kite profile with seriously reduced drag. Reduced strut diameter on the underside of the canopy keeps the kite pulling through the
lulls, but provides instant power up for your favourite seriously committed tricks. This combination of careful design, clean aerodynamic profile and high performance, make for the best SLE kite available. Source: http://www.doksinet Design Details: Continued. As well as huge depower range; the wing tip design of the Waroo endows it with near automatic relaunch capability. So no matter what situation your enthusiasm gets you into, you can be sure the Waroo is designed to get you out of it. Relaunch with the Waroo is much easier than with c-shape kites Automatic safety is provided by the extended depower and trim-strap set up selected for the Waroo bar package. Simply releasing your grip on the bar causes the kite to depower and very slowly slide down the edge of the wind window to the ground, where it will sit de-powered until you retrieve the bar and relaunch the kite by simply turning the bar upwards. For all the snow-kiters out there the depower and leashing options on the Waroo
makes it much easier to handle on your own in the snow that any C-kite. It’s the ideal choice for both winter and summer riding. As well as having designed in safety and relaunch features the Waroo bar also comes with dual rear line “Oh Shit” handles for maximum kite kill, so you can flag the kite out on a single line if you get tumbled through the waves, or use it for leashing the kite for self-launching and landing. The Waroo is the only SLE kite that comes with dual rear line safeties as standard Increased projected area delivers maximum power from the minimum kite size, allowing any rider to enjoy the benefits of riding with a smaller and more responsive kite. When combined with the increased range and sheetability delivered from the flat profile the features of the Waroo means it’s likely to become all things to all riders who choose to fly it. Waroo Kite Package: Details and Set-up Instructions. The Waroo is shipped with all bridle lines secured to the centre strut valve
retaining Velcro. When you receive your kite, unroll your Waroo and remove the foam valve protectors. Next detach the bridle lines from their position on the centre strut and separate the bridle into left and right hand sides. At this point inspect the attachments on the pulleys and pull the knots down firmly to make sure they are seated securely before you inflate you kite and attach the lines. Then layout the leading edge bridle in front of the kite and proceed to lay out the rear line bridles to the sides of the kite, as shown in the bottom image on the page. As with all LEI kites the centre lines from your bar attach to the front of the kite and the back lines from your bar attach to the rear of the kite. The front attachments are comprised of a leading edge bridle that terminates on both sides with a closed loop and free floating pulley, with a knotted attachment for the flying lines. As the pulley is a moving part care should always be taken to inspect the pulley and bridle line
prior to flying the kite. Should signs of wear show on either the pulley or bridle contact your nearest dealer for replacement parts. The rear flying line attachment on the Waroo is comprised of two lines that join to form a ‘Y’ shape bridle, linking the rearmost and mid-wingtip attachment points on the kite itself. This ‘Y’ shape bridle allows for distribution of turning force across different parts of the canopy. Adjustments are made with a series of three knots positioned at the join in the ‘Y’ bridle. Adjustment of these knots as detailed below allows the user to custom tune the turning characteristics of the kite; selecting between either, pivot-turning like a c-shape kite, slide turning like other flat kites, a combination of the two. When delivered the kite is rigged with the knots attached at the combination turning position. Source: http://www.doksinet In each of the adjacent images the ‘Y’ bridle is shown with the blue highlight indicating the rearmost
connection point and the red highlight indicating the middle wingtip connection point. Image 1. The ‘Y’ bridle is rigged on the st 1 knot; this is the ‘pivot’ turning position and gives increased bar pressure. Image 2. The ‘Y’ bridle is rigged onto the middle position knot, giving a combination of ‘slide’ and ‘pivot’ turn styles. Image 3. The ‘Y’ bridle is rigged on the knot closest to the rear of the wingtip giving a ‘slide’ style turn, and reduced bar pressure. Waroo bar 2006: 45cm & 55cm Bar with 25m coloured lines, supplied as a four line set. The Waroo bar is designed to take advantage of the enhanced depower capabilities of the Waroo, it has an extended depower rope, allowing the rider to achieve the maximum depower and safety from the kite by simply dropping the bar. The depower rope is equipped with a swivel, to allow easy un-spinning of the bar. The chicken-loop comes with a handle pass leash ring, for attachment to an optional handle-pass leash
and safety quick release, whilst the rear lines both have ‘ohshit’ grab handles which can be used with or without the standard wrist leash. The wrist safety leash can be attached in multiple ways. It can be clipped directly into the ‘oh-shit’ handles on either side of the bar, when attached in this way care should be taken to make sure it is clipped into the loop and not onto either of the steel rings. Clipping into the webbing loops reduces the activation pressure required to open the Velcro tear off on the ‘oh-shit’ handle. Do not clip your leash to the stainless steel ring, as the Velcro will not release this way. The wrist safety leash can also be clipped directly around the depower rope, attached in this way the leash will spin around the depower rope, but please note, you will have no safety release if something happens to the kite or if a line breaks. We strongly recommend only attaching the leash to the Velcro “Oh Shit” handles. An optional handle-pass leash can
also be rigged. Attached to the back of the harness this enables the rider to perform handle-pass tricks but still benefit from the full auto-safety feature should the bar be released. To facilitate a wide range of rider preferences with regard to riding position and bar placement during riding, the Waroo bar comes with an extra long trim strap. The bar should be rigged, with the trim strap at full extension, so that dropping the bar causes the kite to go into ‘autosafety’, fully depower and land. Set up this way ‘auto-safety’ will always work regardless of trim strap settings, and allow the rider to choose a bar position closer to the body by pulling on the trim strap. Source: http://www.doksinet Waroo bar 2006: Continued. The three images detailed below demonstrate how the power of the kite changes with bar movement. The simplest way to remember this is; the closer the bar is towards your body the more powered the kite, the further away from your body the bar is the less
powered the kite. The Waroo bar has been designed so that the full range of power can be achieved without using the trim-strap, the trim strap on the Waroo serves two main purposes; to accommodate a riders preference for bar position and also to allow a rider to pre-depower the kite before attempting unhooked manoeuvres and landing the kite. The power that the kite delivers at each bar position is displayed by the coloured bar at the left of each image. The further into the red the kite-power indication arrow is shown, the more power there is in the kite. The further towards the yellow the kite-power indication arrow is shown the smaller the amount of power there will be in the kite. At the top of the coloured ‘bar-power indicator’ there is a green section; this indicates the point at which the Waroo will automatically depower. If at any time you push the bar upwards into this safe zone, the kite will fully depower and slowly glide down to the ground, where it will safely sit at
the edge of the window awaiting relaunch. If at any time the bar falls from your grip, the kite will automatically depower and shortly thereafter glide down to the ground. In most cases, if you accidentally drop the bar or need to un-spin the lines after performing a trick, there is sufficient time, to release and grab the bar again before the kite starts to land. In the first image the rider has the bar in the middle of the power zone, this represent the most frequently used bar position whilst riding and indicates that the kite is well powered. The second image shows the bar towards the back of the power zone and at the point closest to the rider, this position is only likely to be used if the kite is underpowered or if the rider is just about to unhook. The third image shows the bar entering the ‘safe zone’, marked in green, a rider will push or release the bar into this position whenever they require to use the built-in safety of the Waroo, examples of this would be when they
suddenly become over powered through changing wind conditions, or if they have lost control of the kite. In addition to the three combinations of bar position and power level shown above it is also possible to modify the bar position further by pulling in on the trim strap. Pulling in on the trim strap effectively shortens the front lines of the kite and has the effect of reducing the power in the kite for any given bar position. This is detailed more thoroughly on the following page. Source: http://www.doksinet Waroo bar 2006: Continued. Pulling down the trim strap on the Waroo bar shortens the length of the front flying lines, this has the same effect as moving the bar upwards and will depower the kite. The amount of total depower that can be achieved with the Waroo is defined by the shape of the kite itself; the position of the bar is the riders access to this range of depower. In the first image the rider has pulled down on the Waroo trim strap, effectively adding more depower
to the kite. The result of this is that the bar can be moved closer to the rider for any given amount of kite power. This has the secondary effect of increasing the size of the ‘safe zone’ on the bar. Pulling the trim strap down increases the ‘safe zone’ and moves the point at which the auto-safety is activated closer to the rider. A secondary effect of pulling in the trim-strap is to reduce the maximum amount of power that the kite will deliver with the bar pulled all the way back towards the riders body, as induced in the ‘power-bar’ shown in the second image. Line Set Up: Knot Selection and Depower settings. The Waroo bar comes complete with a quad-line flying line set and wrist leash. The bar is pre-rigged to be attached to the kite with no adjustments being required at the bar, all adjustments should be performed at the rear attachment points. All Waroo’s come with 6 knots already tied on the bottom of the rear flying line attachment bridle, the Waroo is designed to
work best for nd riders of average weight when the flying lines are attached to the 2 or rd 3 from bottom knot on the rear bridle. When attaching for the first time please use the bottom knot on the bridle and then adjust the knot used thereafter according to the safe activation of the ‘auto-safety’ and as the conditions and your preference dictate. Heavier riders may benefit from using a knot closer to the top of the bridle, but remember that any shortening of the rear lines will move the ‘auto-safety’ activation point at the bar closer to the trim-strap. Launching the Waroo On The Beach. The Waroo launches much like any other LEI kite; the only difference being that the rider must take care where they position the bridle lines prior to launch. With the kite inflated correctly and all the flying lines attached to the correct bridle points the rider should place the kite at the edge of the wind. They should then place sand st nd on the inside of the kite behind the 1 strut
towards the 2 strut, this helps to keep the kite flat to the wind until the wingtip has been folded over and secured with more sand. The wingtip should then be folded over and sufficient sand added to safely restrain the kite from moving. The front bridle from the folded wingtip should be passed out from the front of the kite onto the sand, as shown in the image, whilst the rear line bridle should be carefully laid over the middle of the wingtip, to ensure it does not catch the back of the trailing edge when the kite is launched. With the kite safely weighed down in this way the rider can now walk back to the bar, hook into the chicken-loop and attach their preferred safety leash. Source: http://www.doksinet Launching the Waroo On The Beach: Continued. Once hooked into the bar the rider should walk backwards away from the kite, putting tension into the lines. At this point the trailing wingtip should start to catch the wind, as shown below. As the rider continues to move further
back the trailing wingtip should begin to rise up and line tension should be felt equally in all lines. Once the kite is stood up into the wind but still retained by the sand on the lower wingtip the rider should pull back firmly on the bar whilst steering the kite upwards. This release the sand from the wingtip and the kite will take to the air as shown below. Self-landing the Waroo. Due to having dual rear line ‘oh-shit’ handles and it’s unique bridle layout landing the Waroo is much easier than with other SLE kites. Two simple methods can be used to land the Waroo, depending on your personal preference and the wind conditions. Method 1: This method is suitable for most wind speeds on open beaches, with sufficient free space downwind. Fly your kite to the side of the window leaving the kite at an angle of about thirty degrees to the ground. With your kite at the edge of the window, reach up and grab the lower of the two ’oh-shit’. With the webbing loop firmly in your
grasp, unhook and drop the bar holding onto the webbing handle. The Waroo will fly slightly to the edge of the window, and then loop under itself, coming to rest on the beach in the dead downwind position facing into the wind with the leading edge facing up. please note this method is only recommended if you have more than two line lengths of downwind space. Self-landing the Waroo. Source: http://www.doksinet Self-landing the Waroo: Continued Method 2: To land the Waroo in higher winds fly it down to the ground at the edge of the wind window, so that the lower wingtip touches the sand. Clip your leash to the webbing on the ‘oh-shit’ handle that is now facing upwards on your bar ie if you landed the kite on its right wingtip, then clip into the left hand side ’oh-shit’ handle. Pull gently on the handle to loosen the retaining Velcro. Reach up and pull the trim strap all the way in to fully depower the kite and then unhook from the bar holding the bar equally in both hands.
Quickly check that you hooked correctly into the safety handle and then simply drop the bar. The kite will flag out into the wind with the canopy facing upwards Practice this a few times in lighter wind to get the hang of the routine. If you ever feel unsure of your ability to land in this way due to hugely increased wind speeds then ask for an assisted landing. Water Re-launching The Waroo. The Waroo re-launches far more easily than a normal 4line c-kite. In fact due to it’s unique shape and bridle it re-launches much th more easily than a 5 line equipped kite. If the Waroo should land in the water at any time it can be easily re-launched by following this simple procedure. With the kite dead downwind of you, take the bar and gently begin to pull on one side of the bar until one wingtip of the kite begins to lift up from the water. In the images shown on the left of the page the rider is pulling on the side of the bar connected to the right hand side of the kite. As the rider
continues to pull on this side of the bar the right wingtip of the kite continues to lift up from the water as shown nd in the 2 image. At this point the kite will begin to catch the wind in its canopy and continue to rise from the water as shown rd in the 3 image, until the kite is almost standing completely on its lower wingtip. Water Re-launching The Waroo: Continued. With the Waroo now completely standing on its wingtip and with almost equal tension in all lines the kite will begin to push st forward from the downwind position towards the edge of the wind, as shown in the 1 image. All that is required from the rider, to complete the relaunch, is to sharply pull back on the side of the bar attached to the top nd rd wingtip of the kite and the Waroo will break free of the water and take to the air, as shown in the 2 and 3 images. Water re-launching a downed Waroo is made easier by keeping your board attached to your feet. The surface of the board provide beneficial resistance to the
downwind pull of the kite in the water and helps to retain equal pressure in all the flying lines, increasing control of the kite. In light or marginal wind conditions you can make the re-launching process simpler by rocking the bar from side to side to help initiate the initial wing tip lift from the surface of the water. Once this has occurred revert to the normal relaunch procedure outlined above. Source: http://www.doksinet Frequently asked questions: Why have adjustable turning settings on the Waroo? Different riders prefer different kite characteristics, with the Waroo we have been able to incorporate both the familiar turning characteristics of the classic c-shape kite and also the inside tip-pivot turning style made possible with the new flat kite profile and pivoting front line attachments. The newer turning style allows riders to attempt tricks and wave surfing in a way that wasn’t possible with the older classic kite designs. All Waroo’s turn incredibly quickly
regardless of size making them more usable across wider range of wind conditions. How come the Waroo costs so much less than any other brands SLE kite? There’s only one reason why the Waroo is much better value than other brands SLE kites, the simple answer is that BestKiteboarding has the most efficient manufacture and distribution model on the market, we make more kites than anyone else and we pass on the savings direct to our customers. Whilst other companies SLE kites cost in excess of $1000 per kite the Waroo starts from as little as $399, so you can buy two Waroos for the price of one SLE kite from other companies. What is the bridle used for? The bridle supports the flatter shape of the Waroo, it allows for greater power with higher projected area giving a more efficient kite, in combination with our front pivot placement it also allows for the Waroo’s huge depower range. Why does the Waroo have a simpler bridle and no bar mounted pulleys when compared to other SLE kites?
The Waroo was designed to be the simplest and safest kite on the market, extra bar mounted pulleys are used by some manufacturers to make up for deficiencies in their choice of bridling design and pivot placement. The Waroo was carefully designed to have reduced depower travel and lighter bar pressure than any other SLE kite, taking the time to design it right first time means we haven’t had to use additional pulleys to compensate for poor design. Pulleys on the bar / rear lines also cause a very indirect feel of the kite, and the waroo is so responsive and fun, pulleys would just kill that. Does the Waroo invert like other SLE kites? Early SLE kites from several manufacturers have shown the tendency to invert when fully de-powered, turning inside out during flight. The design of the Waroo differs significantly from these kites, the greater wingtip curvature and carefully positioned pivot points mean that the Waroo is no more likely to invert than a standard c-shape kite. Frequently
asked questions: Continued. How do I compare the size of my Waroo with my older c-shape kites? Although the Waroo has a much greater range and a bigger sweet-spot when compared to any “C” kite, we recommend a minimum of a three kite quiver for all riders. Average men will likely choose the 9m, 12m & 16m Waroos to cover 10-35 knots. Lighter guys and girls will likely choose the 7m, 9m & 14m and heavier guys will appreciate the 12m, 16m & 20m with the added 9m for those really nuking days, but we do not recommend flying any Waroo outside it stated range. Can I use a bar from my other kites on the Waroo? The Waroo bar is designed to be specific to the Waroo kite, its extended travel allows for complete depower of the kite, this is key to the improved safety of the Waroo over c-shape kites. An upgrade kit is available that includes everything but the bar and lines for swapping any 05 Best bar over to be suitable for the Waroo. Details of the complete Waroo bar are shown
above. How hard should I pump my Waroo? Due to its flatter extended profile the Waroo likes to be inflated hard, this helps it provide maximum upwind performance, depower and hangtime. New on all Best kites this year is an improved strut to leading edge connection, this helps to create a stiffer and more responsive airframe. Source: http://www.doksinet Frequently asked questions: Continued. For the Waroo, this means tighter turning and more accurate steering response. The simple rule of thumb when inflating the Waroo is to inflate it until the last few strokes of the pump become strenuous, the leading edge of the Waroo should ping like a drum when flicked with a finger. What is the best way to relaunch the Waroo? The Waroo has a built-in relaunch capability. With the kite leading edge down in the water simply pull on either of the back lines and the kite will slide across the window and take up an upright position at the edge of the window. Once in this position simply turn the kite
bar to launch the kite. In marginal wind conditions it is possible to accelerate this process by rocking the control bar alternately to the left and then the right. This technique also works great on snow For advanced riders the Waroo can be launched almost down wind of the rider with the bar in the de-powered position. Hot launching in the power zone with this technique is only recommended for experienced kiters. Whenever you relaunch the Waroo in the water remember that providing resistance to the pull of the kite by using the surface of the board helps to speed up the relaunch process. What safety systems are built into the Waroo? A Waroo flown on a Waroo bar has multiple redundant safety systems. Releasing the bar and allowing it to slide up to the trim strap fully de-powers the Waroo without the need for pushing past any bumper system. The shorter length of the Waroo depower rope also makes retrieving the bar much easier than with all other SLE kites. Both back flying lines on the
Waroo are equipped with ‘oh-shit’ handles, these can be used by hand for landing the kite on the beach or can have a leash attached to them for use on the water. For riders contemplating handle-pass and unhooked tricks a suicide leash can be clipped to the chicken-loop, if the riders drops the bar mid-trick the kite will depower as if they had released the bar. Can I self-launch my Waroo? The Waroo can be self-launched just like a c-shape kite. Turn the kite over at the edge of the window sand down one wingtip, placing sand on either side of the first strut, walk back to the bar, hook in and launch as normal. When launching in this way always check to make sure that the flying lines are clear of the wing tips. For self-launching on the snow it is recommended that users first secure the bar into the snow with a snow screw or similar retainer, making sure that the bar is in the fully de-powered position and the trim strap pulled in completely. How do I rig my Waroo what knot settings
should I use? This is really the only question we can’t answer for you, without knowing your personal riding style, arm length, harness choice and preferred bar position it is impossible for us to give a definitive answer that will be perfect for you. However, rigging the Waroo couldn’t be any simpler with the standard Waroo bar and line set up. The Waroo comes delivered with ’6 depower knots’ already positioned on the rear bridle. The first time you rig up attach nd your outer flying lines to the rear bridle at the 2 knot from the bottom of the line, this set up will guarantee that you have enough depower in the bar to implement the auto safety by dropping the bar. Some riders may find that in light winds this knot position does not allow for the bar to be pulled back close enough to the rider to maximise the pull of the kite, and in rd th these circumstances it is recommended that the rider choose the 3 or 4 knot from the bottom of the rear line bridle. However you choose to
set up your kite it should always be remembered that whenever you release the bar, the kite should depower and flutter gently down the side of the window. If the kite does not do this pull the trim strap in until it does Unlike c-shape kites where the depower strap gives you access to more depower, the Waroo is designed so that the full range of power and depower can be achieved simply by moving the bar through its full range of travel. Engaging the trim strap allows for the rider to alter bar position for any given amount of depower, so for instance, riders who prefer to ride with the bar closer to their body, may choose to facilitate this by pulling the trim strap in until the bar is at a comfortable position. This will also mean that the auto safety feature will work with the bar closer to the riders body. Appendix: Waroo bar measurement guide. Chicken-loop set up. Waroo bridle measurement guide. Source: http://www.doksinet Source: http://www.doksinet Source:
http://www.doksinet