A doksi online olvasásához kérlek jelentkezz be!
A doksi online olvasásához kérlek jelentkezz be!
Nincs még értékelés. Legyél Te az első!
Legnépszerűbb doksik ebben a kategóriában


Tartalmi kivonat
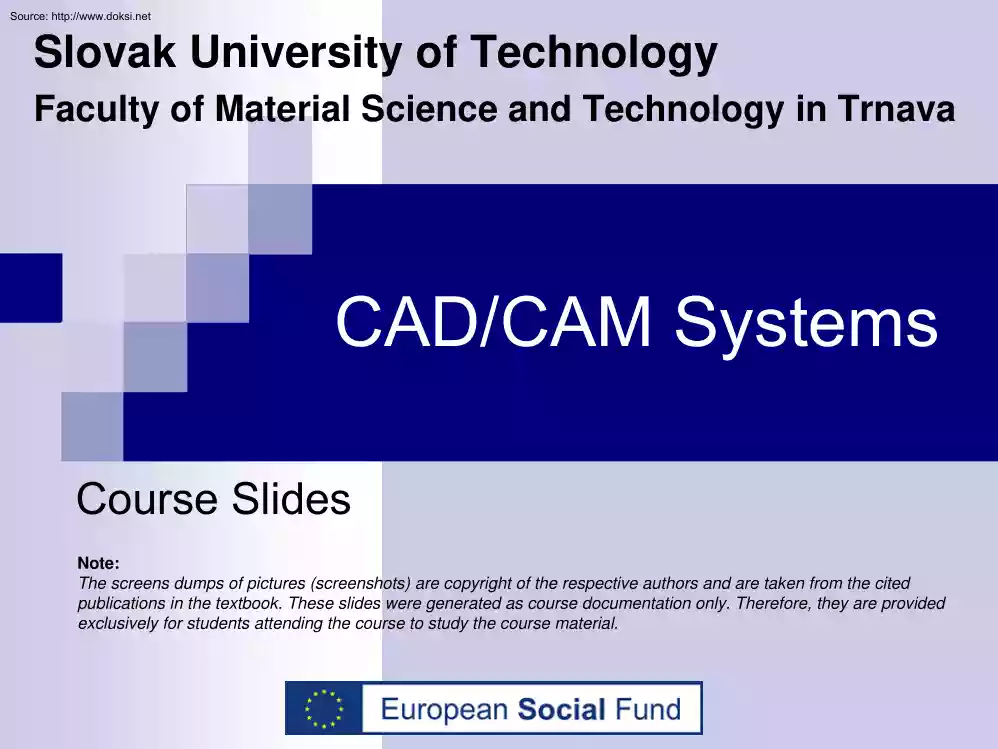
Source: http://www.doksinet Slovak University of Technology Faculty of Material Science and Technology in Trnava CAD/CAM Systems Course Slides Note: The screens dumps of pictures (screenshots) are copyright of the respective authors and are taken from the cited publications in the textbook. These slides were generated as course documentation only Therefore, they are provided exclusively for students attending the course to study the course material. Source: http://www.doksinet Contents Historic Milestones, Concepts & Terminology Computer-Integrated Manufacturing (CIM) Computer-Aided Design (CAD) Computer-Aided Manufacturing (CAM) Computer-Aided Design & Manufacturing (CAD/CAM) PLM/PDM Rapid Prototyping, Concurrent Engineering & Reverse Engineering CATIA Source: http://www.doksinet Introduction It has long been the dream of the industrial system engineers to integrate the operating units in order to be able to produce products at minimum cost
and at maximum overall profit. CAD/CAM can improve productivity, product quality, and profitability. CAD/CAM is a common method of manufacturing used by many corporations. The term CAD/CAM is a shortening of Computer-Aided Design (CAD) and Computer-Aided Manufacturing (CAM). CAD/CAM software uses CAD drawing tools to describe geometries used by the CAM module of the program to define a toolpath that will direct the motion of a machine tool to produce the exact shape that was drawn. A CAD system is a combination of hardware and software that enables engineers and architects to design products. Until the mid 1980s, all CAD systems were specially constructed computers. Source: http://www.doksinet Three Requirements for Production 1. Build and deliver products in response to the demands of the customer at a scheduled delivery time 2. Provide an acceptable quality level 3. Provide everything at the lowest possible cost Source: http://www.doksinet Product
Improvements With Computer Technology Computer-Aided Design - CAD Computer-Aided Manufacturing - CAM Computer-Integrated Manufacturing - CIM Source: http://www.doksinet Production Techniques Flexible Manufacturing Lean Manufacturing Mass Customization Source: http://www.doksinet Historic Milestones, Concepts & Terminology Source: http://www.doksinet Scientific Management Frederick Winslow Taylor (1856-1915) The Principles of Scientific Management (1911) U.S engineer and management consultant, originator of the concept of "scientific management" to increase worker output. Taylor grabbed public attention in the 1880s when he reduced the number of workers shoveling coal at the Bethlehem Steel Works from 500 to 140 without loss of production. According to Taylor, industrial productivity was lower than it ought to be due to two factors: deliberate malingering by workers and unscientific design of work practices by management. He held that
workers could be forced to put the maximum effort into work by a combination of motivating them with higher wages, financed on the basis of higher productivity, and most significantly, by closely monitoring the worker’s every movement so that it was impossible to go slow without detection. In order to achieve the maximum productivity, Taylor proposed that instead of reducing the number of "unproductive" workers to a minimum, about 25% of all employees should be dedicated to supervising, monitoring, measuring and accounting. This was the beginning of the stratification of the working class into more and more layers of supervisory, administrative and technical workers, enjoying privileges over and above the "blue-collar" trades they supervised. The symbol of Taylor’s management methods was the stop-watch, ever-present as supervisors conducted "Time and Motion Studies", timing every hand-movement, every step, every breath a worker made. Hatred
against the stop watch built up to such a pitch that by 1912 laws were passed in the U.S banning the use of stop-watches in the civil service Lenin studied "Taylorism" with a view to applying the progressive and genuinely scientific aspects of his theory to Soviet industry. Source: http://www.doksinet History of CAD/CAM 4 major phases of development 1950s: Start of interactive computer graphics, CRT (Cathode Ray Tube), NC (Numerical Control), APT (Automatically Programmed Tools) 1960s: Critical research period for interactive computer graphics Sketchpad by Ivan Sutherland, CAD, Lockheed initiated CADAM, Storage tube-based turnkey system Source: http://www.doksinet History of CAD/CAM contd. 1970s: Potential of interactive computer graphics was realized by industry: SIGGRAPH, NCGA, IGES, Golden era for computer drafting, Wireframe modeling 1980s: CAD/CAM heady years of research, Integration, Solid modeling 1990s: CIM, EDB, PDM, CALS, VR
Source: http://www.doksinet Background In today’s global competition, industries cannot survive unless they introduce new products or existing ones with: Better quality Lower cost Shorter lead time Computers have come to play an important role in helping industries achieve these goals: Enables automation Helps integration of cumbersome and separate life cycle tasks The CE Paradigm: CAD/CAM facilitates CE based Product and process design. Source: http://www.doksinet Key Technologies CAD, CAM, CAE To understand the role of CAD and CAM, we need to examine the various activities and functions that must be accomplished in general in life-cycle Source: http://www.doksinet Traditional View of Product Life Cycle Taken from Principles of CAD/CAM/CAE By Kunwoo Lee Source: http://www.doksinet Main Areas of the Product Life Cycle Two focus areas Product design Process design Product design: Starts from the customers’ demands that are identified by
marketing personnel Ends with a complete description of the product, usually in the form of a CAD model Process design: Starts from manufacturing planning, mfg., assembly, testing and shipping There has to be concurrency of product and process design (CE) Product design activities: Initially, synthesis sub process Identification of design need, formulation of design specs., design conceptualization Source: http://www.doksinet Simplified Flow Chart of the Route from the Order to the Finished Product Source: http://www.doksinet CAD/CAM Systems – An Overview Unclassified Overview of CAD & CAD/CAM systems: http://www.freebytecom/cad/cadhtm There are a variety of systems and programs available in the CAD/CAM industry and new programs are frequently introduced. Pro/Desktop AutoCAD Architectural Desktop Mechanical Desktop OtherCAD CADDS Medusa Euclid Unigraphics Autodesk Inventor Solid Edge MicroStation CATIA Allplan VariCAD ArchiCAD SolidWorks Pro/ENGINEER
TurboCAD I-DEAS PowerCAD ME 10 CADKEY Source: http://www.doksinet Concepts Terminology CIM - Computer - Integrated Manufacturing CHIM – Computer - Human - Integrated Manufacturing IMS - Integrated Manufacturing Systems CAD - Computer - Aided Design CAM - Computer - Aided Manufacturing CAPP - Computer - Aided Process Planing CAD/CAM - Computer - Aided Design and Manufacturing CADMAT - Computed - Dided Design, Manufacturing and Testing PLM/PDM - Process Lifecycle Management / Process Data Management FMS - Flexible Manufacturing Systems RE – Reverse Engineering CE - Concurrent Engineering RP – Rapid Prototyping Source: http://www.doksinet Computer - Integrated Manufacturing Source: http://www.doksinet What is CIM? The integration of business, engineering, manufacturing and management information that spans company functions from marketing to product distribution. “CIM is a unified network of computer systems controlling
and/or providing information to the function of a manufacturing business in an integrated way”. (Thomas, 1986) “Computer integrated manufacture (CIM) refers to the integrated information processing requirements for the technical and operational tasks of an industrial enterprise”. (Scheer, 1986) “ CIM relates to the use of computers for integrating the flow of information to aid the overall control of a manufacturing unit. ” (Parnaby et al., 1986) . Source: http://www.doksinet The Evolution of CIM CAM CAPP EDI CAD ROBOTICS NC FMS CAPM GT DNC CNC FMC MRP OPT JIT TPM CIM CAE AMT VM PDM CE/SE AM MRPII WCM LM QC 1960 1970 QA 1980 TQM 1990 Source: http://www.doksinet Change in Manufacturing Emphasis, after Scott (1994) Philosophy Techniques Product range Tooling Fixed costs Labour costs Product life cycle Competition Customers Inventory Pricing 1960s 1990s production led simple narrow dedicated low high long national stable order point cost plus
market led complex wide flexible high low short global demanding just-in-time market driven Source: http://www.doksinet The Need for Integration & Standardisation Dedicated and Open Systems Manufacturing Automation Protocol (MAP) General Motors (circa 1980’s) recognized New CAD/CAM system or robot or data collection system Required new cabling and networking facilities Different vendors DIFFERENT implementation requirements only 15% (approx) of 40 000 shop floor devices communicated beyond their own processes 40% of total investment used in communication related activities. Ford (1995/96) Moved to single (reliable) supplier of CAD systems rather than pursue “mix & match” strategy. Source: http://www.doksinet Stages of CIM Development Computerization of function Islands of automation Interfacing Integration Note: advances in computing, information technology, database technology, communications, etc. have supported the development of CIM.
Source: http://www.doksinet Islands of Automation Designer creates geometry CAD Drawing of part Manual geometry specification CAD geometry APT commands NC Package Includes tooling and cutting technology database Part program (punched on to cards and verified) APT processor CL file Data link Post-processor for machine Plot NC tape is Manually loaded Machine 1960s Machine Developments in NC tape generation 1980s Source: http://www.doksinet CIM Computer-integrated manufacturing (CIM) in engineering is a method of manufacturing in which the entire production process is controlled by computer. The fact that CAD, CAE, and CAM work best together has led to the breakdown of many of the traditional barriers between functional and manufacturing units. The goal of CIM is a database, created and maintained on a factory-wide computer network, that will be used for design, analysis, optimization, process planning, production scheduling, robot
programming, materials handling, inventory control, maintenance, and marketing. Functional areas such as design, analysis, planning, purchasing, cost accounting, inventory control, and distribution are linked through the computer with factory floor functions such as materials handling and management, providing direct control and monitoring of all process operations. CIM may be viewed as the successor technology which links Computer-Aided Design (CAD), Computer-Aided Manufacturing (CAM), robotics, numerically controlled machine tools, automatic storage and retrieval systems, flexible manufacturing systems (FMS), and other computer-based manufacturing technology. CIM is also known as Integrated Computer-Aided Manufacturing (ICAM). The CIM factory concept includes both soft and hard technology. Soft technology can be thought of as the intellect or brains of the factory, and hard technology as the muscles of the factory. Whatever the products, the CIM factory is made up of a part
fabrication center, a component assembly center, and a product assembly center. Centers are subdivided into work cells, cells into stations, and stations into processes. Source: http://www.doksinet Characteristics of CIM Complete automation of a manufacturing plant Processes functioning under computer control Digital information tied them together Source: http://www.doksinet Typical Elements of a CIM System CIM system • manufacturing planning & control - MRPII, MRP, CRP, shop floor control, inventory control, • manufacturing engineering - CAD/CAM, CAPP, coding & classification, • manufacturing processes - NC/CNC/DNC, FMS, robots, material handling systems, • indirect elements: - sales order processing (& marketing) - finance & accounting Source: http://www.doksinet Key Challenges Integration of components from different suppliers Data integrity Process control Source: http://www.doksinet Y – CIM Model after A.-W Scheer •
All operational information systems of an industrial company are to be linked by CIM with one another. • Is the center of attention in particular the connection between commercial and technical systems. • The Y-CIM-model of August William Scheer shows the components of both ranges taken part in the integration in descriptive form. Characteristics: • The Y-model tries to represent functions at their expiration, to detailing up to level data and working model. • Restriction on production, no holistic model of the industrial company • Differentiation between technical and economical tasks. Source: http://www.doksinet CIM Model after Helberg Source: http://www.doksinet CIM Wheel Source: http://www.doksinet Cyber Manufacturing – What Does It Mean? See: http://www.mazakjp/english/ Source: http://www.doksinet What is Required? Standard for the product data Easy to use Internationalization Source: http://www.doksinet Data and Process Integration (Scheer,
1988) Source: http://www.doksinet Integrated Product Model Source: http://www.doksinet Integrated Digital Product Line MFG Engineering NC Programming 2D Drawing Authority Manufacturing 2D Drawing Interpretation Quality Assurance Tooling 3D Design 3d Model Oriented Detail Assembly 3D Model Release And Authority 2D Assembly 3Ddrawing Model Assembly Inspection 3D Measurement Equipment Product Product Source: http://www.doksinet Development of Standards for Data Exchange Source: http://www.doksinet STEP (ISO 10 303) STandard for the Exchange of Product data Protocol for neutral form of data definition Covering the full range of product data Over the complete life cycle Independent from any particular system PDES (Product Data Exchange Using Step) Why needed? Collaborative e-engineering Assure the quality of the communicated product model data Relationship of contractor, subcontractor, customer or supplier Source: http://www.doksinet
Criticism Automation, robots = less jobs Ignoration of human and organizational factors Result = CHIM (Computer and HumanIntegrated Manufacturing) appeared Source: http://www.doksinet Computer-Aided Design Source: http://www.doksinet CAD – Intro The application of digital computers in engineering design and production. Computer-aided design (CAD) refers to the use of computers in converting the initial idea for a product into a detailed engineering design. The evolution of a design typically involves the creation of geometric models of the product, which can be manipulated, analyzed, and refined. In CAD, computer graphics replace the sketches and engineering drawings traditionally used to visualize products and communicate design information. Source: http://www.doksinet CAD - History Four decades of CAD evolution: 1970’s – Academic development and large institutional pilots (little or no CAD standards, data exchange or project collaboration).
1980’s – Vendor developed systems, Mini, Unix and PC based, AutoCAD & MicroStation launched (CAD standards and data exchange start to emerge, project collaboration still a pipe dream). 1990’s – Large, Medium, Small client server CAD networks become the norm (mainly windows based), CAD standards and data exchange are commonplace (sometimes supported by contractual Terms & Conditions) project collaboration and drawing management systems start to emerge. 2000 onwards – Critical mass of data starts to impact medium to large systems, extensive use of drawing management and project collaboration systems. CAD standards supported by contractual Terms & Conditions. CAD QA (sometimes automated) starts to emerge. Source: http://www.doksinet CAD – History contd. CAD - An acronym for Computer Aided Design. It is synonymously used for Computer Aided Drafting too CAD is a computer graphics software that is commonly used to design products and make engineering drawings.
1950: Light pen & vector display SAGE (Semi-Automatic Ground Environment) developed in M.IT Lincoln Labs Source: http://www.doksinet CAD – History contd. Vector refreshable display Source: http://www.doksinet CAD – History contd. Minicomputer PDP-11/40 with TU56 dual DECtape drive. Source: http://www.doksinet CAD – History contd. Workstation IBM 6090 with display resolution 1024x1280px and 24 bit color depth (1978) Source: http://www.doksinet A typical CAD Process Source: http://www.doksinet Logical Model of Design Process (Archer,1968) Real world Op e ra tio n al mo d el A n alo gu e s Syst e mat ic mo de l O m1 Om 2 O m3 O m4 A1 A2 A3 A Sm 1 Sm 2 Sm 3 S P1 P2 P3 P Phase 1 Phase 2 Phase 3 De sig n pro gra m P rob le ms De sig n pro ce ss Source: http://www.doksinet A Model of the Design Process Depicted as DFD Source: http://www.doksinet Definition of CAD Tools Based on Constituents Source: http://www.doksinet
Definition of CAD Tools Based on Implementation Source: http://www.doksinet Design Documentation CAD models, reports and design bill of materials In traditional environment, the product designers focus on product design activities Once design is documented it is passed on to manufacturing Source: http://www.doksinet Use of CAD Technology Design conceptualization and feasibility can be aided by CAD systems Design conceptualization involves the intellectual creative process While computer systems haven’t advanced to completely support this task, they can contribute by physically generating various conceptual designs efficiently (CAD based geometric modeling system) Analysis activities can be facilitated by use of CAE technology Source: http://www.doksinet Coordinate Systems Object coordinates World coordinates Camera coordinates Normalized device coordinates Window coordinates Source: http://www.doksinet 3D Coordinates The 3D
coordinates can be entered using the following formats: Cartesian coordinates Spherical coordinates Cylindrical coordinates Source: http://www.doksinet World Coordinates Common coordinates for the scene O O W M wo = TSR Source: http://www.doksinet Normalized Device Coordinates Device independent coordinates Visible coordinate usually range from: −1 ≤ x ≤ 1 −1 ≤ y ≤ 1 −1 ≤ z ≤ 1 Source: http://www.doksinet Window Coordinates Adjusting the NDC to fit the window ( x 0, y 0) is the lower left of the window Source: http://www.doksinet Window Coordinates Adjusting the NDC to fit the window ( x 0, y 0) is the lower left of the window height ⎛ width ⎞ xw = ( xnd + 1)⎜ ⎟ + x0 ⎝ 2 ⎠ ⎛ height ⎞ yw = ( ynd + 1)⎜ ⎟ + y0 ⎝ 2 ⎠ width Source: http://www.doksinet Window Coordinates – Transformation Matrix ⎡ width ⎢ 2 ⎢ M w p ⎢ 0 ⎢ ⎢ 0 ⎢ 0 ⎣ 0 height 2 0 0 0 0 1 0 width ⎤ x0 + 2 ⎥ height ⎥ ⎥ y0 + 2 ⎥ 0 ⎥
⎥ 1 ⎦ Source: http://www.doksinet Object Coordinate to Device Coordinate Take your representation (points) and transform it from Object Space to World Space (Mwo) Take your World Space point and transform it to Camera Space (Mcw) Perform the remapping and projection onto the image plane in Normalized Device Coordinates (Mw p Mpc) Perform this set of transformations on each point of the polygonal object (M= Mw pMpcMcwMwo) Source: http://www.doksinet Modeling The mathematics behind the creation and manipulation of the 3D representation of the object. Model Computer Image Source: http://www.doksinet Modeling vs. Drafting • A primary and essential difference between modern CAD/CAM (Pro/ENGINEER, Catia,) and traditional computer aided drafting systems is that CAD models are three dimensional • In CAD, drawings are produced as view of the model. • Models are NOT drawn so much as sculpted from solid volumes of materials. Drawing Model Traditional CAD
Model Drawing Modern CAD/CAM Source: http://www.doksinet 3D Geometric Modeling 3D modeling capabilities allow to create 3D images that are as realistic as the actual objects. These images are called 3D models because, just like a physical model, they can be rotated on the screen. We can display views from a 3D model, such as isometrics or perspectives, from any angle with a few simple steps. 3D modeling is usually a separate CAD module that has its own set of functions. The 3D models fall into the following categories: Wire-frame models Surface models Solid models Source: http://www.doksinet Objects Representation in CAD (3D Models) Solid model Wireframe model Surface model Source: http://www.doksinet Wireframe Model and Viewing Ambiguity A wire frame model is a visual presentation of a three dimensional physical object used in 3D computer graphics. It is created by specifying each edge of the physical object where two mathematically continuous smooth surfaces
meet, or by connecting an object's constituent vertices using straight lines or curves. The object is projected onto the computer screen by drawing lines at the location of each edge. Wireframe model Possible interpretations Source: http://www.doksinet Criteria for Object Representation in CAD Modeling Representation power Interactivity support Transformation and combination Multiple use Rendering Representation precision Memory requirements Source: http://www.doksinet Data Representation of Wire-frame Model – Explicit list of Edges y Redundancy Edge Matrix (12x6) v4 e3 v3 e9 v6 e10 e5 v5 e4 e2 e6 e8 v1 e1 v2 x e12 e11 v8 e7 v7 Edge ⇒ Vertex e1 0.0 0.0 0.0 1.0 0.0 0.0 e2 1.0 0.0 0.0 1.0 1.0 0.0 e3 1.0 1.0 0.0 0.0 1.0 0.0 e4 0.0 1.0 0.0 0.0 0.0 0.0 e5 0.0 1.0 1.0 1.0 1.0 1.0 e6 1.0 1.0 1.0 1.0 0.0 1.0 e7 1.0 0.0 1.0 0.0 0.0 1.0 e8 0.0 0.0 1.0 0.0 1.0 1.0 e9 0.0 1.0 1.0 0.0 1.0 0.0
e10 1.0 1.0 1.0 1.0 1.0 0.0 e11 1.0 0.0 1.0 1.0 0.0 0.0 e12 0.0 1.0 0.0 0.0 0.0 0.0 Implementation in C as 2D array (static data structure) double hObjekt[POCETH][6] Source: http://www.doksinet Data Representation of Wire-frame Model – List of Edges & Vertices Edge Matrix (12x2) Vertices Matrix (8x3) y v4 e3 v3 e9 v6 e10 e5 v5 e4 e2 e6 e8 v1 e1 v2 x e12 e11 v8 e7 e1 1 2 1 0.0 0.0 0.0 e2 2 3 2 1.0 0.0 0.0 e3 3 4 3 1.0 1.0 0.0 e4 4 1 4 0.0 1.0 0.0 e5 5 6 5 0.0 1.0 1.0 e6 6 7 6 1.0 1.0 1.0 e7 7 8 7 1.0 0.0 1.0 e8 8 5 8 0.0 0.0 1.0 e9 5 4 e10 6 3 e11 7 2 e12 8 1 v7 Indexes of Vertices Implementation in structure typedef struct hObjekt { zoznamV zv; zoznamH kh; }; Implementation in C as two 2D arrays typedef double zoznamV[POCETV][3]; typedef int zoznamH[POCETH][2]; Source: http://www.doksinet Data Representation of Wire-frame Model – Separating Topology & Geometry y
Connectivity Matrix (12x2) v4 e3 v3 e9 v6 e10 e5 v5 e4 e2 e6 e8 v1 e1 v2 e12 e11 v8 e7 v7 x Vertices Matrix (8x3) 1 2 3 4 5 6 7 8 1 0.0 0.0 0.0 1 0 1 0 1 0 0 0 1 2 1.0 0.0 0.0 2 1 0 1 0 0 0 1 0 3 1.0 1.0 0.0 3 0 1 0 1 0 1 0 0 4 0.0 1.0 0.0 4 1 0 1 0 1 0 0 0 5 0.0 1.0 1.0 5 0 0 0 1 0 1 0 1 6 1.0 1.0 1.0 6 0 0 1 0 1 0 1 0 7 1.0 0.0 1.0 7 0 1 0 0 0 1 0 1 8 0.0 0.0 1.0 8 1 0 0 0 1 0 1 0 Source: http://www.doksinet Implementation of Wire-frame Model in C (Example) POCETV – maxi. no of Vertices POCETH – max. no of Edges typedef struct bod { float x,y,z; }; typedef struct hrana { bod v1,v2; }; or typedef struct hrana { bod *pv1,pv2; }; typedef struct hObjekt { int pocetH,pocetVrch; bod zoznamV[POCETV]; hrana zoznamH[POCETH]; } Static data structures Source: http://www.doksinet Data Representation of Wire-frame Model - List typedef struct zoznamV {
Dynamic Data Structures double x,y,z; zoznamV *nextV; y v4 e3 }; typedef struct zoznamH { v3 zoznamV *zVrchol; e9 v6 e10 e5 v5 e4 zoznamV *kVrchol; zoznamH *nextH; e2 }; e6 e8 v1 e1 x v2 typedef struct hObjekt { e12 zoznamH *zho; e11 v8 e7 zoznamV *zvo; v7 e1 e2 e3 e12 NIL List of Edges List of Vertices }; 0.0 00 00 0.0 10 00 1.0 10 00 v1 v2 v3 NIL 1.0 00 10 v8 Source: http://www.doksinet Data Representation of Wire-frame Model – List with Return Pointer Start Data NIL Data Fragment of code in C: typedef struct vrchol{ int x,y; vrchol *next; }; vrchol *temp,nlink; temp=(struct vrchol *) malloc(sizeof(vrchol)); temp->x=40; temp->y=50; temp->next=NLINK; nlink=temp; Data Source: http://www.doksinet Data Representation of Wire-frame Model – Relational Database (0,1) Relations for object description: 1. Vertex is defined by coordinates x, y 2. Edge is defined by vertices (1,1) e4 e2 (0,0) Tab. of vertices e3 e1 (1,0)
Tab. of edges No vertex x y No edge Z-bod K-bod 1 0 0 1 1 2 2 1 0 2 2 3 3 1 1 3 3 4 4 0 1 4 4 1 Source: http://www.doksinet Using of Dynamic Data Structure Change of configuration V4 V3 Štart x1 y1 x2 y2 x3 y3 NIL x1 y1 x2 y2 x3 y3 NIL Štart V1 x4 y4 V2 Source: http://www.doksinet Surface Model CAD software packages use two basic methods for the creation of surfaces: The first begins with construction curves (splines) from which the 3D surface is then swept (section along guide rail) or meshed (lofted) through. The second method is direct creation of the surface with manipulation of the surface poles/control points. From these initially created surfaces, other surfaces are constructed using either derived methods such as offset or angled extensions from surfaces; or via bridging and blending between groups of surfaces. Surface edited by poles (animation) Surface defined by curves (animation) Source:
http://www.doksinet Surface Model of the Rotational Part 3D Faces Source: http://www.doksinet Surface Model Data Representation v4 e9 v5 v3 e3 f5 e5 v6 e10 f3 e8 e2 e6 f2 Edge Matrix (12x2) Face Matrix (6x4) 1 1 2 3 4 2 5 6 7 8 3 2 11 6 10 4 12 8 9 4 5 5 10 3 9 6 7 11 1 12 v2 Static structures e11 v8 e7 v7 Dynamic data structure f2 f1 Vertex Matrix (8x3) 1 1 2 1 0.0 0.0 0.0 2 2 3 2 1.0 0.0 0.0 3 3 4 3 1.0 1.0 0.0 4 4 1 4 0.0 1.0 0.0 5 5 6 5 0.0 1.0 1.0 6 6 7 6 1.0 1.0 1.0 7 7 8 7 1.0 0.0 1.0 8 8 5 8 0.0 0.0 1.0 9 5 4 10 6 3 11 7 2 12 8 1 List of faces e1 e2 e3 e12 NIL List of edges List of vertices 0.0 00 00 0.0 10 00 1.0 10 00 v1 v2 v3 1.0 00 10 v8 Source: http://www.doksinet Classification of Regions for Geometric Modeling Continuous region: K-times continuous region: Convex region: 3-times continuous region Continuous region Non-convex
region Convex region Source: http://www.doksinet Representation of a Face with Hole e3 v4 v3 v7 v6 e6 e7 e5 e4 e2 e8 v8 v5 e1 v1 Non-convex 2-times continuous region. v2 Start & direction of describing e2 e3 e4 e5 e6 e7 e8 List of half edges e1 Global cycle Local cycle v1 v2 v8 Source: http://www.doksinet NURBS-Nonuniform Rational B-Splines NURBS are industry standard tools for the representation and design of geometry. Some reasons for the use of NURBS are, that they: offer one common mathematical form for both, standard analytical shapes (e.g conics) and free form shapes; provide the flexibility to design a large variety of shapes; can be evaluated reasonably fast by numerically stable and accurate algorithms; are invariant under affine as well as perspective transformations; are generalizations of non-rational B-splines and non-rational and rational Bezier curves and surfaces. See: http://en.wikipediaorg/wiki/NURBS Source:
http://www.doksinet Solid Modeling Methods Easy (2,5D) Modeling Methods (sweeping) Solid (3D) Modeling Methods BREP - Boundary Representation CSG - Constructive Solid Geometry Feature Based Modeling Parametric Modeling SE - Spatial Enumeration Spatial Occupancy Enumeration (SOE, voxels) Binary Space Partitioning (BSP) Tries Octrees FREP - Function Representation Facet Modeling Source: http://www.doksinet Solid Model Interpretation of the Object Volume (Material) Interconnected open boundaries Closed boundary Interior Exterior Edges Source: http://www.doksinet Notes on Valid Solids The valid solid surface is locally topological equivalent with the Euclidean plane. Which solids are not valid? Sphere is equivalent with the plane. Zero thickness is invalid. Source: http://www.doksinet Dangling Edge & Face Not a solid model! Dangling face Dangling edge Source: http://www.doksinet Nonsense #1 Not a solid model Source: http://www.doksinet
Nonsense #2 Not a solid model Source: http://www.doksinet Opened Object Here is not a face Not a solid model Source: http://www.doksinet Manifolds - Topological Consistency Objects Manifold The surface of a solid must satisfy some conditions so that the resulting solid is well-behaved. This is the so called manifold condition. A surface is a 2-manifold if and only if for each point x on the surface there exists an open ball with center x and sufficiently small radius so that the intersection of this ball and the surface can be continuously deformed to an open disk. Topological inconsistency Source: http://www.doksinet Easy (2,5D) Solid Modeling Sweeping Idea: Move a 2D-Object (Contour) in the space. All enclosed points generate the object swept. Forms: Translational sweep Rotational sweep Conical sweep Sphere sweep General cylinder, Source: http://www.doksinet Sweeping Translational Rotational Source: http://www.doksinet Translational Sweeping
Define the object with the contour (2D) and the path. Source: http://www.doksinet Rotational Sweeping Define the object by rotating of the contour (2D) with the arbitrary axis. Source: http://www.doksinet Conical Sweeping Define the object by the contour (2D) and a 3D-point (top of the pyramid). Source: http://www.doksinet Sphere Sweeping Define the object by the sphere with the varying radius and a path. Source: http://www.doksinet General Cylinder Define the object by the set of „control“- contours and by the path. Source: http://www.doksinet Quadrics Quadrics are all objects, which is possible to describe using quadratic functions (polynomials). Source: http://www.doksinet Quadrics - Examples Source: http://www.doksinet Half Spaces Representation Source: http://www.doksinet BREP Point list Elements: 3D coordinates Linked lists Face list Elements: Index lists to the 3D points Linked lists STEP defines data models for
boundary representations. The common generic topological and geometric models are defined in ISO 10303-42: Geometric and topological representation. Source: http://www.doksinet BREP – Data Structure Topology and geometry Teleso Object Face Edge Vertex Source: http://www.doksinet v2 BREP – Winged Edges Data Structure f1 f2 e weObjekt pVrch pHran weStena pStien next vrcholy zacVrchol zacPolhr v1 steny wePolhr T vid next lokalhr susedp zacVrchol weVrchol x y z next T T T Source: http://www.doksinet Winged Edges Data Structure Alternative to hierarchical BRep Central element is the edge: Source: http://www.doksinet BREP – Advantages and Disadvantages + Simple transformations General representation Supported by many graphics libraries - Higher memory requirements Combinations necessary and non-robust Approximation of curved objects Source: http://www.doksinet The Euler-Poincaré Formula – Topological Integrity of BREP Model
Euler-Poincaré formula describes the relationship of the number of vertices, the number of edges and the number of faces of a manifold. It has been generalized to include potholes and holes that penetrate the solid f–e+v=2 6 – 12 + 8 = 2 f–e+v=2 10 – 24 + 16 = 2 f – e + v - h = 2 (m – g) 14 – 36 + 24 - 2 = 2 (1 – 1) Source: http://www.doksinet CSG Source: http://www.doksinet CSG – Main Characteristics Composition of primitives Primitives: sphere, cone, cube, cylinder, . U Operations: +, -, , U, . Primitives in the leafs and operations build the rest nodes of the CSG-tree Source: http://www.doksinet CSG – Boolean Operations Using 3 operators enables for all possible combinations - not uniquely Source: http://www.doksinet CSG tree Source: http://www.doksinet CSG Rendering Rendering Algorithms Ray casting (tracing) Extended depth buffer algorithm Evaluation/Conversion Algorithms Boundary representation Octree Constructive
cubes Source: http://www.doksinet CSG – Advantages and Disadvantages + Low memory consumption Simple combining Exact representation of complex surfaces 12 Mantyla’s operators and his proof - Slow and difficult processing Not unique representation Source: http://www.doksinet CSG – Regular Boolean Operations Basic-Operations: Union U* Intersection Subtraction -* *U Source: http://www.doksinet CSG - Regular Boolean Operations S R Union Intersection Subtraction R∪S R∩S R-S R ∪ *S R ∩ *S R - *S Source: http://www.doksinet SE - SOE (Voxels Representation) Dividing the volume into the regular grid Elements: equally sized cubes (voxels) Each element has density (Hounsfield) Main applications: Scientific visualization Medical data visualization (CT, MR, US, .) Source: http://www.doksinet SOE - Voxels Solid Octants definition Source: http://www.doksinet BSP Trees A Binary Space Partitioning (BSP) tree is a standard binary tree
used to sort and search for polytopes in n-dimensional space. The tree taken as a whole represents the entire space, and each node in the tree represents a convex subspace. Subdivisions in half spaces Generating the binary tree sequentially - from the start polygon until all polygons processed Nodes represent polygons Node attributes: Plane equation Normal vector See: ftp://ftp.sgicom/other/bspfaq/faq/bspfaqhtml#6txt Source: http://www.doksinet Generating BSP Trees 1. 2. For convex objects trivial - lists BREP traversal: Polygon search, with least points of intersection Subdivide the face list: 2 parts (in/out) Insert polygon into tree, recursive subtrees processing Source: http://www.doksinet BSP Tree - example An easy way to think about BSP trees is to limit the discussion to two dimensions. To simplify the situation, let's say that we will use only lines parallel to the X or Y axis, and that we will divide the space equally at each node.
Source: http://www.doksinet BSP Trees – Advantages and Disadvantages + Easy transformable Fast rendering with correct visibility Universal like Brep Higher memory consumption Curved objects to be approximated Source: http://www.doksinet Octrees Iterative space subdivision Nodes signed as empty, full, or partial: E, F or P Subdivide until the approximation satisfies required quality for example 512*512512 Dividing planes not object dependent (differs from BSP tree) Analogy in 2D: „Quad Tree“ Source: http://www.doksinet Octrees – Advantages & Disadvantages + Simple combination-operators Fast rendering Spatial queries/search very fast Higher memory consumption for well approximated objects Limited transformability Approximation (criterion) Source: http://www.doksinet SOE - Advantages and Disadvantages + Simple combinations in the same grid Direct utilization of medical data - Extreme memory consumption Representation of voxels
necessary Curved objects has to be approximated Source: http://www.doksinet FREP The Function Representation (or FREP) defines a geometric object by a single real continuous function of point coordinates. HyperFun is a simple language for FREP geometric modeling. It is intended for modeling geometric objects described in the form: F(x1, x2, x3, ., xn) >= 0 This language is applicable to modeling algebraic and skeleton-based "implicit" surfaces, convolution surfaces, distance-based models, voxel objects, constructive solids, and more general FREP objects. The model in HyperFun is interpreted by the modeling and visualization software tools. See: http://hyperfun.org/wiki/dokuphp?id=hyperfun:main http://cis.khoseiacjp/~F-rep/HF descrhtml http://www.cggcvutcz/members/zara/HyperFun/ Source: http://www.doksinet HyperFun - Example Fragment of Notation -- Aizu chair model of 1993 -- bounding box [-12,12] -- Translated from Fortran 6.12002, A Pasko aizu
chair(x[3],a[1]) { Xt = x[1]; Y = x[2]; Z = x[3]; -- Seat SUP1 = 1-((Xt-0.)/6)^4-((Y+3)/2)^4-((Z-0)/6)^4; See complete HyperFun Notation here: here See notation of the object in VRML here: here Source: http://www.doksinet FREP Summary FREP is the functional representation Implicit surfaces using the functional form of set operations (union, intersection, difference) Discovery by Raschev thus enables for unified language for both CSG tree (or scene graph) and subsequent primitives Problems: costly, interpolation Source: http://www.doksinet Facet Modeling - Solid Model with Faceted Primitives Source: http://www.doksinet Using VRML for Object Description - Example IndexedFaceSet Source: http://www.doksinet Basic Deformations (Local Operations) Transformations that do not preserve shape Tapering Twisting Bending Source: http://www.doksinet Tapering Position dependent functions work like the scaling factors. ⎡ x ' ⎤ ⎡1 ⎢ y '⎥ ⎢0
⎢ ⎥=⎢ ⎢ z ' ⎥ ⎢0 ⎢ ⎥ ⎢ ⎣ 1 ⎦ ⎣0 0 f ( x) 0 0 0⎤ ⎡ x ⎤ 0⎥⎥ ⎢⎢ y ⎥⎥ f ( x ) 0⎥ ⎢ z ⎥ ⎥⎢ ⎥ 0 1⎦ ⎣ 1 ⎦ 0 0 Source: http://www.doksinet Bending Transformation that does not preserve shape ⎡ x ' ⎤ ⎡1 ⎢ y '⎥ ⎢0 ⎢ ⎥=⎢ ⎢ z ' ⎥ ⎢0 ⎢ ⎥ ⎢ ⎣ 1 ⎦ ⎣0 0⎤ ⎡ x ⎤ f ( y ) g ( y ) 0⎥⎥ ⎢⎢ y ⎥⎥ h( y ) k ( y ) 0⎥ ⎢ z ⎥ ⎥⎢ ⎥ 0 0 1⎦ ⎣ 1 ⎦ 0 0 Source: http://www.doksinet Twisting Position dependent functions work for twisting of the object, too. ⎡ x'⎤ ⎡ cos(θ ( y )) ⎢ y '⎥ ⎢ 0 ⎢ ⎥=⎢ ⎢ z ' ⎥ ⎢− sin(θ ( y )) ⎢ ⎥ ⎢ 0 ⎣1⎦ ⎣ 0 sin(θ ( y )) 0⎤ ⎡ x ⎤ 1 0 0⎥⎥ ⎢⎢ y ⎥⎥ 0 cos(θ ( y )) 0⎥ ⎢ z ⎥ ⎥⎢ ⎥ 0 0 1⎦ ⎣ 1 ⎦ Source: http://www.doksinet Solid Modeling - Summary Elementary objects Sweeps, Quadrics, . Transformations Combining Objects (CSG, FRep)
Volume representation Rendering (Polygonal case) Future works: transparent objects, bumpy surfaces, textures, global illumination, animation, . Source: http://www.doksinet CAD Data Formats Normalized CAD data formats IGES AutoCAD DXF VRML Source: http://www.doksinet IGES Initial Graphics Exchange Specification Neutral format translators needed Developed by National Aeronautical and Space Administration and National Bureau of Standards in 1979 Reasonably comprehensive tool Neutral data format For transmission of CAD data Between dissimilar CAD/CAM systems IGES file: What should go into a data file? Translate from their system to the IGES format or vice versa Source: http://www.doksinet Computer-Aided Manufacturing Source: http://www.doksinet CAM – Intro Computer-aided manufacturing (CAM) refers to the use of computers in converting engineering designs into finished products. Production requires the creation
of process plans and production schedules, which explain how the product will be made, what resources will be required, and when and where these resources will be deployed. Production also requires the control and coordination of the necessary physical processes, equipment, materials, and labor. In CAM, computers assist managers, manufacturing engineers, and production workers by automating many production tasks. Computers help to develop process plans, order and track materials, and monitor production schedules. They also help to control the machines, industrial robots, test equipment, and systems which move and store materials in the factory. The first commercial applications of CAM were in large companies in the automotive and aerospace industries for example UNISURF in 1971 at Renault (Bezier) for car body design and tooling. Traditionally, CAM has been considered as a numerical control (NC) programming tool wherein three-dimensional (3D) models of components generated in CAD
software are used to generate CNC code to drive numerically controlled machine tools. Although this remains the most common CAM function, CAM functions have expanded to integrate CAM more fully with CAD/CAM/CAE PLM solutions. Source: http://www.doksinet History of CAM CAM software was seen to have several shortcomings that necessitated an overly high level of involvement by skilled CNC machinists. CAM software would output code for the least capable machine, as each machine tool interpreter added on to the standard g-code set for increased flexibility. In some cases, such as improperly set up CAM software or specific tools, the CNC machine required manual editing before the program will run properly. Integration of CAD with other components of CAD/CAM/CAE PLM environment requires an effective CAD data exchange. Usually it had been necessary to force the CAD operator to export the data in one of the common data formats, such as IGES or STL, that are supported by a wide
variety of software. The output from the CAM software is usually a simple text file of G-code, sometimes many thousands of commands long, that is then transferred to a machine tool using a direct numerical control (DNC) program. The largest CAM software companies (by revenue 2005) are UGS Corp (now Siemens PLM Software, Inc) and Dassault Systèmes, both with over 10% of the market; CAMWorks (From Geometric Ltd) is the first CAM package with Automatic Feature Recognition Technology,PTC, Hitachi Zosen and Delcam have over 5% each; while Planit-Edgecam, Tebis, TopSolid, CATIA, CNC (Mastercam), SolidCAM, DP Technology's ESPRIT, OneCNC, and Sescoi between 2.5% and 5% each The remaining 35% is accounted for by other niche suppliers like T-FLEX, MecSoft Corporation, SurfCAM, BobCAD, Metamation, GibbsCAM,and SUM3D Source: http://www.doksinet Process Design Traditionally, begins with process planning ends with product Process planning Is a function which establishes which
processes, parameters and tools are to be used to convert a raw material into the final part • Jigs and fixtures are also part of this function. • Process planning involves human expertise. • Production planning, materials management and machines programming are the next activities to be accomplished. Source: http://www.doksinet Process Planning Life Cycle Source: http://www.doksinet A typical CAM process Source: http://www.doksinet CAM Tools Required to Support Manufacturing Process Source: http://www.doksinet Definition of CAM Tools Based on Constituents Source: http://www.doksinet Definition of CAM Tools Based on Implementation Source: http://www.doksinet Software for Concurrent Product & Process Design Source: http://www.doksinet 5 Axis CNC Machine MotionMaster X,Y,Z,B,C Source: http://www.doksinet Disadvantages of CAM Results in loss of jobs Requires skilled computer operators Expensive to set up initial system Source:
http://www.doksinet Computer - Aided Design & Manufacturing Source: http://www.doksinet What is CAD/CAM CAD - a computer aided system for creating, modifying and communicating a plan for a product or components of a product CAM - broad term used when several manufacturing processes are carried out at one time aided by a computer. These may include process control, planning, monitoring and controlling production. Source: http://www.doksinet CAD/CAM Contents and Tools 2 main process: Design + Manufacturing 2 sub-process of design: Synthesis + Analysis The end goal of the synthesis is a conceptual design of the prospective product The analysis evaluate the performance of the expected product Computer prototypes: Less expensive and faster to generate The core of the CAD tools are geometric modeling and graphics applications Source: http://www.doksinet CAM Tools . 2 main factors that determine the success of CAM implementation the
link between CAD and CAM must be a two-way route the hardware and software networking of the various CAM elements Timely synchronization among robots, vision systems, manufacturing cells, material handling systems, and other shop-floor tasks is most important Source: http://www.doksinet Main Activities CAD + CAPP + NC Manufacturing activities: Programming robot motion, conveyors, etc. Testing: Co-ordinate Measuring Machine (CMM) Manufacturing process begins with the process planning. The outcome of the process planning is a production plan, tools procurement, material order, and machine programming. Source: http://www.doksinet Definition of CAD/CAM Tools Based on Constituents Source: http://www.doksinet Definition of CAD/CAM Tools Based on Implementation Source: http://www.doksinet Typical utilization of CAD/CAM system Source: http://www.doksinet Composition of CNC System & Equipment Source: http://www.doksinet ProENGINEER - The Manufacturing
Process Design Design Model Model WorkPiece WorkPiece Manufacturing Manufacturing Model Model Fixture Fixture Setups Setups Set Set Up Up Process Process Environment Environment Define Define NC NC Sequences Sequences Pro-MANUFACTURING Create Create CL CL Data Data Files Files (APT) (APT) Post-Process Post-Process Drive Drive NC NC Machine Machine Tool Tool Machine Machine Tools Tools (Workcells) (Workcells) Tools Tools Source: http://www.doksinet Different CA Systems Integration Central to overall Supply Chain integration is CAD/CAM/CAE Systems Integration Upstream Upstream CAD CAD Data interoperability for the many and varied end user systems and applications Application Interoperability Different systems have different requirements Different applications have different requirements Data Data Exchange Exchange Downstream Downstream CAx CAx Require effective exchange and sharing of CA model data between different systems and applications Source:
http://www.doksinet Integration Challenges Getting the right electronic data to collaborators ¾ 2D drawings or 3D solid, surface, or wire frame models? ¾ Detailed modifiable models or simple external representations? ¾ Are exchange requirements up to date? Providing data in an immediately usable form ¾ Seamless flow of data between applications? ¾ Correct CAD system and format? ¾ Do quality or structure issues require manual rework? Transmitting data quickly, inexpensively, and reliably ¾ Are iterations necessary to get it right? ¾ Costly overnight shipments? Securing sensitive information ¾ Can competitors get my proprietary data? Source: http://www.doksinet Common Data Integration Obstacles Quality of the Native CAD Data Effective Data Exchange and Model Re-use The Data Exchange Process Understanding Customer / Supplier Requirements Delivery of Data from the Producer to the Consumer Data Management Source:
TranscenData client assessments Source: http://www.doksinet The Number of Interfaces Required by direct Translation and by Using a Standard Source: http://www.doksinet Costs: Independent USA Survey Results The National Institute of Standards and Technology in the United States reveals that CAD model quality and poor data interoperability costs the U.S Automotive Industry in excess of $1Billion annually Similar independent studies have found that the problem crosses all applications, industries and geographical boundaries Source: http://www.doksinet CAD/CAM Market Trends Microcomputers and engineering workstations (EWS). Traditional turnkey systems. The key factor to the future success of CAD/CAM is the development of versatile tools for design and manufacturing applications Source: http://www.doksinet CAD/CAM Market Dynamic Source: http://www.doksinet CAD/CAM Market Dynamic contd. Source: http://www.doksinet CAM in Product Life Cycle Source:
http://www.doksinet FMS Source: http://www.doksinet PDM/PLM Process data Management Process Life Cycle Management Source: http://www.doksinet Product Life Cycle (PLC) The PLC goes through many phases, involves many professional disciplines, and requires many skills, tools and processes. A product's life cycle can be divided into several phases characterized by the revenue generated by the product. Product development is the incubation stage of the product life cycle. After a period of development the product is introduced into the market; it gains more and more customers as it grows; eventually the market stabilizes and the product becomes mature; then after a period of time the product is overtaken by development and the introduction of superior competitors, it goes into decline and is eventually withdrawn. Product life cycle phases Source: http://www.doksinet Product Life Model Source: http://www.doksinet Process Management Systems Process management
systems normally have three broad functions: 1. They manage what happens to the data when someone works on it (Work Management) 2. They manage the flow of data between people (Workflow Management) 3. They keep track of all the events and movements that happen in functions 1 and 2 during the history of a project (Work History Management). Examples of PDM/PLM systems: Windchill PTC OneSpace Autodesk DM Server (Vault) Teamcenter CoCreate AutoDesk Siemens PLM Software (UGS) Source: http://www.doksinet Stages of PLM Source: http://www.doksinet Browser of the Product Structure Source: http://www.doksinet Web Browser of the Product Structure Source: http://www.doksinet PDM / PLM – Internet References http://en.wikipediaorg/wiki/Product Data Management http://www.johnstarkcom/epwldhtml http://www.plmiccom/ http://www.pdm-iforg/pdm schema/ http://www.systemonlinecz/clanky/pdm-systemy-nastupujuhtm http://newsletters.hagermancom/newsletters/ebul22-Mechhtm
http://usa.autodeskcom/adsk/servlet/index?id=4502718&siteID=123112 http://manufacturing.cadalystcom/manufacturing/Column:+Avatech+Tricks/Inv entor-Excel-and-Vault----An-UnbeatableCombinat/ArticleStandard/Article/detail/470091 Source: http://www.doksinet Rapid Prototyping, Concurrent Engineering & Reverse Engineering Source: http://www.doksinet Rapid Prototyping (RP) RP is the most common name given to a host of related technologies that are used to fabricate physical objects directly from CAD data sources. These methods are unique in that they add and bond materials in layers to form objects. Such systems are also known by the general names freeform fabrication (FFF), solid freeform fabrication (SFF) and layered manufacturing. Today's additive technologies offer advantages in many applications compared to classical subtractive fabrication methods such as milling or turning. Objects can be formed with any geometric complexity or intricacy without the need for
elaborate machine setup or final assembly. Rapid prototyping systems reduce the construction of complex objects to a manageable, straightforward, and relatively fast process. Source: http://www.doksinet RP Technologies Stereolitography (SLA) Selective Laser Sintering (SLS) Laser Sintering – Plastic Laser Sintering – Metal Laser Sintering - Foundry Sand Laser Sintering - Ceramic (Direct Shelt Production Casting) 3D Printing (PolyJet, Multi-Jet) Laminated Object Manufacturing (LOM) Fused Deposition Modeling (FDM) Solid Ground Curing Source: http://www.doksinet RP & CAD For rapid prototyping, CAD software generates the program for driving the rapid prototyping machine (*.stl files) Today, a new technology called virtual prototyping is becoming widely used to evaluate design especially to detect problems in downstream activities: In Virtual Prototyping, A DIGITAL MOCKUP OR VIRTUAL PROTOTYPE IS USED Analysis tools can be used to evaluate this
digital mockup Virtual manufacturing, Virtual testing, Virtual assembly Digital mockups reduce need to build physical prototypes Software: Envision, Virtual NC, dVise Source: http://www.doksinet Stereolitography - Principle Stereolithography is a common rapid manufacturing and rapid prototyping technology for producing parts with high accuracy and good surface finish. A device that performs stereolithography is called an SLA or Stereolithography Apparatus. Laser a optický systém Stierač prebytočnej tekutiny Pohyblivý stôl - os Z Nádržka s tekutým polymérom Source: http://www.doksinet SLS - Principle Laser a optický systém Podávač prášku Zásobník prášku Pohyblivý stôl - os Z Source: http://www.doksinet LOM -Principle Laser a optický systém Polohovacie zariadenie Laminovací valec Navíjací valec Fólia Fyzický model Pohyblivý stôl - os Z Podávací valec Source: http://www.doksinet 3D Printing - Principle Hlava Vstup materiálu
Pohyblivý stôl – os YZ Source: http://www.doksinet Advanced Laser Processing Source: http://www.doksinet RP Device STR 200 (Stratasys) Source: http://www.doksinet RP Device Helisys LOM 2030 and Physical Model Source: http://www.doksinet Manufacturing Process of Z402 3D Printer Transform from 3D CAD Data To Model 3D scanner to scan 3D data Use 3D CAD software to establish 3D model Generate 3D Solid *.STL Read 3D solid *.STL file prepare print work proceed printing finished part post process Source: http://www.doksinet The Printing Process of Z402 3D Printer Rapid Prototyping Technology is a unconventional processing means. Z402 System is based on the Massachusetts Institute of Technology's patented 3DPTM(Three-Dimensional Printing) Technology. The Z402 System Software first converts a three-dimensional design built using 3D CAD (and saved in STL format) into thousands of cross-sections or slices. The Z402 three-dimensional printer then prints these
cross-sections one after another from the bottom of the design to the top. This radical new process provides a means for designers to detect mistakes, improve their designs, and communicate more effectively with each other as well as with marketing and manufacturing decision-makers. 1.Collect powder from supply piston 2. Distribute powder on the build piston 3.Collect additional powder in recycle tank 4.Spread the binder 6.Repeat previous 5 steps, until finish the 3D parts 5.Supply piston ascent, and build piston descent 7.Finish the part inside the build piston. High speed of model printing Low material cost The dimension of parts can be as large as 203*254203 mm Nonpoisonous material Suitable for size examine and some function test Not deform due to the change of the weather temperature Several parts can be built at the same time The part can have different tolerance in different sections 8.Remove unbounded powder from parts Functional Prototyping
Applications of RP Source: http://www.doksinet Engine Block Ear gun Screw pump Mask Exhaust pipe Juicer Bottom of shoes Parts design Carry out conceptual design Applications of Bio-Engineering Head bone Head bone model Buildings Piping& tubing 3D toy model Head bone model and skin Head bone assembly Curved ball Conjugate Conceptual design Mobile parts Others Flexible tube Source: http://www.doksinet RP – Internet Sources http://www.zcorpcom/ Firm Z Corporation http://en.wikipediaorg/wiki/Selective laser sintering Wikipedia – SLS www.3dsystemscom Firm 3D Systems www.stratasyscom Firm Stratasys Inc. www.3dtechcz Firm 3D Tech www.mcaecz Firm MCAE Systems (CZ) home.attnet/~castleisland/ CASTLE ISLAND Co. http://www.charlyrobotcom/ Firm Charlyrobot SA, France http://www.ccutahedu/~asn8200/rapidhtml RAPID PROTOTYPING HOME PAGE Source: http://www.doksinet Concurrent Engineering (CE) Concurrent Engineering: a systematic approach to the
integrated, concurrent design of products and their related processes, including manufacture and support. This approach is intended to cause the developer, from the outset, to consider all elements of the product lifecycle from concept through disposal, including quality control, cost, scheduling and user requirements. (Institute for Defense Analyses) Source: http://www.doksinet The Phase and Concurrent (Simultaneous) Model of Product Development Source: http://www.doksinet Influence of Relative Cost of Changes in Dependency of the Product Life Cycle Phase Source: http://www.doksinet Concurrent Product & Process Modeling Source: http://www.doksinet CE – Internet Sources http://www.cerajcom/ Concurrent Engineering: Research and Applications http://cic.vttfi/cib tg33/ Concurrent Engineering in Construction http://www.virginiadotorg/projects/concurengdefaultasp CE: Virginia Department of Transportation Source: http://www.doksinet RE – What Does It Mean?
Reverse engineering (RE) in general is the process of discovering the technological principles of a device, object or system through analysis of its structure, function and operation. It often involves taking something (eg, a mechanical device, electronic component, or software program) apart and analyzing its workings in detail, used in maintenance or to try to make a new device or program that does the same thing without copying anything from the original. Many companies begin their design cycle by creating models sculpted by hand in order to communicate thoughts and ideas more effectively. As ergonomics and product differentiation become increasingly important in the design of a product, shapes become more complex and irregular. The challenge is then to capture these “hard models” and import them into CAD systems. Source: http://www.doksinet RE - Motivation Reasons for reverse engineering: Interoperability. Lost documentation: Reverse engineering often is
done because the documentation of a particular device has been lost (or was never written), and the person who built it is no longer available. Product analysis. To examine how a product works, what components it consists of, estimate costs, and identify potential patent infringement. Academic/learning purposes. Source: http://www.doksinet RE – Information Flow Reverse engineering has become a viable method to create a 3D virtual model of an existing physical part for use in 3D CAD, CAM, CAE and other software. The reverse-engineering process involves measuring an object and then reconstructing it as a 3D model. The physical object can be measured using 3D scanning technologies. Product Výrobok Drawing Výkres CAD CAM Source: http://www.doksinet Classical Process versus RE Classical Process CAD Model NC Manufacture Real Product CAD Model 3D Digitalization Real Product Source: http://www.doksinet Measurement System TriTop Source: http://www.doksinet
Application of the TriTop Source: http://www.doksinet System ATOS II Source: http://www.doksinet RE – Internet Sources http://www.3dscannerscom/ 3D Scanners http://www.cad-basedcom/ CAD-Based Solutions Source: http://www.doksinet CATIA Source: http://www.doksinet CATIA Source: http://www.doksinet Start Part Design Another way is to choose: START> MECHANICAL DESIGN> PART DESIGN Source: http://www.doksinet There are a few different ways to begin a Catia session. From the start-up screen, choose: FILE > NEW > PART Source: http://www.doksinet THREE DIMENSIONAL PART GENERATION IS VERY EASY AND FOLLOWS A LOGICAL PROGRESSION WHEN YOU KNOW HOW TO USE A FEW ICONS to THIS going from THIS to THIS Is as easy as 123! Source: http://www.doksinet This is the first screen you will encounter on the way to making your part. There are a few primary choices you will make here that determine the outcome of your part Part tree Then, pick SKETCHER from the
toolbar on the right. Firstly, choose which plane that you wish to sketch in. To keep it simple, pick the “xy plane” when beginning a part. This will help you to draw in a familiar plane. The PART TREE always tells you where you are. Notice at the top it says PART1 and at the bottom it is waiting for you to do something with PartBody. 6 Source: http://www.doksinet SKETCHER From here you pick an icon from the PROFILE toolbar and Click-andDrag that shape in the sketcher environment. Notice the Part Tree reflects the fact that you are working on Sketch1. This square was drawn using the square icon in the sketcher environment. At this point you are just roughing in the shape. The exact dimensions will be added next if needed. This is the PROFILE toolbar. These shapes are easy to use and the icons are self explanatory. Source: http://www.doksinet or dimension a part, first To CONSTRAIN, click on the line to be done as shown here This is the CONSTRAINTS toolbar Constraints
are used throughout Catia and can be demanding. picked Defined in dialog box Normal constraint Auto Constraint Animate constraint Exit Sketcher Click the line and click on Normal Constraint for the dimension to appeardouble click to change the dimension that appears Once you have all of the required parts dimensioned, you are ready to go into 3D mode Click EXIT for Catia to leave the sketcher mode and enter 3D modeller Source: http://www.doksinet Once you enter the 3D environment, the part profile you were working on takes on an isometric orientation as seen here. This is the SKETCHER toolbar from which you can choose a process of building your 3D model Pad icon 3D Model Definition Notice that not all of the icons shown on the shortened SKETCHER toolbar are active. This is because some other variable must be satisfied for Catia to allow it’s use. Once PAD is chosen, the PAD DEFINITION pop-up will appear. From here you define the TYPE and LENGTH of the pad. You can also
choose to mirror the pad or reverse it’s direction from here. The pad definition box will cause the limits that have been selected to be applied in a wire frame representation first. Now if you click on APPLY and then OK, your wire frame will finally become a solid 3D model. Source: http://www.doksinet Notice that on your PARTS TREE, pad1 has been added BEFORE sketch1 that was already there. This is all part of Catia’s hierarchy system. Source: http://www.doksinet DRESS-UP FEATURES Source: http://www.doksinet Although technically not a Dress-Up Feature, POCKET is a tool that is used often. Unlike HOLE, the feature to PUNCH must be defined in SKETCHER mode since it is user defined, not just a hole. pocket Source: http://www.doksinet Line is picked The first thing to do is pick the face that you want to pocket the void through, then pick Sketcher Source: http://www.doksinet In Sketcher, pick the proper shape icon from the Primary toolbar, and sketch the shape ON THE
3D PART represented in sketcher. Once this is done, EXIT sketcher to return to 3D mode Notice that the shape that will eventually become a hole in your part is represented in the part tree as Sketch2 Sketched circle Source: http://www.doksinet This is how your part will look once you have returned to 3D. The sketch you made will appear flat on the face you chose. If it is not orange, choose it to make it active and ready for pocketing sketch Notice that in our 3D part the sketch we made was not orange immediately when we returned to 3D mode. NO PROBLEM.we just need to either pick it manually from the object we are creating, or directly from the parts tree. Now click on POCKET from the Sketcher Based Features toolbar pocket Source: http://www.doksinet With POCKET picked, the POCKET DEFINITION input box will appear. Input the desired information and Catia will show you a dashed line sketch of your pocket. If all the information is correct, push APPLY and hole will appear in 3D,
then push OK to make it permanent. Notice POCKET1 is active on the action tree. Source: http://www.doksinet From TYPE, you can enter a dimension or constrain the depth of the punch by choosing “up to next”,”up to last”,”up to plane”, etcusing the arrow. Depth is where you enter the dimension for the depth of your pocket. Click on Mirrored extent to “mirror” or send your pocket in both directions. Since Catia automatically sends your pocket in the most logical direction, if you want it to go the other way click on Reverse Direction. Source: http://www.doksinet Here is the part with the pocket in it. Now lets begin to DRESS IT UP Dress Up Features toolbar Source: http://www.doksinet A close look up at DRESS UP TOOLBAR shows that it is ready to do five basic functions Fillet Chamfer Draft Shell DRAFT is what you use to angle the sides of your part in preparation for possible casting processes. Mirror Source: http://www.doksinet Orange means it is
picked Noted on the tree The first thing we will do is FILLET. Pick the face that you wish to fillet, then pick fillet from the toolbar. The Edge Fillet Definition box will appear, which you will fill in with the appropriate info. RADIUS is the size of the fillet and OBJECTS lists the number of faces that you are going to fillet. The box also allows you to pick the propagation of the fillet (Tangency is the best for now). Source: http://www.doksinet You don’t have to pick an entire facea single edge may be picked instead. To pick MORE than one edge, but NOT and entire face simply hold down CONTROL. Here we have chosen two different edges using the CONTROL buttonnotice the edges you choose turn red. MULTIPLE faces can be picked the same way. Source: http://www.doksinet MOUSE MANIPULATION The 3 button mouse is your tool for manipulation of the parts and assemblies that you have created. With it you can ZOOM, ROTATE and PAN your parts or manipulate the specification tree.
First, place your cursor ANYWHERE on the screen CLICK AND HOLD CLICK AND RERLEASE To ZOOM, click and hold the MIDDLE mouse button, click and release the LEFT mouse button, then PUSH the mouse away from you to make your part smaller and PULL it towards you to enlarge your part. Source: http://www.doksinet ZOOM in from a small part To a LARGE part with this simple technique. Source: http://www.doksinet The next thing you can do is ROTATE your part CLICK AND HOLD FIRST CLICK AND HOLD SECOND This is accomplished by HOLDING the MIDDLE mouse button and then the LEFT mouse button while keeping the middle one depressed. Source: http://www.doksinet Another useful mouse aided motion is PANNING CLICK AND HOLD To PAN a part across the screen, click and hold the MIDDLE mouse button only. This allows you to move your part around the screen in a single orientation. Source: http://www.doksinet The SPECIFICATION TREE can also be manipulated. You can EXPAND and SHRINK, MOVE and ZOOM it.
HAND Note the HAND cursor on the tree. To manipulate the tree, you must first click on it. This will turn your part DARK, signaling you are ready to perform various tree functions. Source: http://www.doksinet The tree responds the same as a part does for manipulation. To move the tree, simply place the cursor near it and click and hold the middle mouse button. Now drag the tree wherever you wanted it. TO HERE FROM HERE Here we have moved the tree by dragging it from one corner of the screen to the other. Source: http://www.doksinet By using the same mouse clicks to ZOOM as you did with a part, you can make your tree larger or smaller as you need to. TO THIS FROM THIS Click and hold the middle mouse button, while single clicking the left mouse button. While holding the middle button, move the mouse toward and away from you to make the tree bigger or smaller Source: http://www.doksinet To SHRINK or EXPAND your specification tree, you simply click on the + or – signs.
CLICK HERE TO OPEN TO THIS Clicking a + opens up the tree into it’s individual branches. Clicking a – does the reverse. Source: http://www.doksinet Different RENDERING STYLES give you different views of your part. The most common one is SHADING. It is chosen by clicking on it in the VISUALIZATION toolbar. VISUALIZATION TOOLBAR SHADING Source: http://www.doksinet This is the same part, but with the WIREFRAME picked WIREFRAME Source: http://www.doksinet This is HIDDEN LINES REMOVED mode HLR Source: http://www.doksinet This is SHADING WITH EDGES SHD+E Source: http://www.doksinet This is CUSTOMIZED. When this is picked, you can apply materials to your part. This is useful visually, and needed when you are going to do a stress analysis. Once applied, a single mouse click can get you a lot of useful information, ie: Centre of Gravity, density, weight etc CUSTOMIZED If CUSTOMIZED is not available, go to VIEW>RENDER STYLE>CUSTOMIZE VIEW, and then click on
materials. To have your material apply to the part, you must click PART BODY on the spec tree BEFORE clicking a type of material. Source: http://www.doksinet ADVANCED DRESS-UP FEATURES Once OK has been selected, your part will appear with the filleted area highlighted by orange lines at the boundaries. Click anywhere OFF the part to get rid of the lines and see your part 40 Source: http://www.doksinet chamfer A CHAMFER is used the same way as the fillet command. Important changes that you can make in the Chamfer definition box include changing the length and angle of the chamfer. Source: http://www.doksinet Just like FILLET, the CHAMFER is shown with an orange border until you click off of the part in the blue area. Source: http://www.doksinet Another thing that becomes important, especially during the manufacturing process, is DRAFT ANGLE. This is the angle that you build into your part so that it can easily be extracted from a mold during the casting process draft
The faces that you pick to draft are the ones that turn red, and the Neutral Element face picked becomes blue. The arrow determines which way the angle will occur. Don’t forget to ‘click’ on the neutral element selection box before clicking on the chosen face. Source: http://www.doksinet CLICK HERE Direction arrow and angle relation There is a direct relation between the direction arrow and the angle shown. Closer inspection shows that as you switch the direction of the arrow, you also switch the direction of the draft. Source: http://www.doksinet Now your part has a five degree draft angle that you have designed into it. This draft angle in no way changes the way that your part will act in relation to other parts in an assembly. Source: http://www.doksinet Another handy Dress-Up Feature is SHELL. This is used for ‘hollowing out’ your part when a solid part is not needed. Shell is defaulted to .079in (if you are using inch units) but you may change the inside and
outside dimensions, along with the faces to remove, in the Shell Definition Box. .079in default shown on chosen face shell Source: http://www.doksinet Now your part is shelled and awaiting any other dress up features that you may wish to do. Source: http://www.doksinet The last major dress up feature that you can utilize is the THICKNESS utility. This allows you to increase the thickness of just the area of the part that you have chosen. Here we have chosen to make the one side of the box .039in thick thickness Source: http://www.doksinet The part is now thicker on the edge that you chose, and will remain highlighted until you click off of it. Source: http://www.doksinet Here is your final part, with it’s draft angle, shell and thicknessall you need to do now is save it as a part and get ready to put together your assembly. This will be covered in a later chapter. Source: http://www.doksinet Now your part has a five degree draft angle that you have designed into it.
This draft angle in no way changes the way that your part will act in relation to other parts in an assembly. Source: http://www.doksinet Constraints You do CONSTRAINING in Sketcher mode to create your part to exacting dimensions. This is the opposite of free-form creating we have done up to this point. Source: http://www.doksinet constrain Pick the edge that you want to constrain, or give a definite dimension to, and then click CONSTRAIN from the toolbar. Another way to constrain a line on the part is to pick it and then click on CONSTRAIN IN A DIALOGUE BOX. You will have many different ways of constraining the area that will appear in the dialogue box. The ones that you can use will allow you to pick them. Source: http://www.doksinet Constrain in Picked point Picked line Source: http://www.doksinet The Constraint Definition box allows you to chose one or more constraints and apply it or them to the line that you have chosen to constrain. Source: http://www.doksinet
Now that we have clicked on DISTANCE, the distance between the two areas we have chosen will be defined. distance Source: http://www.doksinet If your REFERENCE ELEMENTS toolbar is not in view and not hidden, you can retrieve it from the toolbars menu seen here. Reference Elements Source: http://www.doksinet REFERENCE ELEMENTS play an important part in any solid modeling. Without them, you can only do work to the outermost surfaces of the part, which may not always be practical or involve a lot of pre-draw planning. 66 Source: http://www.doksinet To carve a step into your part without setting a reference plane, you are very limited as to where you can put it. You must first pick a part face that you are going to work on. This will unfortunately be where your step will begin, like it or not, without setting a plane. 67 Source: http://www.doksinet Once you have entered sketcher, you will draw the shape of the step that will be in your part. Notice in this example that part
of the step shape extends beyond the part. The bit of shape that is not part of the step is of no consequence at this point. overhang This method is the quickest and most convenient way of carving out a stepbut keep in mind that if ACCURACY is important, you must consider how much of the step is overhanging the part in you overall calculations. Source: http://www.doksinet Once back in 3D mode, you can see Sketch2 in relation to the part. You can now POCKET out this shape from one end to the other, and anywhere in between. Source: http://www.doksinet At this point we have highlighted Sketch 2 and picked Pocket from the Dress Up toolbar. The Pocket Definition dialog box pops up for you to enter the initial depth of pocket. Depth of pocket Mirror (pick) Source: http://www.doksinet Lets take the same shape and carve a step into the middle of the front edge, leaving material on both sides. For this we are going to have to do the same things as before, only first we must add a
REFERENCE ELEMENT. Source: http://www.doksinet plane A Reference Element is another plane you can use as a reference for other drawing bits on your part. To do this we first pick the face we wish to reference from, pick PLANE from the Reference toolbar, and in the Plane Definition dialog box we will enter how far the plane should be from the face we initially picked. Enter offset Source: http://www.doksinet To use the reference element, first pick it ( it will highlight orange) and then pick sketcher. 75 Source: http://www.doksinet Here in sketcher it is difficult to know which plane you are drawing on. If you forget, check the tree Here we see that the sketch we are doing at the moment is being done in plane2, as we wished. Other than that, you proceed exactly as we did the other step. Source: http://www.doksinet Back in 3D we see that our shape is exactly in the middle of the part, as we expected. 77 Source: http://www.doksinet From here we do exactly as we did with
the other step. We highlight the shape and choose the pocket icon. Give it depth in the dialog box and maybe even mirror it as we did here) for extra size. Source: http://www.doksinet Click here Click here Click here There is a number of ways to enter ASSEMBLY DESIGN mode. Basic Assembly Design Source: http://www.doksinet Assembling your individual parts into one assembly is very simple and user friendly in Catia. The first thing to do is gather up your parts. Here we have a simple plate with a hole in the middle. Source: http://www.doksinet We are going to take this one inch diameter rod and insert it through the hole in our plate using the ASSEMBLY DESIGN features. Ensure that you have saved your parts to a convenient location for quick access later. 82 Source: http://www.doksinet Both parts are now in the Assembly environment, and both are reflected in the tree. They enter the environment in approximately the same orientation that they were saved. You can now move
and orient them the way you wish. Catia will help you here Source: http://www.doksinet The first skill you will want to learn here is how to manually move parts around relative to one another. Pick the face of the Plate and prepare to move it. Source: http://www.doksinet Grab the COMPASS from the top right corner of your screen. Put your cursor on the red square of the compass and click and drag it to the highlighted part. 89 Source: http://www.doksinet Once you have moved the parts relative to one another, since we are locating round parts we will use COINCIDENCE RESTRAINT. Choose this and then pick the centerlines of the two parts involved. Centerline chosen Source: http://www.doksinet As you pick the second centerline, Catia will automatically constrain them. If Catia does not immediately line them up, click the UPDATE icon. 92 Source: http://www.doksinet Here are the two parts with a coincidence constraint applied , ready to be put together. We can do this
manually. 93 Source: http://www.doksinet Finally, here is your part ready to be DRAFTED and put into production. Notice all the constraints are reflected in the specification tree. Source: http://www.doksinet A properly dimensioned drawing of a part is very important to the manufacturing outcome. Drafting and Dimensioning Source: http://www.doksinet Part Design icon Choose DRAFTING There are a few simple ways to go from Part Design to DRAFTING. If you double click the Part Design icon (top right hand corner) you will access a navigation window as shown. From here, you can pick DRAFTING. 100 Source: http://www.doksinet The NEW DRAWING CREATION dialog box will appear. The first thing to do is pick your automatic layout. Orange shows it has been chosen Next, you can choose MODIFY and change ISO and ANSI standards, number of sheets and orientation, scale and others. Source: http://www.doksinet Quickly the drawing is generated. All of the views we asked for in proper
orientation to each other. This drawing is now ready for dimensions. Since the front view is highlighted, we can start there. Source: http://www.doksinet Click on DIMENSIONING from the toolbar Chosen surface DIMENSIONING And then choose a curved surface to dimension. 104 Source: http://www.doksinet If default is DIAMETER, this is what you will see. If you wish to dimension a RADIUS, highlight the line and right click on it. 105 Source: http://www.doksinet Your dimension is now a Radius. Lengthen and shorten the dimension line by dragging it Click and Drag 107 Source: http://www.doksinet All lines can be done in the same way. Simply pick them and click on Dimension If you are working on a large drawing, this single line picking would be rather tedious. There is another way 111 Source: http://www.doksinet Click on GENERATING DIMENSIONS Step By Step. This will allow CATIA to do the dimensioning one at a time, every few seconds, whatever timeout you choose. Click
here to start the dimensioning . Generating Dimensions icon 112 Source: http://www.doksinet Once all of the automatic dimensioning is finished, you will get an ANALYSIS of what was done. 113 Source: http://www.doksinet After the Auto Dimension, you may want to go back and make changes. This is as simple as highlighting the dimension and making the appropriate change. 114 Source: http://www.doksinet Sources Books: Computer-Based Design and Manufacturing by Emad Abouel Nasr, Ph.D and Ali K Kamrani, PhD Collaborative Product Design and Manufacturing, Methodologies and Applications by W.D Li, SK Ong, Andrew YC Nee and Chris McMahon Internet: http://en.wikipediaorg/wiki/Computer Integrated Manufacturing http://www.steptoolscom/library/standard/step 1html http://design.osuedu/carlson/history/PDFs/igespdf
 Árpád fejedelem fia, Árpád unokája, aki apja halála után, 907-ben szerezte meg a fejedelmi rangot. A krónikák igen homályosan írnak erről a korról. Valószínűleg hatalmi harcok bontakoztak ki Árpád trónjának megszerzéséért, és ezért Zolta hatalma csak árnyéka lehetett honfoglaló ősének. [1][2]Négy idősebb testvére a krónikák szerint Árpád halálakor már nem