A doksi online olvasásához kérlek jelentkezz be!
A doksi online olvasásához kérlek jelentkezz be!
Nincs még értékelés. Legyél Te az első!
Legnépszerűbb doksik ebben a kategóriában


Tartalmi kivonat
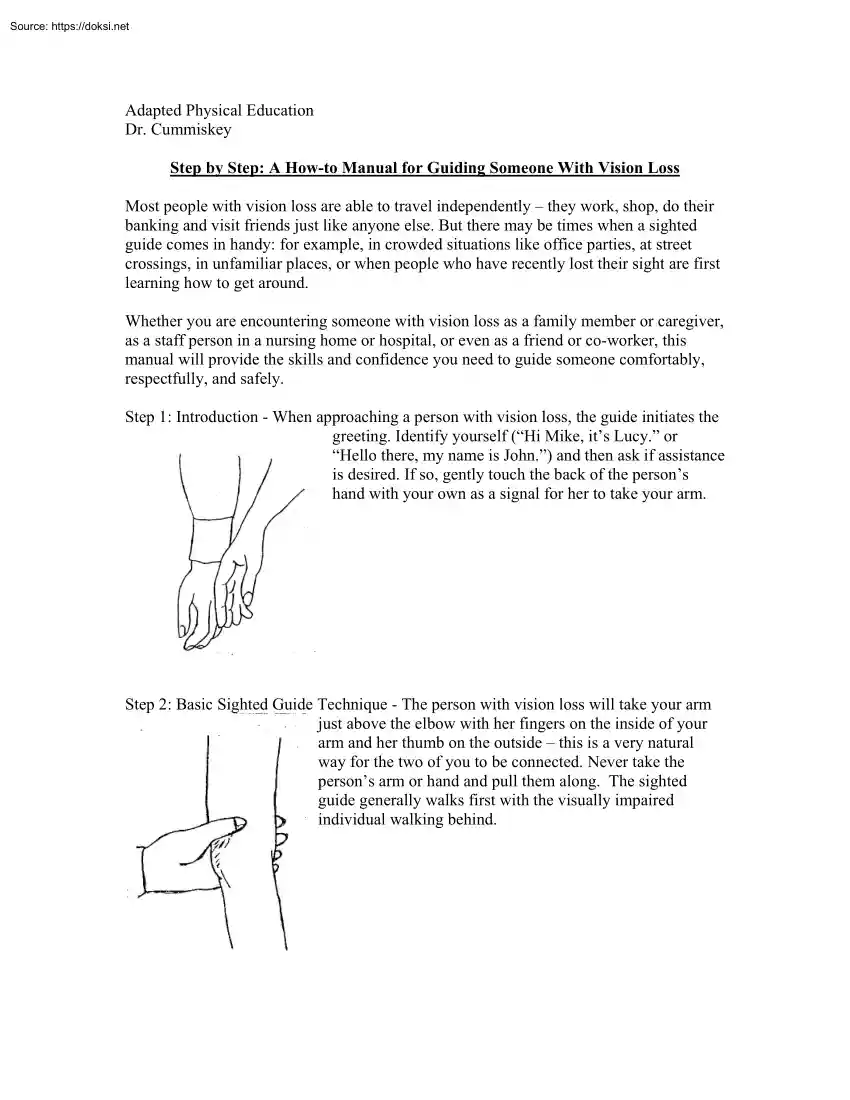
Adapted Physical Education Dr. Cummiskey Step by Step: A How-to Manual for Guiding Someone With Vision Loss Most people with vision loss are able to travel independently – they work, shop, do their banking and visit friends just like anyone else. But there may be times when a sighted guide comes in handy: for example, in crowded situations like office parties, at street crossings, in unfamiliar places, or when people who have recently lost their sight are first learning how to get around. Whether you are encountering someone with vision loss as a family member or caregiver, as a staff person in a nursing home or hospital, or even as a friend or co-worker, this manual will provide the skills and confidence you need to guide someone comfortably, respectfully, and safely. Step 1: Introduction - When approaching a person with vision loss, the guide initiates the greeting. Identify yourself (“Hi Mike, it’s Lucy” or “Hello there, my name is John.”) and then ask if assistance is
desired. If so, gently touch the back of the person’s hand with your own as a signal for her to take your arm. Step 2: Basic Sighted Guide Technique - The person with vision loss will take your arm just above the elbow with her fingers on the inside of your arm and her thumb on the outside – this is a very natural way for the two of you to be connected. Never take the person’s arm or hand and pull them along. The sighted guide generally walks first with the visually impaired individual walking behind. Step 3: Stance - The person may have a preference as to whether she holds your left or right arm; either way is fine. The person’s grip will typically be firm enough to maintain contact with you, but relaxed enough to be comfortable. Step 4: Walk at a normal pace - The guided person will feel your motion and follow along comfortably. If the visually impaired person tightens his grip or pull back on your arm, slow down. The guide should give information such as any
irregularities in terrain, stepping from a concrete sidewalk onto grass, stairs, doors, etc. Step 5: Switching Sides - Sometimes you may need to switch sides when opening doors, using handrails on stairways, or for a change of pace. Here you’ll learn how a person with vision loss switches from the guide’s left side to the guide’s right side. First, the person with vision loss places her left hand on the guide’s arm, directly above her right hand or “grip hand.” Now she is holding onto the guide with both hands She will let go with her right hand and bring her left hand gently across the guide’s back until she connects with the guide’s right arm above the elbow. Now she can take a small step over to the guide’s right side and resume the normal sighted guide position. Step 6: Narrow Areas - In spaces where it’s awkward to walk side-by-side (narrow pathways, doorways, and in crowds), you will need to walk almost directly in front of the person you are guiding. To get
ready for this, move your guiding arm backwards and position it diagonally behind your back. The person with vision loss will then straighten her gripping arm and step directly behind you. Her arm will be fully extended to prevent her from stepping on your heels. When you’re finished negotiating the narrow space, bring your arm back and resume the normal guiding stance. The person you are guiding will pick up on this signal and move back into the standard position, one half-pace behind. Step 6: Going Through Doors - Tell the person with vision loss when you are approaching a door, and describe it and the direction it opens (the side with the hinge). For example, you can say something like “We’re approaching a door opening to the left and toward us. It’s a large wooden door with a doorknob.” The person with vision loss will switch sides if necessary so that she is on the same side that the door opens. After the guide opens the door and begins to walk through, the follower
should have his hand ready to aid in holding it open as they walk through. The follower should sweep his arm across the front of this body to locate the door with a flat palm. If the door is not self closing, he should close it behind them. If the doorway is narrow, use the technique describe above always be one step ahead. Step 7: Stairs and Curbs - Tell the person with vision loss when you are both about to climb up or down stairs or curbs. Approach these squarely – never at an angle – and come to a full stop before you proceed up or down. For follower may need to switch to the side with the handrail. You should tell her where the handrail is in relation to her body (“There’s a metal handrail on your left.”) She will then grasp the handrail and locate the first step by sliding one foot forward until the step is detected. To begin, you step down (or up) one step, then both of you will proceed together in rhythm. As the guide, you will Step 8: Taking a Seat – When
guiding someone to a chair, walk up to it and place your hand on the back of the chair and let the follower trail your arm down to the back. Tell him in which direction the chair is facing and he can then seat himself. If the chair does not have a back or is very large, the follower can be brought up to the chair so that his legs are against the front of the chair. He can then reach down to locate the arms and seat before sitting down. If the chair is located at a table, the guide should describe the relationship of the chair, the table, and the follower. One hand of the follower should be placed on the chair and then other hand on the table. You may want to describe an unfamiliar chair to him (i.e: presence or lack of arms, back; present of swivel or reclining back, movability) Step 9: Revolving doors – If a revolving door can’t be avoided, the guide should wait until the traffic clears and then stop the door. He should then position the visually impaired person into a
compartment. The visually impaired person then pushes with the left hand and trails the shell of the door with the right hand or elbow. Upon reaching the end of the shell, he should exit forward and to the right where he can wait for the guide. Step 10: Going Your Separate Ways - When it comes time to take leave of each other, be sure to tell the person you are guiding that you are about to go. “Goodbye, Andrea I’m heading off now!” will usually do the trick. Make sure she left at a tangible reference point, such as a wall, facing a particular direction, or even in the company of other people. Not only is this courteous, but it also means she will not be left stranded in an open space talking to someone who has already moved on. Assisting People with Guide Dogs - As always, first ask the person if she would like some assistance. The person may want to take your arm, with her dog accompanying both of you. Or, she may instruct her dog to find and follow you as you walk ahead Or she
may simply ask for directions and proceed on her own. If she would like your assistance as a guide, offer your arm by making contact with the back of her hand as usual. The person may have a preference about which arm she chooses, depending on how she normally positions her dog. If she wants to instruct her dog to follow you, walk a few paces ahead and provide verbal directions as you go (“we’re going to be taking the next left”). The person with vision loss will instruct her dog You should never pat a guide dog, unless permission has been given by its owner. Misc Tips: 1. Once inside a room, provide a general orientation including themes, atmosphere, and visual details. 2. Don’t talk loudly, the person is visually impaired, not hearing impaired 3. If you leave someone briefly, let them know because they may not be aware you walked away. Provide a point of reference such as a bench, counter, or wall 4. Be specific as much as possible such as “15 feet to your left,” not
“over there” 5. It is OK to use words like “look” and see” They are part of everyone’s vocab
 Ahogy közeledik a történelem érettségi, sokan döbbennek rá, hogy nem készültek fel eléggé az esszéírás feladatra. Módszertani útmutatónkban kitérünk a történet térbeli és időbeli elhelyezésére, a források elemzésére és az eseményeket alakító tényezőkre is.