A doksi online olvasásához kérlek jelentkezz be!
A doksi online olvasásához kérlek jelentkezz be!
Nincs még értékelés. Legyél Te az első!
Legnépszerűbb doksik ebben a kategóriában


Tartalmi kivonat
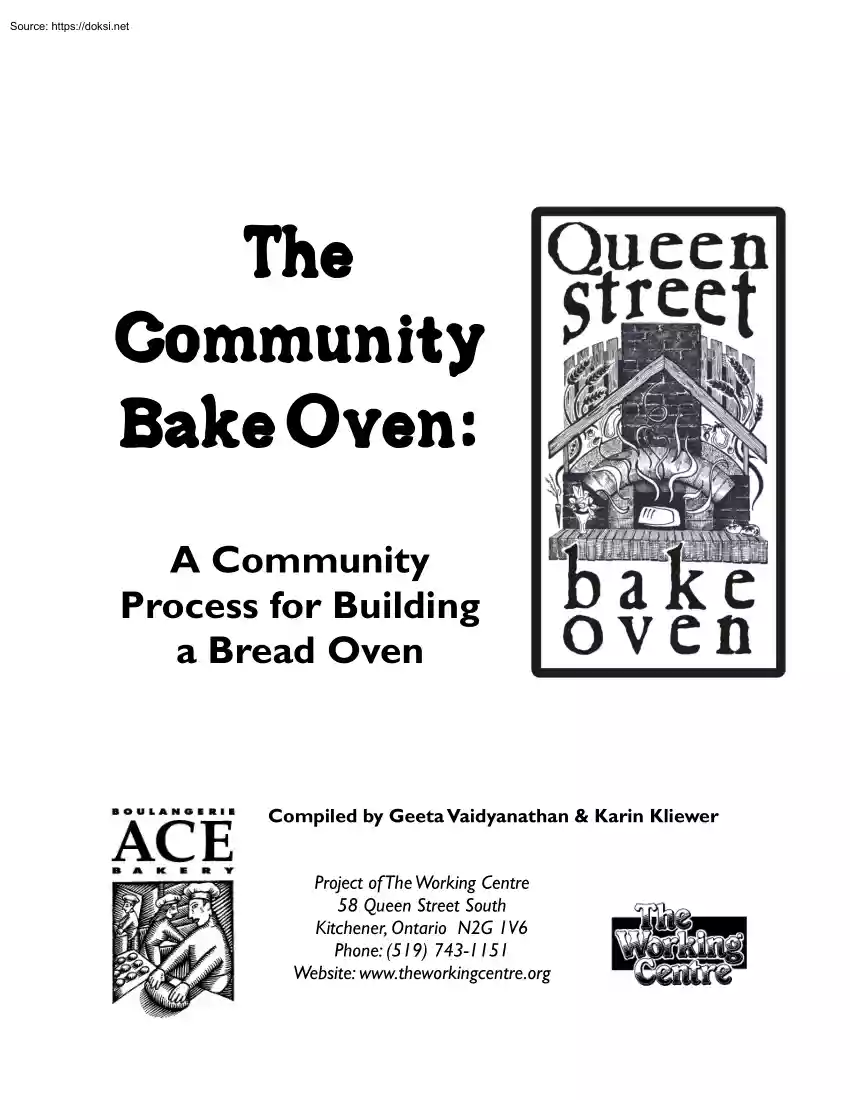
The Community Bake Oven: A Community Process for Building a Bread Oven Compiled by Geeta Vaidyanathan & Karin Kliewer Project of The Working Centre 58 Queen Street South Kitchener, Ontario N2G 1V6 Phone: (519) 743-1151 Website: www.theworkingcentreorg Thank You Many thanks to ACE Bakery and the Toronto Community Foundation for making this project possible through their generous grant funding. To Jutta Mason, (and the Dufferin Grove Park bake oven project), who gave us inspiration for our project. To Alan Scott for his invaluable book The Bread Builders, which was an excellent resource along the way. To Andy MacPherson for designing a unique and beautiful oven logo for us. To our mason Peter Kompter, who gave us the confidence to proceed and provided several hours of emergency brick-laying aid. To the numerous community volunteers, gardeners and neighbours who supported this project, including Ramani, Greg, Ron, Alfred, Steve, and Cassandra. More than 400 volunteer hours
were spent on this oven project, including 50-60 hours of planning and prep time During the build there were nearly 100 visitors to the site, and in the first baking season we have had more than 150 guests attend bread workshops and pizza days. Finally, thanks to The Working Centre for envisioning the concept of the oven and for providing in-kind staff time toward this project. Queen Street Bake Oven Build October 25-November 26/03 Geeta Vaidyanathan has been involved in various local community development projects including developing an affordable housing process with the Working Centre in Kitchener, and supporting self help groups in diversifying livelihood options through the formation of micro-credit and microenterprises with Gram Vikas, a non-profit organization in Orissa, India. Karin Kliewer coordinates the Working Centre’s Urban Agriculture Program in Kitchener, which provides individuals and groups with the necessary resources to produce food in an urban setting. She
believes that local urban food production, including bread baking, contributes to improving the quality of life in the downtown, with benefits such as access to fresh whole food, community building, cleaner air, and sustainable land use. A public oven that gives such a strong push for strangers to share overlapping stories is a very good thing, in a city where so many people know so little about one another’s stories, past or present. - Jutta Mason, from Cooking with Fire in Public Space. Photos by Karin Kliewer. Production of the manual funded by ACE Bakery, Toronto, ON. Published by the Working Centre: Kitchener, ON. 2005 wwwtheworkingcentreorg The Community Bake Oven: A Community Process for Building a Bread Oven Table of Contents Preface . i) How to Use This Handbook . iii) Section 1: Oven Build Choosing the Oven Site . 1 Oven Foundation & Footing . 3 Block Laying . 8 Finish the Block Laying . 10 Pouring the Oven Slab . 12 Mock-Up Hearth Bricks . 14 Laying the Hearth
Bricks . 15 Brick Walls & Start of Dome . 18 Oven Dome Arches . 20 Thermocouples . 21 Dome, Arches & Chimney . 22 Oven Walls, Ash Slot & Chicken Wire . 24 First Firing . 24 Vermiculite-Cement Insulation . 26 Final Touches . 28 Oven Doors . 28 Using the Oven . 30 Oven Photo Gallery . 32 Section 2: Resources Oven Materials . 33 Masonry & Carpentry Tools . 34 Permits to Consider . 35 Related Books & Websites . 36 Section 3: Baking in the Oven Pre-Heat & Baking Tools . 37 Recipe 1: Country Olive Bread . 38 Recipe 2: Three-Grain Wild Rice Sunflower Seed Bread . 39 Recipe 3: Whole Grain Sourdough Bread . 40 Recipe 4: Thin-Crust Pizza Dough . 41 Recipe 5: Cinnamon Buns . 42 Recipe 6: Naan Bread . 43 Recipe 7: Wood-Fired Granola . 44 Bread makes itself, by your kindness, with your help, with imagination streaming through you, with dough under hand, you are breadmaking itself, which is why breadmaking is so fulfilling and rewarding. - Ed Brown, from The Tassajara Bread
Book. The Community Bake Oven: A Community Process for Building a Bread Oven Preface The Working Centre, a non-profit employment resource centre, has been involved with local community development projects in downtown Kitchener for over 20 years. These initiatives, which aim to meet basic needs as well as build new skills in the community, have used the concept of ―community tools‖ to encourage many people who are often marginalized to become involved in creating a vibrant and active downtown. Through it’s Urban Agriculture programs, The Working Centre has been working at building greater food sustainability in our region, again specifically addressing the needs of those living in the downtown. For example, The Working Centre has started and continues to support various volunteer-run urban agriculture initiatives such as the Queens Greens community garden, the Whole Food Box Community Shared Agriculture (CSA) program, GROW Herbal gardens, an organic gardening resource
library, and a one-acre vegetable garden with greenhouse supplying organic produce for the downtown St. Johns Kitchen The community bake oven was envisioned as another such ―community tool‖, which would provide the opportunity for the community coming together through the simple and age-old tradition of baking bread. In 2003 The Working Centre received a generous grant from ACE Bakery (Toronto), to be used for the building and implementing of the first community wood-fired bake oven in downtown Kitchener. Research into the oven building process included a visit to the Dufferin Grove Park in Toronto, where Jutta Mason’s bake ovens are well known and successful. Queens Greens community garden, a 25-plot garden located just down the street from The Working Centre, was chosen as the oven site. Being situated at this community garden, in a highly visible and well-travelled public space surrounded by beautiful organic gardens, the bake oven will hopefully create a natural gathering
place where stories, skills and good food are shared. Throughout the building process numerous community neighbours and garden members continued to drop by, asking questions, lending a hand, offering warm coffee, snapping photos, sharing suggestions, and recounting memories brought back by the sight and smell of a wood-fired bake oven in a public space. In the past, the Working Centre has been involved in other downtown construction projects, using renovation work as an opportunity for job skills training and volunteer involvement. The bake oven was designed and built over the course of one month during the fall of 2003 with this same model in mind. The oven project came to life through the efforts of a team of community volunteers, and a volunteer mason, carpenter, engineer and one part-time coordinator who all had an interest in community development and were willing to share their skills. The following spring (2004) the roof and enclosure were completed by a Working Centre
construction training crew. This community-supported building process offered a unique teaching opportunity for those who wished to learn about building a traditional masonry oven, gain further carpentry skills, or get involved in wood-fired baking. The baking program began in the Spring of 2004, with bread workshops led by a retired professional bread baker, and popular ongoing pizza days. At the writing of this handbook, The Working Centre is in the process of renovating an incubator kitchen in their 66 Queen building, just a few blocks from the bake oven, and we anticipate incorporating the wood-fired baking into a small food retail operation there. As well, we look forward to continuing to host ongoing pizza days and community baking sessions on site. For a current oven baking schedule see the Working Centre’s website at www.theworkingcentreorg i) The Community Bake Oven: A Community Process for Building a Bread Oven Preface continued Each community bake oven will be
unique, based on it’s circumstances: where it’s located and if it’s affiliated with a community group who the builders are and what experience they have what design is used, what materials are used, and what budget is available how it will be used, what will be baked, who will be doing the baking The oven described in this handbook will cost between $2000-$3000, depending on new or used materials, style of roof, and other finishing touches. Read the following section on ―How to Use This Handbook‖ carefully, to determine which design and materials are best for your community oven. If you decide to build a masonry oven, we advise you to speak with a trained mason before you start, or see whether you can recruit a volunteer mason for the project. This book is not intended to be a formal building manual, and does not provide oven building plans. This book tells the story of our community process in designing and building a wood-fired oven. We hope the narrative and photos in the
following pages will inspire hope, excitement, encouragement, and confidence for other groups or individuals to build (and use!) an oven in their own community. Regardless of the style of community oven you decide to build, you can be assured that anytime the wood-fire is stoked, the first baking goes in, and the tantalizing smells start to waft through the air, the same magic will happen as diverse people start to gather around to share their advice, ingredients, skills and stories. Good bread baking is much more than just a good outlet. At certain critical junctures, you really have got to block out extraneous goings-on and attend meticulously to small details. Far from being onerous, these more exacting phases of the baking process can also be the most calmingprecisely because they do require such powerful concentration. And the very fact that so much on oneself is called upon, in the way of artistry and resourcefulness, makes the whole business that much more gratifyingenhances
the quality of life overall. That bread bakingas well as gardening, spinning, beekeepingis in fact creative and exacting is often overlooked. Instead, they are regarded as ―subsistence skills‖ - what you have to deal with to scratch out a bare living, reeling, as you do, from the endless labour entailed. You can hardly blame our parents and grandparents for having set firmly behind them so rigorous and chancy a way of life, and for thinking a bit daft those of us who cast a rueful glance backwards. For it was with full, trusting, and grateful consent that people began to buy what they needed, use ―convenience foods‖, and adopt a full complement of helpful household machines. Hardly a voice was raised in protest when our traditionally home-centred, small-scale system of food production gave way, little by little, to what has been called ―the corporate cornucopia‖. Today, though, there is good reason to question whether our present food system can be sustainedso profoundly
dependent on petroleum is it, and so flagrantly wasteful of other resources as well. Good reason, too, to seek out more direct ways of meeting our food needs, and to breathe a little easier when you find them. This ease of mind is yet another source of satisfaction that comes of being a competent whole grains baker. Revival of what is, yes, a subsistence skills, means you know yourself able to turn just about any flour or grain that might come your way into something that will nourish and even delight. Knowing this, you feel that much less vulnerable to circumstance It’s a subtle change, but it goes deep. - Laurel Robertson, from The Laurel’s Kitchen Bread Book. ii) The Community Bake Oven: A Community Process for Building a Bread Oven How To Use This Handbook This handbook is intended to be an guide to help and inspire other community groups to begin the process of creating an oven for themselves. With this handbook we hope to demystify the masonry (brick) oven, by telling
the story of how our group was able to build a beautiful oven, and how a community can come together for a common project. It is written in a conversational ―diary‖ format, incorporating step-by-step information and photos, as well as some measurements and drawings. It is important to say that this handbook is not intended to be an exhaustive building manual, but rather to be used as a compliment to professional masonry building books that are readily available. An excellent book to use alongside this handbook is Alan Scott’s The Bread Builders, which was an invaluable resource for our group throughout our process. We also used the help of a local mason to complete our oven. Alan Scott’s company ―Ovencrafters‖ (see Resources) has a very informative website, and offers technical design plans which can be ordered by mail for $100-$625 US, depending on what style and size of oven your want to build. Although this handbook describes our experience of building a masonry oven,
community bake ovens also have a long history of being made of adobe, stone, or cob. Cob is a building material similar to adobe, made of a mixture of sand, clay and straw. Many creative builders prefer to use cob, as it and can be moulded into any shape you desire. Several books about cob building are listed in the Resource section. Remember that each oven will have its own unique features, based on its location, the materials available, budget, aesthetic, and how the oven will be used. Oven dimensionsThis handbook describes the building of a simple masonry oven that provides a 32x36-inch baking surface, with an oven platform that is 6 feet, and the actual oven that is 3 feet across. For the excavation you need to leave an 11x11space This does not include the oven roof dimensions, or any enclosed work area near the oven. These are important details to consider before you begin so that you leave enough room for a comfortable working oven (see the ―How to Use this Manual‖ section
for more about oven considerations). Masonry workThis manual will only cover very preliminary information about masonry work, as there are many good books out there on the subject and it is not possible to duplicate that information here. If you are planning to build your own masonry oven (without the help of a ―professional‖ mason), we advise getting a book on basic masonry techniques and familiarize yourself. Once you have done some background reading, decide the specifications that you want for your oven based on where you are building it, who is using it, and what you plan to bake. As the Working Centre has been involved in a variety of renovation projects, we were fortunate to have a strong crew of volunteers with some building experience, including engineering, architectural and carpentry skills. If your group of builders is completely inexperienced, we strongly suggest getting some advice or support from local builders in your community. Many experienced people will be more
than happy to volunteer their time for your community project! iii) The Community Bake Oven: A Community Process for Building a Bread Oven How To Use This Handbook Continued Before you begin building, here are some details you may want to consider: Physical Factors: 1) Do you want a slab and block walls as your foundation (as we used), or do you want to use some other foundation materials or design? For example, we are familiar with a group that used fieldstones that were readily available on their farm, to build a simple and solid foundation for their oven. To save on costs, consider what materials you have on hand 2) Do you want an ash slot in the hearth? We incorporated an ash slot, which is convenient for bread ovens, as the ash needs to be raked out before the bread is baked. If you are planning to use your oven primarily for baking pizzas, where the fire is pushed into the back or side during baking, the ash slot will be optional. 3) Who will be using the oven, and at
what height are they most comfortable working? For most people this will be elbow height. Some bakers prefer a higher height, but lower will not be very functional unless you plan to have children actively involved. 4) Will you use firebrick or clay brick for the walls and dome? Firebricks are larger than clay bricks, and you will need approximately 10% less bricks if you use these for your walls and dome. However, firebricks are more brittle than clay bricks and not as easy to work with We used firebrick for the hearth (this is not optional), but clay brick for the walls and dome. We also sourced a cheap supply of good quality used clay bricks from a demolition project nearby. Consider what resources are available in your community 5) Will you use thermocouples for measuring oven temperature? If you will be measuring the oven hearth temperature you will need to pre-drill the hearth brick as well as the vermiculite slab, before the oven dome is closed. If you will be measuring the
interior oven temperature you will need to pre-drill a dome brick Thermocouples are useful devices if you want to measure the baking temperature accurately. 6) What will the oven façade and front of hearth look like? Will you have blocks, bricks, stones or tiles for the façade? Will the hearth use a stone slab or bricks? Be creative – this will be the most visible part of the oven! 7) Will there be a roof or enclosure for the oven? If the oven is outside, it is wise to consider this feature so that the oven is protected, and that baking can take place in any variety of weather conditions (e.g rain) This decision will depend on your oven location and budget We built a wood frame with asphalt shingles for the oven proper, and added a front enclosure that serves both as a covered workspace and eating area. iv) The Community Bake Oven: A Community Process for Building a Bread Oven How To Use This Handbook Continued Social Factors: 1) Who has access to the oven? Who is this oven
being built for and what kind of needs would they have? Is this oven connected to a broader community, through a community centre or neighbourhood association? Will there be large groups using the oven, will there be school groups or youth involved? Does the oven and surrounding area need to be made wheelchair accessible? Is this oven going to be used for production baking, and do you need a food-safe work area? 2) How visible do you want the oven to be in the community? Are you building your oven in a public areaa park, school yard, community garden? Do you need to contact the city, or neighbours? Consider fencing, tool storage, or lockable door? Will you incorporate community art, such as a mural or oven sign? 3) When to include public and volunteers in the process of building? Who is your work crew? Do you hope to include the community members in the planning or building process? How many volunteers do you need, and are any of them experienced builders? Is there a local mason who is
willing to provide support? Carpenters? Architects? Are you planning to hold any special ―workdays‖ or tours during the build? 4) When to involved public or volunteers in the use? Who will use the oven? Will you need volunteer fire-builders or bakers? Are there local professional bakers who will use the oven or teach workshops? Will there be public baking days? Will there be costs for using the oven? What storage/working facilities are needed for these activities? Resource: adapted from Scott, Alan. The Bread Builders The traditional village bake oven was the hub of community life - the town’s unique focal point, the circle of neighbours swapping recipes and sharing stories, the public meeting space where people’s lives intermingled amidst the pungent smells of wood smoke and fresh baking. In our hurried lives and bustling city, the village bake oven teaches us many things. We learn about the satisfying rewards that come with food that is prepared slowly, with patience and
care. We learn to celebrate bread baking as an art-form, using quality ingredients that come from local sources We learn the value of working with our hands, being part of an age-old history of community bread-bakers. Most of all, we learn of the unexpected friendships that can form when different people come together to work on a common task. - Karin Kliewer, from Creating an ―Urban Village‖ One Loaf at a Time, Good Work News June 2004. v) The Community Bake Oven: A Community Process for Building a Bread Oven Section 1: Oven Build Choosing the Oven Site Day 1 (October 20) Volunteers: 2 Hours on Site: 2 hrs Finding a Suitable Location. Today the oven build officially started! In the summer months, I had met with Queens Greens Community Garden members to discuss how the oven project could fit within the garden. Being directly located on a busy downtown street with mainline bus service, the community garden site provided excellent visibility and accessibility for the
oven. The garden offered water access which was needed for the oven build and fire safety, and had an existing group of active community members interested in using the oven. Permits to Consider. Cities may not require any building or fire permits, but it’s best to inquire before beginning your build. Commercial zoning and food safety/vending permits may be needed if you plan to sell baking to the public. Finally, notify the surrounding neighbours about your project! For more details about these permits see the resources section at the back of this manual. When considering where the oven would be located within the garden, we wanted to choose a site that would create minimal disruption to the 25 existing garden plots, would not shade the sun-loving vegetables, and would provide a comfortable space for a group to gather around. We settled on a little-used sitting area in the centre of the garden that currently only featured a bench and planter which could be moved. The small communal
strawberry & rhubarb patches growing around the edges could be ―rescued‖ by transplanting. This space was also large enough to allow for working space while baking with the long-handled bread peel, an overhang shelter roof, a work table, and several benches. The oven platform is 6 feet, and the actual oven will be 3 feet across. The space required for the excavation is approximately 11x11 feet. This allows for an extension in front of the oven door and some sitting space. You want to be sure to have adequate space all around the oven, and additional space in front of the door to manipulate baking tools. Materials List: Consider pre-ordering supplies for the foundation Tools Needed: Hammersone per person Stakesfor marking out oven dimensions Measuring Tapesat least two Chalk Lineone needed Pencils & Stringenough to mark out oven dimensions 1 Consider Sun and Prevailing Winds. We spent two hours at the chosen site, staking out oven dimensions with a string line and
considering which direction to situate the oven. We decided to face the oven in a NE to SW direction. This way, bakers would not be looking directly into the sun or facing prevailing winds while baking, and the oven would be set into an even parallel with the layout of the existing community garden plots. The Community Bake Oven: A Community Process for Building a Bread Oven Left: The Queens Greens Community Garden, on Queen Street South in downtown Kitchener. Below: The completed Queen Street Bake Oven in the centre of the community garden quickly becomes a focal point for garden members to gather, eat their lunch, or just relax. Day 1 Summary: 1) 2) 3) 4) Find suitable location for oven with large enough surrounding space for all your needs. Consider any permits you may need. See resource list at end of this manual Consider water access and community accessibility. For the oven orientation consider: a) avoiding sun shining in eyes (preferred direction is N-S) b) avoiding wind
blowing through oven door c) avoiding smoke blowing into neighbour’s houses d) situating the oven to blend in with the surrounding garden or area e) leaving enough workable space on all sides of the oven 3) Mark out oven dimensions with string and stakes. 4) Order building supplieswood, bricks, concrete mix, concrete blocks. 5) Rent electric mixer for Day 2or consider getting a shipment of prepared concrete delivered or even donated from a local supplier. 2 The Community Bake Oven: A Community Process for Building a Bread Oven Oven Foundation & Footing Day 2 (October 25) Volunteers: 5 Hours on Site: 8 hrs Visitors: 12 The oven foundation and footing were completed today. We started by digging out and levelling the trench area as had been marked out with our string line. For cold climates the trench must be a 7 1/2-8 inch depth from the finished grade, then levelled. To prevent frost formation at the edge or under the slab, use a 2 inch-thick sheet of insulation, extending
24 inches out from the slab. We shovelled the healthy garden soil onto a spare piece of plywood, making it easy to move later. It is important to make a level firm foundation with sand or clay, not organic matter. The diagonals must be equal to ensure right angleseach diagonal will be 181 inches (15 feet). Alfred, a long-time Queen Greens Community Garden member pitched in for the day, bringing extra tools from home! Ramani volunteered to research the best sources for thermocouples needed for measuring the interior temperature of the oven. Polystyrene insulation sheets 2 inches thick were cut to size (132‖ x 124‖), and levelled in place, extending 30 inches out from where the block wall will be. This was followed by 9-guage 6x6 steel mesh. 2 runs of rebar were placed over top, lifted up off the Styrofoam by 1 inch spacers, and laid flat in the trench. Remember to include an extra 4 inch length in the rebar when cutting, which will form the overlap to tie the ends together with
wire (2 inches per end). The rebar lengths: (also see ―Oven Foundation & Footing‖ diagram on page 4) A. Tied into a square 3 inches from form: 2 pieces x 78― long + 4‖ extra each (2 x 82‖) 2 pieces x 72‖ long + 4‖ extra each (2 x 76‖) B. Tied into a square 8 inches from form: 2 pieces x 68‖ long + 4‖ extra each (2 x 72‖) 2 pieces x 60‖ long + 4‖ extra each (2 x 64‖) Bring food and water. This was a long day for everyone I went to the deli down the street to buy sandwiches for the crew, as no one had remembered to bring a lunch and all were famished after more hours of digging soil and carting concrete than anticipated! We were glad to have toques and gloves, as well as a plastic tarp to sit under for eating our lunch. As Queen Street is a busy downtown area, many passers-by were curious about what our crew was up to. A steady stream of visitors stopped in throughout the day, and it became apparent how valuable a ―host‖ role would become during the
project. The host would greet and tour visitors, explaining the community garden model and the bake oven project, while the rest of the crew could continue in their work with minimal distractions. 3 The Community Bake Oven: A Community Process for Building a Bread Oven Above: Digging out & levelling the foundation area. Tools Needed: Hammers & nails Shovels (for soil/concrete) Cordless drill & extra drill battery Handsaw Pliers Staple gun & extra staples Electrical outlet & extension cord Wheelbarrows (2) Electric mixer Water hose, buckets, and water access! Wire brush & cloth rags to clean tools Hacksaw (for cutting rebar) Wire cutter (for mesh) 4-foot level 4 Above: No more ―Wonder Bread‖we only want wonderful bread! Materials List: Steel wire (to tie rebar) Rebar (7/16 inch) total 50 feet see list on previous pg. Mesh (6x6‖) - 2 pieces 4 feet x 8 feet each Plastic tarp roll, to cut to size as needed Concrete mix (50 bags @ 3 kg each)/ or
consider getting a donation of prepared concrete from a local supplier 2x6 Lumber for forms (124‖x2; 132‖ x 2) 2x6 Lumber for smoothing concrete (1 piece 124‖ long) Tamping tool Plywood pieces (to shovel soil onto) Styrofoam sheet 2 inch thick, size 132‖x124‖ Tarps to cover mixing/lunch area Stakesfor marking out oven dimensions Measuring Tapesat least two Chalk Lineone needed Pencils & Stringenough to mark out oven dimensions Work Glovesone set per volunteer The Community Bake Oven: A Community Process for Building a Bread Oven Oven Foundation & Footing Day 2 Continued Preparing the Form. The oven concrete slab is 84” long x 76”wide x 6”deep, and extends out from the block wall by 6 inches. We used 2x6 boards to build the form, which will hold the concrete in place until it dries. The form can be held in place by pouring back the soil around the edges and packing it down. Next, rebar was tied together with steel wire at each corner, and fastened to
chicken wire mesh to give the base extra strength. Large Working Area. It was useful to have a large working area directly beside the oven site, for setting up the mixer, washing tools, eating lunch, and laying out the rebar frame. Greg, with a background in carpentry and construction, was our third key member in the bake oven building ―crew‖. We fit the rebar into the wooden form, and filled the space with concrete. The concrete was mixed using a rented electric mixer. This mixer could hold 3 bags (30 kg x 3) of our concrete mix at one time It proved to be a good investment to rent this mixer (rather than our other option of mixing manually in a wheelbarrow), as we used 50.5 bags (or 1512 kg) of mix in the footing alone! We used two of the garden wheelbarrows to cart the concrete to the foundation site, poured it and smoothed it flat using an old 2x6 that could be shuttled across the foundation. Concrete generally takes approximately 3 days to fully set, and should be kept
covered with a plastic tarp so as not to dry too quickly. It can be checked and misted occasionally over these 3 days if building this oven in the warm summer months. This was not a great issue for us, as it was October where the days and evenings were cool. Geeta & Ramani had brought warm tea in a thermos, which we sat down to enjoy at the end of the first real day together as a building crew. This was an important way to unwind and reflect on the day’s work together. Always keep a camera on site – we were very happy to have documented this oven project from the beginning Diagram: Oven Foundation & Footing Sheet Insulation 124‖ Form for slab 76‖ Sheet insulation 132‖ 30‖ Diagonals are 181‖. Form for concrete slab 84‖ Rebar 82‖ Rebar 72‖ Rebar Rebar 76‖ 64‖ 5‖ from first rebar 3‖ from form Trenchline 5 The Community Bake Oven: A Community Process for Building a Bread Oven Left: First, lay out the wood forms over the insulation sheets
before pouring the concrete slab. Left: Third, mix concrete by electric mixer or by hand. Remember to wet the inside of the electric mixer to prevent cement dust flying when the motor starts up! 3-4 bags fit per mixer load. Add more water as necessary to make it a workable consistency. A group of 4-5 people is good to have for a speedy flow of materials. Above: Second, on the side prepare the rebar and mesh. Lay this grid on the insulation sheets before the concrete is poured This will reinforce the concrete slab base. Day 2 Summary: 1) Prepare large cleared working area near oven site. 2) Prepare wood form for foundation slab using 2x6 boards. Above: Fourth, the 3) Dig out 8-inch deep oven foundation. freshly poured concrete 4) Cut and level polystyrene insulation sheets in foundation area. slab is smoothed over 5) Lay out steel mesh on insulation sheets and cover with rebar. using an old 2x6 piece 6) Tie rebar ends together with wire to make a frame. of lumber. 7) Fasten rebar
frame to chicken wire mesh. 8) Blend concrete mix in electric mixer. 9) Pour into wheel barrows, cart of foundation area and shovel out. 10) Smooth concrete by shuttling with old 2x6. 11) Cover with tarp and let concrete harden slowly over a 3 day period. 12) Ensure that all materials are ready for starting the build, including 14 closed blocks (corners). 13) Ensure that a water supply will be on hand (access to a garden hose is best). 6 The Community Bake Oven: A Community Process for Building a Bread Oven Block Laying Day 3 (Oct. 30) Volunteers: 3 Hours on Site: 6 hrs Visitors: 3 Concrete blocks. Today we began the laying of the concrete blocks that will form the foundation walls. It was important to get all the angles accurately, as this stage forms the foundation for the entire oven. The most valued tools on the site are quickly proving to be the square, 4’ level and measuring tapes! We started by measuring out 6 inches from each side of the concrete base, and then marking
the outside dimensions with a chalkline. We tested out the sizing by laying one block row (or first course) dry, and realized that our blocks were smaller than the measurements mentioned in the Bread Builder’s which we were using as our guide book (see Resources). To compensate for this difference, we left larger gaps between each block, which were later filled with extra concrete. In this way, we were able to keep the outside dimensions the same as the diagrams in the book we were using The mortar was mixed by hand in a wheelbarrow As the mortar dries out quickly, it was prepared in small portions, and there was no need for renting an electric mixer. After the blocks have been mortared in place and filled with concrete, the forms around the foundation can be removed. Keep a broom near the build site, so that excess mortar can be swept away before it dries in an unwanted place. Mortar must also be continuously cleaned off the sides of the blocks with a damp sponge or cloth. As cement
is caustic it is wise to wear goggles, rubber gloves, and rubber boots when handling it. We generally work until dark, usually around 6:30 pm at this time of the year. At this point the tools still need to be cleaned and put away. We have the good fortune of using storage space in the garden shed on site, which is far more convenient than bringing our tools back and forth each day. By nightfall is also becomes too cold to work, and we soon learn to bring rubber gloves for rinsing off the tools so that our hands stay dry and warm. Materials List: Angle iron - 2x2x3/16‖ (to hold last row of blocks above wood storage) 2 pieces 48‖ & 1 piece 22‖ long for lintel Mortar mix – used 1 ½ bags (30 kg/ea) Concrete mix – used ¾ bag (30 kg/ea) Concrete blocks – remember 14 closed for the ends Rebar pieces – to insert in block wall to hold in place 7 Wheelbarrow Tools Needed: Buckets Chalk line Chisel Garden trowels Masonry Tools Water can or hose Broom 4’ Level Hacksaw
Measuring tapes Square Edger (flat tool) Pencils & Knife (to sharpen pencil) Chop saw (to cut angle iron) Goggles & Work gloves & Rubber boots The Community Bake Oven: A Community Process for Building a Bread Oven Above: After the wall dimensions have been marked out, it’s time to lay the concrete blocks. They are carefully positioned onto mortar which has been prepared. Day 3 Summary: 1) Collect all tools for the day, including a square, 4’ level and measuring tapes. 2) Measure out 6 inches from each side of concrete base and mark with chalkline. 3) Lay out one row of blocks (course) dry as a sample before beginning to mix concrete. 4) Prepare mortar by hand in a wheelbarrow or large bucket as needed. 5) Mortar each block in place, checking level and angles carefully. 6) Stagger block courses to add strength to wall. 7) At the end of the workday, clean or wash all tools and put away. 8) Ensure that all materials are ready for Day 4. 8 Above: Remember to clean
any excess mortar off the bricks before it has time to dry. This can be done by sweeping with a broom or wiping with a damp cloth. The Community Bake Oven: A Community Process for Building a Bread Oven Finish the Block Laying Day 4 (October 31) Volunteers: 2 Hours on Site: 5.5 hrs Visitors: 5 The Block Wall. It took 5 more hours on this day to complete the block wall A portion of the final (fourth) course is held up by a length of angle iron, where it is suspended across the opening for a firewood enclosure/or storage space below. We chose to build the oven wall up at 4 courses so that the oven will be waist-high for the average volunteer using it, between 22-24 inches high. This wall could be made any height that is preferred by the bakers and would vary based on the thickness of the underlying foundation slab. The front opening forms the doorway for the wood storage compartment below. If you do not have a shed or other storage facility near the oven, a lockable door could be
added onto the wood storage compartment so that baking tools could be stored safely below. Pouring the Concrete. We poured concrete into the wider cracks between the blocks to fill them in. All the block openings need to be completely sealed We poured approximately 2 inches of concrete into the base of the blocks and used empty mortar bags, newspaper, and large stones to fill the block holes almost to the top Any available materials could be used here. The blocks were then topped off with more concrete A rectangular cement trowel (as seen in the photo) is excellent for smoothing excess mortar on the sides of the wide concrete blocks – and can double as a mortar palette. Day 4 Summary: 1) Determine height of oven block walls. 4 courses will be about waist-height 2) Prepare mortar in small batches using the wheelbarrow or a large bucket. 3) Lay block walls until you have finished the second-last course. Remember to check the level and angles with each block and block row. An angle
iron rod is suspended across the firebox opening below the fourth course, and will support the final course across it. 4) Prepare concrete in small batches in the wheelbarrow. 5) Fill in any cracks with concrete, and pour 2 inches of concrete into the concrete blocks. 6) Fill up the block openings with any available filler material (stones, newspaper) and then top off with concrete to seal the blocks. Smooth off with mortar tool 7) At the end of the day, wash and clean all tools. 8) Ensure all materials are ready for Day 5. 9) Research thermocouples, or decide how you will monitor the temperature of the oven. 9 The Community Bake Oven: A Community Process for Building a Bread Oven Left: View of height of firewood enclosure. This will be the working height of oven. Below: Second view of block walls. Notice the 4-foot level - it is important to always check the levels at each stage! Materials List: Angle iron – 2 pieces for front wall above wood enclosure Mortar Concrete blocks
Concrete ―Filler‖ materials (newspaper, empty bags from masonry products) Tools Needed: Masonry trowels ( 2 brick laying size, 2 larger concrete size, and 1 flat trowel) Mortar boards (or old plywood pieces) Shovel Wheelbarrows (2 – used for carting blocks to the site, and mixing concrete) ―Pointing‖ tool – to edge/finish the blocks Bucket/watering cans Water access/hose 4’ Level, Work gloves, Hacksaw Safety glasses 10 The Community Bake Oven: A Community Process for Building a Bread Oven Pouring the Oven Slab Day 5 (November 1) Volunteers: 12 Hours on Site: 4 hrs Visitors: 7 The Oven Slab. The oven slab is 48 x 56 inches large, and is formed in two layers: vermiculite and concrete. When it’s completed, the slab will be hanging in the space between the block walls, suspended by the ends of the rebar which run along the interior sides of the block walls. To prepare for this slab, a large sheet of plywood cut slightly larger than slab size is set under the opening
where the slab will be poured. This plywood can be removed (in which case include a layer of paper/plastic so concrete doesn’t bond with the wood), or left in place. Construct sturdy temporary support posts to hold this plywood up until the concrete cures Remember to construct this support so that it can be knocked apart and removed through the front opening once the slab has cured. 1. Vermiculite insulation The first stage of the slab is a 1-inch thick layer of vermiculite insulation. Vermiculite is a dry crumbly mixture that resembles birdseed, and is combined with Portland cement at a ratio of 6:1 (6 vermiculite: 1 Portland cement). 4-inch nails are inserted every 3 inches into the wet vermiculite The nails are inserted upside down on a 45 degree angle to help separate the layers and tie the vermiculite slab to the top concrete slab 2. Rebar grid The next stage involves tying 12 rebar rods together with steel wire to form an even grid. The concrete blocks were chiselled to provide
notches for the rebar grid which supports the weight of the cement slab. A wooden form (notched to fit the rebar) is placed over top to create a ―wall‖ where the concrete slab will be poured, allowing the slab to rise up past the height of the concrete block wall. 3. Pouring concrete The concrete is poured to a thickness of 2 1/2 inches This means the final oven slab will be approximately 3 1/2 inches. This concrete slab is smoothed over evenly using a rectangular masonry trowel, to create a level Materials List: layer on which to build your oven dome. Rebar & steel rods Concrete Mesh Wire Form – for concrete slab 2x4’s for temporary support posts Sheet of plywood & paper/plastic for under Nails (4‖) 1 pound, 40 nails Form for rebar (1x4) Sheet of plastic to cover slab while curing 11 4. Curing concrete Leave the slab covered with a sheet of plastic for at least a week to cure. If the weather is hot, check the slab occasionally and mist it so it doesn’t cure too
quickly and crack. The slab must be cured completely before brick laying begins. When the concrete has cured, remove the form. This will leave a space between the slab and the wall, which allows the slab to expand and contract without cracking the block wall. The Community Bake Oven: A Community Process for Building a Bread Oven Left: View of vermiculite layer filling top row of concrete blocks. Notice 4-inch nails in vermiculite. One of the posts which hold the plywood sheet is visible here in the firebox opening below. Below: Rebar bars grooved into blocks. Wood form around rebar keeps the oven slab apart from the block wall. Left: Finally, the concrete is smoothed over the rebar frame to finish the slab. Day 5 Summary: 1) Cut sheet of plywood and set under the opening of where the slab will be poured (inside the concrete block walls). Hold this plywood up with temporary support posts. 2) Prepare vermiculite with Portland cement, mixing a ratio of 6:1. This can be mixed by
hand in the wheelbarrow. 3) Insert a series of upside-down nails about 3 inches apart into the wet vermiculite layer. 4) Tie 12 rebar rods together with steel wire in an even grid. Chisel top row of concrete blocks to hold this rebar grid in place. 5) Prepare wooden form with notches that will fit over the rebar frame. 6) Mix concrete in the wheelbarrow using hand tools. 7) Pour the concrete mixture on top and smooth out with masonry tools. 8) Wash, clean and put away all tools. 12 Tools Needed: Hack saw – to cut rebar Shovels (2-3) Electric mixer – for concrete Trowels Masonry chisel Masonry Trowels Handsaw Wire cutters Hammers Sawhorses Skill saw Wheelbarrows (2) The Community Bake Oven: A Community Process for Building a Bread Oven Mock-up Hearth Bricks Day 6 (November 6) Volunteers: 2 Hours on Site: 4 hrs Choosing Bricks. Throughout the planning process, we had been discussing the various kinds of bricks available for the oven dome. We had been advised by Peter, our
mason friend, to use reclaimed old clay bricks. We had also noticed a demolition of 3 old brick houses, on the corner of Frederick & Lancaster Streets just a few blocks away from our oven site. Although getting the old bricks would mean more work for us because any remaining mortar needed to be cleaned off by hand, we liked the idea of incorporating 100-year old bricks from the well-known local houses. Volunteers helped us clean the bricks, and we saved money in our oven budget! What Kind of Bricks are there? 1) Red clay bricksmuch more durable, better able to withstand heat than new cement bricks. However, hard to find new, need a reclaimed source (from pre-1950’s) which will need cleaning before use. Slightly smaller size than new cement bricks 2) Red cement bricksthe standard new brick, easy to source large quantities. However, they are more brittle than old clay bricks and less able to withstand the heat of the oven. 3) Fire bricksbrittle bricks made especially for hearth
use. Difficult to work with for shaping walls/domes, but excellent for the flat fire hearth. The building plans we had were for an oven whose interior hearth measured 32 x 36 inches. New cement bricks which are used for the walls and roof typically measure 2 1/2 x 3 3/4 x 8 inches. The old reclaimed clay bricks used were a slightly smaller size, and so our oven had to be adjusted accordingly. Fire bricks used for a hearth are commonly 2 (or 2 1/4) x 4 1/2 x 9 inches From the local building supply, we ordered 140 fire bricks, and five 3 kg tubs of CPD Stove & Furnace Cement (also known as “fireclay”). We were told that one 3 kg tub would cover approximately 30 bricks. We also ordered 6 more bags of cement mortar mix (pre-mixed Quickrite) at 30 kg each, and 7 bags of plasticizer (Mortarmate) that would be mixed with the mortar. Plasticizer is used at a ratio of 3 large garden spades to 1 bag (30 kg) cement mix Mock-up Hearth: Using the fire bricks we made a dry mock-up of the
hearth and measured the centre of the hearth slab. This mock-up would guide us for the actual laying of the hearth bricks tomorrow, showing us the exact number of bricks needed (to the nearest brick). Lay one row of fire brick on edge, end for end, along the side and back of the hearth. Keep tight spacing as there will not be mortar between these hearth bricks. Remember the ash slot will be 2 inches wider than the oven door, so all the ashes fall out when raked past the oven doorway. We decided to use 2 thermocouples to measure the oven temperatures. To prepare for the installation, we drilled a ¼” hole through the hearth slab, and through one dry hearth brick As the hearth bricks were set in place, these holes lined up to allow the thermocouple wire to pass through from inside the oven to our outside thermometer. The second thermocouple would be inserted through the oven dome, in order to read the air temperature of the oven. 13 The Community Bake Oven: A Community Process for
Building a Bread Oven Right: Laying the hearth fire bricks. At this point in the build it is important to start thinking about the dome construction. A door that is 63 percent the height of the inside of the dome is most efficient. 1Polystyrene Insulation Sheets 2Foundation Slab 3Block Wall 4Oven Slab 5Hearth 1Polystyrene Insulation: 2 inches thick. 24 inches out from foundation slab. Dimensions 132 x 124 inches 2Foundation Slab: extends 6 inches out from block wall. 6 inches thick Dimensions 84 x 76 inches. 3Block Walls: 4 courses. Dimensions 4 blocks wide by 4 1/2 blocks long. 4Oven Slab: 1 inch thickness. Dimensions 56 x 48 inches 5Hearth: Dimensions 36 x 32 inches. Day 6 Summary: 1) Find a source of bricks that will work for your oven. Reclaimed clay bricks may be available Check your local building supply, salvage or historic demolition sites. 2) Order hearth/fire bricks, fireclay, more mortar mix and plasticizer as needed. 3) Create a mock-up using the hearth bricks. Lay
them dry, measure the centre of the hearth slab 4) If you are planning to use a thermocouple, remember to drill a hole through the hearth slab and one hearth brick before the outer brick dome has been completed. Ensure the hole is large enough for the thermocouple wire to pass through. See page 21 for more details 5) Put away all tools and prepare materials for Day 7. Materials List: Fire Bricks - 140 (9 x 4 ½ x 2 inches) Fireclay cement (four x 3 kg tubs) Cement mortar (six x 30 kg bags) Mortar mate (7 bags) Bricks – (approximately 500) 14 Tools Needed: Level Drill Square Chalk line Measuring Tapes (2) ¼ inch Masonry Drill Bit Shovels Pencils Saftey glasses The Community Bake Oven: A Community Process for Building a Bread Oven Laying the Hearth Bricks Day 7 (November 7) Volunteers: 7 Hours on Site: 6 hrs Visitors: 6 The Firebricks. Today, we completed the firebrick and first course of the red clay brick. It was a slow process, as we had to get the hang of using mortar and
levelling bricks Read a Professional Masonry Guidebook: Note that this journal will not go into details of laying bricks as there are many well-written books available on this topic. If you have not laid bricks before it is highly advisable to read a good masonry book from the library, or speak with a professional mason to get some tips and techniques before undertaking this project. One detail that needs to be emphasized is that, again, with each course, levelling is very important as this builds the strength and foundation for the next course. It is easy to stray far off the level by the final course, if each previous course has not been carefully measured! With bricks, small increments do make a difference! We realized that working with adobe would have relieved some of the precision needed with brick-laying, although an adobe oven (opening:dome ratio) still needs to have proper proportions to create proper and even heating. Peter, our mason friend, dropped by the site with his
young son Alec to offer advice on brick laying, and also brought a bag of fresh wood-fired bagels from a nearby bakery-café as inspiration! Other visitors today included various community garden members, a local professional bread baker, and the area fire chief! The fire chief was highly supportive of our project, and hopes to build his own backyard bake oven when he retires. We used a small trailer, and one of our local People’s Car Co-op vehicles to pick up the 450 red clay bricks from the demolition project at Lancaster & Frederick Streets. At 40 cents each this was a savings of at least $90 (the cheapest store-bought bricks were quoted at 60 cents each), and were definitely a better quality brick Tools Needed: for our project. However, today we had to deMasonry tools vote several hours to brick cleaning, and chiselWheelbarrow ling off all the remnants of old remaining mortar. 4’ Level Materials List: Continue with Materials List of previous 15 Square Sponges (to wipe
excess mortar off bricks) Buckets Skids – to hold interim bricks Chisel & Hammers (to clean bricks) Brush & Brooms Work gloves Safety glasses The Community Bake Oven: A Community Process for Building a Bread Oven Left: Cleaning and chiseling old mortar off the reclaimed bricks. Left: Laying the first course of the red clay brick oven wall! Day 7 Summary: 1) If laying brick for the first time, read a book on masonry techniques before beginning this stage. 2) Prepare mortar in small batches as needed in a wheelbarrow. Have enough mortar tools, mortar boards, drop cloths and damp sponges on hand for all your volunteers 3) Keep the 4 foot level on hand to level with each course. 4) If using reclaimed bricks, have extra volunteers on site to help with the cleaning. Bring extra brick chisels as these work well for quickly cleaning old mortar off. 5) Clean up tools and mortar. 6) Ensure all materials are ready for Day 8. 7) Prepare a dome form which will be used to shape the
dome arches. This dome form is made of a piece of sheet metal attached to a plywood form. It is sized to hold 1-2 arches (―jack-arch vaults) of bricks on the dome you wish to lay. This will be used on Day 8-9 16 The Community Bake Oven: A Community Process for Building a Bread Oven Brick Walls & Start of Dome Day 8 (November 8) Volunteers: 8 Hours on Site: 6 hrs Visitors: 6 First frost overnight. Far too cold to begin our work before 10 am, and the water in our garden tank is frozen when we arrived in the morning. This provides a good opportunity to check in with the neighbours, who again offer use of their garden hose for our water supply. Over lunch, the neighbours drop off hot coffee and snacks, a welcome gift on such a chilly day! We note that it would have been easier to do this project during the summer months, in a location where electricity, running water, food, and bathroom were easily accessible, and there was no need to slow down our work just to warm up. However,
it turns out to be a beautifully sunny day despite the cold and the hats and gloves that need to be worn. We can feel the days getting shorter, but our energy is still strong. Peter dropped by to give further masonry coaching. Unfortunately we were not as far as we had hoped. We had wanted his advice on closing the dome arches, but we have yet to complete the oven walls and the domes will only be started on Sunday (the next day) By late afternoon the temperature is below 0 degrees Celsius and the mortar becomes difficult to work with, as the water in the mix freezes which causes the mortar to dry too quickly. We will have to re-brick some of the last sections tomorrow. Remember to stagger the courses so no bricks line up evenly. Day 8 Summary: 1) Prepare mortar in wheelbarrow as needed. 2) Continue to lay brick courses as on previous day, up to 5 courses high for the walls. Remember to stagger the courses for strength 3) Wash and clean tools at the end of the day. 4) Ensure all
materials are ready to Day 9. 5) Let brick walls dry for at least 12 hours before beginning the arches. Materials List: Dome form Everything else should be on site by now (bricks & mortar) 17 Tools List: Mortar tools (3-4 trowels) Mortar boards Chisels, mason’s hammer Water access Sponges & rubber gloves to clean excess mortar and keep hands warm in ice cold water) Plastic drop cloth/sheet (to protect inside firebrick from mortar spills) Square Level Wheel barrow Shovels (to mix mortar) Safety glasses The Community Bake Oven: A Community Process for Building a Bread Oven Left: Height of the oven wall – note gable, doorway & door height. Below: Jack-arch vaults (dome for oven). View of the oven dome form fashioned of plywood and curved sheet metal. The form needs to be wedged in place, so it can be pulled out after the arch has dried. We would advise any first-time builder to read a more technical book that describes masonry arches. Working with brick arches
can be quite challenging if you are new! How to Build the Dome Form: Use recycled materials (plywood, sheet metal). Shape dome to size of inner dome. Remember to wedge the dome form so it can be pulled out when bricks are dry. Lay arch bricks across this form, allow to dry. Then begin next arch. 18 The Community Bake Oven: A Community Process for Building a Bread Oven Oven Dome Arches Day 9 (November 14) Volunteers: 4 Hours on Site: 6 hrs Visitors: 5 The Dome Arches. Today we started the arches for the dome, but only finished 2 courses. We had to wait until the afternoon to begin, as the fresh brick walls beneath needed at least 12 hours to dry so that they are strong enough to support the arches. Making these arches is one of the more difficult aspects of the oven build. The bricks need to be aligned with the dome form, fanning out in an arch pattern, and mortared evenly in place. If you have not done much masonry before this stage will take a considerable amount of adjusting
and re-mortaring to get the pattern right. At the end of the day our volunteers were exhausted after two long cold days on the build. We agreed to take a short break, and to meet again in a week to complete the arches. We also hoped it would warm up again by then! Once the bricks have been laid, allow the ―green‖ or fresh bricks to cure completely before beginning the next stage of pouring concrete. You can put a lamp or small heater with a fan inside the oven if the weather outside is too cold, to help the mortar to set and bricks to dry. Some advice on dome dimensions. Alan Scott advises that an efficient and well-functioning oven has a door that is 63% of the dome height. If the dome is too flat, the oven loses too much heat out the door and the door is too low for loading bread. If the dome is too tall, the oven will have cold spots in the top of the dome and never fully heat. Also, if the oven walls or hearth are too thin then enough heat will not be retained for baking bread.
Resource: Adapted from Scott, Alan and Daniel Wing. The Breadbuilders Chelsea Green Publishing: Vermont 130-131 Day 9 Summary: 1) Prepare mortar and have the arch form in place. 2) Begin to mortar the bricks into an arch pattern. If you haven’t worked with bricks before it will take a while to get the knack. Don’t give up - take your time to get them laid out evenly! 3) Wash and clean all tools at the end of the day. 4) Ensure all materials are ready to Day 10. Materials List: • From previous day already on site (red bricks, mortar & dome form) 19 Tools Needed: 7‖ Concrete Drill bit Drill – cordless Extra battery for drill Mortar tools (3-4 trowels) Mortar boards Level Wheelbarrow Shovels Sponges Plastic drop cloth Safety glasses The Community Bake Oven: A Community Process for Building a Bread Oven Left: Completing the oven dome arches. Keep a steady supply of mortar close by to continue a steady pace of laying the bricks. Right: Working on the dome arches and
testing out the cedar posts! A Note About Thermocouples Thermocouples are metallic thermometer probes that are buried inside the wall and floor of oven. Wires lead out to a gauge that tells you what the temperatures are inside, usually one probe conducting the floor and one the air temperatures Using thermocouples makes it easy to see when oven has heated enough to bake, and watch it as it cools down (and finally when the heat stored in masonry walls is too low to continue baking). The cost is a bit expensive (approximately $75-$150 each), but worth it for accurate baking temperatures. 20 The Community Bake Oven: A Community Process for Building a Bread Oven Dome, Arches & Chimney Day 10 (November 15) Volunteers: 6 Hours on Site: 7 hrs Visitors: 10 -15 Consider oven roof. Busy day on the site! Many visitors dropping by throughout the day, as it is becoming more clear that we are really building an oven. Alfred and Greg began discussing the design for the oven roof, and
front enclosure area Alfred had been storing 4 reclaimed cedar posts and one solid oak beam, which he was willing to donate to the project They will form the supports for a front enclosure, work area and picnic area. Peter, our mason, came by to ―save the day‖, completing the oven chimney and arches (2 layers, one on top of the other) in about 4 hours. This job would have taken our novice crew at least the full day! The rest of the crew mixed mortar, passed bricks to Peter. The interior of the oven was cleaned of excess mortar before it could dry, and the corners nearest the doorway were rounded off to prevent ash from building up. With rounded corners a small broom can easily sweep out any ash or debris. Note that our oven still has a square exterior even though the interior is rounded off. The dome arch bricks are covered in a layer of mortar, which will be followed by chicken wire, a 1/4 inch vermiculite layer, and more cement all to provide insulation to the oven interior. We
had to purchase 2 more bags of mortar to complete the oven’s top plastered layer Cover oven with a plastic tarp to let it dry slowly over about one week Several community garden members dropped off fresh pastries from the local Saturday farmers market. From the extent of enthusiasm that came from the builders it is clear that these kinds of breaks with ―treats‖ are vitally important for maintaining good morale on a community build site. Day 10 Summary: 1) Begin to consider what oven roof and front of oven will look like or be constructed of. 2) Prepare mortar in small batches. 3) Complete laying of bricks for arches and chimney. Two layers of bricks could be mortared together for added insulation and strength. 4) Clean all excess mortar from walls. Remember to clean the oven interior before it dries! 5) Plaster arches with layer of mortar and let this layer dry slowly. Cover with plastic tarp and check daily. Mist bricks if they are drying too quickly to avoid cracks 6) Clean
all tools before putting them away. 21 The Community Bake Oven: A Community Process for Building a Bread Oven Left: Front arch & chimney opening, and second view of bricks in vault. Below: Mixing mortar in small batches in the wheelbarrow. Materials List: From previous day already on site (clay bricks, vermiculite, concrete, mortar & dome form) 2 more bags of mortar to complete oven dome plastering layer Arch bricks 22 Tools Needed: 7‖ Concrete Drill bit (for thermocouple wire) Drill – cordless is most convenient Extra battery for drill or extension cord Mortar tools (3-4 trowels) Mortar boards Masonry tools Square Level Wheelbarrow Shovels Sponges Plastic tarp as drop cloth Buckets The Community Bake Oven: A Community Process for Building a Bread Oven Oven Walls, Ash Slot, Chicken Wire & First Firing Day 11 (November 21) Volunteers: 5 Hours on Site: 5 hrs Visitors: 6-10 Throughout the past week we had all taken turns checking on the oven, which was
covered with a plastic tarp so that it would dry and harden slowly. During this time a series of very small fires can be already be made inside to help dry out the oven. Today we were ready to begin our final phase of the construction process that will take place this year. The roof and enclosure will be built in the spring, once the ground thaws We layered the ½ blocks as walls along the side of the oven. These will be parged over, once the oven is completed. We covered the oven with chicken wire mesh, which will form the basis for the insulation layer. The chicken wire mesh should not be tied into the slab or block all The oven needs to be free to move as it heats and cools. Then we completed the final chimney bricks First Oven Fire Today! When the oven has been completed, the brick mortar and plaster will still have some moisture in it, which needs to dry up slowly. If it dries too quickly it can crack, weakening the oven walls For 2-3 weeks, spend time making small fires in the
oven each day to season it. We made our first fire today! When the fire is made, it is built at the front of the oven first, and pushed back as more wood is added. Start the first fires with only a few small sticks or crumpled news- paper at the very front of the oven, then build the fires larger each day until the oven is half-filled with wood which is burned down to ash. Build the fires up slowly, gradually allowing the flames to burn to the back, will allow each part of the oven hearth and walls to season evenly and well. After several hours of our fire today, the oven temperature only got up to approximately 100 degrees Fahrenheit – not enough to even bake yet, but a good step in learning about firing. The oven, which was still damp inside, caused smoke to rise from both the chimney and the doorway and attracted plenty of attention. Continuous small fires made for several hours each day throughout the next week will help dry the oven out completely and prepare it for serious
baking. Many visitors were attracted by the smoky smell, including a local potter. He stopped by to express his interest in getting involved, and wanted advice on building a masonry kiln or oven in his own backyard. To enable novice builders to create similar ovens in their own neighbourhoods, we decided to design a simple manual that included design notes, tools lists, photos and other notes. We hoped that this manual, and our oven itself, would provide simple instructions and inspiration for other community groups to take on a similar venture. After our fire had burned down, we cleaned out the ashes using what tools we already had on hand. A simple garden rake and push-broom were as functional as any expensive equipment for sweeping out the ashes which fall through the ―ash slot‖ safely into the metal fire-proof bin below. 23 The Community Bake Oven: A Community Process for Building a Bread Oven Left: View of inner doorway & outer doorway and front hearth brick detail.
Below: Raking ashes through the ash slot. A simple garden rake and wet mop are useful tools. A metal bucket goes underneath ash slot, in front of wood storage vault, to catch the embers/ashes. Day 11 Summary: 1) Prepare mortar in small batches. 2) Lay final chimney bricks consider a chimney cap. 3) Light first small fire, to help dry out bricks slowly. 4) Check if mortar layer over bricks is dry. 5) Cover oven with layer of chicken wire once mortar layer is dry. 6) Begin to source good hardwood for the oven. Materials List: Concrete half-blocks (20) Chicken wire 2 more Cement mix bags Source of water on hand (beside fire) Kindling and hardwood for fire building 24 Tools Needed: Work tables (for mixing dough) Mixing bowls Wet mop Metal ash bucket or bin Broom to sweep ash Rake (for ashes) Bread peel – needed soon! Wire cutters The Community Bake Oven: A Community Process for Building a Bread Oven Vermiculite-Cement Insulation Day 12 (November 22) Volunteers: 2 Volunteer Hours
Today: 8 hrs Visitors: 10-12 Insulation layer. An insulation layer can be installed over the first layer of arch bricks This insulation layer .is important for two reasons: first, it provides insulation to the oven when baking happens on cold days; second, it prevents anyone who is near the oven from getting burned by the oven walls during firing or baking times! There are two kinds of insulation layers: A) A Mesh/Vermiculite/Concrete layer. B) Or a second layer of clay bricks directly over the first. For our oven, we decided to go with the mesh/vermiculite/concrete option this would save us a considerable amount of time. Brick laying was getting difficult with the cold weather and was much more detailed than spreading concrete! Remember that choosing this mesh/vermiculite/concrete option does mean that all your arch brick-work will be covered, but in our case we were planning to cover the brick dome with a roof anyway. Here are the steps we took for this insulation layer: 1.
Chickenwire meshlay a sheet of this to cover the entire oven dome exterior (this was already done the previous day). 2. Vermiculite mixed with Portland cement (at a ratio of 6:1) spread this evenly over the chickenwire mesh and smooth out as best as possible. Let dry one day 3. Concrete pargingon second day, cover vermiculite with two layers of concrete parging, By now our oven had become a clearly functioning oven, and many visitors stopped in each day, including the same fire marshal who had come by earlier. He was enthusiastic about seeing a real fire lit in the oven. Remember to consult your city officials about any necessary fire or building permits before beginning your oven project. See ―Permits to Consider‖ in resources of this manual Day 12 Summary: 1) Prepare vermiculite mixture. 2) Spread evenly over oven dome and arches. 3) Let dry for one daythen spread concrete. 4) Clean all tools and store away. 5) Build an inner fire-door for the oven. We fashioned our fire-door
with a thick piece of hardwood, wrapped in several layers of sheet metal. This door fits snugly into the oven opening, acting as a ―plug‖ to help seal heat in after the coals have been raked out This door needs to be able to resist extremely hot temperatures, as the oven can be over 500-800 degrees Fahrenheit . 6) Start to consider what kind of outer door the oven will have. 7) Purchase 12 paver bricks to top off the oven chimney. 25 The Community Bake Oven: A Community Process for Building a Bread Oven Above clockwise, left to right: Installing chicken wire mesh & side cladding. Next, the vermiculite insulation layer is spread over the first course of bricks. Then continue oven firing Materials List: • 70 more Red Bricks • 6 more bags Vermiculite • Sand to mix with vermiculite • 2 more bags Concrete mortar • 12 Paver Bricks (to top the chimney) 26 Tools Needed: Mortar tools (3-4 trowels) Mortar boards Square Level Wheelbarrow Shovels Sponges Plastic drop
cloth Safety glasses The Community Bake Oven: A Community Process for Building a Bread Oven Final Touches Day 13 (November 26) Volunteers: 3 Volunteer Hours Today: 7 hrs Visitors: 8-10 Many visitors again today, including several community garden members who have been watching the progress over the past month. It has been exactly one month since we started the oven build. We finished the vermiculite layer, then parged two layers of concrete on the outside After three hours of a fairly large sized fire using up one whole ―blue recycling box‖ full of hardwood, the temperature in the oven got up to at least 375 degrees Fahrenheit. This would easily be hot enough to bake bread, cookies or pies, and we planned to continue to experiment with firing and baking this coming weekend. We roasted some left-over vegetables from the garden, including a few last sweet onions that came out deliciously caramelized after only a few minutes! As winter is on the doorstep, the next phase for our
oven will have to wait until spring 2004. At that point we will install the thermocouples, complete the oven roof, doors, enclosure, and establish a work table and sitting benches near the oven. We will also begin our training sessions for volunteer bakers, set a regular oven baking schedule for bread and pizza days, and integrate community use of the oven Oven Doors. There are two doors used for a bake oven The outer door provides a lockable option and a well-crafted finished look to the oven. Depending on where you are using this oven, the outer door may not be necessary. The inner door is vital as it provides insulation and a good seal to keep the heat in the oven during baking times. Inner doors were traditionally made of oak, which will char but not burn if the wood is wet before being put in place. A cheaper and simpler version of the inner door can also be made two sheets of 3/4-inch plywood. These are cut 1 1/2 inches taller than the doorway bricks on either side. The wood
wrapped on all sides with aluminum or metal sheeting, fastened to the plywood with screws, with a sturdy wooden handle. The inner door acts as a plug, by fitting snugly into the ash slot and sealing off the doorway during bread baking For pizza baking the oven door is kept open, with a small fire burning inside. A variety of door models are available for purchase from Ovencrafters, or if you plan to fashion your own door there is plenty of information on the internet to help you create a door that works best for your needs. See ―Related Books and Websites‖ in the resource section of this book. Day 13 Summary: 1) Complete vermiculite layer if not completed earlier. 2) Mix concrete parging layer. 3) Spread two layers of concrete parging over vermiculite. 4) Clean tools and store away. 5) Continue to consider the options for your outer door, roof, enclosure, benches, etc. 27 The Community Bake Oven: A Community Process for Building a Bread Oven Below: Completed oven still needs
roof and proper doors. Firing should already happen to help dry out bricks & insulation layers slowly. Above: Notice concrete block walls on which the roof frame is mounted. Left: View of oven with plywood roof, which still needs shingles to be added. Notice the frame of the enclosure in place. This will also be shingled 28 The Community Bake Oven: A Community Process for Building a Bread Oven Using the Oven 1. Baking in the Oven The oven will be ready to bake in once you have built a fire all the way into the back of the oven and at this point the oven needs to be at least half filled with hardwood. The fire should be so hot that the dome and walls turn white and there is no more smoke coming out of the chimney. You just see air above the chimney shimmering with heat, and will see heat waves sizzling across the hearth. When the fire has burned down to ash, sweep it out with a rake or broom, and then you are ready to prepare for baking. 2. Cleaning the Oven Hearth A
wheelbarrow or metal bucket can be placed at the oven’s front wallrake the ashes and coals out, catching any stray ones falling through the ash slot into the wheelbarrow below. Have a good supply of water ready, to pour water onto any flaming coals. After the ashes have been raked out, wipe the hearth with a damp mop. With the hearth cleaned of the ashes, you can bake directly on the hearth bricks and have relatively soot-free bread! 3. Letting the Heat Settle When the hearth has been cleaned, close up the inner oven door for about two hours while it settles to an even heat, preferably about 450 degrees Fahrenheit. If you have installed thermocouples, you will be able to check the temperature without having to open the oven The key is to keep the oven door closed, so that valuable heat is not lost. The masonry oven uses conduction, convection and radiation and provides fast, thorough baking. Heat is conduction from the oven hearth to the loaves The intense heat makes a crisp crust
and fills the bread with steam. Convection disperses the steam, caramelizing sugars in the crust and creating the unique hearth bread flavour. Finally the oven walls radiate heat equally, so that one or many loaves can be baked consistently. Once the oven settles into 450 degrees Fahrenheit, this heat will be fairly steady for the next two hours. This is a great time to bake your breads and pizzas As the heat decreases to about 350 degrees Fahrenheit, the oven is perfect for baking cookies, pies or granola. Finally, after about six hours, as the day’s baking is mostly done and the heat has diminished to about 225 degrees Fahrenheit, the oven can be filled with slow-cooking dishes like stew or casseroles and the door closed up for the night. If covered with a lid, the casserole will be cooked and still be warm when you return for lunch the following day! At this point the remaining heat can be used to dry out wood for your next day’s fire. Resources: 29 Mason, Jutta. Cooking with
Fire in Public Space Toronto Denzer, Kiko. ―Build your own Wood-Fired Earth Oven‖, Mother Earth News Oct-Nov. 2002 The Community Bake Oven: A Community Process for Building a Bread Oven Using the Oven Above: A back view of the entire oven, with roof and front shelter. Notice the cement parging on walls and sides which has covered the concrete block wall. Above: A view of the completed oven with roof, and wood finishing to close in the brick chimney. The wood is stored in wood compartment below. Right: The completed oven with the lockable outer door in place. This door was handcrafted by a local woodworker and a blacksmith. 30 The Community Bake Oven: A Community Process for Building a Bread Oven Oven Photo Gallery 31 The Community Bake Oven: A Community Process for Building a Bread Oven Oven Photo Gallery 32 The Community Bake Oven: A Community Process for Building a Bread Oven Section 2: Resources Oven Materials For a 32 inch x 36 inch oven. The
following list does not include enclosure, roof, thermocouples Concrete: • Concrete mixused approximately 1800 kg (60 bags @ 30 kg each) Concrete Block: • Concrete blocks 42 open blocks for walls +14 closed for the ends + 20 half-blocks for dome wall Mortar: • Mortar120 kg (we used 3 1/2 bags @ 30 kg each) • Mortar mate(7 bags) Reinforcing Mesh: (for the total use a 50 foot roll that is 30 inches wide) • Chicken Wire Mesh (6x6x10 inch gauge) - 2 pieces 4 feet x 8 feet each • Chicken wire to cover dome - approximately 6 feet x 7 feet Rebar & Steel Wire: • Rebar (7/16 inch) total 50 feet (12 pieces 4-5 feet long to insert in concrete block walls to hold in place) • Steel wire 20 feet (to tie rebar) Lumber: • 2x6 Lumber for forms (2 pieces @ 124 inches, 2 pieces @ 132 inches) • 2x6 Lumber for smoothing concrete (1 piece @ 124 inches) • Form to fit oven concrete slab which is 48 x 56 inches large Bricks & Fireclay: • Red clay Bricksapproximately 500
(use approximately 55 best-quality for arch) • Fire Bricks or Hearth bricks- 140 (dimensions 9 x 4 ½ x 2 inches) • Fire clay cement12 kg (4 tubs @ 3 kg each) • Paver Bricks16 for below outer hearth and 6 for chimney top Plastic Tarp: • 50 feet plastic tarp roll, to cut to size as needed • Tarps to cover concrete mixing and lunch area in case of rain Plywood: • Large scrap Plywood pieces (to shovel soil onto) • Plywood 48 x 56 inches and 2x4’s to hold concrete slab in place while it dries Angle Iron: • Angle iron – 2 pieces @ 2x3/16th inches 48 inches long (to hold last row of bricks above wood storage) • 1 piece @ 22 inches for lintel Miscellaneous: • Styrofoam insulation sheet 2 inches thick, dimensions 132 inches x 124 inches • “Filler” materials for stuffing into concrete blocks (newspaper, empty bags from masonry products) • 10 or 12 stakesfor marking out oven dimensions • String100 feet roll of strong stringenough to mark out oven dimensions
• Nails1 lb of 4 inch nails (approximately 40) • Materials for dome formuse own design (plywood, scrap metal sheeting) 33 The Community Bake Oven: A Community Process for Building a Bread Oven Masonry & Carpentry Tools Masonry Tools Needed Cement MixerThis is useful for mixing and pouring the concrete foundation slab. Otherwise, the small quantities needed for the oven can be easily mixed by hand in a wheelbarrow ShovelsUsed for measuring cement mixes by shovelful, slicing open cement bags, digging the foundation area, and mixing concrete in the wheelbarrow. Best to have several on site at all times. WheelbarrowsIt is important to use a ―heavy duty‖ wheelbarrow, with a metal/plastic basin that is balanced over the wheels. Useful to have on site at all times, for carting bricks or mixing cement. TrowelsHave at least three trowels during the oven build: a triangular bricklayer’s trowel, a flat cement finishing trowel, and a notched tilesetter’s trowel. Mortar
BoardsEither use masonry mortar boards or keep a few pieces of plywood (18-24 inches), which can be used as mortarboards for holding mortar while working. Jointing ToolThis tool is used for finishing exterior brickwork. It is not necessary, as a sponge can also be used to force the mortar into a tighter bond with the bricks. SpongesKeep several damp sponges on hand to wipe off the excess mortar that seeps out between the bricks. Simple kitchen sponges can be used LevelKeeping both a two and a four-foot level on site is valuable for levelling and plumbing the block walls as they are laid. Chalk LineUsed for laying out the pattern of blocks/bricks before they are laid. Pencil lines can also be used if a chalk line is not available. Wooden MalletUsed to tap the brick and block gently into place. Three-Pound HammerUsed with a brick set to cut bricks to size, and make half-bricks for corners. This is safer than a carpenter’s hammer Brick SetThis is a big blunt chisel, used to score lines
across the bricks until they break along the line. Wear safety glasses, as bricks chips will fly • Hack Saw – Used to cut the reinforcing rebar. Basic Carpentry Tools Needed Pencils Tool Belts Hammers Wood Chisels Work Gloves Hand Saw 34 Circular Saw Squares Work Boots Sawhorses Measuring Tapes The Community Bake Oven: A Community Process for Building a Bread Oven Permits to Consider Permits to Consider 1) Building Permit Cities may not require a building permit but it is best to contact your local authority before starting. They can offer inexperienced builders valuable advice If you are building a community oven it is good to involve the citylet them know what you are planning. Get them on your side! 2) Fire Permit Typically, a fire permit is not required as the oven is considered an enclosed (not open) fire. However, we were required to have a solid door on the oven that will be locked during off hours, a fire extinguisher on site, and a metal container with lid for
storing hot ashes. It would be wise to contact the local fire department to confirm this before beginning the build, as other cities may have different requirements. 3) Commercial Zoning Typically cities do not require commercial zoning unless the oven is planned as a commercial venture. Again, check with your local authorities if you plan to sell bread or pizza at your oven site 4) Food Safety Inspection The local health department will need to do a health inspection (of both kitchen facilities, and baking area) if the oven is a commercial venture. Many health departments also offers short and inexpensive Safe Food Handling courses, which would be recommended for staff or volunteers working with a public oven. 5) Food Vendor’s Permit Food Vendor’s Permits are issued by many cities, which may be free or of small cost to non-profit groups. This permit is only needed if baking is being sold to the public 6) Notifying Neighbours It is best to advise the area neighbours that the oven
build and baking will be taking place. This can be done by involving neighbours as volunteers in the build, use, or eating to help create a sense of ownership and pride for the oven. Other ways to introduce the oven to the neighbours are through tours/open houses, potlucks on site (with fresh bread), demonstrations or free workshops, children’s projects, or community involvement through murals or other artwork on site. Baking days can be announced with posters or flyers around the neighbourhood. 35 The Community Bake Oven: A Community Process for Building a Bread Oven Related Books & Websites Books & Articles Oven Building & Firing Bee, Becky. The Cob Builders Handbook: You Can Hand-Sculpt Your Own Home Murphy, OR: Groundworks, 1997. Boily, Lise, and Jean-Francois Blanchette. The Bread Ovens of Quebec Ottawa: National Museums of Canada, 1979. Denzer, Kiko. Build Your Own Earth Oven Hand Print Press, 2000 Denzer, Kiko. ―Build Your Own Wood-Fired Earth Oven‖
Mother Earth News, Oct-Nov 2002 Jaine, Tom. Building a Wood-Fired Oven for Bread & Pizza Prospect Books,1996 Keiley, Lynn. ―Breads Alive!‖ Mother Earth News, Oct-November 2002 Lyle, David. The Book of Masonry Stoves: Rediscovering an Old Way of Warming Energy Shelter, 1998. Mason, Jutta. Cooking with Fire in Public Space Toronto Only available in PDF format from the Dufferin Grove Park website: www.dufferinparkca/oven/bakeovenhtml Wing, Daniel & Alan Scott. The Bread Builders: Hearth Loaves & Masonry Ovens Chelsea Green Publishing: Vermont, 1999. Bread & Baking Cheney, Susan Jane. Breadtime: A Down-To-Earth Cookbook for Bakers and Bread Lovers Ten Speed Press, 1998. Espe Brown, Edward. The Tassajara Bread Book Shambhala, 1995 Ortiz, Joe. The Village Baker: Classic Regional Breads from Europe and America Berkeley, Calif: Ten Speed Press, 1993. Reinhart, Peter. Crust and Crumb: Master Formulas for Serious Bakers Ten Speed Press, 1998 Reinhart, Peter & Ron
Manville. The Bread Baker’s Apprentice: Mastering the Art of Extraordinary Bread. Ten Speed Press, 2001 Robertson, Laurel, et al. The Laurel’s Kitchen Bread Book: A Guide to Whole-Grain Breadmaking New York: Random House, 2003. Rubel, William. The Magic of Fire: Hearth Cooking One Hundred Recipes for the Fireplace or Campfire. Ten Speed Press, 2002 Websites Berry Hill LimitedSt. Thomas, ON www.berryhilllimitedcom (grain grinders) Dufferin Grove Park Bake OvensToronto, ON. www.dufferinparkca/oven/bakeovenhtml Lehman’s Non-ElectricKidron, OH. www.lehmanscom (grain grinders) Masonry Stove BuildersBrick Oven page www.mha-netorg/msb/html/bakeovenhtm 36 Mother Earth News(bake oven) www.motherearthnewscom OvencraftersPetaluma, CA. www.ovencraftersnet Slow Food MovementItaly. www.slowfoodcom ThermocouplesLaval, Quebec. www.omegaca The Community Bake Oven: A Community Process for Building a Bread Oven Section 3: Baking in the Oven Pre-Heat & Baking Tools Pre-Firing or
Pre-Heat Firing a cold oven to baking temperature takes heat that will not be recovered by baking bread. If a fire for baking is started when the oven is still warm from previous use, but was not hot enough for baking, only a small fire is needed to get it ready for baking. Either plan to hold baking days consecutively, or make do a pre-heat the day before a big baking day Start the fire at front of oven, add wood, then let it burn all way to the back. Keep adding in wood for several hours. Rake out ashes, then prepare to bake Collecting Your Baking Tools Bread MixerAn electric bread mixer is valuable if large amounts of dough are mixed. We advise a 30-60 quart bowl as minimum. Used models can be purchased Ask about attachments such as a dough hook, paddles, whip, and extra bowls. Hand-Grind or Electric Stone-Grind Flour MillA flour mill will be a costly purchase, but it allows for fresh, daily-ground flour done directly onsite. Fresh, slowly ground flour is more fragrant, and reacts
twice as well with yeast and sourdough starter as ―old‖ flour. This results in higher rising and better tasting bread. The investment in a flour mill will quickly pay for itself in the quality of the bread that this flour can produce! Other bakers, or community members can also use the mill to grind their own flour. Loaf Pans, Pizza TraysCompile an assortment of trays and pans to use for any baking that will not be done directly on the hearth (e.g cookies, breads) Mixing and Baking EquipmentCompile a variety of mixing and baking tools such as measuring cups, mixing bowls, spoons, knives, storage containers, and cutting boards. MopA basic mop or long-handled sponge is used to wipe out any left-over ashes after the raking has been done. Peel A peel is a traditional long-handled flat board used to lift pizza and bread in and out of the oven. They come in various lengths, with metal or wooden handles Proofing Shelves and RacksIf you will be baking in large quantities, or producing
bread in a professional way, a cupboard with shelves is needed for the last rise of the bread loaves. A used commercial kitchen steel tray cupboard can work well. This is called ―proofing‖, and most bread books will give advice on this stage. If the cupboard is on wheels it can be rolled out to the oven. RakeUse an upside down rake to pull out ashes and coals. A metal handle is best as the oven is very hot and a wooden handle will easily burn if left near or in the oven too long! Work Table/BenchHave work spaces set up near the oven, for holding tools, and the fresh bread that is cooling. Sturdy Oven MittsRecommended for handling hot bread and baking equipment. 37 The Community Bake Oven: A Community Process for Building a Bread Oven Recipe 1: Country Olive Bread For bread baking the oven needs to be completely cleaned, with no fire burning in it. The heat needs to have settled into an even heat and the door is closed to trap heat in while baking. Country Olive Bread This
recipe calls for good quality black olives, but other variations could include sun-dried tomatoes, fire-roasted peppers, feta or other cheeses, herbs such as oregano, black pepper or garlic. This is a classic bread that uses only ―bread‖ (white) flour To make a heartier variety, wholegrain flours can be substituted Add whole-grain flours slowly, one cup at a time, to make sure to get the right dough consistency. Whole-grain combinations will likely need a little less flour than is called for here Ingredients: 16 cups warm water 1 cup honey or sugar 1/3 cup active dry yeast 1/2 cup salt 1 cup oil 48 cups bread flour 4-8 cups sliced black olives (between 1/4-1/2 cup per loaf) 1. Combine the warm water, honey and yeast in the large mixer bowl Let stand 5 minutes until the yeast bubbles. Add the salt, oil and 1/4 cup of the flour Mix until smooth 2. Slowly add the remaining flour and the olives, turning the mixer first to low speed then medium speed, and knead for 10 minutes until the
dough feels soft, pliable and smooth. 3. Turn out into a large, greased bowl, cover, let rise until doubled, about 1 hour While bread is rising, the fire should have died down in the oven, and ashes should be raked out. Then close up oven door tightly until baking time. This allows the heat to settle into the hearth bricks and walls 4. Divide the dough into 16 parts and shape each into an oblong or round loaf Place on pans or peels that are sprinkled with cornmeal. Cover and let rise until almost doubled, about 45 min 5. Brush with water and dust lightly with additional flour Then slash the tops of the loaves with a sharp blade in two or three places. Be creativedevelop your own slashing design like a pro! 6. When the oven has settled to about 275 degrees Fahrenheit, slide the bread in and bake for about 25-40 minutes. For a crisp crust, mist the oven before loading bread, then mist every 5 minutes for the first 15 minutes of baking time. Try not to open the oven door too often as heat
is lost each time! Bread should be dark brown, and sound hollow when tapped. Brush with olive oil while still hot. Cool in baskets or on a rack Makes 16 loaves, with 10 slices per loaf - Recipe adapted from unknown source. Bread baking has a very special place along the spectrum (of productive community enterprises) - particularly because it’s so immediate and personal, and so well within nearly everyone’s reach. It’s an ideal first step towards a way of life that is more self-reliant, and at the same time more consciously interdependent. - Laurel Robertson, from The Laurel’s Kitchen Bread Book 38 The Community Bake Oven: A Community Process for Building a Bread Oven Recipe 2: Wild Rice Sunflower Bread Three-Grain Wild Rice Sunflower Seed Bread This recipe includes ingredients for either a single batch or a large batch. The single-loaf recipe can be mixed by hand or in a food processor, while the large batch should be mixed in the electric bread mixer. This bread makes a
wonderful sandwich, open-faced or otherwise The entire large batch recipe (16 loaves) costs less than $20 to make, even using organic ingredients! Small Batch Recipe (1 loaf): Large Batch Recipe (16 Loaves): 1 cup warm water 16 cups warm water 2 Tbsp honey 2 cups honey 1 Tbsp active dry yeast 1/3 cup active dry yeast 1 1/2 tsp salt 1/4 cup salt 2 Tbsp oil 2 cups oil 1/4 cup quick rolled oats 4 cups quick rolled oats 1/4 cup whole wheat flour 4 cups (or 1 lb) whole wheat flour 1/4 cup dark rye flour 4 cups (or 1 lb) dark rye flour 1/4 cups cooked, very well-drained wild rice* 4 cups cooked, very well-drained wild rice* 2 1/4 cups bread flour 32-40 cups bread flour Glaze and topping: 1 or 2 eggs, beaten with 2 Tbsp or more water Toasted sunflower seeds * To make 4 cups cooked wild rice, cook 1 cup raw until very tender; be sure to cool thoroughly before adding to the bread. 1. Combine warm water, honey and yeast in a larger mixer bowl Let stand 5 minutes until yeast bubbles. Add the
salt, oil, rolled oats, wheat flour, rye flour and wild rice; mix at low speed until smooth. 2. Slowly add the bread flour; turn mixer on low to medium speed for about 10 minutes or until the dough is well mixed, pulls away from the sides of the bowl and has a slightly tacky feel. Cover and let rise until doubled (about 1 hour). During this time, the oven fire should have died out and you will now rake out the ashes. Close up the oven to let the heat settle in for at least 2 hours while the bread rises. You will want a longer heat settling time if you plan to bake all day 3. Divide the large batch of dough into 16 parts and shape each into an oblong or round loaf Place on pans or bread peel that is lightly sprinkled with cornmeal. 4-5 loaves can fit onto each large sheet pan. Cover with a damp cloth and let rise again until almost doubled, about 45 minutes 4. Brush loaves with the egg-water mixture and sprinkle with the sunflower seeds Slash loaves with a sharp blade in two or three
places. 5. When oven has settled to about 375 degrees Fahrenheit bake for 25-40 minutes, or until a wooden skewer inserted through the loaf comes out clean and dry. For a crisp crust, mist oven before loading bread, then mist every 5 minutes for first 15 minutes of baking. Cool on a rack, and slice for serving. Makes 16 loaves Each loaf has about 10 large slices - Recipe adapted from unknown source. 39 The Community Bake Oven: A Community Process for Building a Bread Oven Recipe 3: Whole Grain Sourdough Whole Grain Sourdough Bread The Sourdough Starter: 1 cup water 1 tsp yeast 1 cup bread flour (hard all-purpose) 1/2 cup whole wheat flour 1/2 cup honey Mix all the ingredients together and let ferment overnight, until the mixture is bubbly and increases in volume. Sourdough breads derive much of their flavour and character from the use of a fermented starter. It is one of the keys to classic bread making The Bread: 8 cups bread flour 3 cups whole wheat flour 2 Tbsp salt 3 1/2
cups water 2 tsp yeast 1 cup 12 grain mix or 1 cup of your own mix of whole grains 1/2 cup sunflower seeds 1. On a large, clean, dry surface make a pile of the flours and salt Mix them together briefly, then form a large well in the centre of them. 2. Pour the water into the well, sprinkle the yeast over the surface Add the sourdough starter and gradually combine flours and liquids together until the whole mixture is cohesive. Begin kneading 3. Continue kneading the bread for a few minutes, then add the mother from a previous batch of bread (if you have one), the 12 grain mix and the sunflower seeds. Continue kneading until all of the grains and ingredients are thoroughly incorporated. If necessary, sprinkle a bit of water over the dough to make it easier. Knead until the dough feels strong, smooth and elastic, about 15 min 4. Let the dough rest, covered, in a warm dry place (or on your proofing racks) until it doubles in volume. Knock it down with your fist and cut it into one pound
pieces Reserve about 8-12 ounces of the dough for your next bread batch, the ―mother‖! 5. Roll up the dough pieces into light balls, rest in a warm dry place until they doubled in volume Then gently transfer the dough to an oven that is about 400 degrees Fahrenheit. Traditionally, bakers will slash the top surface with a sharp knife, to allow greater rising action 6. For a crisp crust mist the oven just before putting the bread in, then again every 5 minutes for the first 15 minutes of baking. Bake until bread is a deep golden brown and sounds hollow when you tap the bottom. This will take about 30-40 minutes Store the ―mother‖ in a fridge or freezer for longer term storage. - Recipe adapted from unknown source. Until the Industrial Revolution, nearly all breads were made from sourdough cultures fermented by airborne bacteria and yeast, which create most of these breads’ flavour. Bake bread in this ancient tradition, with natural, homemade sourdough starter instead of
commercial yeast, and discover rich texture and fabulous flavour. - Lynn Keiley, from ―Breads Alive!‖, 40 The Community Bake Oven: A Community Process for Building a Bread Oven Recipe 4: Thin-Crust Pizza Dough Thin-Crust Pizza Dough A pizza oven needs a small fire burning in it. Begin with a mid-sized fire for 2-3 hours to heat up the oven. Let the fire die down, and rake it to the side of the oven Block off the fire from the baking area with a few bricks. Gently mop the baking surface Transfer the prepared pizzas from the wooden baking peels directly onto the hot brick surface. Once the pizza is done (about 4-5 minutes) lift it out with a metal pizza peel. The pizza is ready when the crust is crisp, with slightly blackened sections, and all the toppings are well cooked. This dough can be made the night before at stored in a freezer or fridge in portioned containers. This makes the distribution to pizza makers very easy on baking day! 1. Dissolve in a large bowl for 10 min: 3
cups wrist temperature water 4 41/2 tsp active dry yeast 3 Tbsp honey or sugar 3. Other ingredients: Olive oil to brush dough Cornmeal for peels 2. Stir into yeast mixture When too thick to stir mix with one floured hand, or electric mixer: 4 1/2 tsp salt 8-9 cups flour 1 cup flax seeds or sesame seeds 4. When yeast and flour mixtures have been combined, brush with oil and put the dough into a bowl covered with a clean damp towel, and set it in a cool spot. 5. If you are preparing your dough at the oven site, the rising time is a great time to check the fire Push the fire to the back of the oven to distribute the heat. Prepare a supply of small softwood pieces, which will be added to the flames to keep them bright and hot. This wood supply should be stored in a wheelbarrow or box right next to the oven for easy access. Keep a hoe or rake near the oven, for pushing the wood pieces and the pizzas around later. 5. If you haven’t done so in advance, this is also a good time to prepare
your basic toppings and put them in bowls covered with plastic. At the Queens Greens Bake Oven pizza days we supply tomato sauce, shredded cheese, and some cut-up vegetables from the garden. Keep these toppings in covered, cool storage containers. Ask people to bring other toppings for themselves We charge $2 for basic toppings plus a ball of dough which makes one fair-sized personal pizza. 6. Prepare baking tools: rolling pins, spoons, the wooden peels and one metal peel, cornmeal for the peels, flour for the table, a basin for hand-washing, two towels for drying, a dough cutter for scraping the table clean, a damp cloth for washing the table, metal platters for holding the cooked pizzas, a pizza wheel to cut the pizza, paper napkins. 7. About 15 minutes before the start of pizza-making, push fire to the back or sides of the oven, and clean the hearth. Punch down dough, divide up and hand out the portioned pieces Keep dough wrapped or covered with a damp cloth. Add corn meal on the
wooden peel or baking sheets. Roll out dough thinly, lay onto peel/trays and add toppings Slide off peel onto the hearth. If the fire is right, pizzas should bake in 4-5 minutes! This recipe makes about 30 individual thin-crust pizzas. - Recipe from adapted Maren Kliewer. 41 The Community Bake Oven: A Community Process for Building a Bread Oven Recipe 5: Cinnamon Buns Cinnamon Buns For the Dough: 1 1/2 Tbsp active dry yeast 1 1/4 cups warm water or milk 1 1/2 cups unbleached flour 5/8 cup brown sugar 1/2 cup oil or margarine 3 eggs 1 tsp salt 1/2 tsp ground cardamom 3-3 1/2 cups white or whole wheat flour, as needed For the Filling: 1/4 cup oil or melted butter 3/4 cup brown sugar 1 Tbsp or more cinnamon 1/2 cup or more raisins 1. Dissolve the yeast in liquid and stir in the 1 1/2 cups unbleached flour, adding a couple of the tablespoons of the sugar Beat well, and set aside to rise 2. Cream the oil or margarine and sugar together Beat in the eggs, one at a time 3. Fold the
oil mixture into the yeast sponge along with the salt and cardamom Then fold in flour (3-3 1/2 cups) as necessary to forma soft dough. Knead the dough until smooth, using more flour as needed. 4. Let the dough rise until doubled in size, about 30-40 minutes 5. After the dough has risen, roll it out on a floured board in a rectangle 1/43/8 inch thick Brush on the melted butter. Sprinkle on the brown sugar, cinnamon, and raisins These quantities will make a fairly sweet cinnamon rollyou can use more or less of these ingredients as you prefer. 6. Starting at the edge, roll up the dough fairly tight as you would a carpet Cut the roll in sections about 1/23/4 inch thick, and place the sections flat on a greased baking sheet, leaving space around them to rise and spread out. Let them rise for another 20 minutes 7. Brush with Egg Wash and bake in an oven that has settled to about 375 degrees Fahrenheit for about 20-30 minutes, until golden brown. If a sweeter cinnamon bun is desired, frost
with Powdered Sugar Glaze while still hot from the oven Let cool in the pan, then gently pull apart Egg Wash: Beat an egg with 4 Tbsp of cold water or milk. Brush on top of cinnamon buns before baking. Powdered Sugar Glaze: Mix 1 cup powdered sugar or white sugar with 4-6 tsp milk or lemon juice. Add more liquid if you want to make it thinner The glaze may be flavoured with vanilla or zested peel of a lemon. Spread on cinnamon buns while they are still hot from the oven 42 The Community Bake Oven: A Community Process for Building a Bread Oven Recipe 6: Naan Bread Naan Bread Ingredients: 2 1/2 cups warm water 2 tsp active dry yeast 6 cups all-purpose flour 1 Tbsp salt Oil for oiling the mixing bowl Extra flour for flouring the kneading board Preparation: 1. In a large bowl, dissolve the water and yeast Add 3 cups of the flour, one cup at a time Stir, using a wooden spoon in one direction for about 1 minute. 2. Sprinkle mixture with salt Add remaining flour, one cup at a time,
stirring after each addition Stop adding flour after the dough is stiff (you might not want to use it all). 3. Turn the dough out onto a lightly floured surface Knead the dough until it is smooth and easy to handle (10 minutes of vigourous kneading). 4. Shape the dough into a ball and put it into a well-oiled bowl Cover with a moist towel and let rise in a warm place until double in bulk (about 1 1/2 hours). 5. Deflate dough and divide into 4 equal pieces Flatten each piece into an 8x6 inch oval Let rest for 10 minutes. 6. Wet fingers with water and ―dimple‖ the bread by pressing your fingertips into the dough and stretching the dough. The dough should be pulled until really thin 7. Transfer the dough to a hot hearth which is at about 375-425 degrees Bake until bread is golden on top and brown and crusty on the bottom (about 5 minutes). 8. Repeat with remaining dough Serve warm with sauce, chutney or jam - Recipe adapted from unknown source. 43 The Community Bake Oven: A
Community Process for Building a Bread Oven Recipe 7: Wood-Fired Granola Wood-Fired Granola A classic granola enhanced by the wood-fired flavour! Excellent crunchy texture. Can be eaten dry as a snack or as a breakfast cereal. Granola is one of the last things to bake in your oven, after pizza and bread have been done, and just as the heat begins to dissipate. You will need an oven that is still about 350 degrees Fahrenheit. As you bake your batch of granola, you will quickly lose heat from the oven as the door needs to be opened every 5 minutes for stirring. If subsequent batches of granola are baked, they will take longer as the base heat has been lowered. This recipe makes about 12 cups 1/23/4 cup honey 1/2 cup oil 1 Tbsp vanilla 1/2 tsp salt 1/2 cup sesame or flax seeds 1 cup wheat germ 1 cup unsweetened coconut, shredded 7 cups whole rolled oats 1. While the oven cools to about 350 degrees Fahrenheit, prepare your ingredients In a large deep baking pan heat the oil, honey
and vanilla until the mixture is thin. If you are working beside your hot oven you can melt this mixture quickly directly in the oven. 2. Stir in the remaining ingredients in the order given Make sure that each ingredient is coated with the honey mixture, except the coconut and rolled oats which you will just have to mix in. 3. Place this baking pan into the oven The granola mixture can also be spread evenly onto several cookie sheets, but baking time will go much more quickly then! Close the oven door to keep heat in. However, depending on the exact temperature of your oven, the granola will begin to toast in about 5-10 minutes. After it begins to brown you will need to stir it every 5 minutes until it’s done. 4. We recommend that the granola is toasted very lightly, but toast it according to your own taste preference. Be sure to stir it up from the bottom too as it will quickly burn here 5. Once the granola has been baked, take it out from the oven and let it cool on your work
table After this it can be portioned into storage containers or bags, or pass it out as a snack to onlookers right away! - Recipe adapted from Recipes for a Small Planet, by Ellen Buchman Ewald. 44 The Community Bake Oven: A Community Process for Building a Bread Oven The Community Bake Oven This handbook is intended to be an guide that will facilitate community groups in designing and building a masonry oven that meets their needs. The Working Centre and the Queen Street Bake Oven project share the story of how an inexperienced group of volunteers was able to build a beautiful oven, and how a community can come together for a common project. Incorporating journal text, step-by-step practical information, photos, drawings, resources and some necessary measurements, this handbook provides the basic information and encouragement needed for more community bake oven projects to begin. This handbook is not intended to be an exhaustive building manual, but rather to be used to
support and compliment professional masonry building books that are readily available. Regardless of the style of community oven you decide to build, you can be assured that anytime the wood-fire is stoked, the first baking goes in, and the tantalizing smells start to waft through the air, the same magic will happen as diverse people start to gather around to share their ingredients, skills and stories. Praise for The Community Bake Oven Handbook: ―I have spent time perusing this publication and am impressed with how much information is tucked into its pages. This gives me the confidence to construct one, should I ever be able to fulfill this dream.‖ ―Having such a handbook handy most certainly allays any fears of the neighbouring community. Having something in hand is much easier to use to persuade than words alone‖ “The step-by-step instructions are clearly written for the novice to understand. Your book inspires confidence. Even though a lot of the terms are new
vocabulary, there are no feelings of being overwhelmed. Geeta and Karin have put together a well-thought out and clearly expressed manual that could be used as a model for others wishing to write in other fields. It is of five star plus quality!‖ Working Centre Publications 2005