Comments
No comments yet. You can be the first!


Content extract
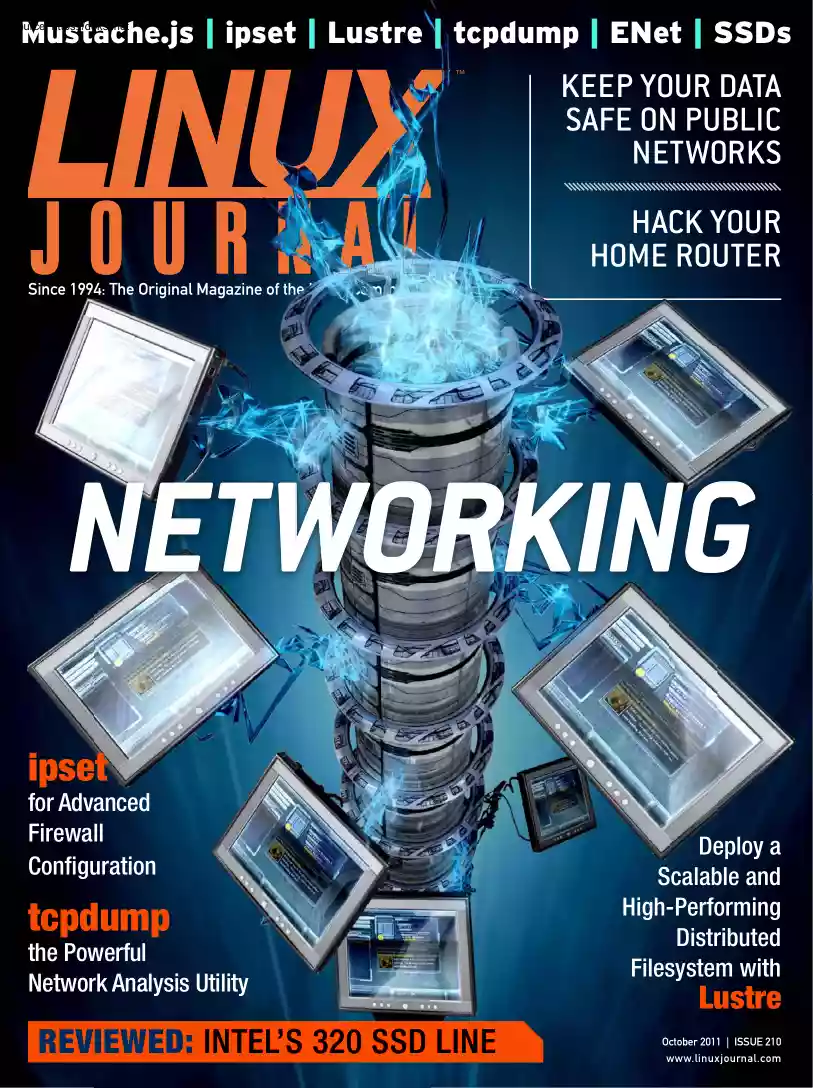
Mustache.js | ipset | Lustre | tcpdump | ENet | SSDs ™ KEEP YOUR DATA SAFE ON PUBLIC NETWORKS HACK YOUR HOME ROUTER Since 1994: The Original Magazine of the Linux Community NETWORKING ipset for Advanced Firewall Configuration tcpdump the Powerful Network Analysis Utility REVIEWED: INTEL’S 320 SSD LINE LJ210-October2011bu2.indd 1 Deploy a Scalable and High-Performing Distributed Filesystem with Lustre October 2011 | ISSUE 210 www.linuxjournalcom 9/21/11 2:55 PM Learn Drupal & jQuery FROM THE COMFORT OF YOUR LIVING ROOM The Lullabot Learning Series includes everything you need to become a Drupal & jQuery expert from the comfort of your living room! The videos are available in both DVD format and high-definition video download. Purchase the videos at http://store.lullabotcom LJ210-October2011bu2.indd 2 9/21/11 2:55 PM Cut Execution Time by >50% with WhisperStation-GPU Delivered ready to run new GPU-enabled applications: Design 3ds Max Bunkspeed
Shot Adobe CS5 Simulation ANSYS Mechanical Autodesk Moldflow Mathematica BioTech MATLAB ACUSIM AcuSolve Tech-X GPULib AMBER GROMACS NAMD, VMD TeraChem Integrating the latest CPUs with NVIDIA Tesla Fermi GPUs, Microway’s WhisperStation-GPU delivers 2x-100x the performance of standard workstations. Providing explosive performance, yet quiet, it’s custom designed for the power hungry applications you use. Take advantage of existing GPU applications or enable high performance with CUDA C/C++, PGI CUDA FORTRAN, or OpenCL compute kernels. Up to Four Tesla Fermi GPUs, each with: 448 cores, 6 GB GDDR5, 1 TFLOP single and 515 GFLOP double precision performance Up to 24 cores with the newest Intel and AMD Processors, 128 GB memory, 80 PLUS® certified power supply, and eight hard drives Nvidia Quadro for state of the art professional graphics and visualization Ultra-quiet fans, strategically placed baffles, and internal sound-proofing New: Microway CL-IDE™ for OpenCL programming on
CPUs and GPUs WhisperStation with 4 Tesla Fermi GPUs Microway’s Latest Servers for Dense Clustering 4P, 1U nodes with 48 CPU cores, 512 GB and QDR InfiniBand 2P, 1U nodes with 24 CPU cores, 2 Tesla GPUs and QDR InfiniBand 2U Twin2 with 4 Hot-Swap MBs, each with 2 Processors + 256 GB 1U S2050 servers with 4 Tesla Fermi GPUs OctoPuter™ 4U Server with up to 8 GPUs and 144 GB memory 1U Node with 2 Tesla Fermi GPUs Microway Puts YOU on the Cutting Edge Design your next custom configuration with techs who speak HPC. Rely on our integration expertise for complete and thorough testing of your workstations, turnkey clusters and servers. Whether you need Linux or Windows, CUDA or OpenCL, we’ve been resolving the complicated issues – so you don’t have to – since 1982. Configure your next WhisperStation or Cluster today! microway.com/quickquote or call 508-746-7341 Sign up for technical newsletters and special GPU promotions at microway.com/newsletter 2U Twin2 Node with 4
Hot-Swap Motherboards Each with 2 CPUs and 256 GB GSA Schedule Contract Number: GS-35F-0431N GS-35F-0431N LJ210-October2011bu2.indd 3 9/21/11 2:55 PM CONTENTS OCTOBER 2011 ISSUE 210 NETWORKING FEATURES 62 Advanced Firewall Configurations with ipset Get more from your iptables with less work. Henry Van Styn 72 Network Programming with ENet Create cross-platform network programs easily. Mike Diehl 80 The Lustre Distributed Filesystem Lustre gives clients access to a single file concurrently for both read and write operations, avoiding bottlenecks during file IO. Petros Koutoupis 90 tcpdump fu Introducing some packet capture basics and a breakdown of tcpdump syntax and usage. Henry Van Styn 4 / OCTOBER 2011 / WWW.LINUXJOURNALCOM LJ210-October2011bu2.indd 4 9/21/11 2:55 PM COLUMNS 24 Reuven M. Lerner’s At the Forge INDEPTH 98 Mustache.js 32 Linux is a great desktop OS, even when the desktop is on another continent. Joey Bernard Dave Taylor’s Work the Shell
Working with Image Files 36 Kyle Rankin’s Hack and / Practice Hacking on Your Home Router 118 Doc Searls’ EOF Linux Is Latin REVIEW 54 Return to Solid State Remote ViewingNot Just a Psychic Power 104 Packet Sniffing Basics To keep your data safe, the best defense is knowing what you can lose, how it can get lost and how to defend against it. Adrian Hannah 110 Python in the Cloud Tame the cloud with Python. Adrian Klaver Kyle Rankin IN EVERY ISSUE 36 PRACTICE HACKING ON YOUR HOME ROUTER 8 Current Issue.targz 10 Letters 14 UPFRONT 42 New Products 46 New Projects 117 Advertisers Index ON THE COVER 49 SINFO • Keep Your Data Safe on Public Networks, p. 104 • Hack Your Home Router, p. 36 • ipset for Advanced Firewall Configuration, p. 62 • tcpdumpthe Powerful Network Analysis Utility, p. 90 • Deploy a Scalable and High-Performing Distributed Filesystem with Lustre, p. 80 • Reviewed: Intel’s 320 SSD Line, p. 54 LINUX JOURNAL (ISSN
1075-3583) is published monthly by Belltown Media, Inc., 2121 Sage Road, Ste 310, Houston, TX 77056 USA Subscription rate is $2950/year Subscriptions start with the next issue WWW.LINUXJOURNALCOM / OCTOBER 2011 / 5 LJ210-October2011bu2.indd 5 9/21/11 5:01 PM Executive Editor Senior Editor Associate Editor Subscribe to Linux Journal Digital Edition for only $2.45 an issue Art Director Products Editor Editor Emeritus Technical Editor Senior Columnist Security Editor Hack Editor Virtual Editor Jill Franklin jill@linuxjournal.com Doc Searls doc@linuxjournal.com Shawn Powers shawn@linuxjournal.com Garrick Antikajian garrick@linuxjournal.com James Gray newproducts@linuxjournal.com Don Marti dmarti@linuxjournal.com Michael Baxter mab@cruzio.com Reuven Lerner reuven@lerner.coil Mick Bauer mick@visi.com Kyle Rankin lj@greenfly.net Bill Childers bill.childers@linuxjournalcom Contributing Editors Ibrahim Haddad • Robert Love • Zack Brown • Dave Phillips • Marco Fioretti •
Ludovic Marcotte Paul Barry • Paul McKenney • Dave Taylor • Dirk Elmendorf • Justin Ryan Proofreader Publisher Carlie Fairchild publisher@linuxjournal.com General Manager Rebecca Cassity rebecca@linuxjournal.com Advertising Sales Representative ENJOY: Timely delivery Off-line reading Easy navigation Phrase search and highlighting Ability to save, clip and share articles Embedded videos Android & iOS apps, desktop and e-Reader versions SUBSCRIBE TODAY! LJ210-October2011bu2.indd 6 Geri Gale Associate Publisher Joseph Torres ads@linuxjournal.com Mark Irgang mark@linuxjournal.com Webmistress Katherine Druckman webmistress@linuxjournal.com Accountant Candy Beauchamp acct@linuxjournal.com Linux Journal is published by, and is a registered trade name of, Belltown Media, Inc. PO Box 980985, Houston, TX 77098 USA Editorial Advisory Panel Brad Abram Baillio • Nick Baronian • Hari Boukis • Steve Case Kalyana Krishna Chadalavada • Brian Conner • Caleb S. Cullen
• Keir Davis Michael Eager • Nick Faltys • Dennis Franklin Frey • Alicia Gibb Victor Gregorio • Philip Jacob • Jay Kruizenga • David A. Lane Steve Marquez • Dave McAllister • Carson McDonald • Craig Oda Jeffrey D. Parent • Charnell Pugsley • Thomas Quinlan • Mike Roberts Kristin Shoemaker • Chris D. Stark • Patrick Swartz • James Walker Advertising E-MAIL: ads@linuxjournal.com URL: www.linuxjournalcom/advertising PHONE: +1 713-344-1956 ext. 2 Subscriptions E-MAIL: subs@linuxjournal.com URL: www.linuxjournalcom/subscribe PHONE: +1 818-487-2089 FAX: +1 818-487-4550 TOLL-FREE: 1-888-66-LINUX MAIL: PO Box 16476, North Hollywood, CA 91615-9911 USA LINUX is a registered trademark of Linus Torvalds. 9/21/11 2:55 PM 2U Appliance: You Are the Cloud Expansion Shelves Available Storage. Speed Stability With a rock-solid FreeBSD® base, Zettabyte File System (ZFS) support, and a powerful Web GUI, TrueNAS™ pairs easy-to-manage FreeNAS™ software with
world-class hardware and support for an unbeatable storage solution. In order to achieve maximum performance, the TrueNAS™ 2U System, equipped with the Intel® Xeon® Processor 5600 Series, supports Fusion-io’s Flash Memory Cards and 10 GbE Network Cards. Titan TrueNAS™ 2U Appliances are an excellent storage solution for video streaming, file hosting, virtualization, and more. Paired with optional JBOD expansion units, the TrueNAS™ System offers excellent capacity at an affordable price. For more information on the TrueNAS™ 2U System, or to request a quote, visit: http://www.iXsystemscom/TrueNAS http://www.iXsystemscom/TrueNAS Clone Snapshot KEY FEATURES: . Supports One or Two Quad-Core or SixCore, Intel® Xeon® Processor 5600 Series . 12 Hot-Swap Drive Bays - Up to 36TB of Data Storage Capacity* . Periodic Snapshots Feature Allows You to . . . Restore Data from a Previously Generated Snapshot Remote Replication Allows You to Copy a Snapshot to an Offsite Server, for
Maximum Data Security Up to 4.48TB of Fusion-io Flash Memory 2 x 1GbE Network interface (Onboard) + Up to 4 Additional 1GbE Ports or Single/ Dual Port 10 GbE Network Cards JBOD expansion is available on the 2U System * 2.5” drive options available; please consult with your Account Manager All Volumes Create Periodic Snapshot Call iXsystems toll free or visit our website today! 1-855-GREP-4-IX | www.iXsystemscom Intel, the Intel logo, Xeon, and Xeon Inside are trademarks or registered trademarks of Intel Corporation in the U.S and/or other countries LJ210-October2011bu2.indd 7 9/21/11 2:55 PM Current Issue.targz SHAWN POWERS SneakerNets and BNC Terminators I first started my sysadmin career about the time in history when 10BASE2 was beginning to see widespread adoption. ThinNet, as it also was called, meant an affordable transition from the SneakerNet so many businesses used. (SneakerNet is a term for walking floppy disks back and forth between computersnot really a
network, but it’s how data was moved.) Anyone who remembers those years knows ThinNet was extremely vulnerable to system-wide failures. A single disconnect (or stolen BNC terminator cap at the end of the chain) meant the entire network was down. That was a small price to pay for such inexpensive and blazing-fast speed. 10Mbit was the max speed ThinNet supported, but who in the world ever would need that much throughput? Networking has changed a lot since my career started, and it’s issues like this one that keep me up to date. Kyle Rankin starts off with a hacking primer using an off-theshelf home router. This isn’t merely the old WRT54G hacks you’re used to reading about. Instead, Kyle shows us how to don our black hats and really hack in to a D-Link wireless 802.11n router If Kyle’s hacking tutorial makes you a little nervous, don’t worry; we have some network security this month as well. Henry Van Styn teaches us some advanced firewall configurations with ipset.
Granted, firewalls won’t protect anyone from PHP vulnerabilities, but they still help me sleep better at night. Mike Diehl switches gears, and instead of showing how to hack (or protect) the network, he describes how to create. Specifically, he explains how to create network programs that are cross-platform and easy to build with ENet. As someone whose programming skills peaked with 10 GOTO 10, Mike’s idea of “easy” might be relative, but he gives coding examples, so even copy/paste programmers can join in. Henry Van Styn has another article in this issue on how to use tcpdump to troubleshoot network issues effectively. If you’re in charge of a large network, you owe it to yourself to polish your tcpdump skills. It’s a tool 8 / OCTOBER 2011 / WWW.LINUXJOURNALCOM LJ210-October2011bu2.indd 8 9/21/11 2:55 PM CURRENT ISSUE.TARGZ If you’re in charge of a large network, you owe it to yourself to polish your tcpdump skills. every network administrator needs, and Henry
takes some of the mystery out of it. Adrian Hannah follows in a one-two punch teaching us how to sniff packets effectively. Packet sniffing is one of those skills that can be used for good and evil both, but we’ll assume you’ll use your powers for good. At the very least, you’ll understand what sort of information is available on your network so you can try to secure it a bit. Networking also has made so many other facets of computing possible. If it weren’t for networking, we wouldn’t have cloud computing. Adrian Klaver shows how to use Python to work with Amazon Web Services. For some of you, cloud computing is scary, because you never get to access the computer you’re working on directly. One way to help alleviate the concern of working on computers far away is to implement remote viewing. Joey Bernard covers several methods for accessing a computer remotely, whether it’s in the next room or on the next continent. Granted, that doesn’t work for cloud-based services,
but it does for remotely hosted servers, so it’s an article you’ll want to check out. Our networks are even home to filesystems nowadays, and Petros Koutoupis shows how to deploy the Lustre distributed filesystem. Utilizing multiple nodes for file storage is a great way to leverage your network resources for speed and redundancy. Regardless of your network speed, however, data will travel only as quickly as the hard drive underneath will send it. Kyle Rankin reviews the Intel 320 series SSD this month. If you haven’t taken the plunge to SSD, after reading about his results, you might decide that now is the time. And, of course, for those of you who think networking is good only for accessing your e-mail, we have articles for you this month too. Programmers will like Reuven M. Lerner’s article about his mustache more specifically, Mustache.js, a JavaScript templating system that might be right up your alley. Dave Taylor shows us scripters how to manipulate image files without
ever leaving the command line. There’s nothing wrong with firing up The GIMP to edit a graphic file, but sometimes you just want to scale an image quickly. Dave explains how We’ve also got new product debuts, Linux news and interesting things I’ve stumbled across this month in the UpFront section. So whether you’re carrying this issue around on a Flash drive (SneakerNet anyone?) or downloading it wirelessly from the wireless router you just hacked, we hope you enjoy it. We certainly enjoyed making it.■ Shawn Powers is the Associate Editor for Linux Journal. He’s also the Gadget Guy for LinuxJournal.com, and he has an interesting collection of vintage Garfield coffee mugs. Don’t let his silly hairdo fool you, he’s a pretty ordinary guy and can be reached via e-mail at shawn@linuxjournal.com Or, swing by the #linuxjournal IRC channel on Freenode.net WWW.LINUXJOURNALCOM / OCTOBER 2011 / 9 LJ210-October2011bu2.indd 9 9/21/11 2:55 PM letters Fun with Days and Dates I
always enjoy learning tricks from Dave Taylor’s Work the Shell column, and I understand that sometimes the example problems need to be somewhat contrived to fit within an article. However, I think he might be thinking too hard about how to determine the day of the week for a date in the past. I use this simple one-liner: $ date -d "7/20/1969" +"%a" Sun You also can use %w for a numeric 0–6 answer: $ date -d "7/20/1969" +"%w" 0 I also use a variant of this command to convert from “seconds since epoch”, which often is found in log files, to a more readable date format: $ date -d @1234567890 Fri Feb 13 18:31:30 EST 2009 As always, thanks for the tips, Dave. I hope you enjoy these in return. Alan Dave Taylor replies: Thanks for the message. The problem is that not all versions of Linux have this more sophisticated date command. I’m old-school I have no problem with long, complicated solutions anyway. Calendar Calculation I have been
reading Dave Taylor’s commandline column (Work the Shell) in Linux Journal for some time, and I think that, although his command-line solutions are, in many ways, quite useful, it looks like he seems to have some problems with creating algorithms to solve the core portion of the problems. For example, I have no problem with his parsing of the input, or loop controls, in the calendar program, but I think I have come up with a much more effective solution to the portion of the problem related to the determination of the year, by looking at the problem in a different way. I examined the problem and decided that you don’t actually need to search for the day in the calendar itself, in order to determine where it is in its week. All you need to know is what day of the week it will fall on, if you look at the calendar of the given month. To do this, you can examine a generic 10 / OCTOBER 2011 / WWW.LINUXJOURNALCOM LJ210-October2011bu2.indd 10 9/21/11 2:55 PM [ month and, from
that, determine where in the week the month begins. So, I came up with the following solution. Given: 1) month in which event occurred (month), 2) day of month on which event occurred (dom), 3) day of week on which $dom occurred (dow). Find: year in which $dom occurred on $dow, in $month (year). 1. Label the days of the week as follows: Sun = 6, Mon = 5, ., Fri = 1, Sat = 0 LETTERS ] iteration, until the value for $year is correct. My version of the loop looks like this. Please see if you can make it better! Specifically, I ended up having to create another variable, $caldays (calendar days, the number of days in the first week of the test month). Notice that in order to make even this work, I had to enclose the entire thing in backticks, or I got errors: while true ; do caldays=`cal $month $year | awk "FNR == 3 { print NF }"` 2. Assign the value for dow, using the appropriate value, from above. if [ $caldays -eq $days ] ; then cal $month $year exit 0 3. Calculate how
many days will be in the first week of the target month: days=$(( $(( $dom + $dow - 1 )) % 7 + 1 )) Now, you know how many days are in the first week of this calendar month, in the target calendar year ($days). So, you can find out if the test month matches this value, like this (well, not really, but if you compare the two values, this will tell if you’ve found the right year). Also, this awk script is predicated on the fact that cal has its first line of days on the third line of its output (FNR == 3): cal $month $year | awk "FNR == 3 { print NF }" If this value equals $days, then the current value of $year is the correct year; otherwise, you will have to loop, decrementing $year (by one) at each # non-error exit Low Cost Panel PC PDX-089T l Vortex86DX 1 GHz Fanless CPU l Low Power Consumption l 1 RS232/422/485 serial port l Mini-PCI Expansion slot l 2 USB 2.0 Host Ports l 10/100 BaseT Ethernet & Audio l PS/2 mouse & keyboard l CompactFlash & MicroSD
card sockets l Resolution/Colors: 1024 x 600 @ 256K l Resistive Touch Screen l Free EMAC OE Linux l Free Eclipse IDE 2.6 KERNEL Setting up a Panel PC can be a Puzzling experience. However, the PDX-089T comes ready to run with the Operating System installed on flash disk. Apply power and watch the Linux X-Windows desktop user interface appear on the vivid color LCD. Interact with the PDX-089T using the responsive integrated touchscreen. Everything works out of the box, allowing you to concentrate on your application rather than building and configuring device drivers. Just Write-It . and Run-It. Since 1985 OVER 24 YEARS OF SINGLE BOARD SOLUTIONS EQUIPMENT MONITOR AND CONTROL Phone: (618) 529-4525 · Fax: (618) 457-0110 · www.emacinccom WWW.LINUXJOURNALCOM / OCTOBER 2011 / 11 LJ210-October2011bu2.indd 11 9/21/11 2:55 PM [ LETTERS ] done only 30 days; Feb has 28 (or 29, in leap years) days, and the rest have 31 days, but I know you already knew that. Dave Johnson By the
way, the most years you will need to go back is ten (except, of course, when $month=February and $dom=29, in which case, you may have to go back significantly farther, as this condition can occur only in a year divisible by four ($year %4 -eq 0))! Also, this version of the program actually prints the calendar for the target month (cal $month $year). I just realized that this script does not check to make certain that the month actually contains $dom, but that realistically should be checked before searching for the existence of the target date, else the input data is/are invalidthat is, September, April, June and November have Dave Taylor replies: Thanks for your note and interesting solution. As with any script, there are a number of different solution paths. What I’m really trying to illustrate in my Work the Shell column is the “solution journey” more than how to find and implement the optimal algorithm. I knew from the get-go that there were better mathematical formulas I
could use, and indeed, one colleague has assured me that there’s a mathematical formula that will solve this puzzle without any invocations of cal or anything like that. I’m unable to find it with Google, but that’s another story. In any case, thanks for your smart and interesting solution! else year=$(( $year - 1 )) fi TECH TIP By combining three useful command-line tools (less, watch and xdotool) along with two xterm windows, you can create an automatically scrolling reader. Say you have a good book in text-file form (“book.txt”) that you just downloaded from Project Gutenberg Open one xterm and do the usual thing you do when you want to read that book with less: $ less book.txt Look at the first few characters in the title line of that xterm’s window. (In mine, it was bzimmerly@zt, which is my user ID and the name of the machine I was working on.) Open another xterm, issue this command, and watch (pun intended) the magic: $ watch -n 1 xdotool search --name bzimmerly@zt
key ctrl+m The watch command will (every second) issue a “Return” (Ctrl-m) keystroke to the window that has “bzimmerly@zt” as a title, and it will stop only when you interrupt it with Ctrl-c! I think this is neato daddyo! (What can I say? I’m a child of the ’60s!) BILL ZIMMERLY 12 / OCTOBER 2011 / WWW.LINUXJOURNALCOM LJ210-October2011bu2.indd 12 9/21/11 2:55 PM [ LETTERS ] Correction to Letters In the Letters section in the September 2011 issue, the Letter titled “What Day Is It?”, and the script provided therein, was written by Peter Ljubic (not Eric Miller). We apologize for the error.Ed Correction to “Linux Standard Base: State of Affairs” In our article, “Linux Standard Base: State of Affairs”, in the August 2011 issue, one of our timeline graphics reported the addition of Java to LSB 4.0, without mentioning that it was added as a “trial-use” standard (proposed for inclusion, but not required). We regret the error Jeff Licquia Linux in the Wild
At Your Service SUBSCRIPTIONS: Beginning with the September 2011 issue, subscriptions to Linux Journal will be fulfilled digitally and will be available in a variety of digital formats, including PDF, an on-line digital edition, and apps for iOS and Android devices will be coming soon. Renewing your subscription, changing your e-mail address for issue delivery, paying your invoice, viewing your account details or other subscription inquiries can be done instantly on-line: www.linuxjournalcom/subs Alternatively, within the US and Canada, you may call us toll-free at 1-888-66-LINUX (54689), or internationally at +1-818-4872089. E-mail us at subs@linuxjournal com or reach us via postal mail at Linux Journal, PO Box 16476, North Hollywood, CA 91615-9911 USA. Please remember to include your complete name and address when contacting us. LETTERS TO THE EDITOR: We welcome your letters and encourage you to submit them at www.linuxjournalcom/contact or mail them to Linux Journal, PO Box 980985,
Houston, TX 77098 USA. Letters may be edited for space and clarity. WRITING FOR US: We always are looking for contributed articles, tutorials and real-world stories for the magazine. An author’s guide, a list of topics and due dates can be found on-line: www.linuxjournalcom/author FREE e-NEWSLETTERS: Linux Journal editors publish newsletters on both a weekly and monthly basis. Receive latebreaking news, technical tips and tricks, an inside look at upcoming issues and links to in-depth stories featured on www.linuxjournalcom Subscribe for free today: www.linuxjournalcom/enewsletters This was me, not too long ago, over Aptos, California (Monterey Bay), near my home. It was my fourth tandem jump, but when I went back and looked at the pics, I thought “this should be in LJ!” It’s my favorite LJ shirt, “May the source be with you”. Rob Polk WRITE LJ A LETTER We love hearing from our readers. Please send us your comments and feedback via www.linuxjournalcom/contact ADVERTISING:
Linux Journal is a great resource for readers and advertisers alike. Request a media kit, view our current editorial calendar and advertising due dates, or learn more about other advertising and marketing opportunities by visiting us on-line: www.linuxjournalcom/advertising Contact us directly for further information: ads@linuxjournal.com or +1 713-344-1956 ext. 2 WWW.LINUXJOURNALCOM / OCTOBER 2011 / 13 LJ210-October2011bu2.indd 13 9/21/11 2:55 PM UPFRONT NEWS + FUN diff -u WHAT’S NEW IN KERNEL DEVELOPMENT Linus Torvalds has decided at last to release Linux version 3.0 For a long time, it seemed as though he might never bump the major version number, because there was no longer any meaning associated with that number. And, indeed, his explanation for the change now ran something along the lines of, Linux is entering its third decade, so why not? Along with the version bump, Linus has decided to do away with the whole threenumbered versioning system that the kernel has used
since time immemorial. So from now on, it’ll just be 3.0, 31, 32 and so on This is great news for the stable tree maintainers, who were getting tired of version numbers like 2.6384, which as Willy Tarreau said, look more like IP numbers than version numbers. But, with the kernel going from a threenumbered system to a two-numbered system, a lot of support scripts are breaking. It’s Linux’s own Y2K bug. Everyone thought 26 was going to be the prefix for the rest of time and wrote their scripts accordingly. So along with the version number changes, a lot of fixes are going into the various support scripts. As soon as the rumor started floating around, Joe Pranevich emerged from a seven-year absence, to announce the “Wonderful World of Linux 3.0” at www.kniggitnet/wwol30 It covers the vast array of changes that occurred throughout the 2.6 time frame, leading up to 30 Matt Domsch announced that Dell was discontinuing the digest forms of the linuxkernel and linux-scsi mailing
lists. Although this would affect a few hundred subscribers, he said that changes at the hardware and software level of their mail servers meant that certain features wouldn’t be re-implemented, and digests were one of those. Dan Rosenberg initiated a fascinating discussion about a particular security problem: how to deal with attackers who based their attacks on knowing the location, in RAM, of vulnerable parts of the kernel. His original idea was to have the system migrate the kernel to a new randomized memory location during boot. But over the course of discussion, it turned out there were many hard problems that would have to be solved in that case. For one thing, it wasn’t always clear where to get enough entropy for random number generationan important issue if one wants to relocate the kernel to a random place in RAM. Also, the 64-bit kernel would load into memory in a different way from the 32-bit kernel, and so it would have to be handled differently by Dan’s code. Also,
if the kernel were in a random location, something would have to be done to oops report generation to make sure the memory references would make sense to 14 / OCTOBER 2011 / WWW.LINUXJOURNALCOM LJ210-October2011bu2.indd 14 9/21/11 2:55 PM [ someone reading them. Even more dangerous was the fact that other parts of the system already would be in memory at the time the kernel was being relocated, and there was a real danger of clobbering those parts, which would kill the system. Hibernation also was an issue, because the existing hibernation code in the kernel made assumptions about the awakening system that Dan’s code violated. Eventually, it became clear that although Dan’s goal was a good onemaking it more difficult to predict where in RAM the vulnerable parts of the kernel could be foundthere were just too many technical difficulties to make it feasible in the way he was planning to do it. Linus Torvalds and H. Peter Anvin each came up with alternative approaches that
UPFRONT ] might be easier to implement, while still accomplishing essentially the same goal. Linus’ idea was to relink the kernel binary with a random piece of data to offset the kernel randomly in RAM that way. H. Peter’s idea was more radical He wanted to convert the core kernel code into a set of kernel modules. At that point, the init code could load the various modules anywhere it wanted, even in noncontiguous RAM. So, he set out to implement that in the syslinux bootloader. Although no clear direction emerged for what would ultimately go into the kernel, it seems as though a number of good ideas will be pursued. Almost certainly, the kernel’s location in RAM will be randomized in some way, before too long.ZACK BROWN LinuxJournal.com content/why-hulu-plus-sucks-and-whyyou-should-use-it-anyway Have you visited us at LinuxJournal.com lately? You might be missing out on some great information if you haven’t. Our on-line publication’s frequent, Web-exclusive posts will
provide you with additional tips and tricks, reviews and news that you won’t find here, so make sure to visit us regularly at LinuxJournal.com In case you missed them, here are a few of the most popular recent posts to get you started: ■ “Wi-Fi on the Command Line”: www.linuxjournalcom/content/ wi-fi-command-line ■ “Review: Recompute Cardboard PC”: www.linuxjournalcom/video/ review-recompute-cardboard-pc ■ “5 Myths About OpenOffice.org/LibreOffice”: www.linuxjournalcom/content/ 5-myths-about-openofficeorg-libreoffice ■ “Why Hulu Plus Sucks, and Why You Should Use It Anyway”: www.linuxjournalcom/ ■ “The Arch Way”: www.linuxjournalcom/ content/arch-way KATHERINE DRUCKMAN ■ “Fun with ethtool”: www.linuxjournalcom/ content/fun-ethtool WWW.LINUXJOURNALCOM / OCTOBER 2011 / 15 LJ210-October2011bu2.indd 15 9/21/11 2:55 PM [ UPFRONT ] Non-Linux FOSS Many Windows or Macintosh users are perfectly happy to download their podcasts with iTunes or
something similar. Here at Linux Journal, however, we like to offer open-source alternatives. Enter Juice Juice is a cross-platform, open-source application for downloading podcasts. Juice is fast, efficient and very feature-rich. Our favorite feature is the built-in directory with thousands of podcast feeds from which to choose. Add things like auto cleanup, centralized feed management and accessibility awesome tool for getting your audio information options, and fix. Check it out for Windows, Mac OS or Linux at you have an juicereceiver.sourceforgenetSHAWN POWERS ClearOS All-in-one Linux-based network servers aren’t a new concept. Distributions like Clark Connect have been around for many years and fit their niche quite well. Lately, however, there seems to be a new batch of all-in-one solutions that offer a similar business model. A couple months ago, we reviewed Untangle, which is a commercial distribution offering a and cloud-based services to end users. You can
feature-limited free version. Recently, one of purchase appliance devices or install ClearOS on our readers, Tracy Holz, pointed me to a similar an existing server. Much like Untangle, ClearOS’s project, ClearOS. Although Untangle is largely free features are limited, but it doesn’t feel a firewall and network services system, ClearOS crippled if you stick to just the free stuff. attempts to do more. Using a combination of The features and add-ons are too numerous to open-source and commercial tools, it can be a list here, but if you’re looking for a commercially one-stop server platform for many networks. backed all-in-one server solution for your network, ClearOS has a unique modular system that check out ClearOS: www.clearfoundationcom seamlessly includes local server applications Tell ’em Tracy sent you.SHAWN POWERS 16 / OCTOBER 2011 / WWW.LINUXJOURNALCOM LJ210-October2011bu2.indd 16 9/21/11 2:55 PM [ UPFRONT ] Google Plus The early years of the
21st century forever will be very early in the beta stages, but it already known as the age of social media. I don’t know seems to have a cleaner and simpler interface if that’s something we should be proud of, but than its direct competitor: Facebook. nonetheless, here we are. During the Google offers unique features like past decade, we’ve seen things like group video chats called “hangouts” Friendster, Pownce, Twitter, Wave, and “circles” of friends to help organize Facebook, Tumblr, Buzz, Gowalla, your following/followers. G+’s integration Brightkite, Foursquare, Loopt, Plurk, with other Google services may be the Identi.ca, LinkedIn, Yammer and now kill shot. Gmail, Picasa, YouTube and Google Plus. Blogger easily can be integrated directly Google hasn’t had a great track record when by Google, making it simple for those folks already it comes to social networking, with both Wave using Google apps to get their Plus on. Is the third and Buzz
being largely unsuccessful. Google time a charm for Google, or will G+ be another Plus, or G+, seems to be its most appealing unfortunate carcass in the pile of outdated social offer so far. At the time of this writing, it’s still media platforms? Only time will tell.SHAWN POWERS Kickstarter for Open-Source Projects? The Web site www.kickstartercom is an interesting place. Basically, it’s a site that allows people to invest in various projects, giving people real money to develop an idea. Those ideas vary from film-making Recently, we’ve seen open-source projects use to programming video games, but the concept is the Kickstarter, and it seems like a great idea. If you see same regardless of the project. a program idea you like, send money, and if the What is the motivation for investing in creators reach their goals, they’ll create the programs. someone’s idea? That’s the beauty; it depends on Because it’s open source, the benefit is obvious: you the
project. Maybe it’s an MC Frontalot album get to use the program when it’s complete. you want to see created, so you give money to Granted, it’s not a perfect system. It certainly the project so the album is produced. Perhaps would be possible to abuse it. It seems that actually it’s a video game you’d really like to play, so you funding open-source developers is a good idea give money to the developer to make the game. though. Perhaps this method of funding is a fad, Perhaps the developer gives a copy of the game or maybe it’s the start of something greatpaying to all investors. Perhaps not There are no rules, developers to develop free software. If it works, it just collaboration. seems like everyone wins.SHAWN POWERS WWW.LINUXJOURNALCOM / OCTOBER 2011 / 17 LJ210-October2011bu2.indd 17 9/21/11 2:55 PM [ UPFRONT ] Big-Box Science A few months ago, I wrote a piece about program will run single-threaded. The most how you can use MPI to run a parallel
basic parallel section is defined by: program over a number of machines that are networked together. But more and more #pragma omp parallel often, your plain-old desktop has more than one CPU. How best can you take advantage in C/C++, or: of the amount of power at your fingertips? When you run a parallel program on one !OMP PARALLEL single machine, it is called shared-memory parallel programming. Several options in FORTRAN. This is called a parallel openMP are available when doing shared-memory pragma. Almost all of the other pragmas that you programming. The most common are are likely to use are built off this. pthreads and openMP. This month, I take a The most common pragma you will see is the look at openMP and how you can use it to parallel loop. In C/C++, this refers to a for loop get the most out of your box. In FORTRAN, this is a do loop. (For the rest of this openMP is a specification, which piece, I stick to C/C++ as examples. There are means you end up
actually using an equivalent FORTRAN statements you can find in implementation. It is implemented as an the specification documentation.) A C/C++ loop extension to a compiler. So, in order to can be parallelized with: use it in your code, you simply need to add a compiler flag. There is no linking #pragma omp parallel for in of external libraries. openMP directives for (i=0; i<max; i++) { are added to your program as special do something(); comments. This means if you try to compile area += i; your program with a compiler that doesn’t do something else(); understand openMP, it should compile } fine. The openMP directives will appear just like any other comment, and you will The pragma tells the openMP subsystem that end up with a single-threaded program. you want to create a parallel section defined by Implementations for openMP are available the for loop. What happens is that the defined under C/C++ and FORTRAN. number of threads get created, and the work
of The most basic concept in openMP is that the loop gets divided among these threads. So, only sections of your code are run in parallel, for example, if you had a quad-core CPU and had and, for the most part, these sections all run to go through 100 iterations in this for loop, each the same code. Outside of these sections, your CPU core gets 25 iterations of the loop to do. So, 18 / OCTOBER 2011 / WWW.LINUXJOURNALCOM LJ210-October2011bu2.indd 18 9/21/11 2:55 PM this for loop should take approximately one-fourth the time it normally takes. Does this work with all for loops? No, not necessarily. In order for the openMP subsystem to be able to divide up the for loop, it needs to know how many iterations are involved. This means you can’t use any commands that would change the number of iterations around the for loop, including things like “break” or “return” in C/C++. Both of these drop you out of the for loop before it finishes all of the iterations. You can
use a “continue” statement, however. All that does is jump over the remaining code in this iteration and places you at the beginning of the next iteration. Because this preserves iteration count, it is safe to use. By default, all of the variables in your program have a global scope. Thus, when you enter a parallel section, like the parallel for loop above, you end up having access to all of the variables that exist in your program. Although this is very convenient, it is also very, very dangerous. If you look back at my short example, the work is being done by the line: area += i; You can see that the variable area is being read from and written to. What happens now if you have several threads, all trying to do this at the same time? It is not very prettythink car pileup on the freeway. Imagine that the variable area starts with a value of zero. Then, your program starts the parallel for loop with five threads and they all read in the initial value of zero. Then, they each add
their value of i and save it back to memory. This means that only one of these five LJ210-October2011bu2.indd 19 9/21/11 2:55 PM [ UPFRONT ] actually will be saved, and the rest essentially will #pragma omp parallel for be lost. So, what can you do? In openMP, there is for (i=0; i<max1; i++) { the concept of a critical section. A critical section is for (j=0; j<max2; j++) { a section of your code that’s protected so that only do something(); one thread can execute it at a time. To fix this issue, you could place the area incrementing within a } } critical section. It would look like this: In this case, every thread is going to have #pragma omp parallel for access to the global variable j. They will all be for (i=0; i<max; i++) { reading from and writing to it at completely do something(); random times, and you will end up with either #pragma omp critical more than max2 iterations happening or less than area += i; max2. What you actually want to see
happen do something else(); is that each thread does everything within each } iteration of the outside loop. What is the solution? Luckily, the openMP specification has the concept Remember that in C, a code block is defined by of a private variable. A private variable is one either a single line or a series of lines wrapped in where each thread gets its own private copy to curly braces. So in the above example, the critical work with. To privatize a variable, you simply need section applies to the one line area += i;. If to add to the parallel for pragma: you wanted it to apply to several lines of code, it would look like this: #pragma omp parallel for private(j) #pragma omp parallel for If you have more than one variable that for (i=0; i<max; i++) { needs to be privatized, you can add them do something(); to the same private() option, comma- #pragma omp critical separated. By default, these new private copies { will act just like regular variables in C code
on area += i; Linux. This means their initial values will be do something else(); whatever junk are in those memory locations. } If you want to make sure that each copy starts } with the value of the original value that existed on entering the parallel section, you can add This leads us to a more subtle way that multiple the option firstprivate(). Again, you threads can abuse global variables. What if you enter the variables you want treated this way have a nested for loop and you want to parallelize in a comma-separated list. As an example that the outside loop? Then: doesn’t really do anything useful, this would 20 / OCTOBER 2011 / WWW.LINUXJOURNALCOM LJ210-October2011bu2.indd 20 9/21/11 2:55 PM ` LJ210-October2011bu2.indd 21 9/21/11 2:55 PM [ UPFRONT ] look like: a = 10; export OMP NUM THREADS=4 You can set more threads than you have CPUs. #pragma omp parallel for Because they are actual threads of execution, private(a,j) firstprivate(a) Linux
has no problem scheduling them on the for (i=0; i<max1; i++) { available CPUs. Just remember if you have more for (j=0; j<max2; j++) { threads than available CPUs, you will see a a += i; slowdown in the execution speed of your code, do something(a*j); as it will be swapping with itself on the CPUs. } } Why would you do this? Well, when you are testing a new piece of code, you may have bugs that don’t present themselves until you reach a certain So, you have a program. Now what? The number of threads. So, in testing scenarios, it may first step is to compile it. Because it is an make sense to run with a large number of threads extension to the compiler itself, you need to and a small input data set. The ideal situation is to add an option to your compilation command. be the only process running on the machine and For gcc, it would simply be -fopenmp. You do running one thread for each CPU. This way, you need to be careful about the compiler version maximize
usage and minimize swapping. you are using and what it supports. The openMP All of this has been only the briefest specification is up to version 3.0 right now, introduction. I haven’t covered generic parallel with support varying across the gcc versions. If sections, functional parallelism, loop scheduling you want to look at the support in detail, check or any of the other more-advanced topics. The the main gcc page at gcc.gnuorg The latest specifications are at www.openmporg along versions are starting to include support for with links to tons of tutorials and other examples. version 3.0 of openMP Hopefully, this introduction has given you some Once you have it compiled, you need to run ideas to try and provides a small taste of what may it. If you simply run it at the command line, be possible. I will leave you with one last hint If without doing anything else, your program will you want to start to play with parallel programs check your machine and see how
many CPUs without having to think about it, add the option you have (a dual-core processor looks like two -ftree-parallelize-loops. This will try CPUs, in case you were wondering). It then will to analyze your code and see if it can parallelize go ahead and use that number as the number any sections. It won’t be able to catch all of the of threads to use in any parallel sections. If you sections that can be parallelized, because it can’t want to set the number of threads that should understand the context of your code and what be used explicitly, you can set it using an it is trying to do. But, for the time it takes to add environment variable. In bash, you would use the option and recompile and test the timing, it this to set four threads: definitely would be worthwhile.JOEY BERNARD 22 / OCTOBER 2011 / WWW.LINUXJOURNALCOM LJ210-October2011bu2.indd 22 9/21/11 2:55 PM They Said It “Be as smart as you can, but remember that it is always better to be wise
than to be smart.”Alan Alda “Being an intellectual creates a lot of questions and no answers.”Janis Joplin “Failure is simply the opportunity to begin again, this time more intelligently.”Henry Ford “Genius is more often found in a cracked pot than in a whole one.”E B White “It’s not that I’m so smart, it’s just that I stay with problems longer.”Albert Einstein “Man is the most intelligent of the animalsand the most silly.”Diogenes “The surest sign that intelligent life exists elsewhere in the universe is that it has never tried to contact us.”Bill Watterson LJ210-October2011bu2.indd 23 9/21/11 2:55 PM COLUMNS AT THE FORGE Mustache.js REUVEN M. LERNER Looking for a JavaScript templating system? Mustache.js might be right for you. The past few articles, I’ve looked at a number of uses for JavaScript, on both the server and the client. I hope to continue my exploration of such systems, particularly on the client side, in the coming months.
But for now, I want to tackle a more mundane problem that JavaScript programmers encounter all the time: the fact that JavaScript doesn’t have any native stringinterpolation mechanism. Sure, you always can use the + operator to concatenate strings: "hello, " + "world" which gives you the string: "hello, world" which is what you might expect. But, what if you have a variable "username", and you want to say “hello” to the user in a friendly way? In Ruby, you would use: "hello, #{username}" And in Python, you would write: "hello, %s" % username But in JavaScript, you’re basically stuck typing: "hello, " + username which isn’t so terrible if you have one variable at the end of the string. But the more I’m working with JavaScript, the more I’d like to have more sophisticated string interpolation. While I’m wishing, I’d like to have all sorts of text-formatting and templating capabilities that I’m
used to from other languages or from various Web frameworks. Now, this doesn’t sound like a tall order. And heaven knows, I’ve used a lot of templating systems during the years, so I know that it’s not very hard to create one especially if the standards aren’t very high. But as Web applications become more heavily focused on the browser, and on JavaScript, you’ll need a templating solution that allows you to work easily in that environment. Fortunately, several templating systems exist. One of the most prominent and interesting is Mustache.js, a JavaScript implementation of the Mustache templating system that is available for many different languages. In contrast with most 24 / OCTOBER 2011 / WWW.LINUXJOURNALCOM LJ210-October2011bu2.indd 24 9/21/11 2:55 PM COLUMNS AT THE FORGE other templates I’ve used, Mustache.js is not a fully fledged programming language, as you might expect. Rather, it’s a tightly defined domain-specific language that describes the page, but
that doesn’t have the potential to make templates into another code repository. So, this article explores Mustache.jshow to install and use it, as well as when it’s appropriate and how to use a few of the more-advanced features that come with it. Templates Many readers probably are familiar with a typical sort of template, with a style used by PHP, ASP, JSP and Ruby’s ERb. Anything that should be executed goes in braces that look like this: <% varname = 5 %> And, anything you want to display on the screen gets nearly the same sort of tag, but with an = sign on the left: <%= varname %> The good news with such templates is that they’re rather easy to use. You don’t have to worry about which symbols mean what, or set up a file just to see some interpolated variables. But on the other hand, they’re too simple for producing large-scale reports and certainly for doing serious text manipulation. The other problem is that as soon as you put code into your template,
you’re violating the rule of MVC, which is that you don’t want to put very much executable code in your template. Assigning variables isn’t a good idea, but calling methods, not to mention retrieving rows from the database, is something you normally don’t want to be doing within your views. But, you can be even stricter in how you interpret this no-execution policy. What if you could avoid all executable code, including if/then statements, loops and other things to which you’re accustomed? Mustache adopts this philosophy in that it allows for a limited set of things to take place within the template. You could argue (and I’d probably believe you) that it’s going too far to say, as the Mustache slogan says, that they’re “logic-less templates”. Indeed, Mustache templates do have a fair amount of logic in them. But the nature of the templating language ensures that the special functions cannot be abused too terribly. If you want to execute code, you’ll have to do it
outside the realm of Mustache. (If you’re wondering, it’s called Mustache because it uses double-curly braces, {{ and }}, as delimiters. Double-curly braces indicate where you want interpolation to take place, and they also delimit various control structures.) Installing Mustache.js couldn’t be easier Download the single mustache.js file from GitHub, put it in an appropriate directory inside the JavaScript directory for your Web WWW.LINUXJOURNALCOM / OCTOBER 2011 / 25 LJ210-October2011bu2.indd 25 9/21/11 2:55 PM COLUMNS AT THE FORGE Listing 1. Simple Use of Mustache <!DOCTYPE html> <html> <head> <title>Testing</title> <script src="jquery.js"></script> <script type="text/javascript" src="mustache.js"></script> <script type="text/javascript"> $(document).ready( function () { var template vars = { name: 'Reuven', number of children: 3 } var template =
"<b>{{name}}</b> has {{number of children}} children."; var html = Mustache.to html(template, template vars); $('#target').html(html); }); </script> </head> <body> <h1>Testing testing</h1> <p>This is a paragraph</p> <p id="target">This space for rent</p> </body> </html> applicationor alongside your HTML file, if you’re just experimenting with it outside a frameworkand you’re ready to go. Note that the inclusion of Mustache.js doesn’t turn your HTML file (or your JavaScript file, for that matter) into a Mustache template. Rather, it provides you with a number of functions that can be 26 / OCTOBER 2011 / WWW.LINUXJOURNALCOM LJ210-October2011bu2.indd 26 9/21/11 2:55 PM COLUMNS AT THE FORGE Listing 2. Replace Text in the Template <!DOCTYPE html> <html> <head> <title>Testing</title> <script src="jquery.js"></script>
<script type="text/javascript" src="mustache.js"></script> <script type="text/javascript"> $(document).ready( function () { var template vars = { proper noun: 'Reuven', color: 'green', food: 'ice cream' } $(".template")each(function(index, value) { var current html = $(this).html(); var translated = Mustache.to html(current html, template vars); $(this).html(translated); }); }); </script> </head> <body> <h1>Testing testing</h1> <p>This is a paragraph</p> <p class="template">My name is {{proper noun}}.</p> <p class="template">I like to wear {{color}} shirts, and eat {{food}} for breakfast.</p> </body> </html> WWW.LINUXJOURNALCOM / OCTOBER 2011 / 27 LJ210-October2011bu2.indd 27 9/21/11 2:55 PM COLUMNS AT THE FORGE applied to text strings. You then can do whatever you want with those text strings,
from inserting them into a file to using them for further processing. Listing 1 contains a simple example of using Mustache.js At the top of the <head> section, I include both the jQuery library and Mustache.js, as I often would in an HTML file I then have a bit of JavaScript code executing in the standard $(document).ready function call, ensuring that it will be executed only after jQuery has detected that the entire HTML document has loaded. This avoids a race condition, in which the JavaScript might or might not run before the HTML has been rendered. I then define a variable (template vars), a JavaScript object with two properties, “name” and “number of children”. These properties can be of any data type, including a function. If a property is a function, it is evaluated when interpolated, and the result of the function’s evaluation is inserted into the template. I’ve then broken up the interpolation into three distinct parts. First, I define the text (the
“template” variable) into which I want to interpolate variables. Notice how the string is a tiny template, and that anything within {{ }} (double-curly braces) is evaluated as a variable by Mustache.js Next, you apply your template vars to the template, getting some HTML back. You then can do whatever you want with that HTML, including (most easily) replacing the text from an existing HTML tag. You also could have created a new node, replaced an existing one or modified the text even further. In the end, I did something fairly simple, namely using jQuery’s “html” function to replace the existing HTML with the improved version. For something a bit more complex, which resembles traditional HTML templates a bit more, consider Listing 2. In this example, I decided to do a Mad Libs sort of replacement, but instead of changing text in a string, I changed it in the document itself. Using jQuery’s selectors, I chose all elements with a “template” class. (This allows the author
of the page to decide whether the {{ }} tags will be used on a particular tag.) Perhaps the most interesting and important part of this code is the callback function I used to do the translation. Rather than using a typical jQuery loop, which would have turned into a rat’s nest of code, I decided to use the “each” function, which iterates over a collection. In each iteration, $(this) refers to the item, and you next use the Mustache.to html function to translate it, and then replace the text with its transformed self. In this way, your JavaScript easily can affect the text on the page. What happens if you ask Mustache to use a variable value that you have not defined? It continues silently, using an empty string. This means that if your template vars variable contains one or more keys with misspelled names, you won’t get any warnings. 28 / OCTOBER 2011 / WWW.LINUXJOURNALCOM LJ210-October2011bu2.indd 28 9/21/11 2:55 PM COLUMNS AT THE FORGE Listing 3. Loops <!DOCTYPE
html> <html> <head> <title>Testing</title> <script src="jquery.js"></script> <script type="text/javascript" src="mustache.js"></script> <script type="text/javascript"> $(document).ready( function () { var template vars = { name: 'Reuven', children: ['Atara', 'Shikma', 'Amotz'] } var template = "<b>{{name}}</b> has children named:<ul>{{#children}}<li>{{.}}</li>{{/children}}</ul>"; var html = Mustache.to html(template, template vars); $('#target').html(html); }); </script> </head> <body> <h1>Testing testing</h1> <p>This is a paragraph</p> <p id="target">This space for rent</p> </body> </html> Loops and Conditionals Remember when I wrote that I wouldn’t call Mustache.js “logic-less templates”, because the templating
language still includes conditionals? Well, now you can see what I meant. (I should add that I’m WWW.LINUXJOURNALCOM / OCTOBER 2011 / 29 LJ210-October2011bu2.indd 29 9/21/11 2:55 PM COLUMNS AT THE FORGE fairly convinced I normally don’t want code to be evaluated/executed in the template. But, conditionals and loops are two things that every useful templating system I’ve had has incorporated, and they are a necessary piece of logic for templates to be useful.) If you look at Listing 3, you’ll see how to create loops. I have added an array (“children”) inside my template vars variable. But instead of saying {{children}} to retrieve the contents of the array, you instead say {{#children} at the beginning of the loop and {{/children} at its end. Mustache.js is smart enough to know what to do, and it repeats the block within these delimiters, once for each element of the array. To get the current array element itself, you use the special syntax {{.}} That’s certainly
some degree of logic, but it’s nothing compared with the {{#mycondition}} tag, which begins the equivalent of an if-then statement. But wait, what are you checking? Well, if you’re starting your condition with {{#mycondition}}, that means you’re going to treat “mycondition” as a function, evaluating it at runtime and then displaying only the contents of the block (that is, the stuff between {{#mycondition}} and {{/#mycondition}} if the function returns “true”). Mustache has a bunch of other features too. It automatically escapes HTML by default, but it has a mechanism, {{{ }}}, that uses raw HTML, without cleaning up the < and > symbols that can be both annoying and potentially dangerous. So, you have the flexibility to replace text as appropriate in your application. The examples I have provided obviously are somewhat contrived and simple. Fortunately, the syntax of Mustache.js is simple enough that it shouldn’t take very long at all to incorporate it into your
work. Conclusion Mustache is a straightforward, but powerful, templating system for JavaScript. If you’re starting to put together a Web application that needs to rewrite parts of the text based on AJAX calls or JavaScript output, or if you’re writing a one-page JavaScript-based application, you certainly should look into Mustache.js The home page on GitHub has good documentation, and other tutorials and documents are linked from there as well.■ Reuven M. Lerner is a longtime Web developer, architect and trainer. He is a PhD candidate in learning sciences at Northwestern University, researching the design and analysis of collaborative on-line communities. Reuven lives with his wife and three children in Modi’in, Israel. Resources The home page for Mustache is mustache.githubcom For an interesting analysis of Mustache.js, as well as where it could be improved (and a description of a fork), read Yehuda Katz’s blog entry at yehudakatz.com/2010/09/ 09/announcing-handlebars-js.
30 / OCTOBER 2011 / WWW.LINUXJOURNALCOM LJ210-October2011bu2.indd 30 9/21/11 2:55 PM The Intel® Xeon® processor 5600 series increases performance, cuts operating costs, and helps deliver ROI. That’s intelligent performance.1 Check out the intelligent features of the Xeon 5600 at intel.com/itcenter Performance: Your processor gets the job done. Intelligent performance: Your processor gets the job done with 40% more performance by adapting to your workload.2 Servers from Advanced Clustering Technologies feature the Intel® Xeon® processor 5600 series. Pinnacle 1BX5502 1U Dual System Blade Server • Intel® Xeon® processor 5600 series advancedclustering.com/lj/1BX5502/ Call toll free: 866.8028222 The Pinnacle 1BX5502 blade server delivers fullsize performance in half the space. Our 1U chassis-based solution holds two complete blade servers to give you the high performance and density you need. Contact our experts to find your perfect Pinnacle server. Intel is not
responsible for and has not verified any statements or computer system product-specific claims contained herein. • High performance, energy-efficient design for HPC clusters • Two complete independent server modules in 1U of space easy module access without disrupting the other system • Available with built-in ConnectX-2 QDR InfiniBand Starting at $1,700 1. Increased performance tested when comparing to the previous generations of Intel ® Xeon® processors Performance tests measure approximate performance of Intel ® products on specific computer systems; any difference in hardware, software, or configuration may affect actual performance. For more information, visit wwwintelcom/performance/server 2. When compared to the previous generations with servers based on Intel ® 32nm microarchitecture Based on results on a server side Java* benchmark in conjunction with power consumption across a load line. Intel internal measurement (Jan 15, 2010) Configuration details: server
side Java benchmark in conjunction with power consumption across a load line 2010, Intel Corporation. All rights reserved Intel, the Intel logo, Intel Xeon, and Xeon Inside are trademarks of Intel Corporation in the US and other countries *Other names and brands may be claimed as the property of others. LJ210-October2011bu2.indd 31 93857121 IIMPCMLJ100111 ACT LinuxJournal.indd 1 9/21/11 11:48 2:58 PM 7/29/11 AM COLUMNS WORK THE SHELL Working with Image Files DAVE TAYLOR Roll your own image inclusion utility. As an old-school tech guy, I can appreciate all the shiny new widgets we have on our computer applications, but I still usually prefer a command line and being able to fine-tune exactly what’s produced rather than just hope it’ll work. This is particularly true when it comes to HTML generators and Web page creation tools. You need only look at the output of Microsoft Word’s “Save as HTML” feature to know what I mean. (All right, that’s not a fair comparison
because it’s so bloody ghastly that even the Microsoft people avoid using Word for this purpose.) It’s fair to call me a prolific writer too, and much of what I write is for the on-line world. This gives me the chance to compare different tools, and since I’m <cough> a bit of a perfectionist <cough>, it also lets me see which content creation tools allow finetuning and which trap you in the world their developers have created. In particular, I’m thinking of WordPress, a super-popular open-source blogging utility, versus Movable Type, a more closed development tool that is unfortunately a bit in limbo due to a change in corporate ownership. My main blog, AskDaveTaylorcom, operates on Movable Type (as does the Huffington Post, among others), whereas the film reviews I write for ScienceFiction.com come through its WordPress system. WordPress makes it complicated to add images to your articles, and when it does, I find that I invariably switch into the HTML source and
tweak the code produced. If nothing else, there’s always insufficient padding between the image and the text adjacent, which is something I often puzzle about how I can be the only person who notices? Movable Type could have the same issues, but because it doesn’t have such a fancy HTML edit widget, it instead has encouraged me to roll my own image inclusion utility, and that’s what we’re going to examine this month. scale.sh The purpose of the utility is to take an image, either in GIF, JPEG or PNG format, calculate its size and produce the HTML necessary to have it properly included in a blog post. To make it more useful, it can automatically scale the image dimensions in the HTML, add image 32 / OCTOBER 2011 / WWW.LINUXJOURNALCOM LJ210-October2011bu2.indd 32 9/21/11 2:58 PM COLUMNS WORK THE SHELL borders if needed and even add captions as specified. Here’s a simple example of it at work: $ scale 1 ./Desktop/test-imagepng <center><img
src="http://www.askdavetaylorcom/blog-pics/ To understand this, imagine we’re using the original image with its 256x384 dimensions. If we constrain it to a max of 200 pixels in width, the multiplier can be calculated as: test-image.png" alt="test image" border="0" width="256" height="384" /></center> multiplier="0$(echo "scale=2 ; $maxwidth / $width" | bc)" It has lots of smarts, including the knowledge to convert the local image into an equivalent URL that instead references the archive layout on my server, calculates height and width, and even includes an ALT attribute (which is good SEO juju) based on the name of the file. The 1 in the command invocation says that I want the image to be at its full size (scale=100%). To make it smaller, say 75%, I could invoke it as scale 0.75, and if I wanted to constrain it by a specific pixel width, perhaps because of a page layout issue, I can do that too with
scale 200. The two most important lines in the script are those that invoke the terrific ImageMagick command-line utility identify and parse the image dimensions: Or, if we want to do the math ourselves, 200/256 = 0.78 Calculate both dimensions by that figure and we arrive at the scaleddown image size of 200x300. width="$(identify $filename | cut -f3 -d | cut -f1 -dx)" height="$(identify $filename | cut -f3 -d | cut -f2 -dx)" Extract a multiplier based on the starting parameter, and it’s then straightforward to use bc and get the new dimensions: width="$(echo "$width * $multiplier" | bc | cut -d. -f1)" height="$(echo "$height * $multiplier" | bc | cut -d. -f1)" SERVER • Fanless x86 500MHz/1GHz CPU • 512MB/1GB DDR2 RAM On Board • 4GB Compact Flash Disk • 10/100 Base-T Ethernet • Reliable (No CPU Fan or Disk Drive) • Two RS-232 Ports 2.6 KERNEL • Four USB 2.0 Ports • Audio In / Out • Dimensions: 4.9 x 47
x 17” (125 x 120 x 44mm) Standard SIB (Server-In-a-Box) Starting at $305 Quantity 1. • Power Supply Included • Locked Compact Flash Access • Analog SVGA 3D Video • Optional Wireless LAN • EMAC Linux 2.6 Kernel • Free Eclipse IDE Since 1985 OVER 25 YEARS OF SINGLE BOARD SOLUTIONS EQUIPMENT MONITOR AND CONTROL Phone: (618) 529-4525 · Fax: (618) 457-0110 · Web: www.emacinccom WWW.LINUXJOURNALCOM / OCTOBER 2011 / 33 LJ210-October2011bu2.indd 33 9/21/11 2:58 PM COLUMNS WORK THE SHELL If the user specifies a percentile multiplier, say 0.75 for a 25% reduction in image size, then the math is even easier because, we don’t have to calculate the multiplier. It already has been specified by the user: 0.75 The resultant image: 192x288. Not rocket science, but darn helpful. The Search Engine Impact of Scaled Images The problem that creeps up here is one that’s tied more to search engine optimization and so-called SERP, search engine results placement. In a
nutshell, slow-loading pages now are penalized in the search results, and if you’re loading up lots of large images and then automatically scaling them down with the attributes in your HTML code, you’re hurting your page and its ability to rank well in user searchesnot good. If it’s a 10% shrinkage or you’re just shaving off a few pixels to make it fit a particular page design (for example, I keep my images to 500 pixels or narrower on my DaveOnFilm.com site), no worries. At that point, the difference in file size is usually negligible. This brings us to another important task that scale.sh performs: testing and warning if you’re going to be scaling an image down to the point where you can experience an SERP penalty. Here’s how that’s calculated: pixels, we’d have the mathematical formula: sizediff=( 200 / 256) * 100 The cut -d. -f1 is the equivalent of the “floor” mathematical function; it just converts a float back into an integer. Do the math, and sizediff =
78. That sounds right based on what we calculated earlier with the multiplier. I’ve set an arbitrary limit so that anything that’s more than a 20% reduction in size is worthy of generating a warning message, like this: if [ $sizediff -lt 80 ] ; then echo "* Warning: $filename scaled to $sizediff%" echo "" fi Sure enough, if we run scale.sh with the 200-pixel width constraint, here’s what we see: * Warning: ./Desktop/test-imagepng scaled to 77% In my next article, I’ll dig farther into the script and describe some of the tricks I’m using to generate the best, smartest HTML code I can manage. In the meantime, think about how you are adding images to your own on-line content and whether your method is optimized for both the user experience and the search engines.■ sizediff=$(echo "scale=3; ( $width / $owidth ) * 100" | bc | cut -d. -f1) owidth is the original width, so in the case where we constrained the image to 200 Dave Taylor has been
hacking shell scripts for a really long time, 30 years. He’s the author of the popular Wicked Cool Shell Scripts and can be found on Twitter as @DaveTaylor and more generally at www.DaveTaylorOnlinecom 34 / OCTOBER 2011 / WWW.LINUXJOURNALCOM LJ210-October2011bu2.indd 34 9/21/11 2:58 PM STALLATIO N I E G R A L H T 5 2 LISA ’11: N ONFERE C N IO T A R T IS IN M D SYSTEM A NCE December 4–9, 2011 BOSTON, MA The Past, Past Present, Present and Future of System Administration DEVOPS: NEW CHALLENGES, PROVEN VALUES Keynote Address: “The DevOps Transformation,” by Ben Rockwood Closing Session: “Tales from IBM’s WatsonJeopardy! Champion” Join us for 6 days of practical training on topics including: • Virtualization Series by instructors such as John Arrasjid, Ben Lin, and Gerald Carter Plus a 3-day Technical Program: • Invited Talks by industry leaders such as Michael Stonebraker, Bryan Cantrill, and Owen DeLong • Configuration Management by Mark Burgess, Nan
Liu, and more • Refereed Papers covering key topics such as migration, clusters, and package deployment • Series on Linux and Becoming a SuperSysadmin • Workshops, Vendor Exhibition, Posters, BoFs, “Hallway Track,” and more! Register by November 14 and save • Additional discounts are available! www.usenixorg/lisa11/lj Sponsored by LJ210-October2011bu2.indd 35 in cooperation with LOPSA 9/21/11 2:58 PM COLUMNS HACK AND / Practice Hacking on Your Home Router KYLE RANKIN Why hack someone else when an ideal target might be lurking in your own network? Although it’s true that I tend to focus mostly on Linux in systems administration (after all, that is my day job), I’ve always had a secondary interest in security, whether it’s hardening systems, performing forensics on a hacked system, getting root on a pico projector or even trying my hand at finding and exploiting vulnerabilities. Even though it’s fun to set up your own Web services and attempt to exploit
them, there’s something more satisfying about finding vulnerabilities in someone else’s code. The downside, of course, is that most Webmasters don’t appreciate it when you break into their sites. However fun hacking is, at least for me, it isn’t worth the risk of jail time, so I need to have my fun in more legal ways. This is where my wireless router comes in. Wireless routers have a long history of being hackable. If you take any group of Linux geeks, you are bound to find a number of them who have, or have had, a member of the classic Linksys WRT series. If you look on-line, there are all sorts of custom firmware you can install to extend its functionality. Although it’s true that on some versions of the router you have to jump through some crazy hoops to install custom firmware, it’s still not the same kind of challenge as discovering and exploiting a vulnerability on a server. Although I have a stack of WRT54G routers, this article isn’t about them; instead, it’s
about the D-Link DIR-685. The D-Link DIR-685 I first became aware of the D-Link DIR-685 during a Woot-Off on woot.com If you are familiar with Woot-Offs, you understand that when a new product shows up on the site, you have a limited time to decide whether you want to buy it before it disappears and a new product shows up. The moment I read the specs, I knew this router looked promising. First, it was an 80211n router, 36 / OCTOBER 2011 / WWW.LINUXJOURNALCOM LJ210-October2011bu2.indd 36 9/21/11 2:58 PM COLUMNS HACK AND / and I was in the market to upgrade from my 802.11g network Second, it had five different gigabit ports in the back along with two USB ports. Finally, as icing on the cake, it not only had this interesting-looking color LCD on the front that could show statistics, photos or other data, but you also could slot a 2.5" SATA drive up to 1Tb and turn the thing into a small NAS. Based on the fact that it required an ext3 filesystem on the 2.5" drive, I
reasonably could assume it even already ran Linux. I didn’t have much time to see if anyone already had hacked into the router or created custom firmware, so I made up my mind and clicked the order button. While I was waiting for the router to ship to my house, I did some extra research. Although unfortunately it looked like there wasn’t any custom firmware I could find (this originally was quite an expensive router, so I imagine it didn’t have a large install base), I did find a site from someone who documented how to open up the router and wire up and connect a serial port to it, so you could access the local serial console. I decided that in the worst case, if I couldn’t find a simpler method, I always could just go that route. When I got the router, I did the initial setup on my network via the Web interface and then looked one last time for any custom firmware or other method apart from a serial console to get root on the router. I wasn’t able to find anything, but
before I went to the trouble of taking it apart, I decided to poke around on the Web interface and see if I saw anything obvious. The first dead end came when I enabled the FTP service via the Web interface, yet was not able to find any known vulnerabilities with that FTP server that I could exploit. Unlike when I got root on my pico projector, when I ran an nmap against the machine, I wasn’t lucky enough to have telnet waiting for me: PORT STATE SERVICE 21/tcp open ftp 80/tcp open http 139/tcp open netbios-ssn 445/tcp open microsoft-ds One Ping Only As I continued searching though, I got my first clue: the ping test. The Web interface provides a complete set of diagnostic tools that, among other things, allows you to ping remote machines to test for connectivity on http://<router ip>/tools vct.php (Figure 1) I figured there was a good chance that the PHP script just forwarded the hostname or IP address you typed in to a system call that ran ping, so I started by
adding a semicolon and an ls command to my input. Unfortunately, there was a JavaScript routine that sanitized the input, but what I noticed was that after I submitted a valid input, the variable also showed up in the URL: http://<router ip>/tools vct.php?uptime= 175036&pingIP=127.001 I discovered that although the page used JavaScript to sanitize the input, it did not WWW.LINUXJOURNALCOM / OCTOBER 2011 / 37 LJ210-October2011bu2.indd 37 9/21/11 2:58 PM COLUMNS HACK AND / So, for instance, to perform a simple test of command injection, you might attempt to add a sleep command. If the page seems to pause for that amount of time before it reloads, that’s a good sign your command injection worked. So, to attempt a sleep command with that page, my encoded URL to set pingIP to “127.001; sleep 30” looked like http://<router ip>/tools vct.php?uptime= 175036&pingIP=127.001%3B%20sleep%2030 Figure 1. The Ping Test sanitize the POST data. In fact, I could put just
about anything I wanted as the value of pingIP, and it would not only accept it, but because the PHP page displayed the value of pingIP in the output, I also would see my variable output in the resulting Web page, which opened up all sorts of possibilities for JavaScript injection and XSS attacks. Of course, none of that would help me get root on the machine, so I started trying to figure out what kind of payload I could send that would allow me to execute system calls. No Escape It was at this point that I searched online for a nice complete table of all of the URL escape codes. You may have noticed that whenever you type a space in a URL, for instance, browsers these days tend to convert it into %20. That is just one of many different escape codes for symbols that are valid to have in a URL in their escaped form. Table 1 shows some of the more useful ones for what I was trying to achieve. “If it’s PHP, there will be a hole.” I iterated through all sorts of different symbols
and options to pass for pingIP, and nothing I tried seemed to have any effect. I was talking to a friend of mine about what I was trying and how I wasn’t turning up any usable hole yet, and I got the encouraging reply, “If it’s PHP, there will be a hole.” I figured that if I already managed to find a JavaScript injection XSS vulnerability, if I kept looking, I had to find some way in. I decided to forget about the ping page for a while and try to find some other vulnerability. Table 1. URL Escape Codes ESCAPE CODE CHARACTER %3B ; %3F ? %26 & %22 “ %3C < %3E > %7C | %60 ` 38 / OCTOBER 2011 / WWW.LINUXJOURNALCOM LJ210-October2011bu2.indd 38 9/21/11 2:58 PM COLUMNS HACK AND / My next clue came when I looked into the system tools page at http://<router ip>/ tools system.php (Figure 2) A glaring item on that page was the reboot button. I figured there was at least a chance that it made some sort of system call, so I looked into the source
for that Web page in my browser and noticed that when you clicked on the reboot button, the JavaScript called this URL: http://<router ip>/sys config valid.xgi?exeshell=submit%20REBOOT There’s nothing more reassuring than a CGI variable named exeshell. Because I had all sorts of example encoded URLs from my ping test, I decided to try enclosing a sleep command in backticks to see if it would exit to a shelllow and behold, it worked! LJ210-October2011bu2.indd 39 Figure 2. System Tools Page The Payload Okay, so now I had a viable way to execute shell commands on the system. The next question was how I was going to take 9/21/11 2:58 PM COLUMNS HACK AND / advantage of this to log in remotely. My first approach was to try to execute netcat, have it listen on a high port, and use the -e argument so that it would execute a shell once I connected to that porta poor man’s telnetd. After all, many consumer devices that run Linux use BusyBox for their shell, and BusyBox often
includes a version of netcat that supports this option. Unfortunately, no combination of netcat arguments I tried seemed to do anything. I was starting to think that I didn’t get a shell after allthat is, until I enclosed reboot in backticks, and it rebooted the router. After the machine came back up, I decided it was possible netcat just wasn’t installed, so it was then that I tried the fateful URL: http://<router ip>/sys config valid.xgi?exeshell=%60telnetd%20%26%60 In case you don’t want to look it up, that converts into `telnetd &` as input. Sure enough, after I ran that command, my nmap output looked a bit different: PORT STATE SERVICE 21/tcp open ftp 23/tcp open telnet 80/tcp open http 139/tcp open netbios-ssn 445/tcp open microsoft-ds BusyBox v1.00 (20090727-14:12+0000) Built-in shell (msh) Enter 'help' for a list of built-in commands. # I not only got a shell, but also a root shell! When I ran a ps command, I noticed my telnetd
process on the command line: sh -c `telnetd &` > /dev/console It turns out any command you pass to exeshell just gets passed to sh -c, so I didn’t need any fancy escaped backticks or ampersands, exeshell=telnetd would work just fine. Conclusion So, what’s the moral to this story? Well, for one, don’t open up hardware and void its warranty to get to a serial console when you can get a shell from the Web interface. Two, JavaScript isn’t sufficient to sanitize inputsif you accept POST data, you need to sanitize it as well. Three, passing an input variable directly to sh is probably a bad idea. Finally, next time you want to try your hand at a bit of penetration testing, you don’t have to go any further than your own network. Hacking your own hardware can be just as fun (and safer) than hacking someone else.■ Then, I fired up telnet from that same machine: $ telnet <router ip> Trying <router ip>. Connected to <router ip>. Kyle Rankin is a Sr. Systems
Administrator in the San Francisco Bay Area and the author of a number of books, including The Official Ubuntu Server Book, Knoppix Hacks and Ubuntu Hacks. He is currently the president of the North Bay Linux Users’ Group. Escape character is '^]'. 40 / OCTOBER 2011 / WWW.LINUXJOURNALCOM LJ210-October2011bu2.indd 40 9/21/11 2:58 PM Regis ter N ow Zend PHP Conference October 17-20, 2011 – Santa Clara, CA Join us at the largest gathering of the PHP Community in 2011 4 days of exceptional technical presentations, tutorials and Keynotes from leading PHP experts Learn about the latest developments in the fastest growing web-development language Benefit from the know-how of internationally renowned speakers and industry experts Discover more about PHP’s cost and time savings Network with other delegates, speakers, vendors and suppliers Architecture & Best Practices Testing, Debugging, Profiling and QA Zend Framework Cloud Infrastructure, Management and
Application Services Server & Operations Rich Internet Apps and Mobile / Tablet Flash / Flex / HTML 5 / Ajax NoSQL and Big Data Standards Compliance Unsung Tools Real World Case Studies, Designs and Data Models PHP on the IBM i www.zendconcom LJ210-October2011bu2.indd 41 Follow us twitter.com/zendcon ZendCon 9/21/11 2:58 PM NEW PRODUCTS RunRev’s LiveCode Server LiveCode Server from RunRev is a new and novel solution that provides back-end and cloud services for mobile or desktop applications and processes. The advantage of LiveCode Server, says RunRev, is to enable developers to create data-intensive apps with confidence that the sheer volume of information and files required are kept securely in the cloud and readily accessible. LiveCode is a programmable server environment that allows developers to write flexible CGI scripts, rather than obscure symbolic languages. An English-like programming language is used to describe server application logic quickly and build and
deploy solutions rapidly. Users can use the LiveCode server as a standalone engine to install on their own Mac OS or Linux hardware or utilize RunRev’s On-Rev hosting service. www.runrevcom Sencha Touch Charts The thrill of Sencha Touch Charts lies not merely in the ability to explore complex data sets with simple gestures on a smartphone or tablet, but more important, to do so using HTML5. Sencha says that its new Web app development framework renders charts at the same level of fidelity as native apps without having to rely on native drawing packages. Sencha Touch Charts renders charts, captures multi-touch inputs and drives interactivity. A simple swipe will pan across a data set, whereas a “reverse pinch” will zoom into detail. Richer interactions, such as axis swaps, aggregation, filtering and more, are all enabled by similarly simple gestures. The HTML5 Canvas technology is fully supported by the latest WebKit browsers that ship with Android, Apple iOS, BlackBerry OS6 and
HP WebOS. www.senchacom 42 / OCTOBER 2011 / WWW.LINUXJOURNALCOM LJ210-October2011bu2.indd 42 9/21/11 2:58 PM NEW PRODUCTS SSVV Narasimha Rao’s Sencha Touch 1.0 Mobile JavaScript Framework (Packt Publishing) As long as we’re on the topic of Sencha Touch, allow us to note that extensive help already is available, so you can utilize the platform to maximum benefit. Narasimha Rao’s Sencha Touch 1.0 Mobile JavaScript Framework teaches all one needs to know to get started with Sencha Touch and “build awesome mobile Web applications that look and feel native on Apple iOS and Google Android touchscreen devices”, says publisher Packt Publishing. Beginning with an overview of Sencha Touch, the book guides users through increasingly complex sample applications. Other topics include styling the UI, exploring Sencha Touch components and working with animations and data packages using comprehensive examples. www.packtpubcom Lantronix and Timesys’ PremierWave EN The new
Linux-based, wireless device server PremierWave EN is a collaborative effort between secure communication technologies provider Lantronix and embedded Linux specialist Timesys. PremierWave EN allows design engineers and OEMs to add Wi-Fi and Ethernet networking to virtually any device easily. As a result, companies can transmit medical, financial, customer or other important data securely across corporate networks. Lantronix applications, such as the Advanced Applications Suite, tunneling applications, an enterprise-class command-line interface, management capability using a standard Web browser, diagnostic utilities, Ethernetto-Wireless LAN bridging and virtual IP are standard. A subscription to Timesys’ LinuxLink embedded Linux software development framework also is included. www.lantronixcom and wwwtimesyscom WWW.LINUXJOURNALCOM / OCTOBER 2011 / 43 LJ210-October2011bu2.indd 43 9/21/11 2:58 PM NEW PRODUCTS McObject’s eXtremeDB Cluster Step one to database nirvana: clear
your mind of the most undelicious fast-food item imaginable out of your head (that is, a McObject). Step two: with mind now clear, check out McObject’s new eXtremeDB Cluster, which the company bills as the first clustering database system built especially for distributed embedded software and real-time enterprise applications. eXtremeDB Cluster manages data stores across multiple hardware nodes, which increases the net processing power available for data management; reduces system expansion costs; and delivers a scalable and reliable database solution for increasingly data-intensive real-time applications. According to McObject’s benchmarks, eXtremeDB Cluster delivered a 161% throughput improvement when scaling to four nodes from one. Targeted applications include carrier-grade telecom, algorithmic trading applications, SaaS platforms and the like. www.mcobjectcom Vector Fabrics’ vfThreaded-x86 Tool Take your pickexpletives and ibuprofen or Vector Fabrics’ vfThreaded-x86
Toolto take the pain out of the task of optimization and parallelization of applications for multicore x86 architectures. The cloud-based software tool, which is aimed at developers who write performance-centric code for high-performance computing, scientific, industrial, video or imaging applications, greatly reduces the time involved and the risks associated with optimizing code for the latest multicore x86 processors. By using thorough dynamic and static code analysis techniques, vfThreaded-x86 quickly analyzes code and guides the developer to make the right choices for partitioning code to separate cores. This includes examining cache hit/ miss effects, data bandwidth to memories and bandwidth between individual code sections. An intuitive GUI provides code visualizations that highlight code hotspots and dependencies that might require partitioning trade-offs. www.vectorfabricscom 44 / OCTOBER 2011 / WWW.LINUXJOURNALCOM LJ210-October2011bu2.indd 44 9/21/11 2:58 PM NEW
PRODUCTS Scott Mueller’s Upgrading and Repairing PCs, 20th Ed. (Que) Besides our fealty to Linux, there may be nothing else besides tinkering with our PCs that defines our Linux geek identity. Therefore, we know that books like Scott Mueller’s Upgrading and Repairing PCs, now in its 20th edition, will appeal to many of our readers. Publisher Que calls Mueller’s book “the definitive guide to the inner workings of the latest PCs” and “with nearly 2.5 million copies sold, it’s the best-selling hardware guide ever”. The book contains extensive information on troubleshooting problems, improving system performance and making the most of today’s best new hardware. The latest hardware innovations and repair techniques since the previous edition have been added. Ninety minutes of DVD video is included, covering insider information about several key PC components, including hard disk drives, power supplies, motherboards and so on. Besides presenting comprehensive coverage of
every PC component, Mueller also covers overclocking, cooling, PC diagnostics, testing and maintenance. www.informitcom Cutting Edge’s Power-Saving Cloud Archive From the “saving green by going green” newsdesk is Cutting Edge’s new Power-Saving Cloud Archive (PSCA), an energy-saving storage technology for the cloud. Cutting Edge describes PSCA’s advantages to include “extremely high performance and scalability, a low acquisition cost, up to a 90% power savings and a new low in TCO for organizations that are struggling to address the relentless flood of unstructured data and longer retention times”. Moreover, PSCA, says the company “is the ideal solution for today’s power-hungry storage environments where the cost to provide power and cooling for storage systems now actually exceeds the cost to acquire the equipment being powered and cooled”. Cutting Edge’s technology is a combination of its fifth-generation EdgeWare unified storage software and multi-tiered
archiving, as well as innovative power-saving hardware and open systems. www.cuttedgecom/psca Please send information about releases of Linux-related products to newproducts@linuxjournal.com or New Products c/o Linux Journal, PO Box 980985, Houston, TX 77098. Submissions are edited for length and content WWW.LINUXJOURNALCOM / OCTOBER 2011 / 45 LJ210-October2011bu2.indd 45 9/21/11 2:58 PM NEW PROJECTS Fresh from the Labs luakitExtensible Micro Browser luakit.org/projects/luakit Fellow control freaks, if you enjoy having dominion over just about every aspect of a program, I think you’ll like this. Inspired by projects such as uzbl, and developed by fellow Perth-boy Mason Larobina, luakit is the Web browser for those who like the element of control. According to the Web site: to have fine-grained control over their Web browser’s behavior and interface. Installation Pre-made packages/binaries are available on the Web site for Gentoo, Arch Linux, Debian/Ubuntu and Fedora,
along with the source code. As for library requirements, the documentation says you need the following: luakit is a highly configurable, microbrowser framework based on the WebKit Web content engine and the GTK+ toolkit. It is very fast, extensible by Lua and licensed under the GNU GPLv3 license. ■ gtk2. It is primarily targeted at power users, developers and any people with too much time on their hands who want ■ libwebkit (webkit-gtk). ■ Lua (5.1) ■ lfs (lua filesystem). ■ libunique. It’s hard to notice the discreet tabs, with black for active and gray for inactive, but they’re very cool. 46 / OCTOBER 2011 / WWW.LINUXJOURNALCOM LJ210-October2011bu2.indd 46 9/21/11 2:58 PM NEW PROJECTS and make, combining the twointeresting. If you run into any errors here, chances are that you’re missing a library dependency somewhere; pay close attention to the output. Finally, to install luakit, if your distro uses sudo, enter: $ sudo make install This lightweight
browser seems to run YouTube with Flash just as well as Firefox and Chrome. If your distro uses root, enter: $ su ■ sqlite3. # make install ■ help2man. Usage The actual interface is rather unique. Like the lovechild of Chrome and Vim, the interface is part sleek and On my Kubuntu system, the lfs package was called liblua5.1-filesystem0 If you’re using the source and running into dependency errors, it’s worth trying out the above libraries’ development packages (usually named -dev) and doing the luakit installation again. If you’re running with the source, grab the latest tarball from the Web site, extract it, and open a terminal in the new folder. Enter the command: $ make I’m not sure what resources Mason has used here, but this make script is kind of like a cross between ./configure Project code that’s both documented and diagrammednow I’ve seen everything! WWW.LINUXJOURNALCOM / OCTOBER 2011 / 47 LJ210-October2011bu2.indd 47 9/21/11 2:58 PM NEW
PROJECTS luakit Keyboard Commands These are the most important bindings for basic usage (see the documentation for more): ■ i insert mode. ■ : command mode. ■ Ctrl-z passthrough mode. ■ o open URL. ■ t open URL in new tab. ■ w open URL in new window. ■ d/Ctrl-w close tab. ■ D/ZQ close window. ■ ZZ save session and close window. modern-minimalist, part old-school hacker. Entering a URL or even clicking Back may leave the uninitiated a little shocked, as the GUI elements one takes for granted are seemingly nonexistent. However, the two main UI elements unlock them immediately: right-clicking and the input bar. Starting with the input bar, you can enter URLs with o, t or w to open URLs in the same tab, a new tab or a new window, respectively. Right-clicking provides controls like Back, Forward, Stop and so on. On the subject of tabs, not only was I impressed by their presence in this lightweight browser, but they’re also by far the coolest tabs I ever have
seen. They nearly blend into the background (perhaps part of their mystique), and at first I didn’t even notice their presence. Open some new tabs with t, and the tabs at the top of the browser start dividing evenly, with the active tab a strong black, and the inactive tabs techy-gray. Much to my surprise (given luakit’s minimalist nature) Flash appeared to work without any worries, with YouTube as my first test. Indeed, many pages I thought wouldn’t stand a chance, loaded in a way that was both accurate and stable. Nevertheless, the actual browsing aspect is only half the equation when considering luakit, whose real appeal lies in its endless customizability. The entire browser is constructed by a series of config files, which do all kinds of things, like change what parts of the browser are loaded and in which order, define button combinations and so on. Regarding this, Mason gave a great response to one of my leading questions that was long and detailed, and it will appeal to
anyone who knows what they’re doing. Check the Web site if you want to see it. For the modder who is about jump into coding, luakit’s Web site has something I’ve never actually come across. Unlike 99% of us who just start coding randomly, the Web site has a whole Data Structure Index, explaining each file with flowcharts and 48 / OCTOBER 2011 / WWW.LINUXJOURNALCOM LJ210-October2011bu2.indd 48 9/21/11 2:58 PM NEW PROJECTS documented referencesthe way we were taught but always avoided! If any programmers are looking to help out with luakit, Mason recommends porting a Firefox or Chrome plugin that you can’t live without. A simple method for ad-blocking also would be greatly appreciated. At the end of the day, this is one of those projects that will inspire great loyalty among its fans with its own unique style. And if any film-makers working on a hacker movie are reading this and looking for a browser that looks Neo-from-The-Matrix cool, this is the one. sinfo displays
invaluable system information over multiple PCs for easy administration. sinfoAdvanced Network Monitoring www.antuni-bremende/whomes/rinas/sinfo Are you looking to set up some kind of network cluster, but dealing with many different computers, all of which are nearly impossible to keep track of? What if you’re in charge of a room full of computers and also of those who are using them (some of whom may be looking to slack off or run something I’ll politely dub “objectionable”)? sinfo may be what you’re looking for. According to its Freshmeat entry: sinfo is a monitoring tool that uses a broadcast scheme to distribute information on the status of each computer on your local network. It supports CPU, memory usage, network load and information about the top five processes on each computer. sinfo uses ncurses to display the information in an attractive manner. Further extending sinfo’s use with the -s switch provides even meatier information. Installation A binary is
available for those with Debian-based systems, such as Debian, Ubuntu and the like, and chances are that it’s already sitting in your repository. Given that this software also includes a startup dæmon, sinfod, I thoroughly recommend taking the binary option if you can, because a great deal of the process is automated (it’s also the version I cover here). Nevertheless, in the interests WWW.LINUXJOURNALCOM / OCTOBER 2011 / 49 LJ210-October2011bu2.indd 49 9/21/11 2:58 PM NEW PROJECTS of distro neutrality, I also cover the source version during the installation, as usual. As far as library requirements are concerned, you need the following, according to the documentation: ■ ncurses: libraries for terminal handling (tested with version 5.7) ■ boost: peer-reviewed portable C++ source libraries using Boost.Bind and Boost.Signals (tested with version 142) ■ asio (>=1.10): asio is a cross-platform C++ library for network programming (tested with version 1.41) If you’re
compiling from source, you need the pesky developer packages as well (-dev). The number of packages under libboost- in particular are quite extensive, so if you run into any problems during make, the libboost libraries may be the culprit, requiring more of its packages before you can install properly. For those running with source, once you have the library requirements out of the way, grab the latest tarball and extract it. Open a terminal in the new folder and enter the following commands: $ ./configure $ make If your distro uses sudo: $ sudo make install If your distro uses root: $ su # make install Before I continue, I should explain that sinfo is broken into two parts: the everyday application and the background dæmon. As for installing the dæmon, I’m going to leave this part to you, because it seems that just about every distro has a different method of dealing with startup processes (and the Debian package takes care of all that). Check the readme files in the source
tarball and the Web site for more information if you’re still using the source. Usage sinfo is a “semi-GUI” commandline program that’s actually pretty easy to use, although advanced users can make it do some pretty cool stuff via command-line switches. To run the program in its basic mode, simply enter: $ sinfo Assuming that you have sinfo installed only on your machine for now, the information being displayed will be just that of your machine. From this screen, you see all kinds of useful information, such as available memory, CPU utilization, hostnames and so on. The sinfo Keyboard Commands sidebar shows a list of the keyboard commands that drive sinfo, toggling parts of the program with a single keystroke. However, in this state, it’s really just a glorified version of top. The whole point is that you can display information from 50 / OCTOBER 2011 / WWW.LINUXJOURNALCOM LJ210-October2011bu2.indd 50 9/21/11 2:58 PM NEW PROJECTS several machines at once to keep tabs
on a LAN. If the other PCs on your network have sinfo in their distro’s repository, it should be as easy as installing sinfo via apt-get and the like, then running the program on those machines. As soon as I did that on a second machine, voilà, both PCs were displaying under both installations. Keep installing it on other networked PCs, and the list will grow larger and larger. Those are the basics out of the way, but what about the extended features? Obviously, I don’t have the space to cover everything here (and you really should check the man page for more details), but let’s look at some of my favorite features. At the command line, if you add the LJ210-October2011bu2.indd 51 -W switch (or alternatively --wwwmode) like so: $ sinfo -W the output changes from the usual top-like screen to HTML output insteadvery handy for those into things like remote administration with automated Web pages and whatnot. This is slightly redundant while in the sinfo user interface (simply
press the s key), but it’s awesome when doing some kind of command-line scripting: add the switch -s (or alternatively --systeminfo), and a big chunk of serious system information is output as well. As an example, my two machines 9/21/11 2:58 PM NEW PROJECTS had the following extra information: 192.16812 knightro-bigdesktop i686 Linux 2.632-27-generic #49-Ubuntu SMP Wed De sinfo Keyboard Commands cpus: 4 MHz: 800.0 RAM: 3276.5 MByte load 1min: 0.0 swap: 7629.4 Mbyte load 5min: 0.1 ■ q quit sinfo. load 15min: 0.1 ■ Page up, Page down scroll 192.16811 the screen by one page. nhoj-desktop x86 64 Linux 2.638-8-generic #42-Ubuntu SMP Mon Apr 11 0 ■ Up arrow/u, down arrow/d cpus: 2 MHz: 1000.0 RAM: 2007.6 MByte load 1min: 0.1 uptime swap: 2047.3 Mbyte load 5min: 0.2 scroll the screen by one line. load 15min: 0.1 0 days, 19:13:03 This kind of information suggests many potential uses, and keeping watch and troubleshooting at LAN parties springs instantly to
mind. If any one node is having trouble, there’s a good chance that the host will be able to hit the ground running when trying to isolate the problem. In the end, sinfo is not only well designed, but if it’s installed as binary, it’s also convenient. Ultimately, I think this application will carve out an instant niche for itself, and hopefully, it will turn into one of those standard applications that are so commonplace, they just become part of the landscape. Maybe porting it would do exactly that.■ ■ Home jump to the top line. ■ s toggle display of system information. ■ o toggle display of your own processes. ■ n toggle display of network information. ■ D toggle display of disk load. ■ t toggle display of the top X processes. ■ c toggle the scaling of the CPU load bars from “log”, “lin” John Knight is a 27-year-old, drumming- and bass-obsessed maniac, studying Psychology at Edith Cowan University in Western Australia. He usually can be found
playing a kick-drum far too much to full. BREWING SOMETHING FRESH, INNOVATIVE OR MIND-BENDING? Send e-mail to newprojects@linuxjournal.com 52 / OCTOBER 2011 / WWW.LINUXJOURNALCOM LJ210-October2011bu2.indd 52 9/21/11 2:58 PM LJ210-October2011bu2.indd 53 9/21/11 2:58 PM REVIEW HARDWARE Return to Solid State Are modern SSDs worth the price if you use Linux? KYLE RANKIN Three years ago, I first reviewed an SSD (solid-state drive) under Linux (www.linuxjournalcom/article/10094) At the time, I had an ultra-portable laptop with a 4200rpm hard drive that really bogged down the performance on what was otherwise a pretty snappy little machine. Although there definitely were SSD reviews around, I didn’t notice many comprehensive reviews for Linux. Instead of focusing strictly on benchmarks, I decided to focus more on real-world tests. In the end, I saw dramatic increases in speed for the SSD compared to my 4200rpm drive. That may have been true back then, but what about today?
For example, one thing that always bothered me about my first comparison was the fact that at the time, I had only a 4200rpm 1.8" drive available to me, and I was limited by my ATA/66 bus speed. My new laptop, a Lenovo ThinkPad X200s, came with a 7200rpm 2.5" SATA drive, and ever since I got the laptop, I’ve been curious to repeat my experiment with modern equipment. How would a modern SSD hold up to a modern 7200rpm SATA "drive in real-world Linux use? Recently, Intel was kind enough to provide me with a review unit of its new 320 SSD line, a follow-up to the X25 SSD line, so I decided to repeat my experiments. My Testing Methodology As in the previous review, I focus mostly on real-world performance tests, but I still throw in some raw benchmark numbers for those of you in the crowd who are curious. Where it made sense, I ran multiple tests to confirm I got consistent results, and here, I report the best performance for each drive. Also, when I was concerned about
file-caching skewing results, I booted the machine from scratch before a test. The 7200rpm drive is a 160GB Fujitsu MHZ2160B, and after its tests, I transferred an identical filesystem to the 160GB Intel 320 SSD. 54 / OCTOBER 2011 / WWW.LINUXJOURNALCOM LJ210-October2011bu2.indd 54 9/21/11 2:58 PM REVIEW Editor’s Note: All SSDs Are Not Created Equal (see the video at http://www.linuxjournalcom/video-ssd-editor-note) Test 1: GRUB to Log In I’ll be honest, I actually don’t boot my laptop all that much. My battery life is good enough that I usually just close the laptop lid when I’m not using it; it suspends to RAM, and I resume my session later. That said, distributions, such as Ubuntu, have focused on boot times in the past couple releases, and my 7200rpm drive seemed to boot Ubuntu 10.04 pretty fast, so I was curious whether I even would see an improvement with the SSD. I used a stopwatch to measure the time between pressing Enter at the GRUB prompt to when I saw the
login screen. The boot process is both processor- and disk-intensive, and although the 7200rpm was fast, it turns out there still was room for improvement: ■ 7200rpm: 27 seconds ■ SSD: 16 seconds WWW.LINUXJOURNALCOM / OCTOBER 2011 / 55 LJ210-October2011bu2.indd 55 9/21/11 4:35 PM REVIEW Test 2: Log In to Desktop The next logical test was to time how long it takes from the login screen until reaching a full, functioning desktop. In my case, that meant I started the stopwatch after I typed my password and pressed Enter, and I stopped the stopwatch once my desktop loaded and my terminals and Firefox appeared on the screen. In this case, the SSD really stood out by loading my desktop in less than half the time: As you can see in these results, the SSD was a bit faster with cached reads but not by as much of a margin as in the past tests. That said, the buffered disk readers, again, were about twice as fast. This far along in the tests I started to notice a pattern: the SSD
seems to be about two times as fast as my 7200rpm drive for most of the tests. The real question for me was whether it will maintain that kind of performance through the rest of the tests. ■ 7200rpm: 22 seconds Test 4: Bonnie++ Although hdparm can be useful for getting basic hard drive performance metrics, when you want detailed information and a larger range of tests, Bonnie++ is the program to use. The downside, of course, is that you get a huge amount of benchmark data to wade through. I won’t go through metric by metric Instead, I show the output from the commands but talk about only a few highlights: 7200rpm (output modified to fit): ■ SSD: 9 seconds Test 3: hdparm For the next test, I ran hdparm with its traditional -Tt benchmarking options on both drives. Although not as full-featured as Bonnie++, the fact that hdparm outputs only a few metrics definitely makes it easier to do a comparison: 7200rpm: ------Sequential Output------ --Sequential Input- --Random$ sudo
hdparm -Tt /dev/sda6 -Per Chr- --Block-- -Rewrite- -Per Chr- --Block-- --Seeks-- /dev/sda6: K/sec %CP K/sec %CP K/sec %CP K/sec %CP K/sec %CP Timing cached reads: 6748 MB in 1.99 seconds = 338399 MB/sec Timing buffered disk reads: 220 MB in 3.01 seconds = 7308 MB/sec 186 99 71090 17 33138 19 1251 97 83941 /sec %CP 17 175.2 4 Latency 49232us 1079ms 759ms 54918us 188ms 294ms SSD: ------Sequential Create------ --------Random Create-------$ sudo hdparm -Tt /dev/sda6 -Create-- --Read--- -Delete-- -Create-- --Read--- -Delete-- /dev/sda6: /sec %CP Timing cached reads: 7168 MB in 1.99 seconds = 359546 MB/sec Timing buffered disk reads: 500 MB in 3.00 seconds = 16648 MB/sec 258 /sec %CP 2 +++++ +++ /sec %CP /sec %CP 369 345 3 /sec %CP 3 +++++ +++ /sec %CP 323 3 Latency 314ms 633us 150ms 151ms 486us 398ms 56 / OCTOBER 2011 / WWW.LINUXJOURNALCOM LJ210-October2011bu2.indd 56 9/21/11 2:59 PM REVIEW SSD (output modified to fit): ------Sequential
Output------ --Sequential Input- --Random-Per Chr- --Block-- -Rewrite- -Per Chr- --Block-- --Seeks-K/sec %CP K/sec %CP K/sec %CP K/sec %CP K/sec %CP /sec %CP 187 4636 124 99 164010 40 85149 32 1325 99 297390 60 Latency 52047us 423ms 336ms 21716us 12432us 9048us ------Sequential Create------ --------Random Create--------Create-- --Read--- -Delete-- -Create-- --Read--- -Delete-/sec %CP 9079 /sec %CP /sec %CP 56 +++++ +++ 10451 63 /sec %CP 8292 /sec %CP 60 +++++ +++ /sec %CP 7043 61 Latency 5177us 283us 5218us 10723us 30us 16179us Okay, that is a lot of data to go through, so let’s just pick out a few metrics to highlight. What I found interesting was that except for the tests where the CPU was a limiting factor (like Per-Character tests), the SSD seemed to have dramatically better performance than the 7200rpm drive. The SSD is around twice as fast as the 7200rpm drive in Sequential Output Block and Rewrite tests (71,090 K/sec vs. 164,010 K/sec and 33,138
K/sec vs. 85,149 K/sec, respectively). Switching to reads and random seeks though, there’s a much wider gap, such as in the Block test (83,941 K/sec vs. 297,390 K/sec), and the random seeks (a known strength for SSDs) are almost no Choices, Excellent Service, Polywell Solutions More Great Prices! Quiet Storage NAS/SAN/iSCSI 9015H 15Bay 9020H 20Bay 60TB $9,999 45TB $7,750 30TB $4,999 - 4x Gigabit LAN - RAID-5, 6, 0, 1, 10 - Hot Swap, Hot Spare - Linux, Windows, Mac - E-mail Notification - Tower Case NetDisk 8074A - 4x Gigabit LAN 72 Bay 144TB $26,999 - RAID-5, 6, 0, 1, 10 74 Bay 222TB $36,999 - Hot Swap, Hot Spare 5048A 5U-48Bay 144TB $26,999 RAID-6, NAS/iSCSI/SAN Storage SATA, 4x GigaLAN SATA II, RAID-6, 2x GigaLAN NAS/iSCSI/SAN Storage Silent Eco Green PC Netdisk 8000V - Linux, Windows, Mac 2U12B 2U-12Bay 36TB $6,999 - Dual Gigabit LAN - RAID-5, 6, 0, 1, 10 - Hot Swap, Hot Spare - Linux, Windows, Mac - E-mail Notification - Tower Case - Intel® / AMD® CPU - Energy
efficient - Quiet and Low Voltage Platform Quiet Performance 4U24A 4U-24Bay 72TB $12,950 - Dual Gigabit LAN - RAID-5, 6, 0, 1, 10 - Hot Swap, Hot Spare - E-mail Notification - Tower Case starts at $199 LD-001 RAID-6, NAS/iSCSI/SAN Storage Mix SAS/SATA, 4x Giga/10Gbit LAN Polywell OEM Services, Your Virtual Manufacturer Prototype Development with Linux/FreeBSD Support Small Scale to Mass Production Manufacturing Fulfillment, Shipping and RMA Repairs 20 Years of Customer Satisfaction 5-Year Warranty, Industry's Longest First Class Customer Service 888.7659686 linuxsales@polywell.com www.polywellcom/us Polywell Computers, Inc 1461 San Mateo Ave. South San Francisco, CA 94080 6505837222 Fax: 6505831974 NVIDIA, ION, nForce, GeForce and combinations thereof are trademarks of NVIDIA Corporation. Other names are for informational purposes only and may be trademarks of their respective owners LJ210-October2011bu2.indd 57 OLY POLYWELL 9/21/11 2:59 PM REVIEW comparison
with 175.2 seeks per second compared to 4,636. All of that said, it’s with the file creation tests that the SSD performance really shines. In sequential file creation where the 7200rpm drive can create and delete 248 and 369 files per second, respectively, the SSD goes through 9,079 and 10,451 files per second. The same goes for random file creation with the 7200rpm’s create and delete scores of 345 and 323 files per second compared to the SSD’s 8,292 and 7,043 files per second. This is really one good reason why I have included so many real-world tests in this review. After all, you can look at some of these numbers and conclude that if you got the SSD, your system may be 20 times faster, yet it’s how these numbers apply in real applications that ultimately matters. virtual hard drive. Then, I booted the VMs, and at the boot screen, I pointed them to a kickstart file I created to automate the Ubuntu Server installation process. I started the stopwatch the moment I pressed
Enter on one of the VMs, then quickly started the second at the same time. I didn’t stop the stopwatch until the last system rebooted and showed my login screen. What I figured was that having both VMs read from the same .iso file and write to separate virtual disks on the same physical hard drive would be a good torture test for the drive. To avoid any issues with file caches, when it came to the SSD, I created all new VMs with new disks. Here are the results: Test 5: VirtualBox Torture Test The next test I decided to perform was one that I felt might highlight some of the performance advantages of the SSD: virtualization. These days, it’s more and more reasonable to use an ordinary laptop as a platform to run multiple virtual machines, and I although I knew that having multiple VMs on at the same time had the tendency to slow down my system greatly, I wondered whether the SSD might show an improvement. To try to quantify this, I invented the following test. I set up two
identical VirtualBox VMs pointed at the same Ubuntu Server .iso file Both systems were given their own dynamically allocated I admit these results really surprised me. I was expecting a much more dramatic difference, but it turned out that although the test really sounded like one that would work out the hard drives, in both cases, it was my dual-core CPU that got the workout. It goes to show that disk I/O isn’t always the bottleneck, and sometimes a faster drive doesn’t make everything faster. ■ 7200rpm: 11 minutes, 7 seconds ■ SSD: 10 minutes, 32 seconds Test 6: Filesystem Traversal For the final test, I wanted to compare how fast both drives allowed me to traverse the filesystem. In my February 2008 column (www.linuxjournalcom/article/9944), I talked about how to clean up space on your 58 / OCTOBER 2011 / WWW.LINUXJOURNALCOM LJ210-October2011bu2.indd 58 9/21/11 2:59 PM REVIEW When it’s done, it creates a tally that shows you not only which overall directories
take up the most space, but also which directories within them are the real culprits. hard drive using the “duck command” or: $ cd / $ du -ck | sort -n This command traverses the entire filesystem and calculates how much space is being taken up by the files in each LJ210-October2011bu2.indd 59 directory recursively. When it’s done, it creates a tally that shows you not only which overall directories take up the most space, but also which directories within them are the real culprits. Because I realized that the sort command wouldn’t help me test the disks at all, I skipped it and just timed how long it took to run du -ck 9/21/11 2:59 PM REVIEW starting from /: 7200rpm: real 5m25.551s user 0m2.700s sys 0m18.589s SSD: real 0m41.663s user 0m2.040s sys 0m13.453s This result also really surprised me. Based on some of my other tests, I thought the SSD would be faster but only by around a factor of two. I definitely didn’t expect the SSD to complete the test in an
eighth of the time. I think part of this must have to do with the dramatically better random seek performance. Conclusion When it comes to SSDs, most people these days realize that this performance does come at a price. The question is, is it worth it? Honestly, that’s a difficult question to answer. After all, in a good deal of my tests, I did see two times or better performance out of the SSD, and in some cases, dramatically better performance. I also must admit that I saw other more subtle improvements. For example, when my network backup job ran on my 7200rpm drive, I definitely would notice as my system slowed to a crawl. In fact, sometimes I’d even kill the rsync and run the backup later, because I could barely browse the Web. On the SSD, I didn’t even notice when the backup ran. When it comes to performance, by the way, I should note that right now, not only does the Intel 320 series of drives have a wide range of prices depending on what size drive you get, according to
Intel’s product page, the lower-capacity drives actually tout reduced speeds. This particular 160GB drive currently retails for around $300 on-line. Although it’s true that’s a lot of money for 160GB of storage, honestly, I tend to store bulk files on a file server at home. Back when 32GB SSDs were the affordable norm, you had to make some storage sacrifices for speed, but at this point, I am comfortable with the 160GB drive my laptop came with. It really does just come down to price. You will have to make your own judgment based on the price versus the performance; however, an important factor for me that makes me lean toward the SSD is how much extra life it gives to my current laptop. The processor and RAM in this laptop are more than adequate for my daily needs, and really any performance issues I’ve ever had with the machine could be traced back to the storage. I expect with the increased performance of an SSD, I could get another few years out of a laptop I already have
had for quite some timea laptop that would cost much more than the price of an SSD to replace.■ Kyle Rankin is a Sr. Systems Administrator in the San Francisco Bay Area and the author of a number of books, including The Official Ubuntu Server Book, Knoppix Hacks and Ubuntu Hacks. He is currently the president of the North Bay Linux Users’ Group. 60 / OCTOBER 2011 / WWW.LINUXJOURNALCOM LJ210-October2011bu2.indd 60 9/21/11 2:59 PM '11HPC.LinuxJNLSeptad:Layout 1 6/29/11 11:05 AM Page 1 8th Annual 2011 HIGH PERFORMANCE COMPUTING ON WALL STREET Show and Conference September 19, 2011 (Monday) TH SA E D VE AT E Roosevelt Hotel, NYC Madison Ave and 45th St, next to Grand Central Station Register today online. See HPC, Low Latency, Networks, Data Centers, Speed, Cost Savings. Wall Street markets will assemble at the 2011 HPC Sept. 19 show to see these new systems live on the show floor www.flaggmgmtcom/hpc H igh Performance Computing, Low Latency, Networks, Data
Centers, Cost Savings – the largest meeting of High Performance Computing in New York in 2011. This HPC networking opportunity will assemble 800 Wall Street IT professionals at one time and one place in New York in September 2011. This show will cover High Performance Computing, High Frequency Trading, Low Latency, Networks and Switch Solutions, Data Centers, Virtualization, Grid, Blade, Cluster, overcoming Legacy systems. Our Show is an efficient one-day showcase and networking opportunity. Register in advance for the full conference program which includes general sessions, drill down sessions, an industry luncheon, coffee breaks, exclusive viewing times in the exhibits, and more. Save $100. $295 in advance $395 on site Wall Street IT speakers and Gold Sponsors will lead drill-down sessions in the Grand Ballroom program. Don’t have time for the full Conference? Attend the free Show. Register in advance at: www.flaggmgmtcom/hpc Sponsors This Show is a networking opportunity for
the entire IT community. Show Hours: Mon, Sept 19 8:00 - 4:00 Conference Hours: 8:30 - 4:50 Global Investment Technology Show & Conference: Flagg Management Inc 353 Lexington Ave, NY10016 (212) 286 0333 flaggmgmt@msn.com Visit: www.flaggmgmtcom/hpc LJ210-October2011bu2.indd 61 9/21/11 2:59 PM ADVANCED FIREWALL CONFIGURATIONS with ipset With significant performance gains and powerful extra featuresLIKE THE ABILITY TO APPLY SINGLE FIREWALL RULES TO ENTIRE GROUPS OF HOSTS AND NETWORKS AT ONCEipset may be iptables’ perfect match. HENRY VAN STYN i ptables is the user-space tool for configuring firewall rules in the Linux kernel. It is actually a part of the larger netfilter framework. Perhaps because iptables is the most visible part of the netfilter framework, the framework is commonly referred to collectively as iptables. iptables has been the Linux firewall solution since the 2.4 kernel ipset is an extension to iptables that allows you to create firewall rules that match
entire “sets” of addresses at once. Unlike normal iptables chains, which are stored and traversed linearly, IP sets are stored in indexed data structures, making lookups very efficient, even when dealing with large sets. Besides the obvious situations where you might imagine this would be useful, such as blocking long lists of “bad” hosts without worry of killing system resources or causing network congestion, IP sets also open up new ways of approaching certain 62 / OCTOBER 2011 / WWW.LINUXJOURNALCOM LJ210-October2011bu2.indd 62 9/21/11 2:59 PM aspects of firewall design and simplify many configuration scenarios. In this article, after quickly discussing ipset’s installation requirements, I spend a bit of time on iptables’ core fundamentals and concepts. Then, I cover ipset usage and syntax and show how it integrates with iptables to accomplish various configurations. Finally, I provide some detailed and fairly advanced real-world examples of how ipsets can be used
to solve all sorts of problems. Because ipset is just an extension to iptables, this article is as much about iptables as it is about ipset, although the focus is those features relevant to understanding and using ipset. Getting ipset ipset is a simple package option in many distributions, and since plenty of other installation resources are available, I don’t spend a whole lot of time on that here. The important thing to understand is that like iptables, ipset consists of both a userspace tool and a kernel module, so you need both for it to work properly. You also need an “ipset-aware” iptables binary to be able to add rules that match against sets. Start by simply doing a search for “ipset” in your distribution’s package management tool. There is a good chance you’ll be able to find an easy procedure to install ipset in a turnkey way. In Ubuntu (and probably Debian), install the ipset and xtables-addons-source packages. Then, run module-assistant auto-install
xtables-addons, and ipset is ready to go in less than 30 seconds. Figure 1. iptables Built-in Chains Traversal Order If your distro doesn’t have built-in support, follow the manual installation procedure listed on the ipset home page (see Resources) to build from source and patch your kernel and iptables. The versions used in this article are ipset v4.3 and iptables v149 iptables Overview In a nutshell, an iptables firewall configuration consists of a set of built-in “chains” (grouped into four “tables”) that each comprise a list of “rules”. For every packet, and at each stage of processing, the kernel consults the appropriate chain to determine the fate of the packet. Chains are consulted in order, based on the “direction” of the packet (remote-tolocal, remote-to-remote or local-to-remote) and its current “stage” of processing (before or after “routing”). See Figure 1 When consulting a chain, the packet is compared to each and every one of the
WWW.LINUXJOURNALCOM / OCTOBER 2011 / 63 LJ210-October2011bu2.indd 63 9/21/11 2:59 PM FEATURE Advanced Firewall Configurations with ipset Figure 2. Anatomy of an iptables Command chain’s rules, in order, until it matches a rule. Once the first match is found, the action specified in the rule’s target is taken. If the end of the chain is reached without finding a match, the action of the chain’s default target, or policy, is taken. A chain is nothing more than an ordered list of rules, and a rule is nothing more than a match/target combination. A simple example of a match is “TCP destination port 80”. A simple example of a target is “accept the packet”. Targets also can redirect to other user-defined chains, which provide a mechanism for the grouping and subdividing of rules, and cascading through multiple matches and chains to arrive finally at an action to be taken on the packet. Every iptables command for defining rules, from the very short to the very long, is
composed of three basic parts that specify the table/chain (and order), the match and the target (Figure 2). To configure all these options and create a complete firewall configuration, you run a series of iptables commands in a specific order. iptables is incredibly powerful and extensible. Besides its many built-in features, iptables also provides an API for custom “match extensions” (modules for classifying packets) and “target extensions” (modules for what actions to take when packets match). Enter ipset ipset is a “match extension” for iptables. To use it, you create and populate uniquely named “sets” using the ipset commandline tool, and then separately reference those sets in the match specification of one or more iptables rules. A set is simply a list of addresses stored efficiently for fast lookup. Take the following normal iptables commands that would block inbound traffic from 1.111 and 2222: iptables -A INPUT -s 1.111 -j DROP iptables -A INPUT -s 2.222 -j
DROP The match specification syntax -s 1.111 above means “match packets whose source address is 1.111” To block both 1.111 and 2222, two separate iptables rules with two separate match specifications (one for 1.111 and one for 2.222) are defined above Alternatively, the following ipset/iptables commands achieve the same result: ipset -N myset iphash ipset -A myset 1.111 64 / OCTOBER 2011 / WWW.LINUXJOURNALCOM LJ210-October2011bu2.indd 64 9/21/11 2:59 PM ipset -A myset 2.222 iptables -A INPUT -m set --set myset src -j DROP The ipset commands above create a new set (myset of type iphash) with two addresses (1.111 and 2222) The iptables command then references the set with the match specification -m set --set myset src, which means “match packets whose source header matches (that is, is contained within) the set named myset”. The flag src means match on “source”. The flag dst would match on “destination”, and the flag src,dst would match on both source and
destination. In the second version above, only one iptables command is required, regardless of how many additional IP addresses are contained within the set. Although this example uses only two addresses, you could just as easily define 1,000 addresses, and the ipset-based config still would require only a single iptables rule, while the previous approach, without the benefit of ipset, would require 1,000 iptables rules. Set Types Each set is of a specific type, which defines what kind of values can be stored in it (IP addresses, networks, ports and so on) as well as how packets are matched (that is, what part of the packet should be checked and how it’s compared to the set). Besides the most common set types, which check the IP address, additional set types are available that check the port, the IP address and port together, MAC address and IP address together and so on. Each set type has its own rules for the type, range and distribution of values it can contain. Different set
types also use different types of indexes and are optimized for different scenarios. The best/most efficient set type depends on the situation. The most flexible set types are iphash, which stores lists of arbitrary IP addresses, and nethash, which stores lists of arbitrary networks (IP/mask) of varied sizes. Refer to the ipset man page for a listing and description of all the set types (there are 11 in total at the time of this writing). The special set type setlist also is available, which allows grouping several sets together into one. This is required if you want to have a single set that contains both single IP addresses and networks, for example. Advantages of ipset Besides the performance gains, ipset also allows for more straightforward configurations in many scenarios. If you want to define a firewall condition that would match everything but packets from 1.111 or 2222 and continue processing in mychain, notice that the following does not work: iptables -A INPUT -s ! 1.111 -g
mychain iptables -A INPUT -s ! 2.222 -g mychain If a packet came in from 1.111, it would not match the first rule (because the source address is 1.111), but it would match the second rule (because the source WWW.LINUXJOURNALCOM / OCTOBER 2011 / 65 LJ210-October2011bu2.indd 65 9/21/11 2:59 PM FEATURE Advanced Firewall Configurations with ipset address is not 2.222) If a packet came in from 2.222, it would match the first rule (because the source address is not 1.111) The rules cancel each other outall packets will match, including 1.111 and 2222 Although there are other ways to construct the rules properly and achieve the desired result without ipset, none are as intuitive or straightforward: ipset -N myset iphash ipset -A myset 1.111 ipset -A myset 2.222 iptables -A INPUT -m set ! --set myset src -g mychain In the above, if a packet came in from 1.111, it would not match the rule (because the source address 1.111 does match the set myset). If a packet came in from 2222, it
would not match the rule (because the source address 2.222 does match the set myset) Although this is a simplistic example, it illustrates the fundamental benefit associated with fitting a complete condition in a single rule. In many ways, separate iptables rules are autonomous from each other, and it’s not always straightforward, intuitive or optimal to get separate rules to coalesce into a single logical condition, especially when it involves mixing normal and inverted tests. ipset just makes life easier in these situations. Another benefit of ipset is that sets can be manipulated independently of active iptables rules. Adding/changing/removing entries is a trivial matter because the information is simple and order is irrelevant. Editing a flat list doesn’t require a whole lot of thought. In iptables, on the other hand, besides the fact that each rule is a significantly more complex object, the order of rules is of fundamental importance, so in-place rule modifications are much
heavier and potentially error-prone operations. Excluding WAN, VPN and Other Routed Networks from the NATthe Right Way Outbound NAT (SNAT or IP masquerade) allows hosts within a private LAN to access the Internet. An appropriate iptables NAT rule matches Internet-bound packets originating from the private LAN and replaces the source address with the address of the gateway itself (making the gateway appear to be the source host and hiding the private “real” hosts behind it). NAT automatically tracks the active connections so it can forward return packets back to the correct internal host (by changing the destination from the address of the gateway back to the address of the original internal host). Here is an example of a simple outbound NAT rule that does this, where 10.000/24 is the internal LAN: iptables -t nat -A POSTROUTING -s 10.000/24 -j MASQUERADE This rule matches all packets coming from the internal LAN and masquerades them (that is, it applies “NAT” processing).
This might be sufficient if the only route is to the Internet, where all through traffic is Internet traffic. If, however, there are routes 66 / OCTOBER 2011 / WWW.LINUXJOURNALCOM LJ210-October2011bu2.indd 66 9/21/11 2:59 PM to other private networks, such as with VPN or physical WAN links, you probably don’t want that traffic masqueraded. One simple way (partially) to overcome this limitation is to base the NAT rule on physical interfaces instead of network numbers (this is one of the most popular NAT rules given in on-line examples and tutorials): be avoided if it’s not actually necessary. As it turns out, this is another great application for ipset. Let’s say that besides acting as the Internet gateway for the local private LAN (10.000/24), your box routes directly to four other private networks (10.30300/24, 1040400/24, 192.16840/23 and 1722200/22) Run the following commands: iptables -t nat -A POSTROUTING -o eth0 -j MASQUERADE ipset -N routed nets nethash ipset -A
routed nets 10.30300/24 This rule assumes that eth0 is the external interface and matches all packets that leave on it. Unlike the previous rule, packets bound for other networks that route out through different interfaces won’t match this rule (like with OpenVPN links). Although many network connections may route through separate interfaces, it is not safe to assume that all will. A good example is KAME-based IPsec VPN connections (such as Openswan) that don’t use virtual interfaces like other user-space VPNs (such as OpenVPN). Another situation where the above interface match technique wouldn’t work is if the outward facing (“external”) interface is connected to an intermediate network with routes to other private networks in addition to a route to the Internet. It is entirely plausible for there to be routes to private networks that are several hops away and on the same path as the route to the Internet. Designing firewall rules that rely on matching of physical
interfaces can place artificial limits and dependencies on network topology, which makes a strong case for it to ipset -A routed nets 10.40400/24 ipset -A routed nets 192.16840/23 ipset -A routed nets 172.2200/22 iptables -t nat -A POSTROUTING -s 10.000/24 -m set ! --set routed nets dst -j MASQUERADE As you can see, ipset makes it easy to zero in on exactly what you want matched and what you don’t. This rule would masquerade all traffic passing through the box from your internal LAN (10.000/24) except those packets bound for any of the networks in your routed nets set, preserving normal direct IP routing to those networks. Because this configuration is based purely on network addresses, you don’t have to worry about the types of connections in place (type of VPNs, number of hops and so on), nor do you have to worry about physical interfaces and topologies. This is how it should be. Because this is a pure layer-3 (network layer) implementation, the underlying classifications
required to achieve it should be pure layer-3 as well. WWW.LINUXJOURNALCOM / OCTOBER 2011 / 67 LJ210-October2011bu2.indd 67 9/21/11 2:59 PM FEATURE Advanced Firewall Configurations with ipset Limiting Certain PCs to Have Access Only to Certain Public Hosts Let’s say the boss is concerned about certain employees playing on the Internet instead of working and asks you to limit their PCs’ access to a specific set of sites they need to be able to get to for their work, but he doesn’t want this to affect all PCs (such as his). To limit three PCs (10.005, 10006 and 10.007) to have outside access only to worksite1.com, worksite2com and worksite3.com, run the following commands: ipset -N limited hosts iphash ipset -A limited hosts 10.005 Blocking Access to Hosts for All but Certain PCs (Inverse Scenario) Let’s say the boss wants to block access to a set of sites across all hosts on the LAN except his PC and his assistant’s PC. For variety, in this example, let’s match the
boss and assistant PCs by MAC address instead of IP. Let’s say the MACs are 11:11:11:11:11:11 and 22:22:22:22:22:22, and the sites to be blocked for everyone else are badsite1.com, badsite2.com and badsite3com In lieu of using a second ipset to match the MACs, let’s utilize multiple iptables commands with the MARK target to mark packets for processing in subsequent rules in the same chain: ipset -A limited hosts 10.006 ipset -A limited hosts 10.007 ipset -N blocked sites iphash ipset -N allowed sites iphash ipset -A blocked sites badsite1.com ipset -A allowed sites worksite1.com ipset -A blocked sites badsite2.com ipset -A allowed sites worksite2.com ipset -A blocked sites badsite3.com ipset -A allowed sites worksite3.com iptables -I FORWARD -m mark --mark 0x187 -j DROP iptables -I FORWARD iptables -I FORWARD -m set --set limited hosts src -m mark --mark 0x187 -m set ! --set allowed sites dst -m mac --mac-source 11:11:11:11:11:11 -j DROP -j MARK --set-mark
0x0 iptables -I FORWARD This example matches against two sets in a single rule. If the source matches limited hosts and the destination does not match allowed sites, the packet is dropped (because limited hosts are allowed to communicate only with allowed sites). Note that because this rule is in the FORWARD chain, it won’t affect communication to and from the firewall itself, nor will it affect internal traffic (because that traffic wouldn’t even involve the firewall). -m mark --mark 0x187 -m mac --mac-source 22:22:22:22:22:22 -j MARK --set-mark 0x0 iptables -I FORWARD -m set --set blocked sites dst -j MARK --set-mark 0x187 As you can see, because you’re not using ipset to do all the matching work as in the previous example, the commands are quite a bit more involved and complex. Because there are 68 / OCTOBER 2011 / WWW.LINUXJOURNALCOM LJ210-October2011bu2.indd 68 9/21/11 2:59 PM multiple iptables commands, it’s necessary to recognize that their order is
vitally important. Notice that these rules are being added with the -I option (insert) instead of -A (append). When a rule is inserted, it is added to the top of the chain, pushing all the existing rules down. Because each of these rules is being inserted, the effective order is reversed, because as each rule is added, it is inserted above the previous one. The last iptables command above actually becomes the first rule in the FORWARD chain. This rule matches all packets with a destination matching the blocked sites ipset, and then marks those packets with 0x187 (an arbitrarily chosen hex number). The next two rules match only packets from the hosts to be excluded and that are already marked with 0x187. These two rules then set the marks on those packets to 0x0, which “clears” the 0x187 mark. Finally, the last iptables rule (which is represented by the first iptables command above) drops all packets with the 0x187 mark. This should match all packets with destinations in the blocked
sites set except those packets coming from either of the excluded MACs, because the mark on those packets is cleared before the DROP rule is reached. This is just one way to approach the problem. Other than using a second ipset, another way would be to utilize user-defined chains. If you wanted to use a second ipset instead of the mark technique, you wouldn’t be able to achieve the exact outcome as above, because ipset does not have a machash set type. There is a macipmap set type, however, but this requires matching on IP and MACs together, not on MAC alone as above. Cautionary note: in most practical cases, this solution would not actually work for Web sites, because many of the hosts that might be candidates for the blocked sites set (like Facebook, MySpace and so on) may have multiple IP addresses, and those IPs may change frequently. A general limitation of iptables/ipset is that hostnames should be specified only if they resolve to a single IP. Also, hostname lookups happen
only at the time the command is run, so if the IP address changes, the firewall rule will not be aware of the change and still will reference the old IP. For this reason, a better way to accomplish these types of Web access policies is with an HTTP proxy solution, such as Squid. That topic is obviously beyond the scope of this article. Automatically Ban Hosts That Attempt to Access Invalid Services ipset also provides a “target extension” to iptables that provides a mechanism for dynamically adding and removing set entries based on any iptables rule. Instead of having to add entries manually with the ipset command, you can have iptables add them for you on the fly. For example, if a remote host tries to connect to port 25, but you aren’t running an SMTP server, it probably is up to no good. To deny that host the opportunity to try anything else proactively, use the following rules: ipset -N banned hosts iphash iptables -A INPUT -p tcp --dport 25 WWW.LINUXJOURNALCOM / OCTOBER
2011 / 69 LJ210-October2011bu2.indd 69 9/21/11 2:59 PM FEATURE Advanced Firewall Configurations with ipset -j SET --add-set banned hosts src iptables -A INPUT -m set --set banned hosts src in order to ensure a complete “reset” from any state, the iptables chains have to be flushed first (as illustrated above). -j DROP If a packet arrives on port 25, say with source address 1.111, it instantly is added to banned hosts, just as if this command were run: ipset -A banned hosts 1.111 All traffic from 1.111 is blocked from that moment forward because of the DROP rule. Note that this also will ban hosts that try to run a port scan unless they somehow know to avoid port 25. Clearing the Running Config If you want to clear the ipset and iptables config (sets, rules, entries) and reset to a fresh open firewall state (useful at the top of a firewall script), run the following commands: Conclusion ipset adds many useful features and capabilities to the already very powerful
netfilter/iptables suite. As described in this article, ipset not only provides new firewall configuration possibilities, but it also simplifies many setups that are difficult, awkward or less efficient to construct with iptables alone. Any time you want to apply firewall rules to groups of hosts or addresses at once, you should be using ipset. As I showed in a few examples, you also can combine ipset with some of the more exotic iptables features, such as packet marking, to accomplish all sorts of designs and network policies. The next time you’re working on your firewall setup, consider adding ipset to the mix. I think you will be surprised at just how useful and flexible it can be.■ iptables -P INPUT ACCEPT iptables -P OUTPUT ACCEPT iptables -P FORWARD ACCEPT iptables -t filter -F iptables -t raw -F iptables -t nat -F iptables -t mangle -F ipset -F Henry Van Styn is the founder of IntelliTree Solutions, an IT consulting and software development firm located in Cincinnati,
Ohio. Henry has been developing software and solutions for more than ten years, ranging from sophisticated Web applications to low-level network and system utilities. He is the author of Strong Branch Linux, an in-house server distribution based on Gentoo. Henry can be contacted at www.intellitreecom ipset -X Sets that are “in use”, which means referenced by one or more iptables rules, cannot be destroyed (with ipset -X). So, Resources Netfilter/iptables Project Home Page: www.netfilterorg ipset Home Page: ipset.netfilterorg 70 / OCTOBER 2011 / WWW.LINUXJOURNALCOM LJ210-October2011bu2.indd 70 9/21/11 2:59 PM Oct. 12, 13, & 14 for BUILDING SUCCESSFUL WEBSITES Featuring Awesome Speakers! Jeffrey ZELDMAN Jeff ROBBINS Josh CLARK Also Karen McGrane, Angela Byron, Karen Stevenson, Jeff Eaton, Ryan Szrama & more! Do it with Drupal sessions are designed for you, covering the latest Drupal information and best practices as well as a wide array of topics beyond
Drupal like UX, mobile apps, web typography, & more. Do it with Drupal provides practical information you can start using right away! Use coupon code LJ100 when you register & save $100! * coupon code expires October 10th doitwithdrupal.com LJ210-October2011bu2.indd 71 9/21/11 2:59 PM CROSS-PLATFORM NETWORK PROGRAMMING MADE EASY. Mike Diehl C reating a multiplayer game can be a lot of fun, but navigating the complexities of IP network programming can be a headache. That’s kind of a strange statement, but the two go hand in hand. You can’t write a multiplayer game without some sort of network-based communications, and game-related network programming introduces difficulties not often found with more simple applications. For example, most game developers are concerned with bandwidth utilization and throttling. There’s also player session management to contend with. Then, there’s the problem of message fragmentation, acknowledgement and sequencing. Oh, and
you’d really like to be able to make your game run on both Linux and Windows. That’s a tall order for developers who probably are more concerned with writing their games than they are in becoming experts in crossplatform network programming. Fortunately, 72 / OCTOBER 2011 / WWW.LINUXJOURNALCOM LJ210-October2011bu2.indd 72 9/21/11 2:59 PM the ENet library (enet.bespinorg) takes care of these details and presents developers with a simple, flexible and consistent API. ENet’s event-driven programming model makes client session management very simple. The library dispatches an event when a peer connects or disconnects, and when a message is received from a peer. The developer simply writes event handlers that take care of initializing and deallocating resources, and acting upon incoming messages. This means you don’t have to worry about the complexities of forking, preforking, threading or nonblocking calls to connect() and accept() in order to handle multiple connections.
With ENet, all you do is make periodic calls to its event dispatcher and handle the events as they come in. ENet provides for both reliable and unreliable transmission. The networking industry really needs to find a better term than “unreliable”, however. Unreliable means that a packet will be sent out, but the receiving end won’t be expected to acknowledge receiving the packet. In a “reliable” protocol, every packet must be acknowledged upon receipt. If a peer sends out a packet and requests acknowledgement and doesn’t receive it in a timely fashion, the packet will be resent automatically until it is acknowledged, or the peer is deemed to be unreachable. The nice thing about ENet is that the same API provides both reliable and unreliable semantics. ENet also makes it easy to write real-time client-server applications by taking care of packet fragmentation and sequencing chores for you. Put simply, fragmentation and reassembly is done automatically and is transparent to
the developer. Sequencing also is handled transparently and can be turned on and off at will. ENet’s concept of a communications channel is related to sequencing. ENet buffers each channel separately and empties each buffer in numerical sequence. The end result is that you can transmit multiple data streams and that lower-numbered channels have higher priority. For example, you could put all realtime game update packets into channel 1, while system status packets could be in a lower-priority channel. For the sake of demonstration, I discuss both the client and server for a simple chat program. The code I’m using is based on a 3-D video game I’m writing in my limited free time. However, while stripping the code down to its basics, I left something out and couldn’t get it to work. So, I posted a description of my problem and code snippets to the ENet e-mail list. Within an hour, I had a reply that showed me how to fix my problem. Thanks, Nuno In this example, a user starts the
client and provides a user name as a command parameter. Once a client session has been created, the client is expected to tell the server the name of the user, as the very first message sent from the client. Then, anything the user types will be sent to the server. Any messages that come from the server will be displayed on the client’s screen. Because all user input is taken in a blocking fashion, the user won’t actually see any incoming messages until WWW.LINUXJOURNALCOM / OCTOBER 2011 / 73 LJ210-October2011bu2.indd 73 9/21/11 2:59 PM FEATURE Network Programing with ENet Listing 1. configh Listing 2. Client Code #define HOST "localhost" 1 #include <stdio.h> #define PORT (7000) 2 #include <string.h> #define BUFFERSIZE (1000) 3 #include <enet/enet.h> 4 #include "config.h" pressing the Enter key. This isn’t ideal, but the point of the code is to demonstrate the ENet library, not nonblocking I/O on STDIN and the necessary cursor
control. (In a real-world situation, your programs would be generating messages, such as player movement and projectile impact, in real time anyway.) If the user simply presses the Enter key, no message is sent to the server, but any queued-up messages will be displayed. If the user types the letter q and presses Enter, the client disconnects and terminates. The server also is very simple. When a client connects, the server waits for the client to identify the user. Then, the server sends a broadcast message announcing the new user’s connections. When a client disconnects, that fact also is broadcast to all connected users. When a client sends a message, that message is sent to every connected client, except the one who sent it. Like I said, it’s a very simple chat system Let’s look at some code. First, let’s get a few #defines out of the way. Take a look at config.h shown in Listing 1 This is pretty straightforward, so let’s look at the client code shown in Listing 2. Lines
1–17 are boilerplate. Note that on line 3, I include enet/enet.h and not simply eneth The ENet documentation indicates that enet.h 5 #include <unistd.h> 6 char buffer[BUFFERSIZE]; 7 ENetHost *client; 8 ENetAddress address; 9 ENetEvent event; 10 ENetPeer *peer; 11 ENetPacket *packet; 12 int main(int argc, char * argv) { 13 int connected=0; 14 if (argc != 1) { 15 printf("Usage: client username "); 16 exit; 17 } 18 if (enet initialize() != 0) { 19 printf("Could not initialize enet. "); 20 return 0; 21 } 22 client = enet host create(NULL, 1, 2, 5760/8, 1440/8); 23 if (client == NULL) { 24 printf("Could not create client. "); 74 / OCTOBER 2011 / WWW.LINUXJOURNALCOM LJ210-October2011bu2.indd 74 9/21/11 2:59 PM 25 26 return 0; } 48 49 puts( (char*) event.packet->data); break; enet address set host(&address, HOST); 51 28 address.port = PORT; 52 30 peer = enet host connect(client, &address, 2, 0); if
(peer == NULL) { 31 printf("Could not connect to server "); 32 return 0; 33 34 } if (enet host service(client, &event, 1000) > 0 && 35 case ENET EVENT TYPE RECEIVE: 50 27 29 switch (event.type) { case ENET EVENT TYPE DISCONNECT: 53 connected=0; 54 printf("You have been disconnected. "); 55 return 2; 56 } 57 } 58 if (connected) { 59 printf("Input: "); 60 gets(buffer); 61 if (strlen(buffer) == 0) { continue; } 62 if (strncmp("q", buffer, BUFFERSIZE) == 0) { event.type == ENET EVENT TYPE CONNECT) { 36 printf("Connection to %s succeeded. ", HOST); 37 connected++; 63 connected=0; 38 strncpy(buffer, argv[1], BUFFERSIZE); 64 enet peer disconnect(peer, 0); 39 packet = enet packet create(buffer, strlen(buffer)+1, 65 continue; ENET PACKET FLAG RELIABLE); 40 41 66 } 67 packet = enet packet create(buffer, strlen(buffer)+1, enet peer send(peer, 0, packet); } else { ENET PACKET
FLAG RELIABLE); 42 enet peer reset(peer); 68 43 printf("Could not connect to %s. ", HOST); 69 44 return 0; 70 } 71 enet deinitialize(); 45 46 47 enet peer send(peer, 0, packet); } } while (1) { 72 } while (enet host service(client, &event, 1000) > 0) { WWW.LINUXJOURNALCOM / OCTOBER 2011 / 75 LJ210-October2011bu2.indd 75 9/21/11 2:59 PM FEATURE Network Programing with ENet may conflict on some systems, so the enet directory must be used. The global buffer defined on line 6 is where I will put user input. Lines 7–11 simply define some variables that the ENet library requires The real ENet code begins on line 18 with the call to enet initialize(). Once the library is initialized, I create the client host on line 22. As you’ll see, clients and servers are both created with a call to enet host create(). The only difference is that for a client, you send NULL as the first argument. For a server, this argument tells ENet what address to bind to.
Because a client doesn’t have to bind, you pass in NULL. The second argument sets the limit on how many connections to make room for. This example client will connect only to one server, so I pass in 1. These two arguments are the only differences between creating a client and a server! The third argument indicates how many channels I expect to use, 0-indexed by the way. Finally, the last two arguments indicate bandwidth limitations in bits per second for upload and download, respectively. Of course, I check to see if the call to enet host create() was successful and continue. Lines 27–33 tell the client what address and port the server is on and to try to connect to it. If the client can’t connect, it will terminate If the program gets to line 34, it has connected to the server, and it’s time to identify the user. The enet host service() function is ENet’s event dispatcher, but this will be made more clear in the server code. For now, understand that all I’m doing is
waiting for the server to confirm the Listing 3. Server Code 1 #include <stdio.h> 2 #include <string.h> 3 #include <stdlib.h> 4 #include <enet/enet.h> 5 #include "config.h" 6 ENetAddress address; 7 ENetHost *server; 8 ENetEvent event; 9 ENetPacket 10 char *packet; buffer[BUFFERSIZE]; 11 int main(int argc, char * argv) { 12 int i; 13 if (enet initialize() != 0) { 14 printf("Could not initialize enet."); 15 return 0; 16 } 17 address.host = ENET HOST ANY; 18 address.port = PORT; 19 server = enet host create(&address, 100, 2, 0, 0); 20 if (server == NULL) { 21 printf("Could not start server. "); 22 return 0; 23 } 24 while (1) { 25 while (enet host service(server, &event, 1000) > 0) { 76 / OCTOBER 2011 / WWW.LINUXJOURNALCOM LJ210-October2011bu2.indd 76 9/21/11 2:59 PM 26 27 28 switch (event.type) { 48 } 49 break; case ENET EVENT TYPE CONNECT: break; 50 case ENET EVENT TYPE
DISCONNECT: 51 29 30 31 case ENET EVENT TYPE RECEIVE: if (event.peer->data == NULL) { 33 packet = enet packet create(buffer, strlen(buffer)+1, 0); 53 enet host broadcast(server, 1, packet); 54 free(event.peer->data); strcpy((char*) event.peer->data, (char*) 55 event.peer->data = NULL; event.packet->data); 56 break; sprintf(buffer, "%s has connected ", 57 default: event.peer->data = (char*) event.packet->data); 34 packet = enet packet create(buffer, strlen(buffer)+1, 0); 35 enet host broadcast(server, 1, packet); 36 enet host flush(server); 37 38 event.peer->data); 52 malloc(strlen((char*) event.packet->data)+1); 32 sprintf(buffer, "%s has disconnected.", (char*) } else { 58 printf("Tick tock. "); 59 break; 60 } 61 } 62 } 63 enet host destroy(server); 64 enet deinitialize(); for (i=0; i<server->peerCount; i++) { 39 if (&server->peers[i] != event.peer) { 40
sprintf(buffer, "%s: %s", 41 (char*) event.peer->data, (char*) 65 } event.packet->data); 42 packet = enet packet create(buffer, strlen(buffer)+1, 0); 43 enet peer send(&server->peers[i], 0, packet); 44 enet host flush(server); 45 } else { 46 } 47 } WWW.LINUXJOURNALCOM / OCTOBER 2011 / 77 LJ210-October2011bu2.indd 77 9/21/11 2:59 PM FEATURE Network Programing with ENet connection so you can identify yourselves. If you don’t see the ENET EVENT TYPE CONNECT, you know you didn’t really get connected and should terminate. On lines 38–41, I create and send a packet to the server that simply contains the user’s name. (I’ll have more to say about packets when I examine the server code.) The rest of the program, from line 46, is the main event loop. (I’ll discuss enet host service() and the switch statement that follows it in more detail when I discuss the server.) The code starting from line 58 is fairly simple. statement that follows
is used to determine what happened. Note the third argument indicates how many milliseconds to wait for something to happen. If I had passed a 0 in this argument, the call to enet host service() would be completely nonblocking. The ENET EVENT TYPE CONNECT event indicates that a client has connected to the server. Normally, you’d want to initialize resources for the client. But in this case, there is nothing to do until the client has identified itself. I left this case intact for instructional purposes. THE CLIENT REALLY ISN’T VERY DIFFICULT TO WRITE AND UNDERSTAND. AS YOU’RE ABOUT TO SEE, THE SERVER CODE IS ALMOST IDENTICAL. Here I get input from the user and check if it’s an empty line or if it’s a line with just a q on it. Otherwise, I create a packet and send it. Obviously, I never really get to line 71, but I included it for instructional purposes. The client really isn’t very difficult to write and understand. As you’re about to see, the server code is almost
identical. Let’s take a look at the server code in Listing 3. As you can see, the first 24 lines of code are almost identical to those found in the client code, with two notable exceptions. On lines 17–19, I tell the server to bind to the default IP address, 0.000, and allocate space for up to 100 client connections. In this case, I don’t set any limits on bandwidth utilization. On line 25, I call enet host service() until it returns 0. Each time enet host service() returns a nonzero value, I know that something has happened, and the switch The ENET EVENT TYPE RECEIVE event is dispatched when the server receives a message from a client. For this event, there are two possible scenarios: 1. The client hasn’t identified itself yet, and this is the first message I’ve received from them. 2. The client has been identified, and this is a normal chat message. I check to see which is the case in the conditional on line 30. This line also points out an issue that comes up in the
forums from time to time, so I’ll explain it in a bit more detail. Most server applications have to store at least some information about each client. Typically, they use an array of structures to 78 / OCTOBER 2011 / WWW.LINUXJOURNALCOM LJ210-October2011bu2.indd 78 9/21/11 2:59 PM store this information. Intuition tells you that one of the things you should store in a given client’s structure is a pointer to whatever data type allows you to communicate with it. But with ENet, that intuition is wrong. Instead, ENet’s peer data type provides a field, data, that you can use to store a pointer. This pointer presumably would point to the client’s information structure. So, it’s almost backward from what you expect. But, this is kind of an elegant solution; ENet manages its data, and you manage yours, separately. The only client data that you care about is the name of the user associated with a given client. If you don’t already have the user’s name, and you receive a
message from his or her client, you can assume that the client is identifying itself to you and you should store the user’s name. I do this in lines 31 and 32. Then, in lines 33–36, I announce the new user to the rest of the clients. Note that I create a packet on line 34, but the call to enet host broadcast() deallocates it. It is a major error to deallocate that data structure yourself. In lines 37–49, you can see the case where the client already is identified. All you have to do is send a message to the other clients indicating the name of the “speaker” and what he or she “said”. To do this, you loop over ENet’s list of peers. For each peer, check to see if it’s the same peer that sent the message. If it is, you skip it, as people really don’t want their own messages echoed back to them. Otherwise, you create a message and send it. This way, each client knows what was said, and by whom. The ENET EVENT TYPE DISCONNECT event indicates that a client has
disconnected. In this case, you announce that the user has disconnected and deallocate the space used to store the user’s name. On line 55, I set the data pointer back to NULL just in case ENet decides to re-use this structure when another client connects. If no event is received, the default case is executed, and the server simply prints “Tick tock” to the console, as a reassurance that it is still running. And, there you have ita chat client in 72 lines of code and a multi-user chat server in 65 lines of code, and much of the code was identical. In fact, in the program upon which this code is based, I actually use identical code for both the client and server. Rather than have a block of code in the switch statement, I simply call an event handler, which is implemented in a separate code module, one for the client and one for the server. Then, depending on which module I link against, I can have a client or a server. This has the added benefit of isolating all of the
ENet-specific code in one source file. As you can see, the ENet library is almost trivial to use, but it encapsulates sophisticated network communications capabilities. Of course, what this really means is that it’s just fun to use.■ Mike Diehl operates Diehlnet Communications, LLC, a small IP phone company. Mike lives in Albuquerque, New Mexico, with his wife and three sons. He can be reached at mdiehl@diehlnetcom WWW.LINUXJOURNALCOM / OCTOBER 2011 / 79 LJ210-October2011bu2.indd 79 9/21/11 2:59 PM THE LUSTRE DISTRIBUTED FILESYSTEM DEPLOY A SCALABLE AND HIGH-PERFORMING DISTRIBUTED FILESYSTEM IN YOUR CLUSTERED ENVIRONMENT WITH LUSTRE. There comes a time in a network or storage administrator’s career when a large collection of storage volumes needs to be pooled together and distributed within a clustered or multiple client network, while maintaining high performance with little to no bottlenecks when accessing the same files. That is where Lustre comes into the picture. The
Lustre filesystem is a high-performance distributed filesystem intended for larger network and high-availability environments. PETROS KOUTOUPIS 80 / OCTOBER 2011 / WWW.LINUXJOURNALCOM LJ210-October2011bu2.indd 80 9/21/11 2:59 PM The Storage Area Network and Linux Traditionally, Lustre is configured to manage remote data storage disk devices within a Storage Area Network (SAN), which is two or more remotely attached disk devices communicating via a Small Computer System Interface (SCSI) protocol. This includes Fibre Channel, Fibre Channel over Ethernet (FCoE), Serial Attached SCSI (SAS) and even iSCSI. To better explain what a SAN is, it may be more beneficial to begin with what it isn’t. For instance, a SAN shouldn’t be confused with a Local Area Network (LAN), even if that LAN carries storage traffic (that is, via networked filesystems shares and so on). Only if the LAN carries storage traffic using the iSCSI or FCoE protocols can it then be considered a SAN. Another thing
that a SAN isn’t is Network Attached Storage (NAS). Again, the SAN relies heavily on a SCSI protocol, while the NAS uses the NFS and SMB/CIFS file-sharing protocols. An external storage target device will represent storage volumes as Logical Units within the SAN. Typically, a set of Logical Units will be mapped across a SAN to an initiator nodein our case, it would be the server(s) managing the Lustre filesystem. In turn, the server(s) will identify one or more SCSI disk devices within its SCSI subsystem and treat them as if they were local drives. The amount of SCSI disks identified is determined by the amount of Logical Units mapped to the initiator. If you want to follow along with the examples here, it is relatively simple to configure a couple virtual machines: one as the server node with one or more additional disk devices to export and the second to act as a client node and mount the Lustre enabled volume. Although it is bad practice, for testing purposes, it also is possible
to have a single virtual machine configured as both server and client. SCSI SCSI is an ANSIstandardized hardware and software computing interface adopted by all early storage The Distributed manufacturers. Filesystem Revised A distributed editions of filesystem allows the standard access to files from continue to be multiple hosts used today. sharing a computer network. This makes it possible for multiple users on multiple client nodes to share files and storage resources. The client nodes do not have direct access to the underlying block storage but interact over the network using a protocol and, thus, make it possible to restrict access to the filesystem depending on access lists or capabilities on both the servers and the clients, unlike a clustered filesystem, where all nodes have equal access to the block storage where the filesystem is located. On these systems, the access control must reside on the client. Other advantages to utilizing distributed filesystems include the fact
that they may involve facilities for transparent replication and fault tolerance. So, when a limited number of nodes in a filesystem goes off-line, the system continues WWW.LINUXJOURNALCOM / OCTOBER 2011 / 81 LJ210-October2011bu2.indd 81 9/21/11 2:59 PM FEATURE The Lustre Distributed Filesystem to work without any data loss. Lustre (or Linux Cluster) is one such distributed filesystem, usually deployed for large-scale cluster computing. Licensed under the GNU General Public License (or GPL), Lustre provides a solution in which high performance and scalability to tens of thousands of nodes and petabytes of storage becomes a reality and is relatively simple to deploy and configure. Despite the fact that Lustre 2.0 has been released, for this article, I work with the generally available 1.85 Lustre contains a somewhat unique architecture, with three major functional units. One is a single metadata server or MDS that contains a single metadata target or MDT for each Lustre
filesystem. This stores namespace metadata, which includes filenames, directories, access permissions and file layout. The MDT data is stored in a single disk filesystem mapped locally to the serving node and is a dedicated filesystem that controls file access and informs the client node(s) which object(s) make up a file. Second are one or more object storage servers (OSSes) that store file data on one or more object storage targets or OST. An OST is a dedicated object-base filesystem exported for read/write operations. The capacity of a Lustre filesystem is determined by the sum of the total capacities of the OSTs. Finally, there’s the client(s) that accesses and uses the file data. Lustre presents all clients with a unified namespace for all of the files and data in the filesystem that allow concurrent and coherent read and write access to the files in the filesystem. When a client accesses a file, it completes a filename lookup on the MDS, and either a new file is created or the
layout of an existing file is returned to the client. Locking the file on the OST, the client will then run one or more read or write operations to the file but will not directly modify the objects on the OST. Instead, it will delegate tasks to the OSS. This approach will ensure scalability and improved security and reliability, as it does not allow direct access to the underlying storage, thus, increasing the risk of filesystem corruption from misbehaving/defective clients. Although all three components (MDT, OST and client) can run on the same node, they typically are configured on separate nodes communicating over a network (see the details on LNET later in this article). In this example, I’m running the MDT and OST on a single server node while the client will be accessing the OST from a separate node. Installing Lustre To obtain Lustre 1.85, download the prebuilt binaries packaged in RPMs, or download the source and build the modules and utilities for your respective Linux
distribution. Oracle provides server RPM packages for both Oracle Enterprise Linux (OEL) 5 and Red Hat Enterprise Linux (RHEL) 5, while also providing client RPM packages for OEL 5, RHEL 5 and SUSE Linux Enterprise Server (SLES) 10,11. If you will be building Lustre from source, ensure that you are using a Linux kernel 2.616 or greater Note that in all deployments of Lustre, the server that runs on an MDS, MGS (discussed below) or OSS must utilize a patched kernel. Running a patched kernel on 82 / OCTOBER 2011 / WWW.LINUXJOURNALCOM LJ210-October2011bu2.indd 82 9/21/11 2:59 PM a Lustre client is optional and required only if the client will be used for multiple purposes, such as running as both a client and an OST. If you already have a supported operating system, make sure that the patched kernel, lustre-modules, lustre-ldiskfs (a Lustre-patched backing filesystem kernel module package for the ext3 filesystem), lustre (which includes userspace utilities to configure and run
Lustre) and e2fsprogs packages are installed on the host system while also resolving its dependencies from a local or remote repository. Use the rpm command to install all necessary packages: $ sudo rpm -ivh kernel-2.618-1943101el5 lustre184i686rpm $ sudo rpm -ivh lustre-modules-1.84-2618 1943101el5 lustre.184i686rpm $ sudo rpm -ivh lustre-ldiskfs-3.13-2618 1943101el5 View the /boot/grub/grub.conf file to validate that the newly installed kernel has been set as the default kernel. Now that all packages have been installed, a reboot is required to load the new kernel image. Once the system has been rebooted, an invocation of the uname command will reveal the currently booted kernel image: [petros@lustre-host ~]$ uname -a Linux lustre-host 2.618-1943101el5 lustre184 #1 SMP Mon Jul 26 22:12:56 MDT 2010 i686 i686 i386 GNU/Linux Meanwhile, on the client side, the packages for the lustre client (utilities for patchless clients) and lustre client modules (modules for patchless clients)
need to be installed on all desired client machines: lustre.184i686rpm $ sudo rpm -ivh lustre-1.84-2618 1943101el5 lustre.184i686rpm $ sudo rpm -ivh lustre-client-1.84-2618 1943101el5 lustre.184i686rpm $ sudo rpm -ivh lustre-client-modules-1.84-2618 1943101el5 $ sudo rpm -ivh e2fsprogs-1.4110sun2-0redhatoel5i386rpm After these packages have been installed, list the boot directory to reveal the newly installed patched Linux kernel: [petros@lustre-host ~]$ ls /boot/ lustre.184i686rpm Note that these client machines need to be within the same network as the host machine serving the Lustre filesystem. After the packages are installed, reboot all affected client machines. config-2.618-1943101el5 lustre184 grub initrd-2.618-1943101el5 lustre184img lost+found symvers-2.618-1943101el5 lustre184gz System.map-2618-1943101el5 lustre184 vmlinuz-2.618-1943101el5 lustre184 Configuring Lustre Server In order to configure the Lustre filesystem, you need to configure Lustre Networking, or
LNET, which provides the communication infrastructure required by the Lustre filesystem. LNET supports many commonly used network types, which include InfiniBand and IP WWW.LINUXJOURNALCOM / OCTOBER 2011 / 83 LJ210-October2011bu2.indd 83 9/21/11 2:59 PM FEATURE The Lustre Distributed Filesystem networks. It allows simultaneous availability across multiple network types with routing between them. In this example, let’s use tcp, so use your favorite editor to append the following line to the /etc/modprobe.conf file: to provide information, while the client(s) contact the MGS to retrieve information. The MGS requires its own disk for storage, although there is a provision that allows the MGS to share a disk with a single MDT. Type the following command to create a combined MGS/MDT node: options lnet networks=tcp This step restricts LNET to be using only the specified network interfaces and prevents LNET from using all network interfaces. Before moving on, it is important to
discuss the role of the Management Server or MGS. The MGS stores configuration information for all Lustre filesystems in a clustered setup. An OST contacts the MGS [petros@lustre-host ~]$ sudo /usr/sbin/mkfs.lustre --fsname=lustre --mgs --mdt /dev/sda1 Permanent disk data: Target: lustre-MDTffff Index: unassigned Lustre FS: lustre Mount type: ldiskfs Flags: 0x75 Try Before You Buy! Benchmark Your Code on Our GPU Cluster with AMBER, NAMD, or Custom CUDA Codes NEW Microway MD SimCluster with 8 Tesla M2090 GPUs, 8 CPUs and InfiniBand 30% Improvement Over Previous Teslas Configure your WhisperStation or Cluster today! www.microwaycom/tesla or 508-746-7341 GSA Schedule Contract Number: GS-35F-0431N GS-35F-0431N LJ210-October2011bu2.indd 84 9/21/11 2:59 PM (MDT MGS needs index first time update ) Persistent mount opts: iopen nopriv,user xattr,errors=remount-ro Parameters: mdt.group upcall=/usr/sbin/l getgroups device size = 1019MB unique names for each labeled volume.
These names become very important for when you access the target on the client system. Create the OST by executing the following command: 2 6 18 [petros@lustre-host ~]$ sudo /usr/sbin/mkfs.lustre --ost formatting backing filesystem ldiskfs on /dev/sda1 --fsname=lustre --mgsnode=10.0215@tcp0 /dev/sda2 target name lustre-MDTffff 4k blocks 261048 options -i 4096 -I 512 -q -O dir index,uninit groups -F mkfs cmd = mke2fs -j -b 4096 -L lustre-MDTffff -i 4096 -I 512 -q -O dir index,uninit groups -F /dev/sda1 261048 Writing CONFIGS/mountdata Permanent disk data: Target: lustre-OSTffff Index: unassigned Lustre FS: lustre Mount type: ldiskfs If nothing has been provided, by default, the fsname is lustre. If one or more of these filesystems are created, it is necessary to use Flags: 0x72 (OST needs index first time update ) Persistent mount opts: errors=remount-ro,extents,mballoc Microway’s Proven GPU Expertise Thousands of GPU cluster nodes installed. Thousands of
WhisperStations delivered. ns/Day (Higher is Better) Award Winning BioStack – LS Award Winning WhisperStation Tesla – PSC with 3D CPU + GPU CPU Only ‘11 AWARD BEST Best New Technology 3.54 2.02 1.07 1.30 0.33 1 Node 0.65 2 Nodes 4 Nodes NAMD F1-ATP Performance Gain Visit Microway at SC11 Booth 2606 LJ210-October2011bu2.indd 85 9/21/11 2:59 PM FEATURE The Lustre Distributed Filesystem The /var/log/messages file will log the following messages: Parameters: mgsnode=10.0215@tcp checking for existing Lustre data: not found device size = 1027MB Jun 25 10:26:54 lustre-host kernel: Lustre: lustre-MDT0000: 2 6 18 new disk, initializing formatting backing filesystem ldiskfs on /dev/sda2 target name lustre-OSTffff Jun 25 10:26:54 lustre-host kernel: Lustre: lustre-MDT0000: Now serving lustre-MDT0000 on /dev/sda1 with recovery enabled 4k blocks 263064 options -J size=40 -i 16384 -I 256 -q -O Jun 25 10:26:54 lustre-host kernel: Lustre: dir index,extents,uninit
groups -F 3285:0:(lproc mds.c:271:lprocfs wr group upcall()) lustre-MDT0000: group upcall set to /usr/sbin/l getgroups mkfs cmd = mke2fs -j -b 4096 -L lustre-OSTffff Jun 25 10:26:54 lustre-host kernel: Lustre: lustre-MDT0000.mdt: -J size=40 -i 16384 -I 256 -q -O set parameter group upcall=/usr/sbin/l getgroups dir index,extents,uninit groups -F /dev/sda2 263064 Mount the OST: Writing CONFIGS/mountdata When the target needs to provide information to the MGS or when the client accesses the target for information lookup, all also will need to be aware of where the MGS is, which you have defined for this target as the server’s IP address followed by the network interface for communication. This is just a reminder that the interface was defined earlier in the /etc/modprobe.conf file Now you easily can mount these newly formatted devices local to the host machine. Mount the MDT: [petros@lustre-host ~]$ sudo mkdir -p /mnt /ost [petros@lustre-host ~]$ sudo mount -t lustre /dev/sda2
/mnt/ost/ Verify that it is mounted with the df command: [petros@lustre-host ~]$ df -t lustre Filesystem 1K-blocks Used Available Use% Mounted on /dev/sda1 913560 17768 843584 3% /mnt/mdt /dev/sda2 1035692 42460 940620 5% /mnt/ost The /var/log/messages file will log the following messages: [petros@lustre-host ~]$ sudo mkdir -p /mnt /mdt [petros@lustre-host ~]$ sudo mount -t lustre /dev/sda1 /mnt/mdt/ Jun 25 10:41:33 lustre-host kernel: Lustre: lustre-OST0000: new disk, initializing Verify that it is mounted with the df command: Jun 25 10:41:33 lustre-host kernel: Lustre: lustre-OST0000: Now serving lustre-OST0000 on /dev/sda2 with recovery enabled [petros@lustre-host ~]$ df -t lustre Filesystem 1K-blocks /dev/sda1 913560 Jun 25 10:41:39 lustre-host kernel: Lustre: Used Available Use% Mounted on 3417:0:(mds lov.c:1155:mds notify()) MDS lustre-MDT0000: 17752 843600 add target lustre-OST0000 UUID 3% /mnt/mdt 86 / OCTOBER 2011 / WWW.LINUXJOURNALCOM
LJ210-October2011bu2.indd 86 9/21/11 2:59 PM FAILOVER Failover is a process with the capability to switch over automatically to a redundant or standby computer server, system or network upon the failure or abnormal termination of the previously active application, server, system or network. Many failover solutions exist on the Linux platform to cover both SAN and LAN environments. Jun 25 10:41:39 lustre-host kernel: Lustre: 3188:0:(quota master.c:1716:mds quota recovery()) Only 0/1 OSTs are active, abort quota recovery Jun 25 10:41:39 lustre-host kernel: Lustre: lustre-OST0000: received MDS connection from 0@lo Jun 25 10:41:39 lustre-host kernel: Lustre: MDS lustre-MDT0000: lustre-OST0000 UUID now active, resetting orphans Even though they are mounted like typical filesystems, you will notice that the MDT and OST labeled volumes do not contain the typical filesystem characteristics. That is where the client will come into play: [petros@lustre-host ~]$ ls /mnt/ost/ client node,
you must specify this name. This can be observed below following the network method (tcp0) by which you are mounting the remote volume. Again, TCP was defined in the /etc/modprobe.conf file for the supported LNET networks interfaces: [petros@client1 ~]$ sudo mkdir -p /lustre [petros@client1 ~]$ sudo mount -t lustre 10.0215@tcp0:/lustre /lustre/ After successfully mounting the remote volume, you will see the /var/log/messages file append: ls: /mnt/ost/: Not a directory [petros@lustre-host ~]$ sudo ls /mnt/ost/ ls: /mnt/ost/: Not a directory Jun 25 10:44:17 client1 kernel: Lustre: Client lustre-client has started [petros@lustre-host ~]$ sudo ls -l /mnt/ total 4 d--------- 1 root root 0 Jun 25 10:22 ost d--------- 1 root root 0 Jun 25 10:22 mdt Use df to list the mounted Lustre-enabled volumes: [petros@client1 ~]$ df -t lustre Configuring Lustre Client(s) Remember that you named the Lustreenabled volume lustre. When you mount the volume over the network on the Filesystem
1K-blocks Used Available Use% Mounted on 10.0215@tcp0:/lustre 1035692 42460 940556 5% /lustre Once mounted, the filesystem now WWW.LINUXJOURNALCOM / OCTOBER 2011 / 87 LJ210-October2011bu2.indd 87 9/21/11 2:59 PM FEATURE The Lustre Distributed Filesystem can be accessed by the client node. For instance, you cannot read or write from or to files located on the mounted OST. In the following example, let’s write approximately 40MB of data to a new file, on /lustre: [petros@client1 lustre]$ sudo dd if=/dev/zero of=/lustre/test.dat bs=4M count=10 10+0 records in 10+0 records out 41943040 bytes (42 MB) copied, 1.30103 seconds, 322 MB/s A df listing will reflect the changes of available and used capacities to the /lustre mountpoint: [petros@client1 lustre]$ df -t lustre Filesystem 1K-blocks 10.0215@tcp0:/lustre 1035692 Used Available Use% Mounted on 83420 899596 9% /lustre [petros@client1 lustre]$ ls -l total 40960 -rw-r--r-- 1 root root 41943040 Jun 25 10:47 test.dat
Summary Although I covered a simple introduction and tutorial of the Lustre distributed filesystem, there still is so much uncharted territory and methods by which the filesystem can be configured for a truly rich computing environment. For instance, Lustre can be configured for high availability to ensure that in the situation of failure, the system’s services continue without interruption. That is, the accessibility between the client(s), server(s) and external target storage is always made available through a process called failover. Additional HA is provided through an implementation of disk drive redundancy in some sort of RAID (hardware or software via mdadm) configuration for the event of drive failures. These high-availability techniques normally would apply to server nodes hosting the MDS and OSS. It is suggested to place the OST storage on a RAID 5 or, preferably, RAID 6, while the MDT storage should be RAID 1 or RAID 0+1. It isn’t a difficult technology to work with;
however, there still exists an entire community with excellent administrator and developer resources ranging from articles, mailing lists and more to aid the novice in installing and maintaining a Lustre-enabled system. Commercial support for Lustre is made available by a non-exhaustive list of vendors selling bundled computing and Lustre storage systems. Many of these same vendors also are contributing to the Open Source community surrounding the Lustre Project.■ Petros Koutoupis is a full-time Linux kernel, device-driver and application developer for embedded and server platforms. He has been working in the data storage industry for more than seven years and enjoys discussing the same technologies. Resources Lustre Project Page: wiki.lustreorg/indexphp Wikipedia: Lustre: en.wikipediaorg/wiki/Lustre (file system) Wikipedia: Distributed File Systems: en.wikipediaorg/wiki/Distributed file system 88 / OCTOBER 2011 / WWW.LINUXJOURNALCOM LJ210-October2011bu2.indd 88 9/21/11 2:59 PM
If You Use Linux, You Should Be Reading LINUX JOURNAL ™ In-depth information providing a full 360degree look at featured topics relating to Linux Tools, tips and tricks you will use today as well as relevant information for the future Advice and inspiration for getting the most out of your Linux system Instructional how-tos will save you time and money Subscribe now for instant access! For only $29.50 per yearless than $2.50 per issueyou’ll have access to Linux Journal each month as a PDF, in ePub format, on-line and through our Android app. Wherever you go, Linux Journal goes with you. SUBSCRIBE NOW AT: WWW.LINUXJOURNALCOM/SUBSCRIBE LJ210-October2011bu2.indd 89 9/21/11 2:59 PM tcpdump fu Unleash the power and convenience of the original, venerable, command-line network analysis utility. HENRY VAN STYN 90 / OCTOBER 2011 / WWW.LINUXJOURNALCOM LJ210-October2011bu2.indd 90 9/21/11 2:59 PM P acket capture is one of the most fundamental and powerful ways
to do network analysis. You can learn virtually anything about what is going on within a network by intercepting and examining the raw data that crosses it. Modern network analysis tools are able to capture, interpret and describe this network traffic in a human-friendly manner. tcpdump is one of the original packet capture (or “sniffing”) tools that provide these analysis capabilities, and even though it now shares the field with many other utilities, it remains one of the most powerful and flexible. If you think that tcpdump has been made obsolete by GUI tools like Wireshark, think again. Wireshark is a great application; it’s just not the right tool for the job in every situation. As a refined, universal, lightweight command-line utilitymuch like cat, less and hexdumptcpdump satisfies a different type of need. One of tcpdump’s greatest strengths is its convenience. It uses a “one-off-command” approach that lends itself to quick, on-thespot answers. It works through an
SSH session, doesn’t need X and is more likely to be there when you need it. And, because it uses standard command-line conventions The tcpdump/libpcap Legacy tcpdump has been the de facto packet capture tool for the past 25 years. It really did spawn the whole genre of network utilities based on sniffing and analyzing packets. Prior to tcpdump, packet capture had such high processing demands that it was largely impractical. tcpdump introduced some key innovations and optimizations that helped make packet capture more viable, both for regular systems and for networks with a lot of traffic. The utilities that came along afterward not only followed tcpdump’s lead, but also directly incorporated its packet capture functionality. This was possible because very early on, tcpdump’s authors decided to move the packet capture code into a separate portable library called libpcap. Wireshark, ntop, snort, iftop, ngrep and hundreds of other applications and utilities available today are all
based on libpcap. Even most packet capture applications for Windows are based on a port of libpcap called WinPcap. WWW.LINUXJOURNALCOM / OCTOBER 2011 / 91 LJ210-October2011bu2.indd 91 9/21/11 2:59 PM FEATURE tcpdump fu (such as writing to STDOUT, which can be redirected), tcpdump can be used in all sorts of creative, interesting and extremely useful ways. In this article, I introduce some of the basics of packet capture and provide a breakdown of tcpdump syntax and usage. I show how to use tcpdump to zero in on specific packets and reveal the useful information they contain. I provide some real-world examples of how tcpdump can help put the details of what’s happening on your network at your fingertips, and why tcpdump is still a musthave in any admin’s toolbox. But, in order for your network card to receive the packets in the first place, you still have to be where the traffic is, so to speak. Essential Concepts Before you can begin to master tcpdump, you should
understand some of the fundamentals that apply to using all packet sniffers: The expression identifies which packets to capture, and the options define, in part, how those packets are displayed as well as other aspects of program behavior. ■ Packet capturing is passiveit doesn’t transmit or alter network traffic. Options tcpdump options follow the standard command-line flag/switch syntax conventions. Some flags accept a parameter, such as -i to specify the capture interface, while others are standalone switches and can be clustered, such as -v to increase verbosity and -n to turn off name resolution. The man page for tcpdump lists all available options, but here are a few of the noteworthy ones: ■ You can capture only the packets that your system receives. On a typical switched network, that excludes unicast traffic between other hosts (packets not sent to or from your machine). ■ You can capture only packets addressed to your system, unless the network interface is in
promiscuous mode. Anatomy of a tcpdump Command A tcpdump command consists of two parts: a set of options followed by a filter expression (Figure 1). Figure 1. Example tcpdump Command ■ -i interface: interface to listen on. It is assumed that you’re interested in seeing more than just your local traffic, so tcpdump turns on promiscuous mode automatically (which requires root privileges). ■ -v, -vv, -vvv: more verbose. ■ -q: less verbose. 92 / OCTOBER 2011 / WWW.LINUXJOURNALCOM LJ210-October2011bu2.indd 92 9/21/11 2:59 PM ■ -e: print link-level (Ethernet) headers. here are a few example filter expressions: ■ -N: display relative hostnames. ■ tcp ■ -t: don’t print timestamps. ■ port 25 and not host 10.003 ■ -n: disable name lookups. ■ icmp or arp or udp ■ -s0 (or -s 0): use the max “snaplen” capture full packets (default in recent versions of tcpdump). ■ vlan 3 and ether src host aa:bb:cc:dd:ee:ff ■ arp or udp port 53 None of these
are required. User-supplied options simply modify the default program behavior, which is to capture from the first interface, and then print descriptions of matching packets on the screen in a singleline format. Filter Expression The filter expression is the Boolean (true or false) criteria for “matching” packets. All packets that do not match the expression are ignored. The filter expression syntax is robust and flexible. It consists primarily of keywords called primitives, which represent various packetmatching qualifiers, such as protocol, address, port and direction. These can be chained together with and/or, grouped and nested with parentheses, and negated with not to achieve virtually any criteria. Because the primitives have friendly names and do a lot of the heavy lifting, filter expressions are generally self-explanatory and easy to read and construct. The syntax is fully described in the pcap-filter man page, but ■ icmp and (dst host mrorange or dst host mrbrown) Like
the options, filter expressions are not required. An empty filter expression simply matches all packets. Understanding tcpdump Output How much sense the output makes depends on how well you understand the protocols in question. tcpdump tailors its output to match the protocol(s) of the given packet. For example, ARP packets are displayed like this when tcpdump is called with -t and -n (timestamps and name lookups turned off): arp who-has 10.001 tell 10002 arp reply 10.001 is-at 00:01:02:03:04:05 ARP is a simple protocol used to resolve IPs into MAC addresses. As you can see above, tcpdump describes these packets in a correspondingly simple format. DNS packets, on the other hand, are displayed WWW.LINUXJOURNALCOM / OCTOBER 2011 / 93 LJ210-October2011bu2.indd 93 9/21/11 2:59 PM FEATURE tcpdump fu completely different: IP 10.00250435 > 1000153: 19+ A? linuxjournalcom (34) found that tcpdump does a pretty good job in general of showing the most useful information about a given
protocol. IP 10.00153 > 1000250435: 19 1/0/0 A 7674252198 (50) This may seem cryptic at first, but it makes more sense when you understand how protocol layers work. DNS is a more complicated protocol than ARP to begin with, but it also operates on a higher layer. This means it runs over top of other lowerlevel protocols, which also are displayed in the output. Unlike ARP, which is a non-routable, layer-3 protocol, DNS is an Internet-wide protocol. It relies on UDP and IP to carry and route it across the Internet, which makes it a layer-5 protocol (UDP is layer-4, and IP is layer-3). The underlying UDP/IP information, consisting of the source and destination IP/port, is displayed on the left side of the colon, followed by the remaining DNSspecific information on the right. Even though this DNS information still is displayed in a highly condensed format, you should be able to recognize the essential elements if you know the basics of DNS. The first packet is a query for
linuxjournal.com, and the second packet is an answer, giving the address 76.74252198 These are the kind of packets that are generated from simple DNS lookups. See the “OUTPUT FORMAT” section of the tcpdump man page for complete descriptions of all the supported protocol-specific output formats. Some protocols are better served than others by their output format, but I’ve Capture Files In addition to its normal behavior of printing packet descriptions to the screen, tcpdump also supports a mode of operation where it writes packets to a file instead. This mode is activated when the -w option is used to specify an output capture file. When writing to a file, tcpdump uses a completely different format from when it writes to the screen. When writing to the screen, formatted text descriptions of packets are printed. When writing to a file, the raw packets are recorded as is, without analysis. Instead of doing a live capture, tcpdump also can read from an existing capture file as input
with the -r option. Because tcpdump capture files use the universally supported “pcap” format, they also can be opened by other applications, including Wireshark. This gives you the option to capture packets with tcpdump on one host, but perform analysis on a different host by transferring and loading the capture file. This lets you use Wireshark on your local workstation without having to attach it to the network and location you need to capture from. Analyzing TCP-Based Application Protocols tcpdump is a packet-based analyzer, and it works great for connectionless, packetbased protocols like IP, UDP, DHCP, DNS and ICMP. However, it cannot directly analyze “connection-oriented” protocols, such as 94 / OCTOBER 2011 / WWW.LINUXJOURNALCOM LJ210-October2011bu2.indd 94 9/21/11 2:59 PM HTTP, SMTP and IMAP, because they work completely different. They do not have the concept of “packets”. Instead, they operate over the stream-based connections of TCP, which provide an
abstracted communications layer. These application protocols are really more like interactive console programs than packet-based network protocols. TCP transparently handles all of the underlying details required to provide these reliable, end-to-end, session-style connections. This includes encapsulating the stream-based data into packets (called segments) that can be sent across the network. All of these details are hidden below the application layer. In order to capture TCP-based application protocols, an extra step is needed beyond capturing packets. Because each TCP segment is only a slice of application data, it can’t be used individually to obtain any meaningful information. You first must reassemble TCP sessions (or flows) from the combined sets of individual segments/ packets. The application protocol data is contained directly within the sessions. tcpdump doesn’t have an option to assemble TCP sessions from packets directly, but you can “fake” it by using what I call
“the tcpdump strings trick”. The tcpdump Strings Trick Usually when I’m capturing traffic, it’s just for the purpose of casual analysis. The data doesn’t need to be perfect if it shows me what I’m looking for and helps me gain some insight. In these cases, speed and convenience reign supreme. The following trick is along these lines and is one of my favorite tcpdump techniques. It works because: 1. TCP segments usually are sent in chronological order. 2. Text-based application protocols produce TCP segments with text payloads. 3. The data surrounding the text payloads, such as packet headers, is usually not text. 4. The UNIX command strings filters out binary data from streams preserving only text (printable characters). 5. When tcpdump is called with -w - it prints raw packets to STDOUT. Put it all together, and you get a command that dumps real-time HTTP session data: tcpdump -l -s0 -w - tcp dst port 80 | strings The -l option above turns on line buffering, which makes
sure data gets printed to the screen right away. What is happening here is tcpdump is printing the raw, binary data to the screen. This uses a twist on the -w option where the special filename - writes to STDOUT instead of a file. Normally, doing this would display all kinds of gibberish, but that’s where the strings command comes init allows only data recognized as text through to the screen. WWW.LINUXJOURNALCOM / OCTOBER 2011 / 95 LJ210-October2011bu2.indd 95 9/21/11 2:59 PM FEATURE tcpdump fu There are few caveats to be aware of. First, data from multiple sessions received simultaneously is displayed simultaneously, clobbering your output. The more refined you make the filter expression, the less of a problem this will be. You also should run separate commands (in separate shells) for the client and server side of a session: command to display only lines with GET or Host. These strings show up in HTTP requests and together show the URLs being accessed. This works just as
well for SMTP. You could run this on your mail server to watch e-mail senders and recipients: tcpdump -l -s0 -w - tcp dst port 25 | strings | grep -i 'MAIL FROM|RCPT TO' tcpdump -l -s0 -w - tcp dst port 80 | strings tcpdump -l -s0 -w - tcp src port 80 | strings Also, you should expect to see a few gibberish characters here and there whenever a sequence of binary data also happens to look like text characters. You can cut down on this by increasing min-len (see the strings man page). This trick works just as well for other text-based protocols. HTTP and SMTP Analysis Using the strings trick in the previous section, you can capture HTTP data even though tcpdump doesn’t actually understand anything about it. You then can “analyze” it further in any number of ways. If you wanted to see all the Web sites being accessed by “davepc” in real time, for example, you could run this command on the firewall (assume the internal interface is eth1): tcpdump -i eth1 -l -s0 -w -
host davepc and port 80 | strings | grep 'GET|Host' In this example, I’m using a simple grep These are just a few silly examples to illustrate what’s possible. You obviously could take it beyond grep. You could go as far as to write a Perl script to do all sorts of sophisticated things. You probably wouldn’t take that too far, however, because at that point, there are better tools that actually are designed to do that sort of thing. The real value of tcpdump is the ability to do these kinds of things interactively and on a whim. It’s the power to look inside any aspect of your network whenever you want without a lot of effort. Debugging Routes and VPN Links tcpdump is really handy when debugging VPNs and other network connections by showing where packets are showing up and where they aren’t. Let’s say you’ve set up a standard routable network-to-network VPN between 10.0500/24 and 19216850/24 (Figure 2). If it’s operating properly, hosts from either network
should be able to ping one another. However, if you are not getting replies when pinging host D from host A, for instance, you can use tcpdump to zero in on exactly where 96 / OCTOBER 2011 / WWW.LINUXJOURNALCOM LJ210-October2011bu2.indd 96 9/21/11 2:59 PM Figure 2. Example VPN Topology the breakdown is occurring: tcpdump -tn icmp and host 10.0502 In this example, during a ping from 10.0502 to 192168538, each round trip should show up as a pair of packets like the following, regardless of from which of the four systems the tcpdump command is run: IP 10.0502 > 192168538: ICMP echo request, id 46687, seq 1, length 64 IP 192.168538 > 100502: ICMP echo reply, Conclusion I hope this article has piqued your interest in tcpdump and given you some new ideas. Hopefully, you also enjoyed the examples that barely scratch the surface of what’s possible. Besides its many built-in features and options, as I showed in several examples, tcpdump can be used as a packet-data conduit by
piping into other commands to expand the possibilities further even if you do manage to exhaust its extensive “advertised” capabilities. The ways to use tcpdump are limited only by your imagination. tcpdump also is an incredible learning tool. There is no better way to learn how networks and protocols work than from watching their actual packets. Don’t forget to check out the tcpdump and pcap-filter man pages for additional details and information. ■ id 46687, seq 1, length 64 If the request packets make it to host C (the remote gateway) but not to D, this indicates that the VPN itself is working, but there could be a routing problem. If host D receives the request but doesn’t generate a reply, it probably has ICMP blocked. If it does generate a reply but it doesn’t make it back to C, then D might not have the right gateway configured to get back to 10.0500/24 Using tcpdump, you can follow the ping through all eight possible points of failure as it makes its way across
the network and back again. Henry Van Styn is the founder of IntelliTree Solutions, an IT consulting and software development firm located in Cincinnati, Ohio. Henry has been developing software and solutions for more than ten years, ranging from sophisticated Web applications to low-level network and system utilities. He is the author of Strong Branch Linux, an in-house server distribution based on Gentoo. Henry can be contacted at wwwintellitreecom Resources tcpdump and libpcap: www.tcpdumporg Wireshark: www.wiresharkorg TCP/IP Model: en.wikipediaorg/wiki/TCP/IP model WWW.LINUXJOURNALCOM / OCTOBER 2011 / 97 LJ210-October2011bu2.indd 97 9/21/11 2:59 PM INDEPTH Remote Viewing Not Just a Psychic Power More and more often these days you need to work on remote machines. What can you do when the command line isn’t enough? JOEY BERNARD Most people today are used to having a nice, intuitive graphical environment when they sit down to use a computer. Gone are the days of using a
DOS machine or being lucky enough to have a dial-up account at 300 baud on a UNIX mainframe. Today, most people expect to be able to point and click their way to work nirvana, even when that work is being done on some other machine over a network. In this article, I look at some of the available options, what the relative costs and benefits are, and hopefully by the end, you should have enough information to make a choice as to what would be the best option for you. Before I begin though, I probably should take a look at what actually is involved in using a GUI on Linux. The overwhelming majority of Linux users will be using the X11 Window System (typically shortened to just X11). X11 has been around since 1987 Since then, it has gone through several revisions, and it’s currently at R7. Any X11 installation you are likely to encounter will be some version of X11R7. There have been attempts to replace it, including Wayland, Berlin/Fresco and the Y Window System, but they are fairly
rare out in the wild, and you’ll need to go out of your way to run into them. X11 is built on a client-server model. In this model, the X11 server is the part that actually draws on a physical screen. As such, it is the part you end up running on your desktop in front of you. The client portion in this model is the user-space program that has output that needs to be seen by the end user. The client does this by sending requests to the X11 server. These are high level and of the form “Draw a window”, “Add text to the window border”, “Move the window to the right by x pixels”. Because of this, there potentially can be a lot of 98 / OCTOBER 2011 / WWW.LINUXJOURNALCOM LJ210-October2011bu2.indd 98 9/21/11 2:59 PM INDEPTH messages, those messages easily can be sent over a network connection. The first thought that should come to you is “Hey, I can open a window on my friend’s machine and display rude pictures there.” Unfortunately, the writers of the X11
specification have beaten you there and closed that particular hole. By default, X11 servers are configured not to accept connections from clients on the network. You have to allow this explicitly. You can use two separate mechanisms to allow external connections. The older one is called xhosts With xhosts, you tell the X11 server to accept connections from the servers that you permit. The command looks like this: xhost +111.222333444 Figure 1. The X11 Window System (from Wikipedia) communication if a lot is going on. When most people experience X11, both parts of this model are running on the desktop in front of them. But, this isn’t the only option. There is no reason for the client and server to be on the same machine, or even on the same continent. Because everything is done by sending The newer authentication mechanism is called xauth. In this method, the X11 server creates a cookie that is required in order to connect to the X11 server. If you want to connect to the X11
server from a remote machine, you need to copy this cookie over to the remote machine. An example of doing this, from the xauth man page is: xauth extract - $DISPLAY | ssh otherhost xauth merge - This command pulls out the cookie for the current X11 server and “SSHes” it over to the remote machine and merges it into the user’s xauth file. Once you have done this, how do client WWW.LINUXJOURNALCOM / OCTOBER 2011 / 99 LJ210-October2011bu2.indd 99 9/21/11 2:59 PM INDEPTH applications go ahead and connect to your X11 server? All programs that run under X11 accept certain command-line options. One of these is -display. With this option, you can tell your client program to which X11 server to connect and send its output. The general form of this option is: -display hostname:display#.screen# The reason for all of the parts of this option is that a given machine could be running more than one X11 server, and each server could be running more than one display screen. The first
server and screen is labeled as 0.0, so in most cases you will use: -display hostname:0.0 As an aside, you can do this on your desktop. If you open a terminal, you can run an X11 client program with: -display :0.0 and it will show up on your default desktop. A consequence of this is that you need to have a connection to the remote machine that will be running the client program. Most times, this connection will be over an SSH connection between your local machine and the remote machine. Luckily, SSH provides the ability to tunnel X11 traffic over your SSH connection for you. This tunneling happens “out-ofband”, so to speak You start a session by SSHing in to your remote machine and using either the -X or -Y options. The -X option is the preferred method. It sets up a secure X11 socket on the remote machine using xauth as the authentication system. Unfortunately, some X11 servers have a hard time with this, so you can use -Y. This essentially turns off any authentication. It is
equivalent to using xhost +. Once your SSH connection is established, a new X11 socket is created on the remote machine, and the environment variable DISPLAY is set to point to it. From here on, any X11 applications you start on this remote machine will send their output to your X11 server on your desktop. When you do this, you may notice something. In most cases, it is unbelievably sloweven slower than slow if the machine you are connecting to is any appreciable distance away. Due, in part, to this issue, the SSH developers have included an extra option, -C. This turns on compression of the data traveling over the SSH connection. A side effect is that the packets being sent containing the X11 protocol instructions get bunched together and sent as a single unit. This makes much more efficient use of the bandwidth available, because you are cutting down the amount of control data that also gets sent over the line. As I mentioned above, both X11 and X11 over SSH are notoriously slow. In
some cases, it is nearly unusable. Luckily, there’s another option available, VNC. VNC also follows the client/server model, but it reverses the location of the client and server from what you might be used 100 / OCTOBER 2011 / WWW.LINUXJOURNALCOM LJ210-October2011bu2.indd 100 9/21/11 2:59 PM INDEPTH VNC also follows the client/server model, but it reverses the location of the client and server from what you might be used to with X11. to with X11. With VNC, you run a server out on the remote machine and then use a client on your desktop in front of you. You can run a VNC server in the background, where it sits and acts like any other service. It also doesn’t use any of the standard X11 sockets, so it will not interfere with any standard X11 desktop that also may be running on the remote machine. Because it runs as a service, it can continue to run, whether you are connected to it or not. You can think of it as a GUI version of the old standby, screen. There also are client
applications for all the major operating systems, and they are much lighter weight than a full X11 server. So, you can start up vncserver on the remote machine, connect to it from your Windows box, start some longrunning process, disconnect and go home, and then check on its progress from your Linux box. This is a great improvement over straight X11. Also, you will notice that in most cases, it is a bit more responsive than X11 was. This is due to the amount of information being sent back and forth between the client and server parts of VNC. The server command is simply vncserver. When you run this command, a directory named .vnc is created in your home directory if it doesn’t exist already. If a password has not been set yet for this instance of the VNC server, it will ask you to enter one. It is saved in the file passwd in encrypted form. If you want to change it, you can use the command vncpasswd. In this directory, you also should find log files for each instance of vncserver
that you start, as well as a pid file containing the PID of any currently running instances of vncserver. The last file of interest is the xstartup file. This is the file that is used when you start vncserver to set up all the required options and also lay out what will be run on the vncserver desktop. The defaults on my Ubuntu system look like this: #!/bin/sh xrdb $HOME/.Xresources xsetroot -solid grey #x-terminal-emulator -geometry 80x24+10+10 -ls -title "$VNCDESKTOP Desktop" & #x-window-manager & # Fix to make GNOME work export XKL XMODMAP DISABLE=1 /etc/X11/Xsession So in this case, it sets the background to gray and then tries to run whatever session is defined in the global script Xsession. This is where you can do some editing and make WWW.LINUXJOURNALCOM / OCTOBER 2011 / 101 LJ210-October2011bu2.indd 101 9/21/11 2:59 PM INDEPTH Figure 2. Fluxbox Running under vncserver it your own. I prefer Fluxbox as a window manager on smaller screens. So you can
simplify this to: nice when I connect to it from my Netbook, I would use this: vncserver -geometry 800x600 #!/bin/sh xrdb $HOME/.Xresources startfluxbox Starting this gives you a nice-looking desktop running Fluxbox. If the client that is going to be connecting to this has to deal with a smaller screen size (like on a Netbook), you can set the desktop size on the command line with the -geometry option. You also can set the color depth of the virtual desktop with the -depth option. So, to set up a server that looks Now, what about the other end? There are two general classes of vncviewer applications, GUI and command line. The GUI versions, like the most common ones for Mac OS X and Windows, have pointand-click access to all the relevant options. They also have them in different locations, depending on who wrote your particular favorite viewer. Because VNC is a protocol (kind of like FTP or HTTP), there is a great deal of variation in what you get from the various implementers.
Let’s look at the 102 / OCTOBER 2011 / WWW.LINUXJOURNALCOM LJ210-October2011bu2.indd 102 9/21/11 2:59 PM INDEPTH command-line versions here and see what you can do with those. The GUI versions should have comparable options available. To connect to a vncserver, you would run: the tunneling. If this is the same machine as your vncserver, the command would look like this: vncviewer -via user@somehost.com localhost:1 vncviewer hostname:port where hostname is either the true hostname of the remote machine or its IP address. port is the port number on which the vncserver is listening, starting at 1. This number is added to the default starting port number 5900, so the actual network port number in this case is 5901. This will try to connect to the given server, and it will ask for a password if one had been set during vncserver’s startup. Then, you get a nice Fluxbox desktop. There are lots of options for changing various parts of what is being transmitted, such as the
encoding algorithm, the compression level and the quality level. Playing with these options can improve your session’s responsiveness, potentially at the cost of some image quality. Depending on what work you are trying to do, this may not be a trade-off you are willing to make. Although you can force some kind of authentication on VNC, that may not be enough in these security-conscious days. You may have to work with a remote machine that sits behind a firewall that allows only SSH traffic. What can you do? VNC allows for tunneling of the protocol over an SSH connection by using the -via gateway option. This gateway machine is the machine that you are SSHing in to for This tells vncviewer to ssh to somehost.com as user “user”, then connect to vncserver on the localhost to somehost.comin other words, somehost.com itself There is no reason that these need to be the same machine. This means you could connect to a vncserver on a machine behind a security gateway machine. In this
case, it would look like this: vncviewer -via user@gateway.com someotherhostcom:1 Be aware that VNC still will ask you to authenticate after the SSH session has been established. Conclusion Hopefully, this article has provided some options for those times when you just can’t live without a nice graphical interface. Even when you are forced to squeeze through an SSH connection, you still can have all of that great GUI goodness. If you know of other ways of getting a graphical interface on a remote machine, I would love to hear about them.■ Joey Bernard spends his days helping university researchers do scientific computing. But by night, he is a masked crusader fighting crimeat least, once he gets the kids to sleep and can hit the sack himself. WWW.LINUXJOURNALCOM / OCTOBER 2011 / 103 LJ210-October2011bu2.indd 103 9/21/11 2:59 PM INDEPTH Packet Sniffing Basics Your data isn’t safe on public networks. You may not even realize the extent to which that statement is true.
ADRIAN HANNAH Imagine this: you’re sitting in your local coffee shop sucking down your morning caffeine fix before heading into the office. You catch up on your work e-mail, you check Facebook and you upload that financial report to your company’s FTP server. Overall, it’s been a constructive morning. By the time you get to work, there’s a whirlwind of chaos throughout the office. That incredibly sensitive financial report you uploaded was somehow leaked to the public, and your boss is outraged by the crass and unprofessional e-mail you just sent him. Was there some hacker lurking in the shadows that broke into your company’s network and decided to lay the blame on you? More than likely not. This mischievous ne’er-do-well probably was sitting in the coffee shop you stopped at and seized the opportunity. Without some form of countermeasures, your data isn’t safe on public networks. This example is a worst-case scenario on the far end of the spectrum, but it isn’t so
farfetched. There are people out there who are capable of stealing your data. The best defense is to know what you can lose, how it can get lost and how to defend against it. What Is Packet Sniffing? Packet sniffing, or packet analysis, is the process of capturing any data passed over the local network and looking for any information that may be useful. Most of the time, we system administrators use packet sniffing to troubleshoot network problems (like finding out why traffic is so slow in one part of the network) or to detect intrusions or compromised workstations (like a workstation that is connected to a remote machine on port 6667 continuously when you don’t use IRC clients), and that is what this type of analysis originally was designed for. But, that didn’t stop people from finding Figure 1. A Capture of a Packet of Someone Trying to Log In to a Web Site 104 / OCTOBER 2011 / WWW.LINUXJOURNALCOM LJ210-October2011bu2.indd 104 9/21/11 2:59 PM INDEPTH Figure 2. Tools
like NetworkMiner can reconstruct images that have been broadcast on the network more creative ways to use these tools. The focus quickly moved away from its original intentso much so that packet sniffers are considered security tools instead of network tools now. Finding out what someone on your network is doing on the Internet is not some arcane and mystifying talent anymore. Tools like Wireshark, Ettercap or NetworkMiner give anybody the ability to sniff network traffic with a little practice or training. These tools have become increasingly easy to use and continue to make things easier to comprehend, which makes them more usable by a broader user base. How Does It Work? Now, you know that these tools are out there, but how exactly do they work? First, packet sniffing is a passive technique. No one actually is attacking your computer and delving through all those files that you don’t want anyone to access. It’s a lot like eavesdropping. My computer is just listening in on the
conversation that your computer is having with the gateway. Typically, when people think of network traffic, they think that it goes directly from their computers to the router or switch and up to the gateway and then out to the Internet, where it routes similarly until it gets to the specified destination. This is mostly true except for one fundamental detail. Your computer isn’t directly sending the data anywhere. It broadcasts the data in packets that have the destination in the header. Every node on your network (or switch) receives the packet, determines WWW.LINUXJOURNALCOM / OCTOBER 2011 / 105 LJ210-October2011bu2.indd 105 9/21/11 2:59 PM INDEPTH The most devastating data, and the stuff most people are concerned with, is user credentials. whether it is the intended recipient and then either accepts the packet or ignores it. For example, let’s say you’re loading the Web page http://example.com on your computer “PC”. Your computer sends the request by basically
shouting “Hey! Somebody get me http://example.com!”, which most nodes simply will ignore. Your switch will pass it on to where it eventually will be received by example.com, which will pass back its index page to the router, which then shouts “Hey! I have http://example.com for PC!”, which again will be ignored by everyone except you. If others were on your switch with a packet sniffer, they’d receive all that traffic and be able to look at it. Picture it like having a conversation in a bar. You can have a conversation with someone about anything, but other people are around who potentially can eavesdrop on that conversation, and although you thought the conversation was private, eavesdroppers can make use of that information in any way they see fit. What Kind of Information Can Be Gathered? Most of the Internet runs in plain text, which means that most of the information you look at is viewable by someone with a packet sniffer. This information ranges from the benign to the
sensitive. You should take note that all of this data is vulnerable only through an unencrypted connection, so if the site you are using has some form of encryption like SSL, your data is less vulnerable. The most devastating data, and the stuff most people are concerned with, is user credentials. Your user name and password for any given site are passed in the clear for anyone to gather. This can be especially crippling if you use the same password for all your accounts on-line. It doesn’t matter how secure your bank Web site is if you use the same password for that account and for your Twitter account. Further, if you type your credit-card information into an unsecure Web page, it is just as vulnerable, although there aren’t many (if any) sites that continue this practice for that exact reason. There is a technique in the security world called session hijacking where an attacker uses a packet sniffer to gain access to a victim’s session on a particular Web site by stealing the
victim’s session cookie for that site. For instance, say I was sniffing traffic on the network, and you logged in to Facebook and left the Remember Me On This Computer check box checked. That signals Facebook to send 106 / OCTOBER 2011 / WWW.LINUXJOURNALCOM LJ210-October2011bu2.indd 106 9/21/11 2:59 PM INDEPTH CARNIVORE Carnivore was a system implemented by the Federal Bureau of Investigation that was designed to monitor e-mail and electronic communications. It used a customizable packet sniffer that can monitor all of a target user’s Internet traffic. Figure 3. A Firefox Extension Designed to Gather Unencrypted Session Cookies from the Network you a session cookie that your browser stores. I potentially could collect that cookie through packet sniffing, add it to my browser and then have access to your Facebook account. This is such a trivial task that it can be scripted easily (someone even has made a Firefox extension that will do it automatically), and there still
aren’t many Web sites that encrypt their traffic to the end user, making it a significant problem when using the public Internet. Packet sniffers exist that are specifically designed for monitoring what you are up to on the Internet. They will rebuild the exact Web page you are looking at, photos you’re browsing, videos you’re watching, and even files you’re downloading. These applications are tailored to look through a string of packet captures to find various packet streams and reassemble them on the fly. My roommate in college whipped up something that would display the contents of my browser in real time on his computer (a scary revelation indeed). E-mail is another one of those things that people tend to get up in arms about because there’s an assumption of privacy in e-mail that is derived from the regular mail system. Your e-mail is sent out and viewable, just like anything else that emanates from your computer of the network. E-mail sniffing is what made the FBI’s
Carnivore program so infamous. Since every packet bears a destination address in its header, it’s possible that someone could sniff the network just to gather a browsing history of everyone on that segment. This may not be very insidious, but it’s gathered data, and there’s always someone willing to pay for all sorts of data. Precautions I’m sure you’re currently seconds WWW.LINUXJOURNALCOM / OCTOBER 2011 / 107 LJ210-October2011bu2.indd 107 9/21/11 2:59 PM INDEPTH None of these precautions is the magic cure for eavesdroppers, but using even one of them will make you a less-desirable target. from taking a pair of scissors to your network cable and swearing off the Internet for life, but fear not! There are less-drastic measures you can take to prevent such sensitive data loss. None of these precautions is the magic cure for eavesdroppers, but using even one of them will make you a less-desirable target. There’s an old joke that says that when you’re being chased by
a bear, you don’t need to outrun the bear, just the guy in front of you. You don’t have to have the most secure computer on the block, just more secure than somebody else’s. As with most network security, if people really want your data, they can get at it. However, most of the time, attackers aren’t targeting a specific person, they’re looking for targets of opportunity, so the more secure you are, the less likely you are to be such a target. The first defense against eavesdropping is the Secure Socket Layer (SSL) used by most Web pages that handle sensitive information. This forces all the content shared back and forth between you and the site to be encrypted. Some sites use SSL for their login pages only. Most sites don’t even use SSL at all. It’s easy to tell the URL in the address bar will start with https instead of http. Some sites offer you some choice in the matter. For instance, Google allows you to turn SSL on all the time within Gmail, thus encrypting all
your e-mail traffic. Modern network switches are designed to pass data intelligently to avoid packet collisions and excessive network traffic. If a packet is broadcast that is not intended for one of the nodes attached to it, the router will not rebroadcast to the local nodes. Likewise, if a packet is broadcast locally that is intended for another local node, the switch will not rebroadcast to the outside network. This forces strict segmentation on a network. For us, this means that someone using a packet sniffer on a switched network will not see any traffic from hosts not attached to the same switch. This doesn’t mean much on small-scale networks, like you have at your house, but on a larger scale, it means that somebody can’t sit in the breakroom sniffing traffic three floors up from the accounting department. Wireless network encryption has come a long way in its short lifespangoing from no encryption to Wired Equivalent Privacy (WEP) encryption to Wi-Fi Protected Access (WPA)
encryption. Wireless networks don’t provide the same segmentation that the previously mentioned switches provide, meaning that any packet transmitted on a wireless access point gets rebroadcast to 108 / OCTOBER 2011 / WWW.LINUXJOURNALCOM LJ210-October2011bu2.indd 108 9/21/11 2:59 PM INDEPTH everyone else on the access point. Even though your traffic is encrypted under WEP, this encryption protects only the data from users not connected to that wireless network. The encryption scheme and key are identical for all users, so all your “encrypted” data is decryptable by anyone on the network, making your data essentially unencrypted. WPA solves this issue by isolating all users on the network and giving them a different encryption scheme even when the key is the same. If you have SSH access to a computer outside your current network (which I’m sure most of us do), you can tunnel all your traffic through an SSH connection. You essentially are using the encryption of the SSH
connection to protect all your data from eavesdroppers. There are two apparent downsides to this technique. First, you’re connection speed will drop, because now instead of going from you to the destination and back, your traffic will go from you to the SSH server to the destination and back. Second, your data is transmitted unencrypted from the remote end, so if that machine is vulnerable to packet sniffing, your data is no safer than it was at your local machine. Virtual private networks are intended to allow users access to a network that otherwise would be inaccessible. However, they also can be used to protect your traffic, because VPN connections are encrypted. You can set up a private VPN for yourself just for this purpose, but it will have the same disadvantages as SSH tunneling. If you work for a company that has a VPN, you may be allowed to use it for this purpose, but your traffic will fall under the same policy and rules that you have in your office, so be careful what
you use it for.■ Adrian Hannah is a self-proclaimed hacker with a penchant for privacy-minded political issues. He has worked as a system administrator in one capacity or another for more than ten years and has a strong computer science background founded in his early childhood. He is a biker (with no bike), a martial artist (with no dojo), a TV junkie (with no cable), a rebel (without a cause) and a horse (with no name). You can reach him on Twitter (@codemonkey2841). WWW.LINUXJOURNALCOM / OCTOBER 2011 / 109 LJ210-October2011bu2.indd 109 9/21/11 2:59 PM INDEPTH Python in the Cloud A basic introduction to using the Python boto library to interact with AWS services and resources. ADRIAN KLAVER This article explores using the boto library to work with resources in the Amazon Web Services (AWS) cloud. For those wondering, the boto name refers to a species of freshwater dolphin found in the Amazon river. boto is maintained by Mitch Garnaat who works on the Eucalyptus team at
Canonical. The library covers many, though not all, services offered by AWS (see the boto Web site for a current listing). But, before I start on the use and care of boto, let me take a little diversion. It probably goes without saying, but you need to set up an AWS account if you want to play along. If you already have an Amazon account, you just need to register with Amazon at the AWS site (see Resources) to set up your AWS account. Otherwise, you need to set up an Amazon account first. As part of the setup for your AWS account, you will be issued some credentials (you will be using those later). Note, if you are a new user to AWS, check out the free tier offer (see Resources). This allows you to kick the tires at no charge for the most part. For this article, I try to stick to the offer restrictions as much as possible. With the AWS setup out of the way, let’s move on to installing boto. At the time of this writing, the current version is 2.0b4, which is what I use in this
article. boto is available from the Python Package Index (PyPi), and you can install it with easy install boto. Remember, if you want it to be a system-wide library, do the previous as a superuser. You also can go to either PyPi or the boto site and download a tarball, and then do a Python setup.py install The PyPi site has the latest version only; the boto site has a variety of versions available. Now that the housekeeping’s done, it’s time to play. As mentioned above, boto allows you to access many of the AWS servicesin fact, many more than I have space to cover here. This article covers the Amazon Machine Image (AMI), Elastic Block Store (EBS), Elastic Compute Cloud (EC2), Simple Storage Service (S3) and Simple Notification Service (SNS). Where an AMI is a virtual machine, an EBS is a virtual hard drive, EC2 is the cloud you run an AMI/EBS combo in, S3 is key/object storage, and SNS is a messaging system from the cloud. In all these cases, account information is 110 / OCTOBER
2011 / WWW.LINUXJOURNALCOM LJ210-October2011bu2.indd 110 9/21/11 2:59 PM INDEPTH needed for boto to access AWS. You’ll need the AWS AccessKey and the AWS Secret Access Key. They were created when you signed up, but if you did not record them, don’t fret. They are available in your AWS account page as Security Credentials. To make things easier and more secure, there are options to include the information in the connection string. The first option is to create the AWS ACCESS KEY ID and AWS SECRET ACCESS KEY ENV variables and set them equal to the respective keys. The other option is to create a .boto file in your home directory, and using ini style, set the keys (Listing 1). Before going further, I should point out that AWS has a Web-based management tool for most of its services. It is called the AWS Management Console, and you can reach it by going to the AWS site and clicking on the Account tab at the top of the page (I make reference to and use this tool for some of what
is to follow). The management console also is handy for confirming that the boto code actually is doing what it is supposed to be doing. Just remember to click the Refresh button at the top of the Console when in doubt. Listing 1. boto Configuration File #.boto file format [Credentials] aws access key id = <some access key> aws secret access key = <some secret access key> What follows is a basic look at the interaction between boto and AWS. The code is kept simple both to conserve space and illustrate basic principles. To get started, I need to create an AMI of my own to work with. The easiest way to do that is to grab an existing public image and make it private. I use the Ubuntu images maintained by Canonical for my own use. The best place to find what is available is the Alestic site (see Resources). It has a handy table labeled “Ubuntu and Debian AMIs for Amazon EC2” with tabs for the AWS regions. Click on the region you want, and then select the appropriate
image. For this article, I selected the Ubuntu 10.04 LTS 64-bit EBS AMI in the US-East-1 region with an AMI ID of ami-2ec83147 (the ID may be different as new images are built, see the EBS/S3 AMI Sidebar). Clicking on the arrow next to the image takes me to the AWS Management Console (after login) to start an instance from the image. To make use of the free tier, I selected the micro instance. At this point, there is an instance of a public image running on my account. To make a private image, I could use the management console by right-clicking on the instance and selecting Create Image, but where is the fun in that? Let’s use boto to do it instead (Listing 2). It’s simple Import the boto convenience function connect ec2, and note the lack of access credentials in the connection code. In this case, they are in a .boto file in my home directory Then, I use create image() to create and WWW.LINUXJOURNALCOM / OCTOBER 2011 / 111 LJ210-October2011bu2.indd 111 9/21/11 2:59 PM
INDEPTH EBS vs. S3 AMI Here’s some enlightenment on the differences between an EBS-backed and an S3-backed AMI. S3 AMIs were the rule when AWS first started They stored the image root device as a series of data chunks in the AWS S3 storage service. S3-backed AMIs also are referred to as instance store AMIs. Later, EBS-backed AMIs were made available. These store the root device as an EBS volume This has some practical considerations, such as the following: ■ Maximum root device size of the S3 is 10GiB and of the EBS is 1TiB. ■ The boot time is faster with EBS, because the root device does not have to be assembled first. ■ Stop: EBS AMI instances have the ability to be stopped, which is roughly equivalent to a paused state, in addition to being terminated. S3-backed instances only can be terminated. For a more-detailed comparison, see the URL listed in the Resources for this article. register a private AMI using the running instance (i-c1315eaf), launched from the management
console, with the name lj test. The create image function returns the AMI IDin this case, ami-7eb54d17. The next step is to put the image to use by launching an instance or instances of it. For this, see the line in Listing 2 with con.run instances() The AMI previously created is used as the template for the instances. The min count and max count parameters need some explaining. AWS has a default limit of 20 instances that can be running per region (this can be increased by filling out a request form) per account. This is where the min/max count comes into play. If I already had 18 instances running in a region and I set the min count at 2 and the max count at 5, two new instances will be launched. The key name is an SSH keypair generated by Amazon that is used for SSH access to the instance(s). The instance type is set to the EC2 micro instance, and it is slotted to run in the us-east-1d availability zone by the placement parameter. Let’s take a brief side trip on AWS availability
zones. Availability zones are relative to your account. In other 112 / OCTOBER 2011 / WWW.LINUXJOURNALCOM LJ210-October2011bu2.indd 112 9/21/11 2:59 PM INDEPTH words, my us-east-1d may not represent the same physical availability zone as your us-east-1d. The final parameter disable api termination=True is a lock-out mechanism. It prevents the termination of an instance using API termination calls. An instance with this protection in force has to have that parameter first changed to False and then have a termination command given in order for it to go away. See the modify instance attribute() line for how to undo the termination protection on a running instance. Assuming a successful launch, run instances() will return a boto reservation class that represents the reservation created by AWS. This class then can be used to find the instances that are running, assuming it was captured and iterated over right then. A more generic approach is to use the get all instances() function
to return a list of reservation classes that match the criteria given. In Listing 2, I use the filter parameter to limit my search of instances to those created from the AMI created above and that are actually running. So, where do you find what filters are available? The boto documentation does not list the filters, but instead points you at the source, which is the AWS developer documentation for each resource (see Resources). Drilling down in that documentation gets you to an API Reference where the options to the various actions are spelled out. For this particular case, the information is in the EC2 API (see Resources) under Actions/DescribeImages. There is not a complete one-to-one Security Security, as always, is an important issue when discussing a server that is on the Internet. The standard procedures apply to EC2 instances as to regular servers For those, see Mick Bauer’s Paranoid Penguin column in previous issues of LJ, as well as any number of security references.
However, there is a special case related to AMIs that deserves mention. As demonstrated in this article, it is possible to take a publicly available AMI image and make it your own private image. This presents some special problems; see the Security URL in the Resources section. Before you create a production instance, it would be prudent to read that information and take it to heart. For the other side of the coin, consult the Alestic blog (see Resources) for how to create a secure AMI to share with others that does not leak out your private information. WWW.LINUXJOURNALCOM / OCTOBER 2011 / 113 LJ210-October2011bu2.indd 113 9/21/11 2:59 PM INDEPTH Listing 2. Using boto #!/usr/bin/env python # -*- coding: utf-8 -- # Create a tag con.create tags(["i-391c2657"], import time from boto import connect ec2, connect sns {"Name": "lj instance"}) con.create tags(["vol-a9590ac2"], {"Name": "lj volume"}) # Create private image
con = connect ec2() con.create image("i-c1315eaf", "lj test") # Get volume vol = con.get all volumes( # Launch/run instance(s) filters={"tag:Name": "lj volume"})[0] reserv = con.run instances("ami-7eb54d17", min count=2, max count=5, key name='laptop', # Create snapshot instance type="t1.micro", snap = vol.create snapshot(voltags["Name"] placement="us-east-1d", + "Snap") disable api termination=True) # Monitor snapshot creation and notify on completion # Disable termination protection con.modify instance attribute("i-132e457d", "disableApiTermination", False) def check snapshot(snap): while snap.status != "completed": print "Sleeping" time.sleep(30) # Find running instances res list = con.get all instances( filters={"image-id": "ami-7eb54d17", "instance-state-name": "running"}) snap.update() g
time = time.gmtime() msg str = "Snapshot " + snap.id + " " msg str += "of volume " + snap.volume id + " " msg str += "started at time " # Find instance information msg str += snap.start time + " " for reservation in res list: msg str += "completed at " inst list = reservation.instances msg str += time.asctime(g time) for instance in inst list: ARN = "arn:aws:sns:us-east-1:213825411462:Lj" instance.id, instancestate # See Figure 1 for output. sns con = connect sns() sns con.publish(ARN, msg str, "Snapshot done") print msg str 114 / OCTOBER 2011 / WWW.LINUXJOURNALCOM LJ210-October2011bu2.indd 114 9/21/11 2:59 PM Figure 1. EC2 Instance Information correspondence between the boto function names and the AWS API names, but it is close enough to figure out. Having run the function, I now have a list of reservations. Using this list, I iterate through the reservation classes in the list,
which yields an instance list that contains instance classes. This, in turn, is iterated over, and various instance attributes are pulled out (Figure 1). Having created an AMI and launched instances using that image, now what? How about backing up the information contained in the instance? AWS has a feature whereby it is possible to create a snapshot of an EBS volume. What is nice about this is that the snapshots are incremental in nature. Take a snapshot on day one, and it represents the state of the volume at that time. Take a snapshot the next day, and it represents only the differences between the two days. Furthermore, snapshots, even though they represent an EBS volume, are stored as S3 data. The plus to this is that although monthly charges for EBS are based on the size of the volume, space used or not, S3 charges are based on actual space used. So, if you have an EBS volume of 40GB, you are LJ210-October2011bu2.indd 115 9/21/11 2:59 PM INDEPTH charged 40GB/month.
Assuming only half of that is used, the snapshot will accrue charges of roughly 20GB/month. The final feature of a snapshot is that it is possible to create an EBS volume from it that, in turn, can be used to create a new AMI. This makes it relatively easy to return to some point in the past. To make the snapshot procedure easier, I will create a tag on the instance that has the EBS volume I want to snapshot, as well as the volume itself. AWS supports userdefined tags on many of its resources The create tags() function is a generic one that applies a tag to the requested resource(s). The first parameter is a list of resource IDs; the second is a dictionary where the tag name is the key and the tag value is the dictionary value. Knowing the Name tag for the instance, I use get all volumes() with a filter to retrieve a volume class. I then use the volume class to create the snapshot, giving the snapshot a Description equal to the volume Name tag plus the string Snap. Though the create
snapshot() will return a snapshot ID fairly quickly, the snapshot may not finish processing for some time. This is where the SNS service comes in handy. SNS is exactly that, a simple way of sending out notifications. The notifications can go out as e-mail, e-mail in JSON format, HTTP/HTTPS or to the AWS Simple Queue Service (SQS). I don’t cover SQS in depth here; just know it is a more robust and featured way of sending messages from AWS. The first step is to set up a notification topic. The easiest way is to use the SNS tab in the AWS management console. A topic is just an identifier for a particular notification. Once a topic is created, subscriptions can be tied to the topic. The subscriptions do not take effect until they are confirmed. In the case of subscriptions going to e-mail (what I use here), a confirmation e-mail is sent out with a confirmation link. Once the subscription is confirmed, it is available for use. As I alluded to earlier, I demonstrate monitoring the
snapshot creation process with a notification upon completion (Listing 2). The function check snapshot() takes a snapshot class returned by create snapshot and checks in on its progress at regular intervals. Note the snap.update() The AWS API is Webbased and does not maintain a persistent connection. Unless the snapshot returns a status of “completed” immediately, the while loop will run forever without the update() method to refresh the status. Once the snapshot is completed, a message is constructed using the snap attributes. The message then is published to the SNS topic, which triggers the subscription to be run, and an e-mail should show up shortly. The ARN shown stands for Amazon Resource Name. It is created when the SNS topic is set up and represents the system address for the topic. Note that the simple part of SNS is that there is no delivery confirmation. The AWS API will throw an error if it can’t do its part (send the message), but receiving errors are 116 / OCTOBER
2011 / WWW.LINUXJOURNALCOM LJ210-October2011bu2.indd 116 9/21/11 2:59 PM not covered. That’s why one of the sending options for SNS is SQS. SQS will hold a message and resend a message for either a certain time period or until it receives confirmation of receipt and a delete request, whichever comes first. So, there you have ita basic introduction to using the Python boto library to interact with AWS services and resources. Needless to say, this barely scratches the surface. For more information and to keep current, I recommend the blog at the Alestic site for general AWS information and Mitch Garnaat’s blog for boto and AWS information. ■ Advertiser Index CHECK OUT OUR BUYER’S GUIDE ON-LINE. Go to www.linuxjournalcom/buyersguide where you can learn more about our advertisers or link directly to their Web sites. Thank you as always for supporting our advertisers by buying their products! ADVERTISER URL ADVANCED CLUSTERING TECHNOLOGIES www.advancedclusteringcom
EMAC, INC. www.emacinccom FSCONS fscons.org 53 HIGH PERFORMANCE COMPUTING www.flaggmgmtcom/hpc 61 IXSYSTEMS, INC. www.ixsystemscom 7 LOGIC SUPPLY, INC. www.logicsupplycom 51, 109 LULLABOT doitwithdrupal.com 2, 71 MICROWAY, INC. www.microwaycom 3, 84, 85 OEM PRODUCTION www.oemproductioncom 59 POLYWELL COMPUTERS, INC. www.polywellcom 57 boto Web Site: code.googlecom/p/boto RACKMOUNTPRO www.rackmountprocom 39 What is a boto? www.acsonlineorg/factpack/Botohtm SILICON MECHANICS www.siliconmechanicscom 21 boto Documentation: boto.cloudhackerscom TECHNOLOGIC SYSTEMS www.embeddedx86com 23 USENIX ASSOCIATION www.usenixorg/lisa11/lj 35 ZENDCON zendcon.com 41 Adrian Klaver (adrian.klaver@gmailcom), having found Python, is on a never-ending quest to explore just how far it can take him. Resources boto Blog: www.elasticiancom PAGE # 31 11, 33 AWS Web Site: aws.amazoncom Using Public AMIs: aws.amazoncom/ articles/0155828273219400 Creating Secure AMIs:
alestic.com/2011/06/ec2-ami-security EBS vs. S3: docsamazonwebservicescom/AWSEC2/ latest/UserGuide/Concepts BootFromEBS.html AWS Free Tier: aws.amazoncom/free AWS Developer Documentation: aws.amazoncom/ documentation EC2 API: docs.amazonwebservicescom/AWSEC2/ latest/APIReference Alestic: alestic.com ATTENTION ADVERTISERS The Linux Journal brand’s following has grown to a monthly readership nearly one million strong. Encompassing the magazine, Web site, newsletters and much more, Linux Journal offers the ideal content environment to help you reach your marketing objectives. For more information, please visit www.linuxjournalcom/advertising WWW.LINUXJOURNALCOM / OCTOBER 2011 / 117 LJ210-October2011bu2.indd 117 9/21/11 4:53 PM EOF Linux Is Latin DOC SEARLS World Domination is still arriving, but it’s not thanks to anybody’s empire. DOC SEARLS R ome Latin isn’t the first Western language; it’s just the first to become a de facto standard. It’s a standard that
still exists, or I wouldn’t have used “de facto” in the last sentence. Nor would I feel free to leverage Latinate terms in English, which is just one of Latin’s many twisted forks. My first suspicion that Linux was Latin didn’t arrive here in Rome, but in a car last week in North Carolina. I was driving up the interstate, somewhere between Graham and Haw River, when I saw a billboard for a company that needed Linux programmers. Thus, it occurred to me, on the spot, that Linux was becoming the lingua franca of big-business IT development. True, Linux isn’t a language in the literal sense, but it is becoming necessary to know Linux if you are going to get along in IT, just as you needed to know Latin if you were going to get along in the Roman Empire and its sphere of influencefor a millennium and a half following the time of Caesar. Latin was inherited by Rome and its empire from the Latins, a tribe that inhabited Latium, the fertile lands drained by the Tiber along the
river’s south side. Latin itself was a branch of Italic, which was a branch of Proto-Indo-European, which is now used even less than Multics, which we might call Proto-UNIX. And, thus, we arrive at Latin as a metaphor for Linux. For Latin, World Domination is still going on, because it is embodied in dozens of languages, as well as countless sciences, art, literature and everything else people teach in school. For Linux, World Domination is still starting. Like Latin, Linux has roots. Those are mostly in UNIX, which also persists through variants like HP/UX, AIX, Solaris and the BSDs. But Linux is now the One 118 / OCTOBER 2011 / WWW.LINUXJOURNALCOM LJ210-October2011bu2.indd 118 9/21/11 2:59 PM EOF That Matters. It is, by far, the world’s most common, easily used and free (as in both beer and speech) OS. And, it didn’t require an empire to arrive at that state. In that sense, it also bears another resemblance to Latin, because what remains of ancient Rome offers less
evidence of empire than of engineering. Romans may not have invented everything they spread, but they did create and maintain a system of respect for invention, in the form of writing. They kept records of everything they could. While Rome did much (or all) to give us paved roads, dams, aqueducts, water-distribution systems, public baths, blown glass, cranes, elevators, stadiums and building designs and methods of many kinds, the reason was not just that an empire spread those things. Rome also needed engineers, skilled craftspeople, and a spoken and written language to communicate How Things Are Done. My favorite example is the Pantheon, which for 1,700 years has held the record for the world’s largest un-reinforced concrete dome. Look up at the roof from inside, and you see the shapes of the forms into which mixed concrete was pounded (it wasn’t poured). There isn’t a crack anywhere in the whole thing. We know how the Romans made that concrete because they commented on their
methods in writing. All their building methods were debugged, patched and improved in ways that are echoed in how we make, improve and communicate about code today. That’s one reason the Romans’ innovations were easily shared and spread. Having an empire helped, but that was an insufficient condition. They also needed writing and speech that everyone could understand and put to use and re-use. I’d like to say the same about coffee, which came to the world from Ethiopia by way of Venice. By acclaim, two of the best coffees you can drink are found only at Sant’Eusatachio and Tazzo d’Oro, both within a stone’s throw of the Pantheon. Neither shares their secrets, which are closely guarded and highly proprietaryas once was AT&T’s UNIX. I love the coffee I’ve enjoyed repeatedly at both places. But I can make espressos, cappuccinos and macchiatos at home too, on my own Italian machine, using coffee roasts of all kinds. And, frankly, I like my own coffee creations just as
well, if not better, than these Roman originals, especially when I get them right. Those two places may have set the original standard, but coffee, like language and code, is a living thing that nobody owns, everybody can use and anybody can improve. I can’t guess how long Linux will prove to be the same, but its age is clearly upon us.■ Doc Searls is Senior Editor of Linux Journal. He is also a fellow with the Berkman Center for Internet and Society at Harvard University and the Center for Information Technology and Society at UC Santa Barbara. WWW.LINUXJOURNALCOM / OCTOBER 2011 / 119 LJ210-October2011bu2.indd 119 9/21/11 2:59 PM